
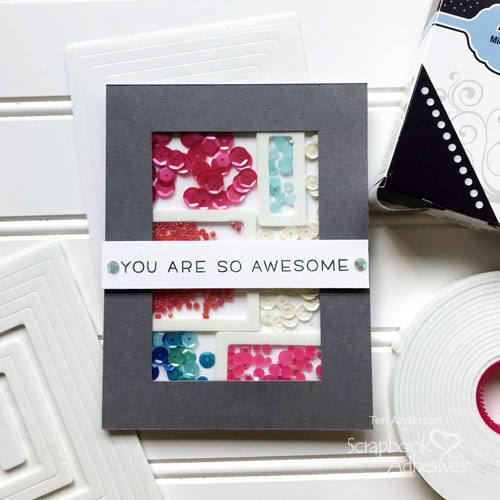
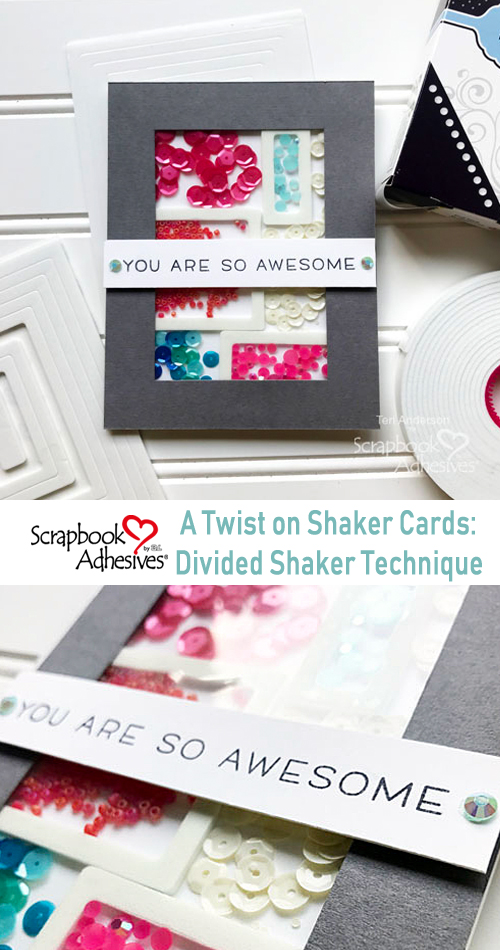
Do you like to make interactive cards? Teri here, and I’ve got a fun twist on shaker cards for you! I’m going to show you how to make a divided shaker card! These cards are so fun, and they are incredibly easy to make with foam products from Scrapbook Adhesives by 3L.
Divided Shaker Card Base
Start by doing a little prep work. Cut a 4 1/4″ x 11″ panel of cardstock. Fold it in half. This will serve as your card base. You’ll also need a 4 1/4″ x 5 1/2″ panel cut from a transparency sheet.
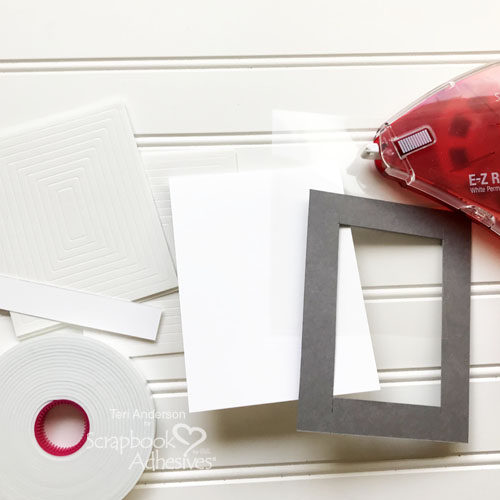
You’ll also want to cut a frame from cardstock to put on the front of your card, as well as a 4 1/4″ x 3/4″ strip of cardstock for a sentiment.
Divided Shaker Details
Take the card base and set it on your work surface. Apply four strips of Crafty Foam Tape along the outer edges. Leave the backing paper on the top of the tape strips. You’ll see why in a minute.
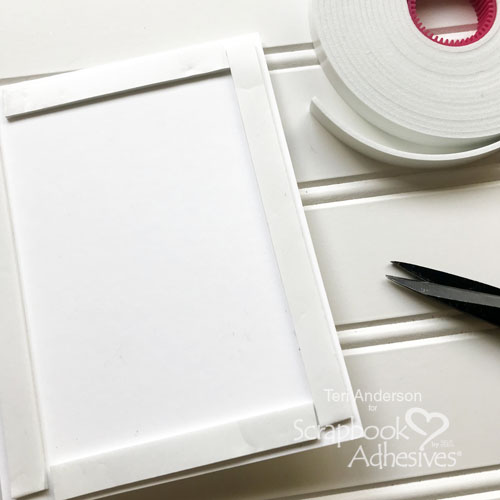
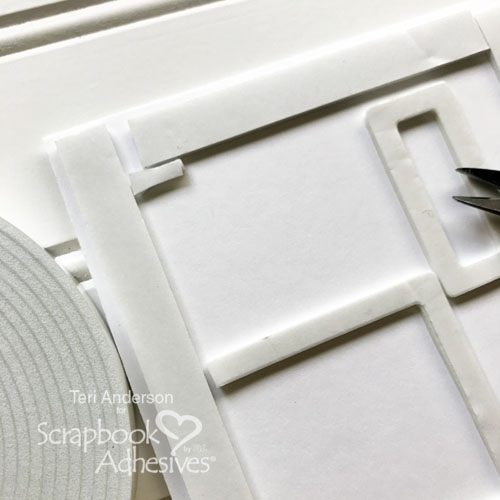
Now, take out some 3D Foam Frames and adhere one frame to your card panel. Then apply a few more frames. Keep going until you’ve added as many frames as you desire!

Also don’t be afraid to cut a frame in half and only use part of it. Be sure to line up the open side with your cut frame with the strips from the Crafty Foam Tape.
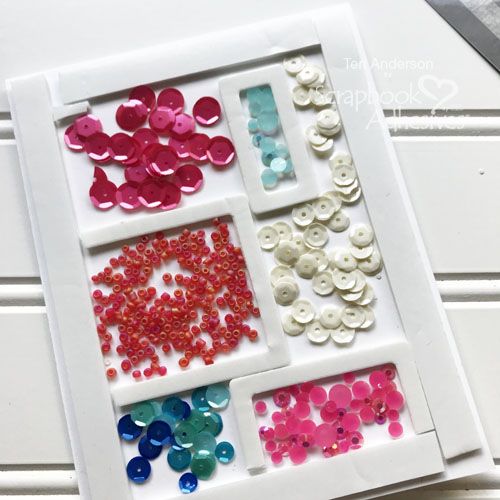
You get to fill up your shaker now. But, first, take a good look at your card and look for any holes where fillers might fall out! If you spot one, cut a small piece of Crafty Foam Tape and simply place it where the hole is.
To fill your shaker, you can use beads, sequins, confetti and even gems! There is no limit to the possibilities! Make sure each compartment of your shaker card has something in it.
Finishing the Card
Once you’ve filled your shaker up with embellishments, adhere the transparency to your cardstock frame. I like to use my E-Z Runner® Grand Refillable Dispenser for this because the adhesive goes on flat and is super strong!
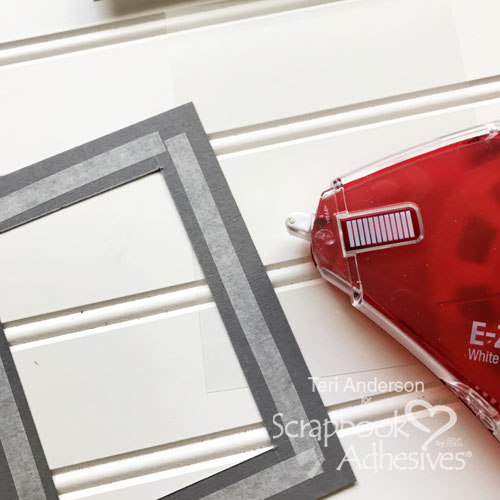
You don’t want your shaker fillers to stick to the transparency so be sure to rub it first with a non-stick embossing pouch or a dryer sheet. This is kind of like magic! Embellishments will not stick to the transparency!
Remove the backing paper from all your foam frames and strips and adhere the transparency and frame to the card.
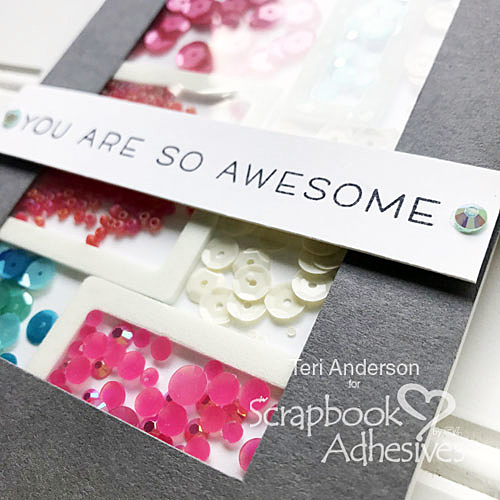
Finish your card by stamping a sentiment on the small strip of cardstock. You can also add a few gems to the outside of your card. The micro-sized Adhesive Dots are perfect for small embellishments!
I’d love to see your take on this fun technique! Share your divided shaker cards by leaving links to your projects in the comments field.
Creative Time: 45 Minutes
Skill Level: Beginner
Materials Needed
Scrapbook Adhesives by 3L®
Crafty Foam Tape White
3D Foam Frames
E-Z Runner® Grand Refillable Dispenser
Adhesive Dots Micro
Other
Seed Beads by Jillibean Soup; Gems and Sequins by Pretty Pink Posh; Simply Sentiments Stamp Set by Lawn Fawn; Transparency; Black Ink Pad; White and Gray Cardstock; Dryer Sheet
Pin It!
By Amy Tsuruta January 13, 2019 - 5:31 am
This is very fun!