
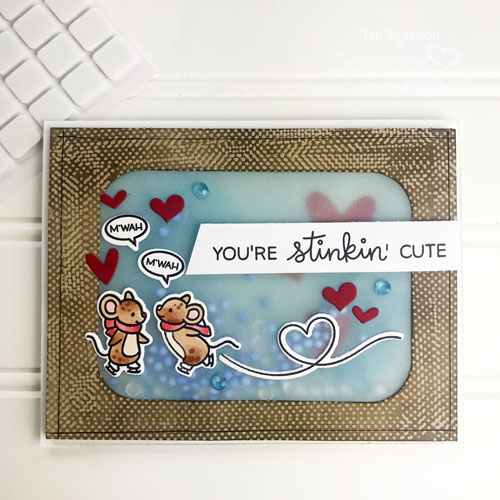
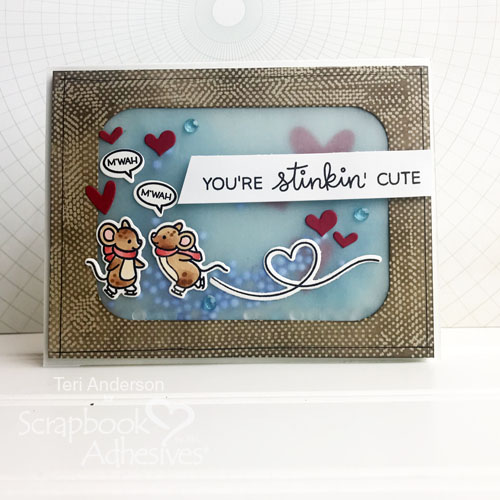
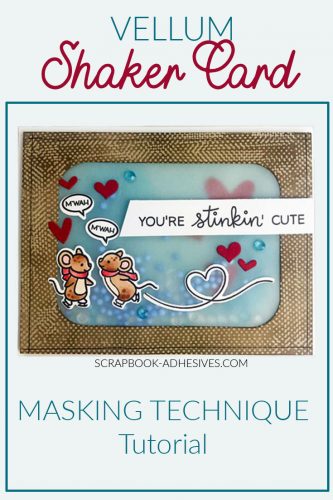
Hi, friends! Can you believe Valentine’s Day is just three weeks away? Teri here, and I’ve got a fun vellum shaker card you can make to tell your sweetheart you love them!
Creating the Vellum Shaker Card Window
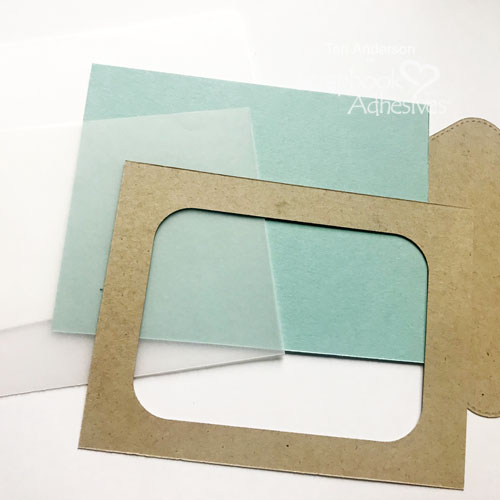
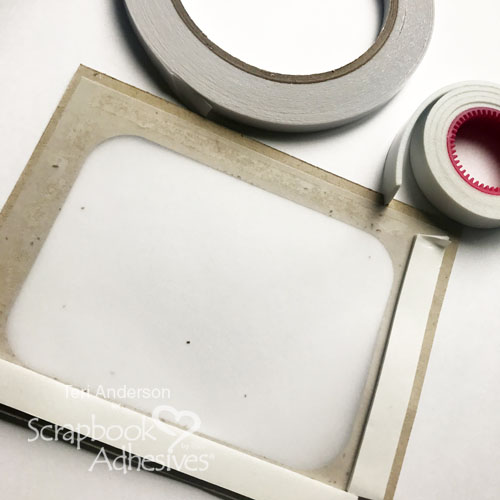
You’ll first want to do some cutting. You will need a card base, plus two cardstock panels and one vellum panel to fit on top. You’ll also want to cut a rectangle out of one of the cardstock panels.
Sponge a little blue ink on the blue panel. It doesn’t need to look perfect. It just needs to add the look of texture.
Masking Technique
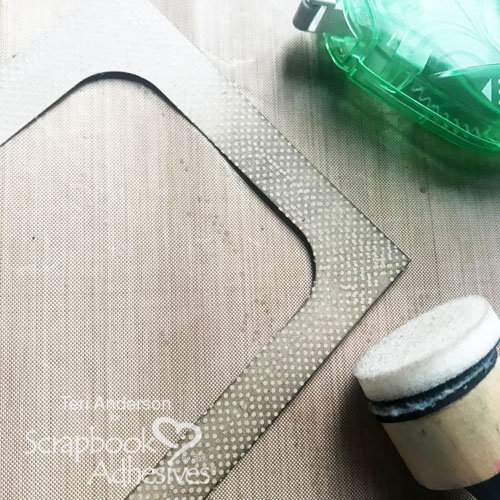
Also repeatedly apply removable dots with the E-Z Dots® Repositionable Refillable Dispenser to the second panel of cardstock. (Please note it’s key that you use removable adhesive and not permanent. You’ll see why in a minute.) Don’t worry if your dots overlap or your lines are uneven! It will add to the handmade look of your finished card!
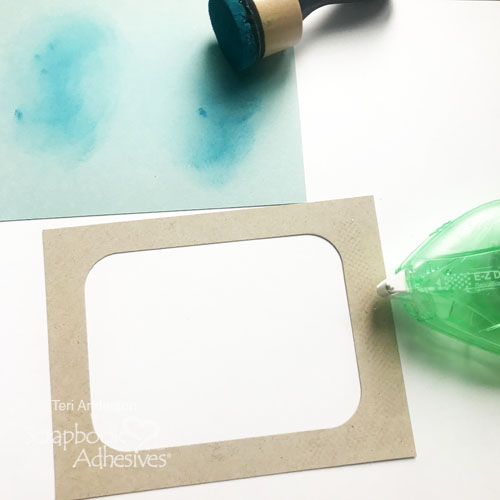
Set the kraft panel of cardstock on a craft mat or a scratch piece of paper. Gently sponge brown ink onto the panel. Use your finger to rub off the adhesive!
Make the Shaker Feature
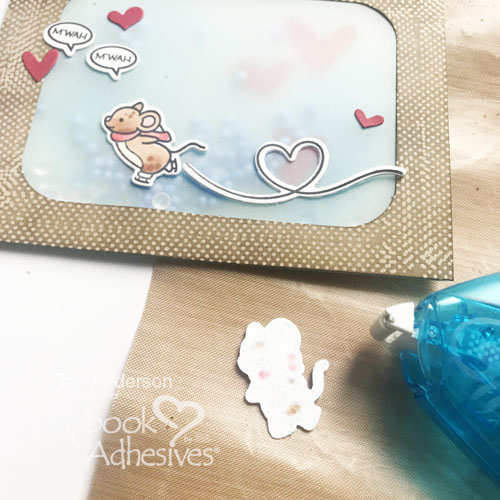
Flip the panel upside down and adhere the vellum onto it. Then “frame” the window with Crafty Foam Tape.
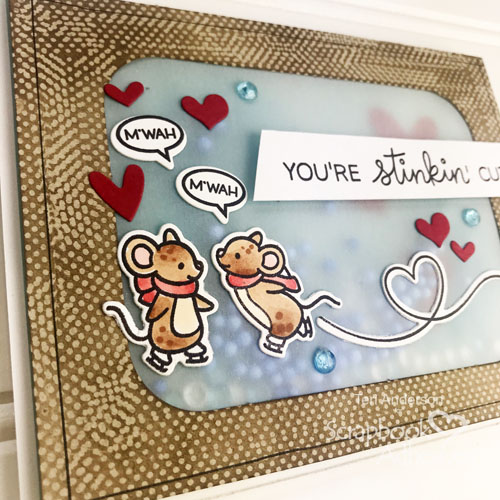
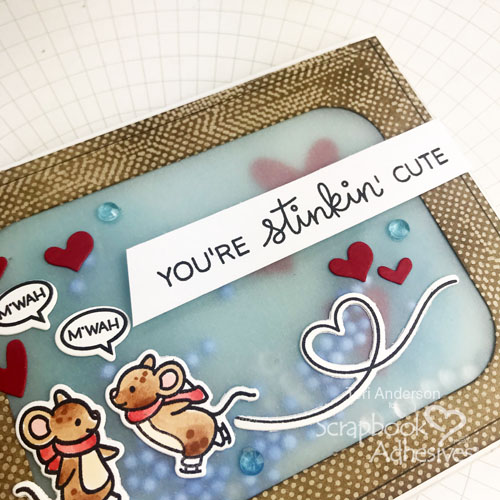
Set a mixture of embellishments on the window. Sequins, beads and gems all make wonderful shaker filler! Adhere three die-cut hearts to the blue panel and affix the blue panel to the shaker window. Mount the shaker to a card created from cardstock.

Finishing off the Card
Decorate the shaker with stamped critters and die-cut hearts. (I used mice but you may want to use some other cute stamps! The decision is up to you.) Here’s a trick for adhering super small stamped images to a card. Set them upside down on a piece of scratch paper and apply adhesive to them with the E-Z Dots® Permanent Refillable Dispenser. It’s the perfect tool for getting adhesive completely on the small parts of those images!
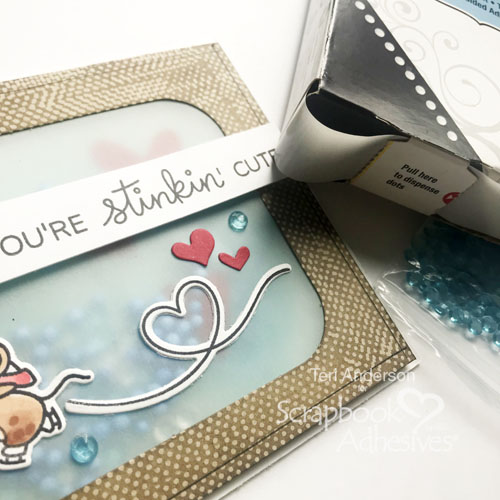
Complete the Vellum Shaker Card by stamping a sentiment on a strip of adhering it to the card with 3D Foam Squares. Add a few embellishments as well.
Thanks for stopping by today! I hope you will be inspired to make a vellum shaker card of your own!
Happy creating!
Teri Anderson
Creative Time: 60 Minutes
Skill Level: Intermediate
Materials Needed
Scrapbook Adhesives by 3L®
- 3D Foam Squares White Regular Size
- Crafty Foam Tape White
- Adhesive Dots Micro
- E-Z Dots® Repositionable Refillable Dispenser
- E-Z Dots® Permanent Refillable Dispenser
HomeHobby™ by 3L
Other
White Cardstock and Vellum: Neenah Paper; Blue and Kraft Cardstock: My Favorite Things; Stamps: Lawn Fawn (Stinkin’ Cute, Mice on Ice and Sealed with a Kiss Stamp Sets); Dies: Paper Smooches (Hearts) and My Favorite Things (Rectangle); Black and Brown Ink Pads: Ranger Ink; Blue Ink Pad: My Favorite Thing; Gems and Foam Balls: Jillibean Soup; Markers: Copic
Save to Pinterest!
Visit our Website and Blog!
Sign up for our Newsletter so you never miss a contest or giveaway!


