
Hi, everyone! Staying home and looking for a simple way to say hello to your friends and loved ones? Teri here to show you how to make a card with an inked background like this to send to a special someone! Let’s get right to creating!
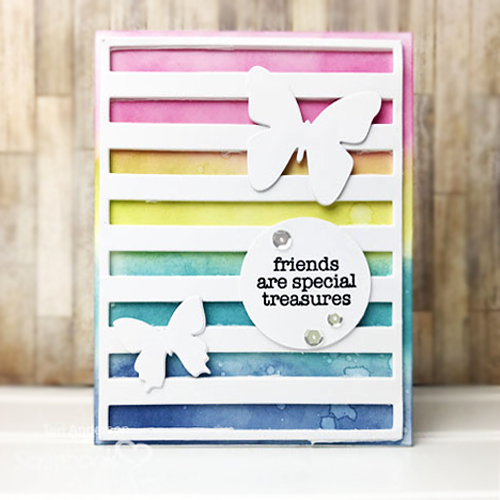
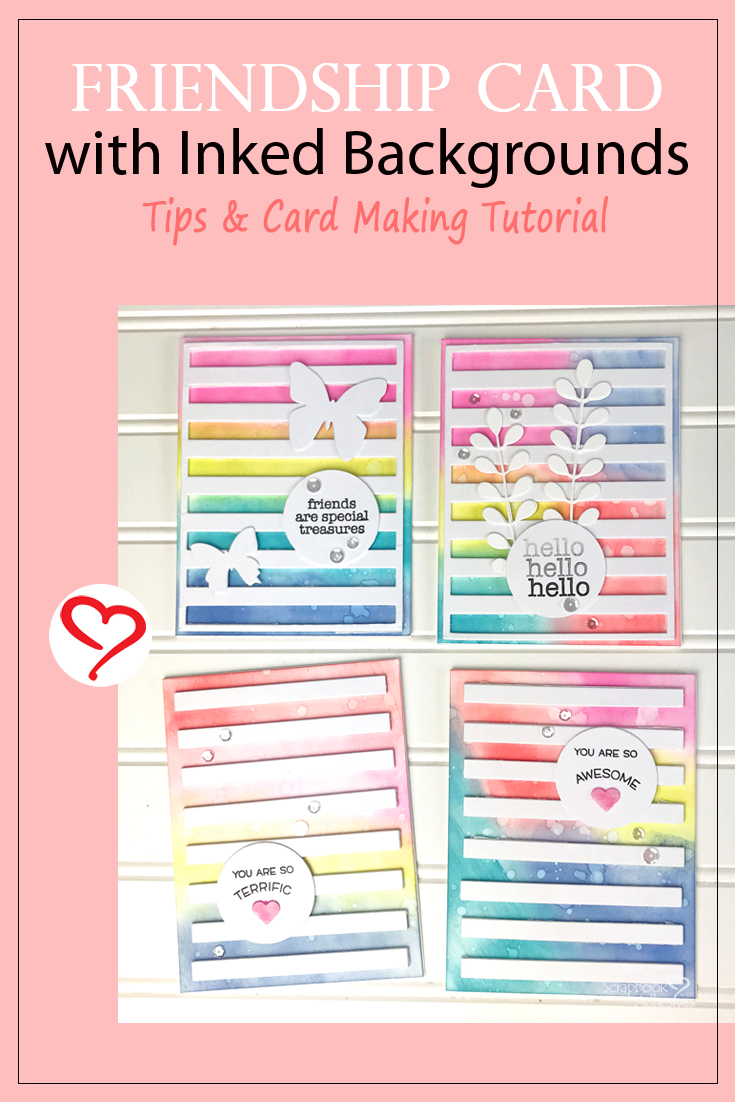
Friendship Card Inked Background
You are going to start by adhering a piece of white cardstock to a 3D Foam Creative Sheet. You’ll then want to cut a large background die with it. I recommend using a background with lines or big circles.
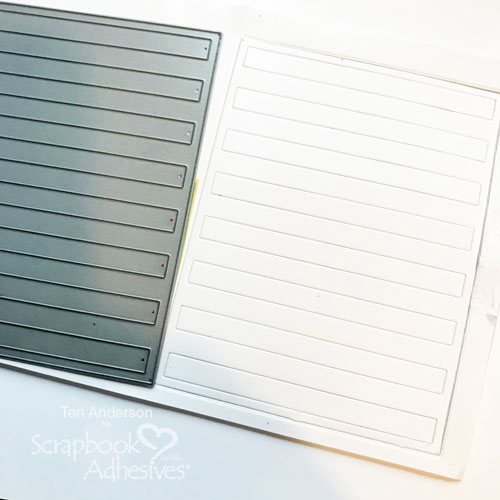
Designer’s Tip: Hold the die in place by adding a few strips of Washi tape along the sides. That way, if you have to run the die and paper multiple times through your die-cutting machine to get it to cut, the die will not shift.
Inking Fun
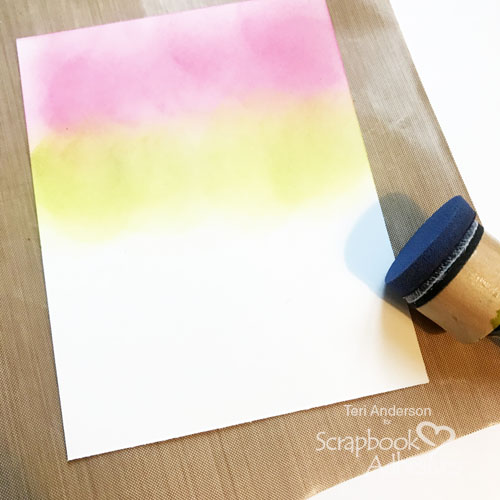
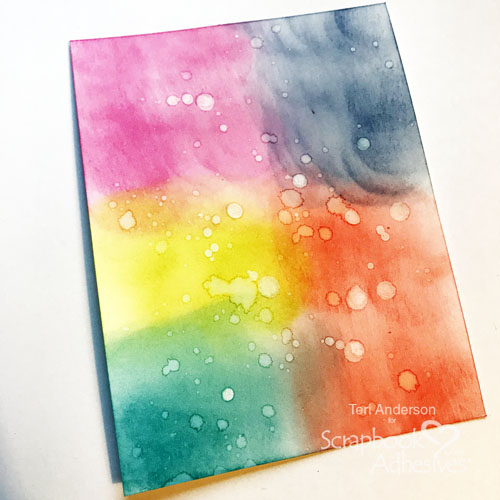
Once you’ve cut your background, set it aside and grab a panel of cardstock. Sponge several ink colors in lines from the top to bottom of the panel. Remember, your inking does not have to be perfect. You just want to make sure you get some ink all over the panel.
If you’ve used a water-based ink, splash a few drops of ink onto it and dab of the excess water with a paper towel.
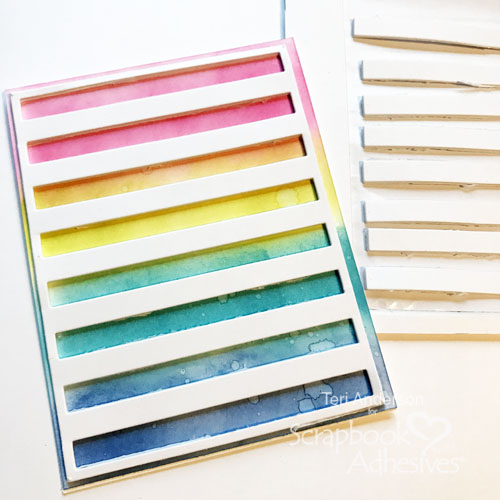
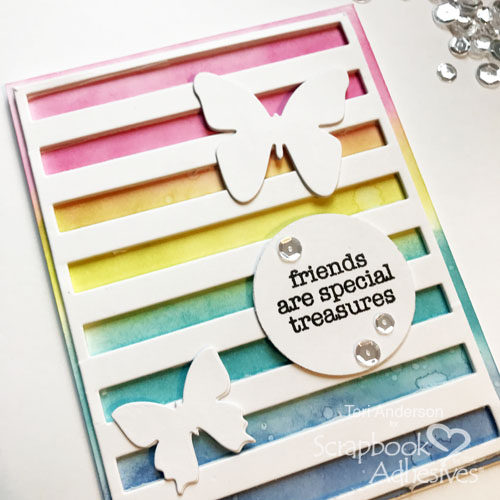
Adhere the panel onto a top folded A2 card. Then, grab your background die and adhere it onto the card. Set any inner pieces (such as stripes or circles) aside to use on another project.
Embellishing the Card Front
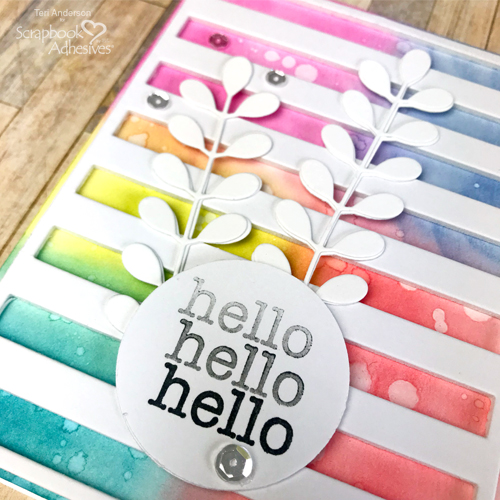
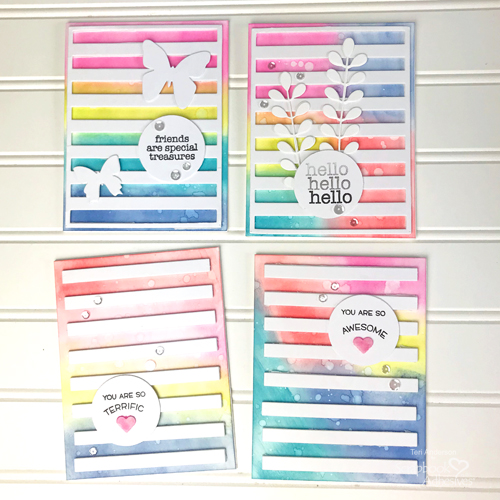
Stamp a sentiment on a circle of cardstock. Cut two more circles and stack all of the circles on top of each other. Mount the sentiment to the card. Then die-cut a couple butterflies from cardstock and adhere them to your card.
Complete the card by embellishing it with a few sequins. This design is easy to reproduce but also easy to slightly change up!
Change It Up for a Second Time
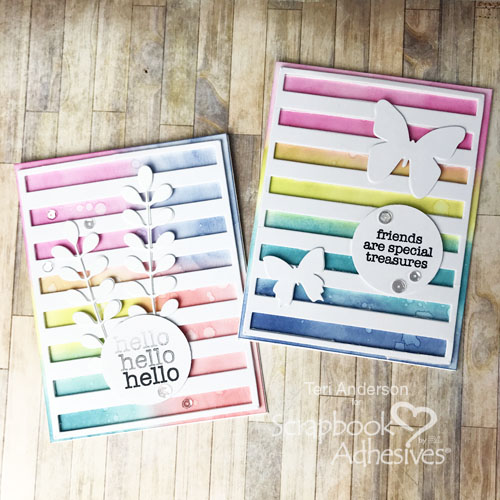
Rather than applying ink on my background paper in stripes for my Hello card, I randomly applied it in chunks all over the panel.
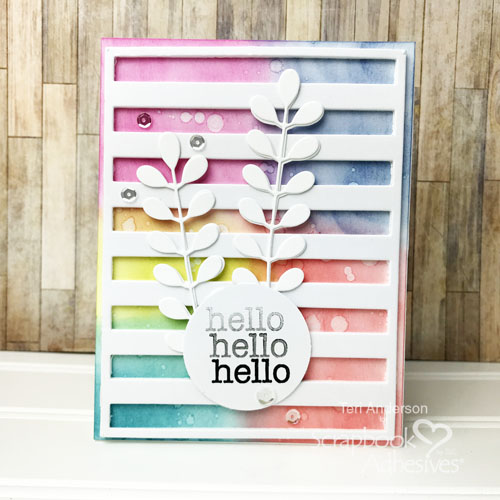
I also flicked water, as well as white paint, onto the inked panel to give it a more artsy look.
Rather than using butterfly dies on this card, I chose a long stem die and added a few stems. I also used a different sentiment.
While this card looks different than first card, it really isn’t that much different!
Leftovers for More Cards
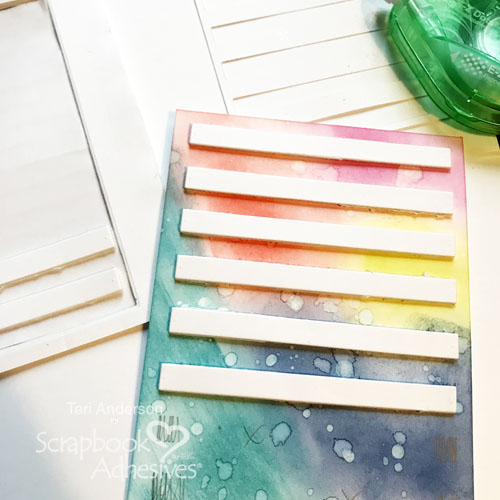
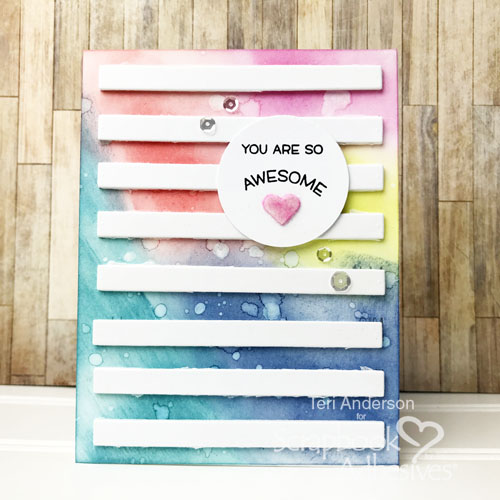
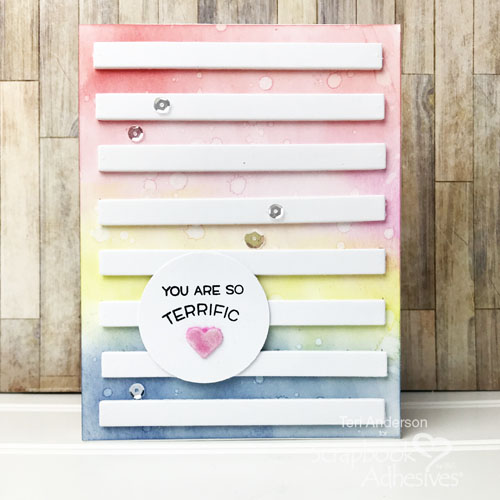
You can also use the leftover pieces from the background die to make cards! I used the leftover stripes from the other two cards to make these two cards.
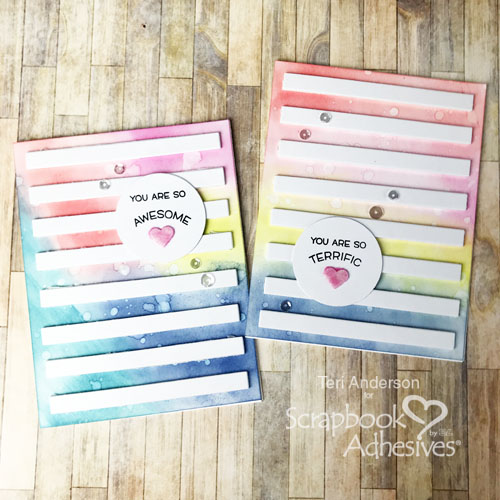
I created inked backgrounds just like I did for the other cards for these two. Then I die-cut a background from cardstock to use a template. I set the template for each background and marked with a pencil where the stripes needed to be placed.
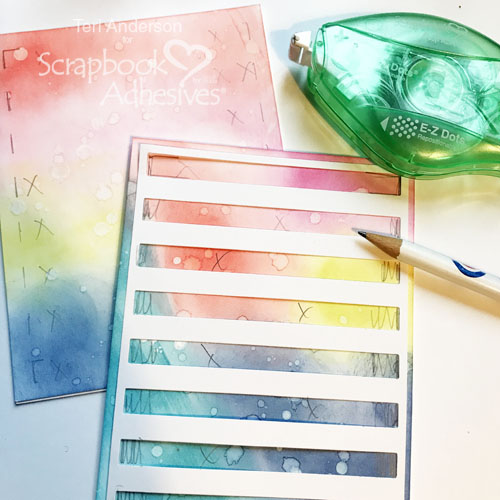
Then I gradually built a background by adhering the strips over my pencil marks. Easy peasy!
To complete these cards, I stamped sentiments on circles of cardstock and then added 3D Foam Hearts. Wear Your Adhesive on the Outside by adding flock on top of the hearts, along with a few sequins.
Make a few of these Friendship Cards with Inked Background! I hope you enjoyed today’s post and are inspired to create and send them to your friends and loved ones!
Happy creating,
Teri Anderson
Creative Time: 60 Minutes
Skill Level: Intermediate
Materials Needed
Scrapbook Adhesives by 3L®
- E-Z Dots® Permanent Refillable Dispenser
- 3D Foam Hearts
- E-Z Dots® Repositionable Dots Refillable Dispenser
- E-Z Runner® Permanent Strips Refillable Dispenser
- 3D Foam Creative Sheets Medium White
- Adhesive Dots Micro
Other
White Cardstock: Neenah Paper; Dies: My Favorite Things (Stripes Cover-Up, Circle), Echo Park Paper Co. (Butterflies), Simon Says Stamp! (Leaf Column Background); Stamps: Hero Arts (Essential Messages), Lawn Fawn (Reveal Wheel Sentiments); Sequins: Pretty Pink Posh; Ink Pads: Ranger Ink; Flock: Stampendous!; White Paint: Plaid
Save It for Pinterest!
Visit our Website and Blog!
Sign up for our Newsletter so you never miss a contest or giveaway!


By amy tsuruta April 24, 2020 - 6:49 am
Teri, I LOVE these.