
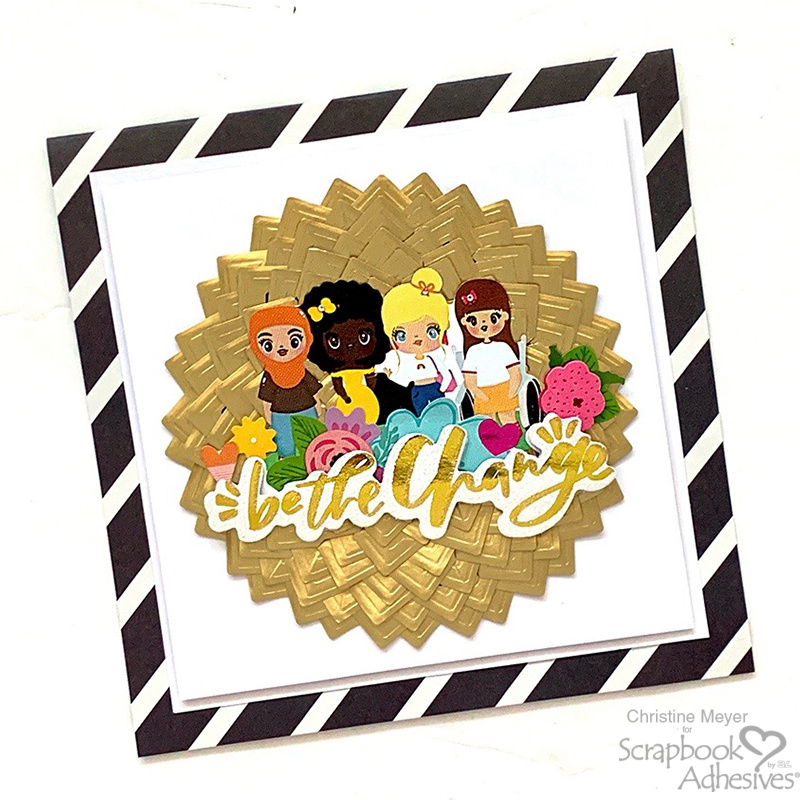
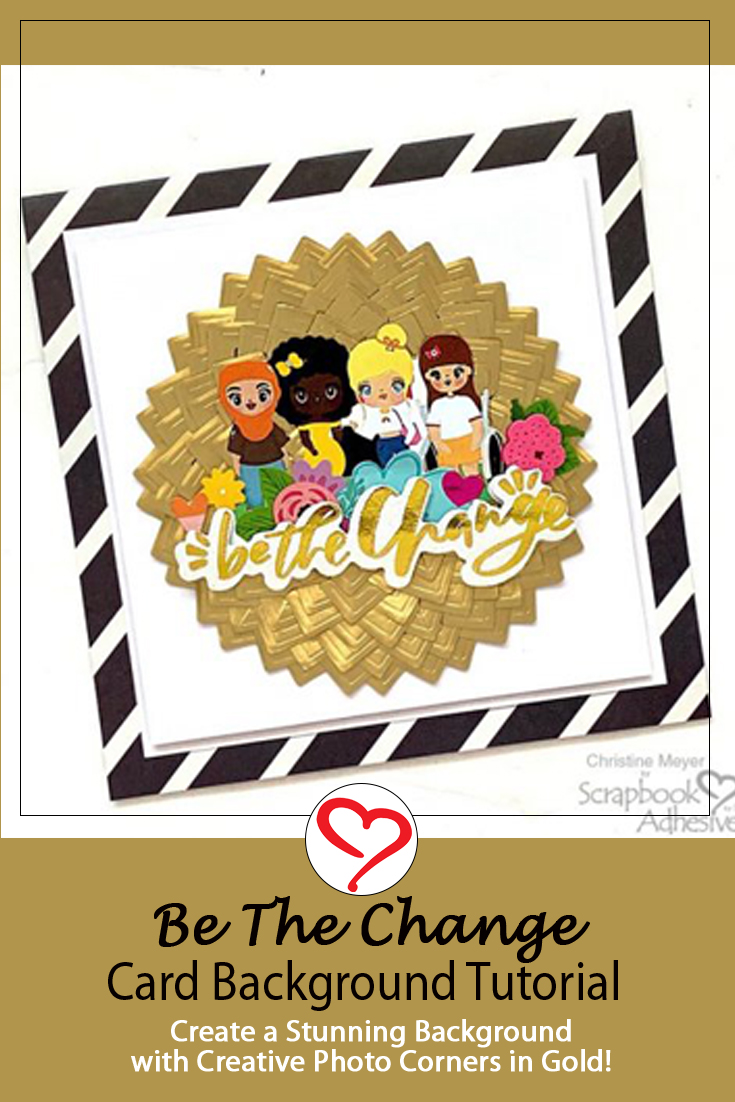
Have you ever had a sticker that was just so cool you had to make a card with it? Be The Change card is one of those cool cards! Christine joining you today with an encouraging card with a technique using the Creative Photo Corners!
If this technique looks familiar, it’s because you’ve seen me do it a couple of times before! I have used it on a scrapbook layout and. a home decor piece. But this is the first time that I have done it on a card! Let’s dive into how it came together!
Be the Change Card Background Technique
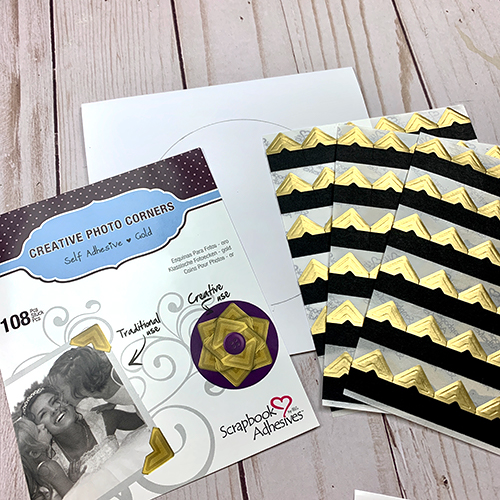
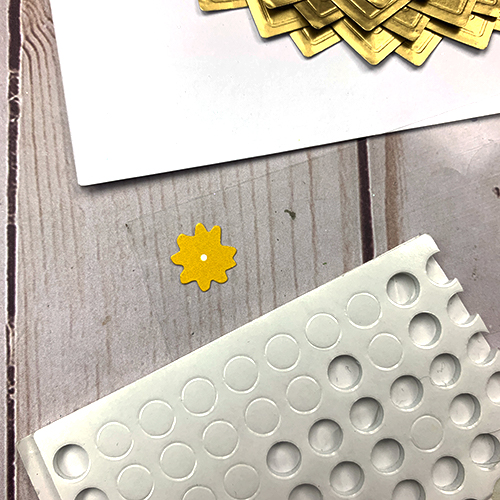
For today’s card, I used the Creative Photo Corners in Gold.
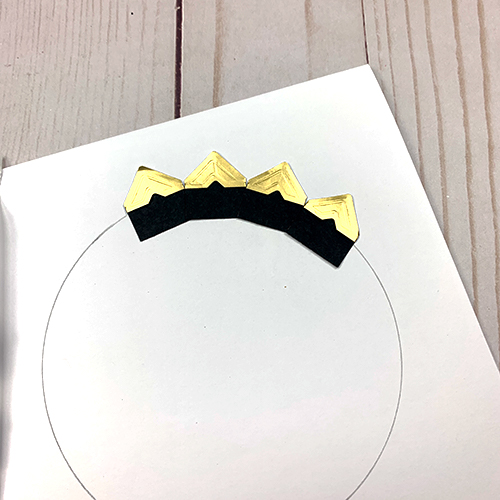
Draw a circle on your card. It will be covered up, so don’t worry about erasing anything. Use your Creative Photo Corners to outline the circle. You will need to overlap a little.
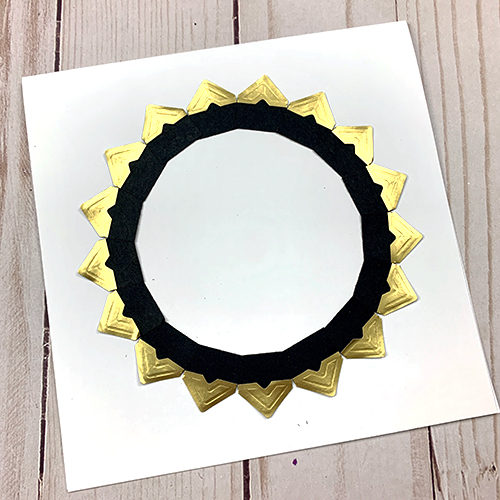
Keep going until you finish a full circle. Keep building up the layers.
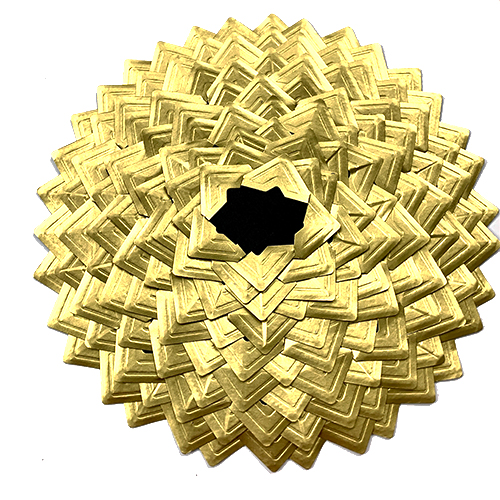
Eventually, you will end up with a beautiful, golden shape to add texture and dimension to your card background!
The Rest of the Adhesives
To finish off the card I used several different adhesives. The layers are assembled with a combination of Crafty Foam Tape and the E-Z Runner Grand. Adding the stickers was a little trickier because of the background.
I added the small details using Small 3D Foam Circles. This gave them some dimension and a strong hold.
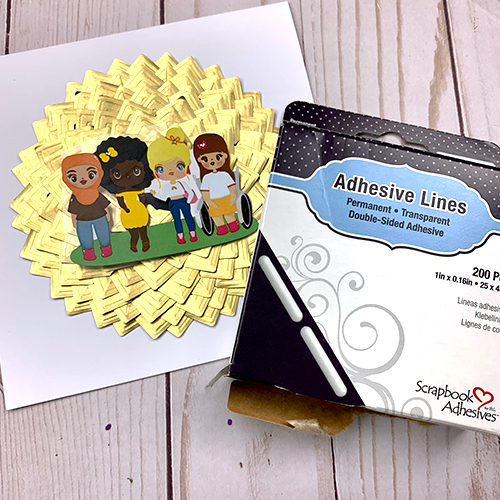
The big sticker was flat and I was concerned about how well it would hold against the Creative Photo Corners. So I added Adhesive Lines to the back of that to give it a really strong hold.
Thanks so much for joining me today! I hope you’ve been inspired to bust out those Creative Photo Corners and try something new!
Creative Time: 60 minutes
Skill Level: Intermediate
Materials Needed
Scrapbook Adhesives by 3L®
E-Z Runner Grand Permanent Strips Dispenser
Crafty Foam Tape 108′
3D Foam Circles White Mix
Creative Photo Corners Gold
Adhesive Lines
Other
Stickers & Patterned Paper from Paper House Productions
Save It!
Visit our Website and Blog!
Sign up for our Newsletter so you never miss a contest or giveaway!


