
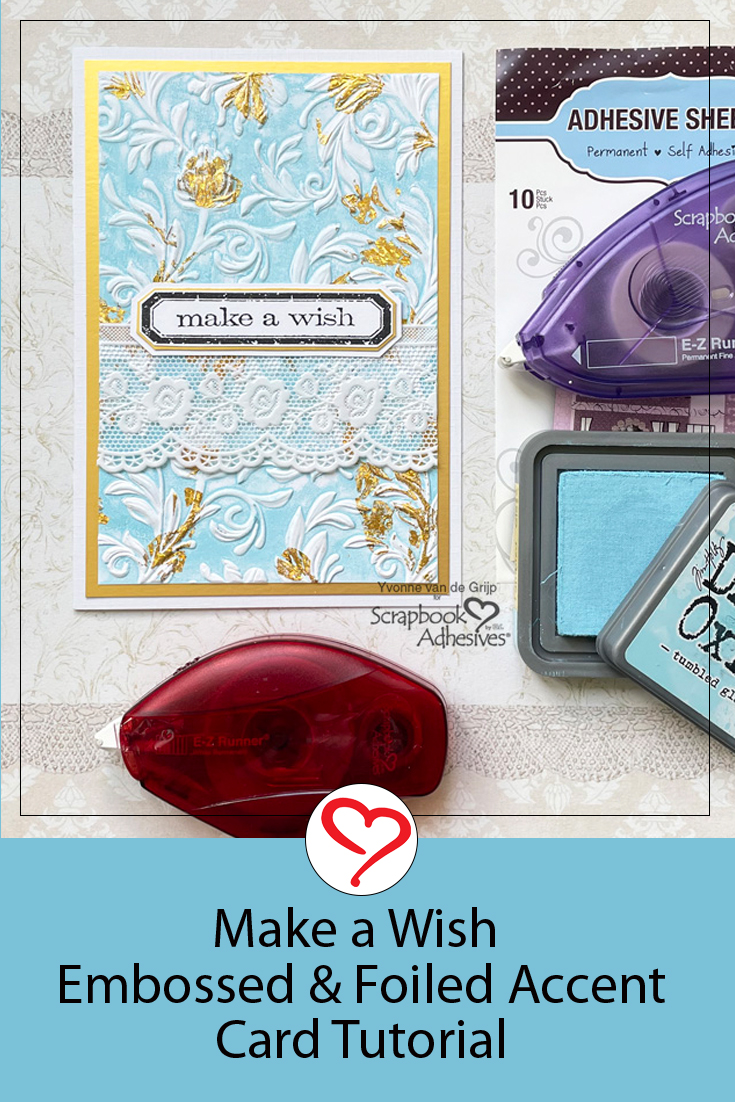
Hi everyone, Yvonne here with a foil accented Make a Wish card using a technique called Wear Your Adhesive on the Outside. It’s so much fun to use adhesive as an eye-catching accent for your card. I would love to share how I made the card, will you join me?
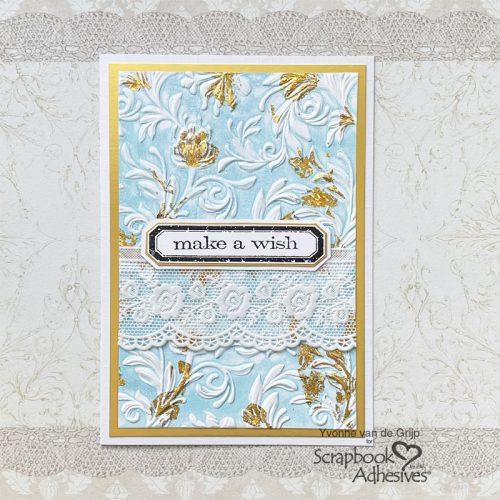
Make a Wish Embossed Card Panel
First, ink an embossing folder with soft blue ink by rubbing the inkpad softly over the inside of the embossing folder. Make sure you ink the correct side of the embossing folder: the lifted parts are the background parts to be inked.
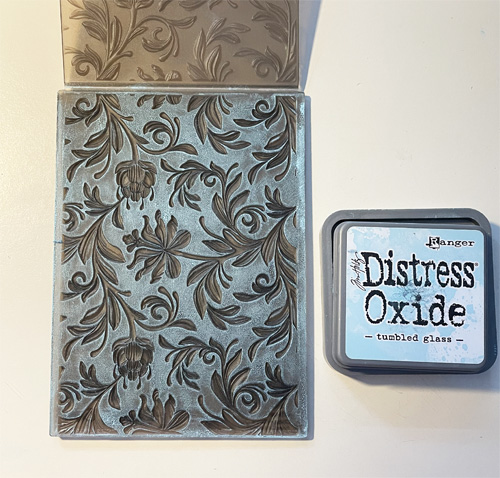
Then put a piece of white cardstock between the inked embossing folder and run through your die-cutting and embossing machine using the sandwich (plates) as recommended by the manufacturer of the machine. Then remove the paper from the embossing folder.
Wear Your Adhesive on the Outside with Foil
To make the foiled accents, I cut a small strip of the Adhesive Sheets 4×6 inch sheet. Remove the yellow liner from the strip and dab the adhesive side of the strip onto the embossed cardstock. Repeat in random spots.

Next, take a piece of Metallic Transfer Foil Sheets Holographic Colors and gently apply onto the adhesive spots on the embossed cardstock. Make sure the holographic pattern is facing upward.
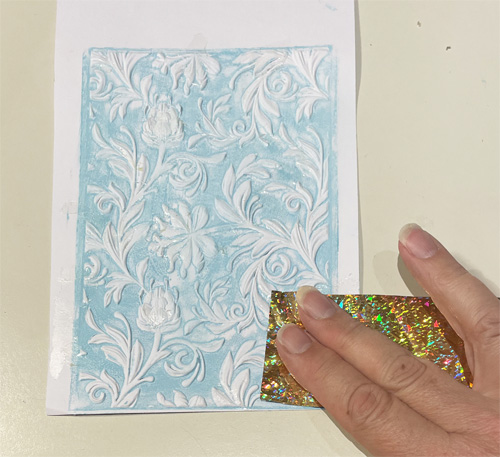
This technique making your adhesive shine is also known as Wear Your Adhesive on the Outside. Isn’t this a fun effect?
Make a Wish Card Base
Trim the embossed and foil accented cardstock to a rectangular size and adhere on a gold card panel using the E-Z Runner® Permanent Strips Refillable Dispenser. Then secure it on a white card base again using the E-Z Runner® Permanent Strips Refillable Dispenser.
Embellishing the card
Adhere a piece of white lace on the card with the E-Z Runner® Permanent Fine. I use it because it turns transparent when it settles, and no adhesive residue shines through the lace! Stamp the sentiment on a piece of white cardstock, cut with scissors, and double-mat with gold and white cardstock with the E-Z Runner® Permanent Strips Refillable Dispenser. Lastly, adhere to the card using again the E-Z Runner® Permanent Strips Refillable Dispenser.
And voila…your inked and foil accented card is ready to make someone a very happy receiver!
Thanks for stopping by and wishing you happy crafting!
Yvonne van de Grijp
Creative Time: 30 minutes
Skill Level: Intermediate
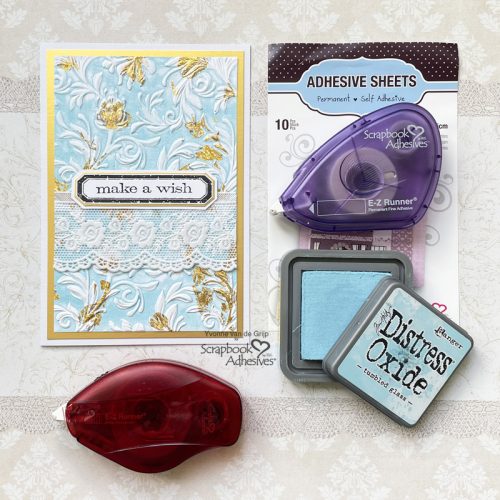
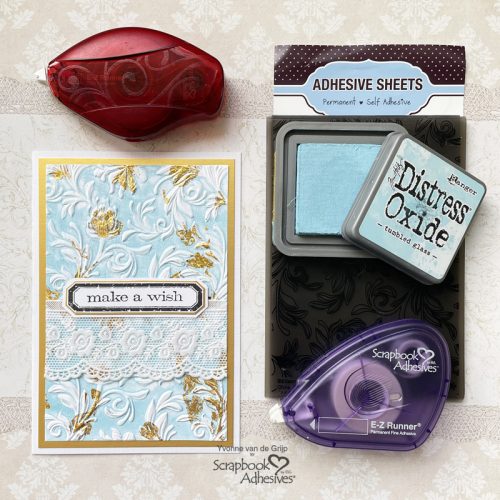
Materials needed:
Scrapbook Adhesives by 3L®
E-Z Runner® Permanent Strips Refillable Dispenser
E-Z Runner® Permanent Fine Adhesive Dispenser
Adhesive Sheets 4×6 inch
Metallic Transfer Foil Sheets Holographic Colors
Other:
Inks: Ranger Ink (Distress Oxide inkpad in Tumbled Glass, Archival Inkpad in Jet Black); Embossing Folder: Sizzix (Tim Holtz: Botanical); Die-Cutting and Embossing Machine: Spellbinders® Paper Arts (Platinum 6 Machine); Stamp: Stampers Anonymous (Tim Holtz: Simple Sayings); White and Gold Cardstock; Scissors; Paper Trimmer; Lace
Save to Pinterest!
Visit our Website and Blog!
Sign up for our Newsletter so you never miss a contest or giveaway!


