
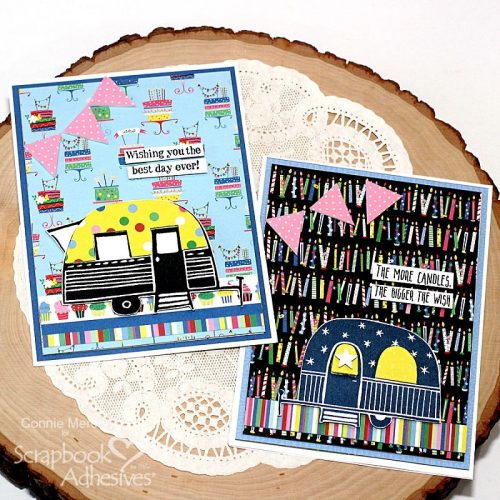
Hi, Connie here with a couple of birthday cards created using the 3D Foam Pennants. I think these would make anyone a Happy Camper! There is some paper piecing involved along with stamping. Sounds like fun, right? Let’s get started!
Prep Work on the Happy Camper Birthday Cards
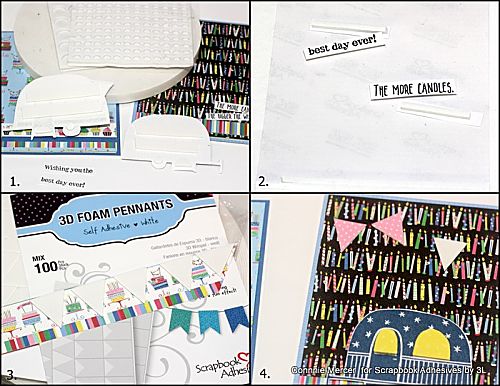
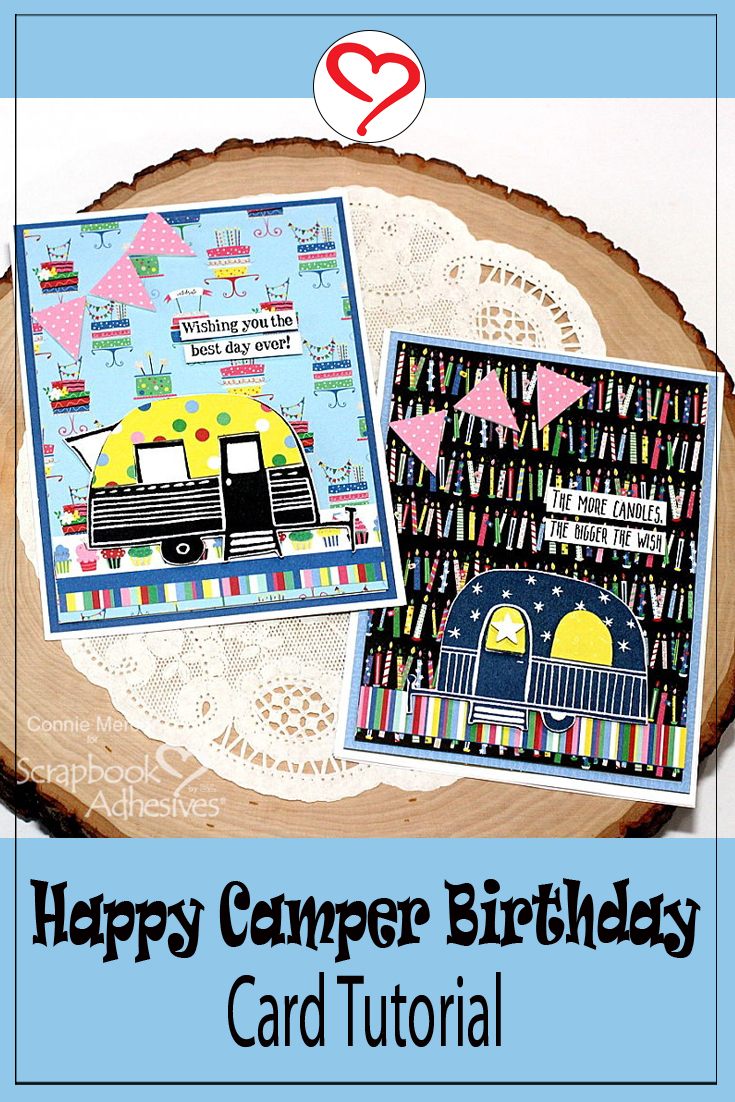
Stamp the trailers out on white cardstock, using Archival ink/Black and Cobalt. Trim out the trailer images and set them aside. Stamp the trailers a second time on coordinating pattern paper. Trim out the door, window, and the side of the trailer. Doing this will add color to the trailers, making for colorful Birthday cards.
Assemblying Layers

- 1. Adhere mat to white cardstock base using the E-Z Runner Grand Refillable Dispenser.
2. Apply Crafty Foam Tape 108′ to the pattern paper that will be on the card front.
3. Adhere the card front to the mat with the E-Z Runner Grand Refillable Dispenser.
4. You are ready to add the stamped trailer images. Add the paper cut outs to each trailer using the 3D Foam Circles White Mix.
Setting Up Details
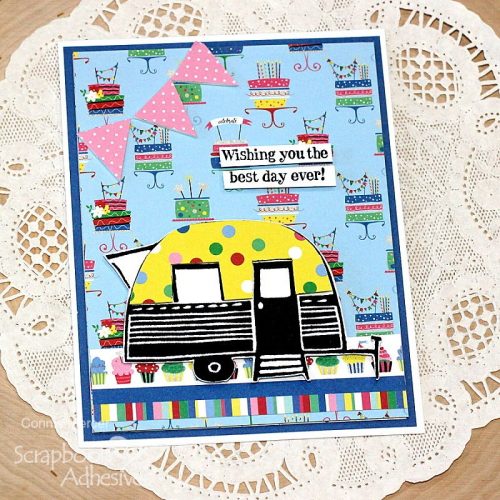
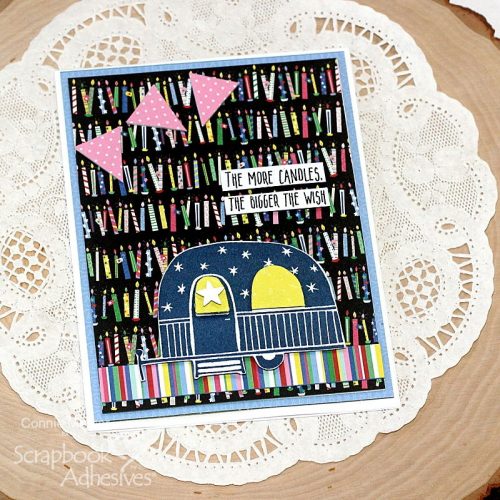
- 1. Adhere the trailers to the card front with the Crafty Foam Tape 108′.
2. Add the sentiment strips to the card front using 3D Foam Strips.
3. Create the pennants by putting 3D Foam Pennants on the back of pattern paper and then cut along the line of the 3D Foam Pennants. You will need six of these.
4. Remove the paper backing on the 3D Foam Pennants and place the pennants on the card front.
Thanks for stopping by and I hope you enjoyed my Happy Camper Birthday Cards!
Connie Mercer
Creative Time: 50 Minutes
Skill Level: Beginner
Materials Needed
Scrapbook Adhesives by 3L®
3D Foam Pennants
Crafty Foam Tape 108′
3D Foam Strips
3D Foam Circles White Mix
E-Z Runner Grand Refillable Dispenser
3D Foam Micro Squares White
Other:
Paper: PhotoPlay Co. (Confetti Collection), Stamps: Darkroom Door, Ink: Ranger Ink (Archival Ink in Jet Black & Cobalt), White Cardstock
Save to Pinterest!
Visit our Website and Blog!
Sign up for our Newsletter so you never miss a contest or giveaway!


