
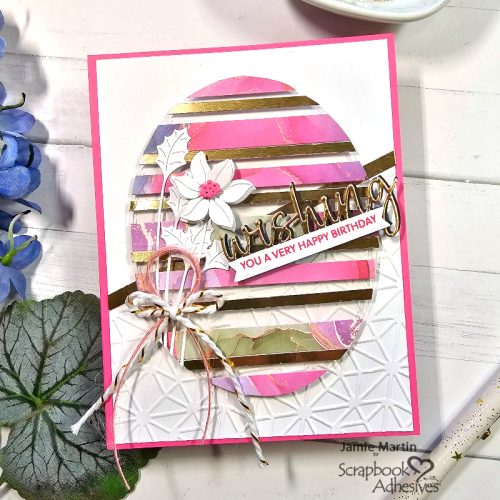
Hi, Jamie here today with a floating strips birthday card that’s easy to make with the right adhesives.
Preparing the Card Base
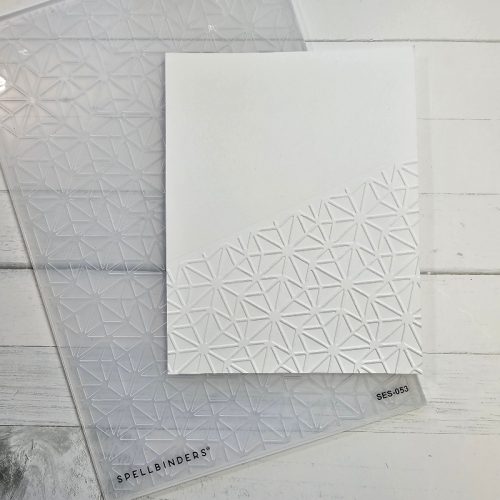
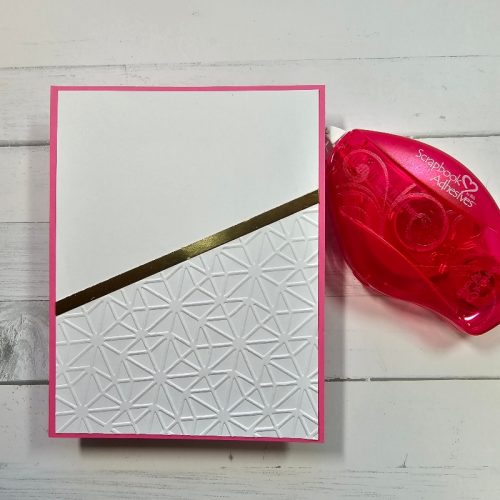
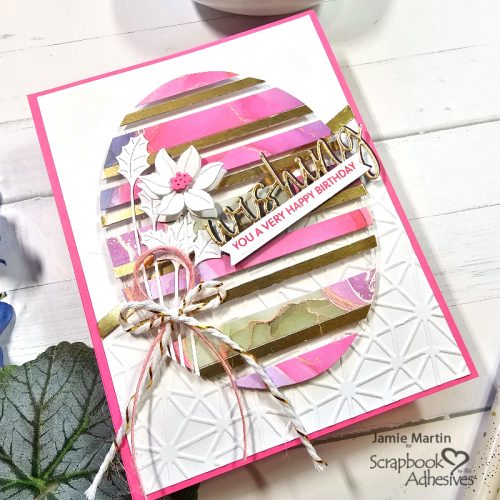
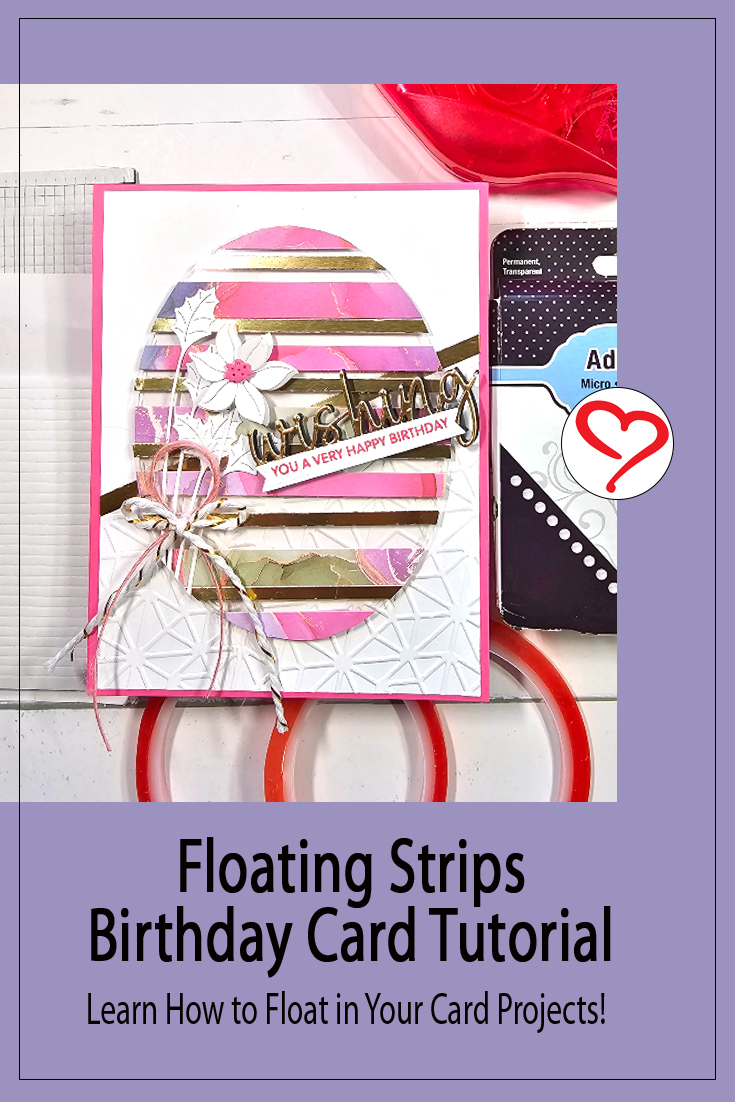
Emboss the bottom of a white cardstock panel and place a strip of gold paper where the embossing ends using 1/8″ tape. Mount this to a top folding pink card using the E-Z Runner® Permanent Strips Refillable Dispenser.
Making the Floating Strips Panel
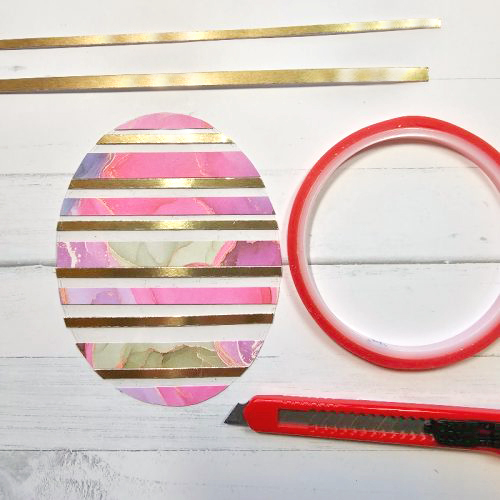
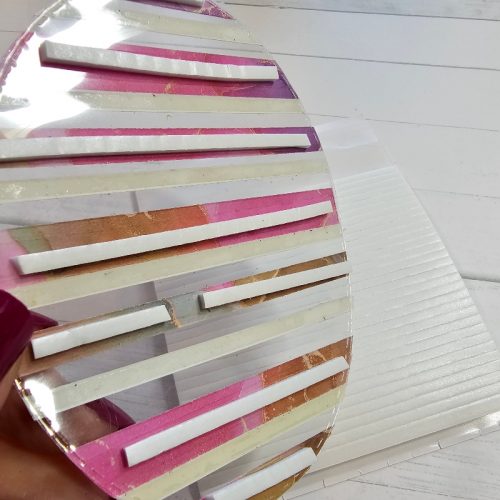
Die-cut an oval from acetate and place alternating strips of decorative paper and gold paper, securing it with Extreme Double-Sided Tape 1/4in. and Extreme Double-Sided Tape 1/8in. Place 3D Foam Strips on the back of the acetate behind the paper strips.
Decorating the Floating Strips Panel
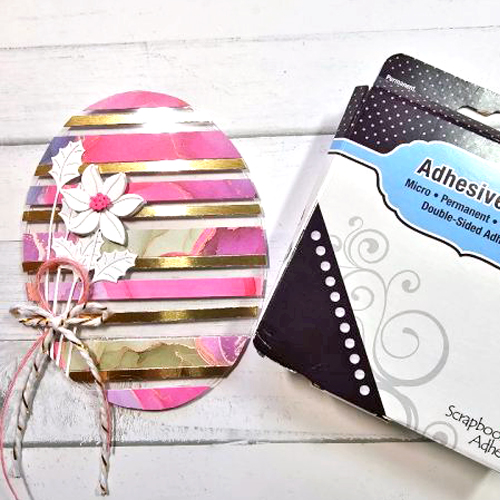
Die-cut flowers and leaves from white cardstock and place them on the left side of the oval using Micro dots. The pink center of the flower is popped up using 3D Foam Squares Micro Black. Attach a pink cord and a bow to the stem of the flowers using Adhesive Dots Micro. Die-cut Wishing from black and gold cardstock. Layer the gold on the black with the black edge showing and pop this up diagonally on the oval using 3D Foam Strips. Die-cut a banner from white cardstock and stamp it with the sentiment using pink ink. Add pink twine and a white and gold ribbon to the stem of the flowers.
Thanks for Visiting!
Jamie Martin
Creative Time: 45 mins
Skill Level: Intermediate
Materials Needed:
Scrapbook Adhesives by 3L®
E-Z Runner® Permanent Strips Refillable Dispenser
3D Foam Squares Micro Black
3D Foam Strips
Adhesive Dots Micro
HomeHobby™ by 3L
Extreme Double-Sided Tape 1/4in.
Extreme Double-Sided Tape 1/8in.
Other:
Thin Metal Cutting Dies, Stamps and Embossing Folder: Spellbinders Paper Arts
Click Preferred Retailers List
Save to Pinterest!
Visit our Website and Blog!
Sign up for our Newsletter so you never miss a contest or giveaway!


Visit our Website and Blog!
Sign up for our Newsletter so you never miss a contest or giveaway!