
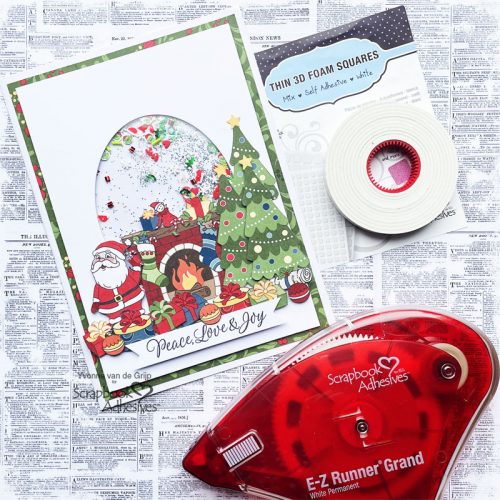
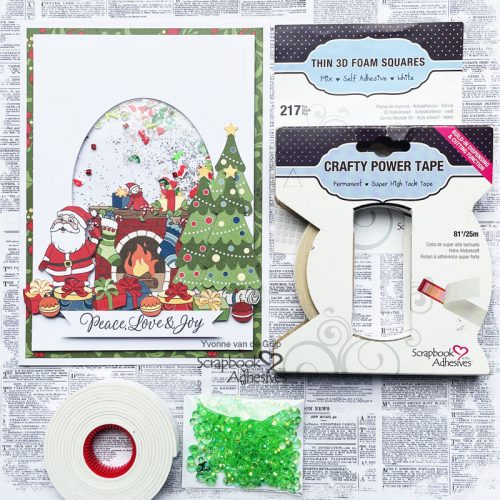
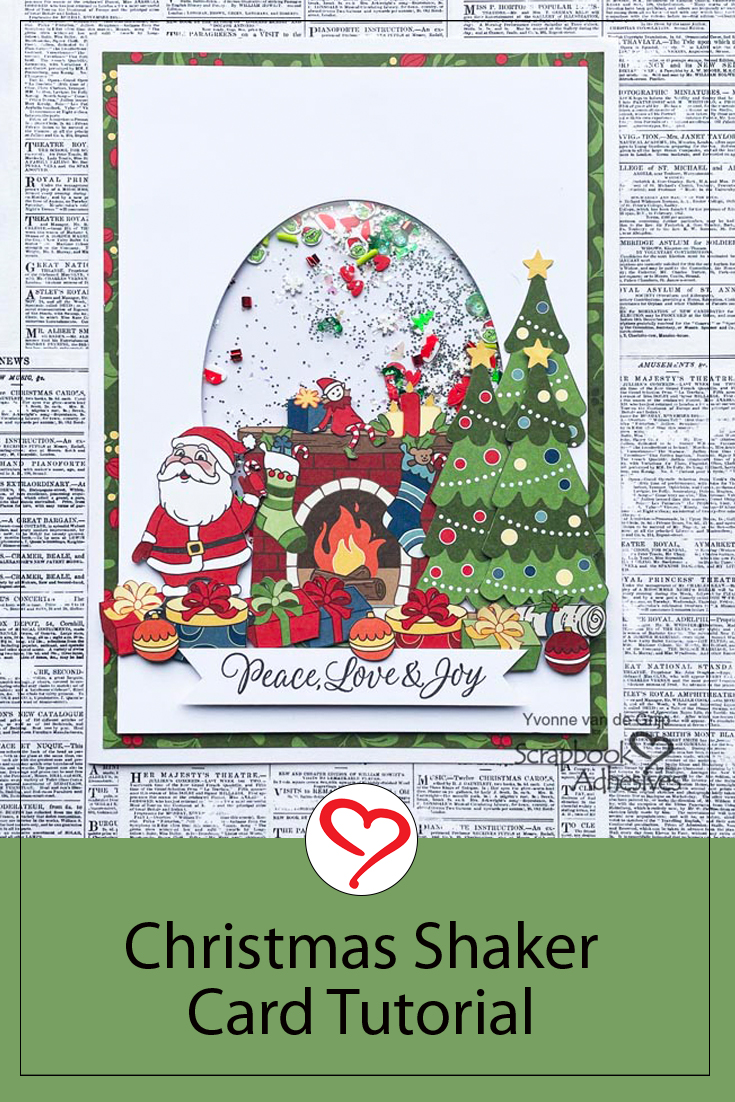
Hi everyone! With Christmas a little over a month away I made a Christmas Shaker Card. This card is all about fuzzy cutting, layering, and of course a shaker doom. I would love to share how I made my card. Wanna join me?
Shaker Panel
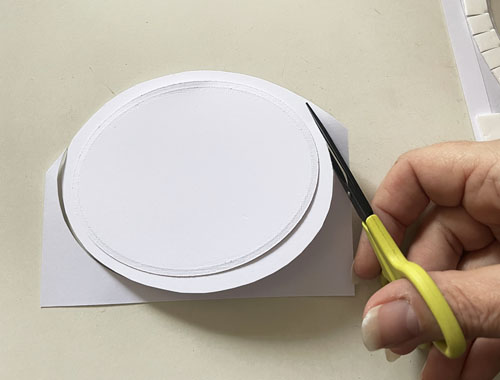
Die-cut an oval from white cardstock. Then trim a white cardstock into a rectangle-sized top card panel. Use the cut oval as a guide to cut out a larger oval from a piece of white cardstock with scissors. This will become the shaker’s background.
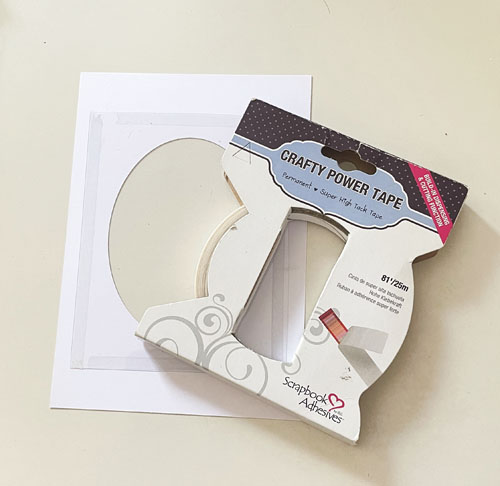
Cut a piece of acetate to fit the oval shaker window and adhere it to the back of the card panel using Crafty Power Tape Dispenser 81ft.
Place strips of Crafty Foam Tape White around the back of the card panel and around the oval window. This will be the shaker window panel.
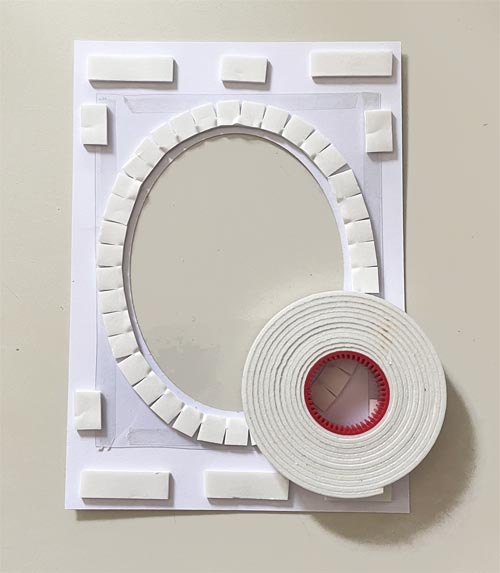
Designer’s Tip: I used scissors to make tiny incisions on the Crafty Foam Tape White around the oval shaper window to make it easy to “bend” around the window (as pictured).
Shaker Filling
To add a fun element to the Christmas Shaker card, I mixed a couple of wonderful shaker mixes from Buttons Galore More into the shaker feature.
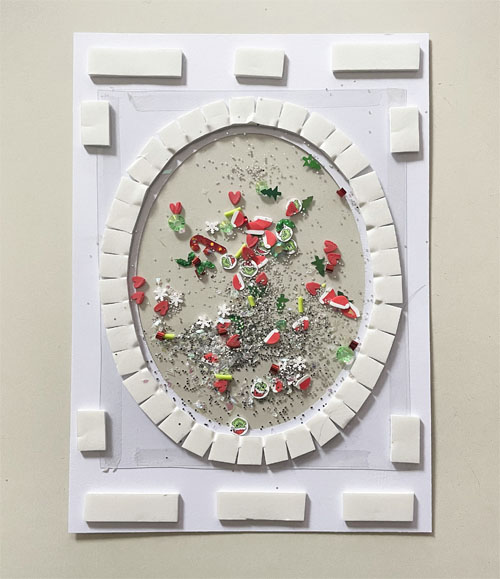
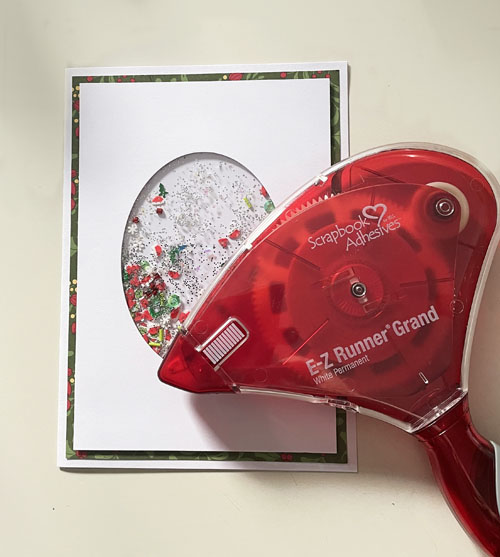
Remove the liner from Crafty Foam Tape White and cover the window with the hand-cut larger white oval. Make sure no shaker material can escape. Adhere the shaker card panel onto a patterned paper mat, and place it onto a white card base using the E-Z Runner® Grand Refillable Dispenser.
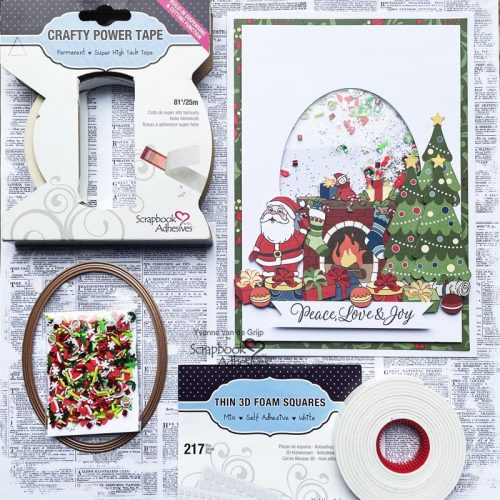
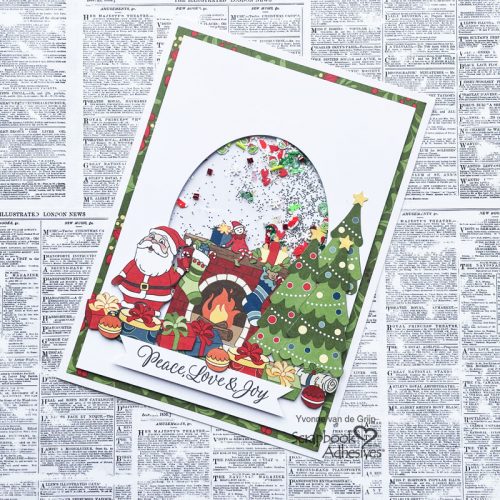
Fuzzy Cut Elements
To add scenery to the Christmas Shaker card front, I fuzzy cut images from patterned paper and layered them with a combination of Thin 3D Foam Squares White Mix and 3D Foam Squares White Small Size. This helps to create a lovely dimensional interest. For a final touch, stamp a sentiment on white cardstock, cut it to a banner, and adhere it with 3D Foam Squares White Small Size. Voilá, your card is ready!
I hope you enjoyed this tutorial and wish you happy crafting!
Yvonne van de Grijp

Creative Time: 60 minutes
Skill Level: Intermediate
Materials needed:
Scrapbook Adhesives by 3L®
Crafty Power Tape Dispenser 81ft
Thin 3D Foam Squares White Mix
3D Foam Squares White Small Size
E-Z Runner® Grand Refillable Dispenser
Other: Patterned Paper and Stamp Set: Dare2BeArtzy® (Home for the Holidays Collection and Poinsettia Basket Clear Stamp Set); Ink: Tsukineko (Versafine in Black Onyx); Shaker Bits: Buttons Galore & More (Lime and Who Village); Etched Dies and Die-Cutting Machine: Spellbinders Paper Arts® (Pierced Ovals Dies and Platinum 6 Machine); White Cardstock; Glitter; Scissors; Paper Trimmer
Save to Pinterest!
Visit our Website and Blog!
Sign up for our Newsletter so you never miss a contest or giveaway!


