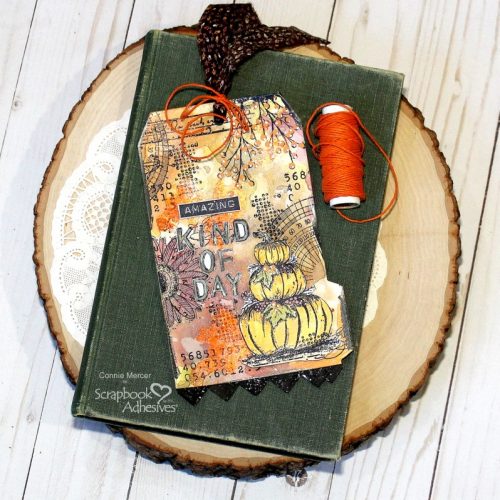
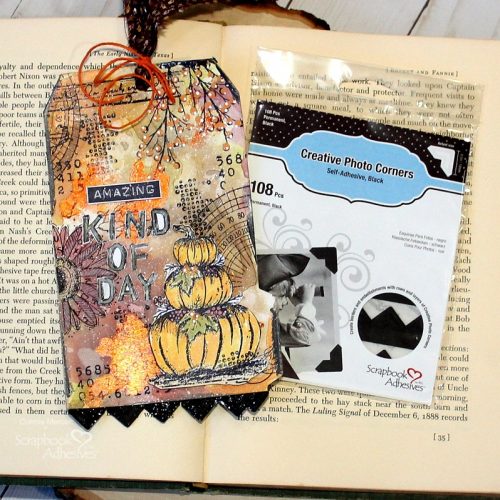
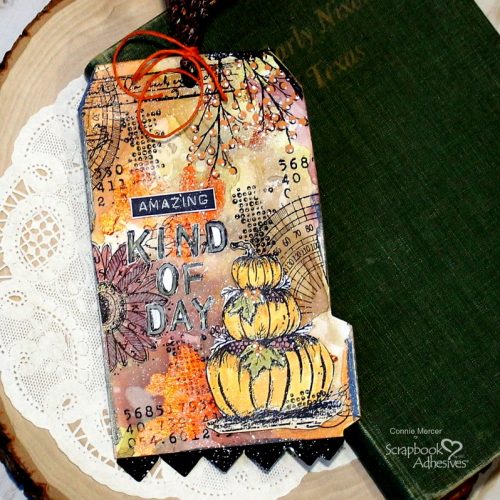
Hi, Connie here with an Amazing Kind of Day fall tag that would look super cute on a loaf of homemade bread. I started with Metallic Transfer Foil Sheets, Adhesive Sheets 4×6, and Distress Oxide ink. This will give you a pretty cool background to start building the tag on.
Building the Tag Background
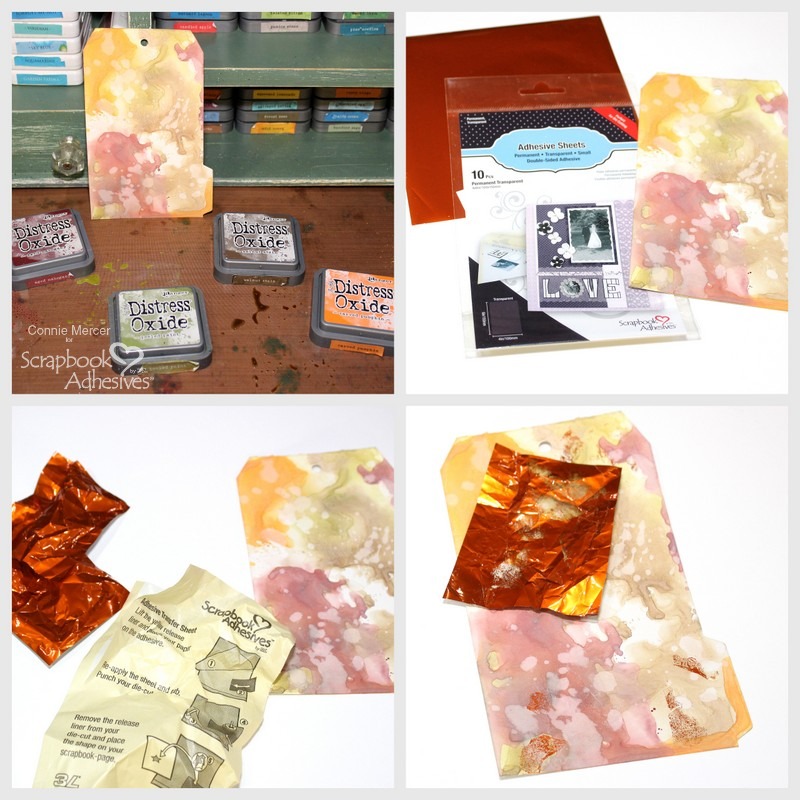
- 1. Gather inks along with a tag and make a cool mixture for the tag background.
2. Gather the copper foil from the Metallic Transfer Foil Sheets in Nature Color and Adhesive Sheets 4×6.
3. Crinkle the Adhesive Sheet and the copper foil sheet.
4. Dab the Adhesive Sheet in random spots on the tag. Take the copper foil, lay it over the sticky adhesive, and pull it up. Repeat the process until you get the look you want.
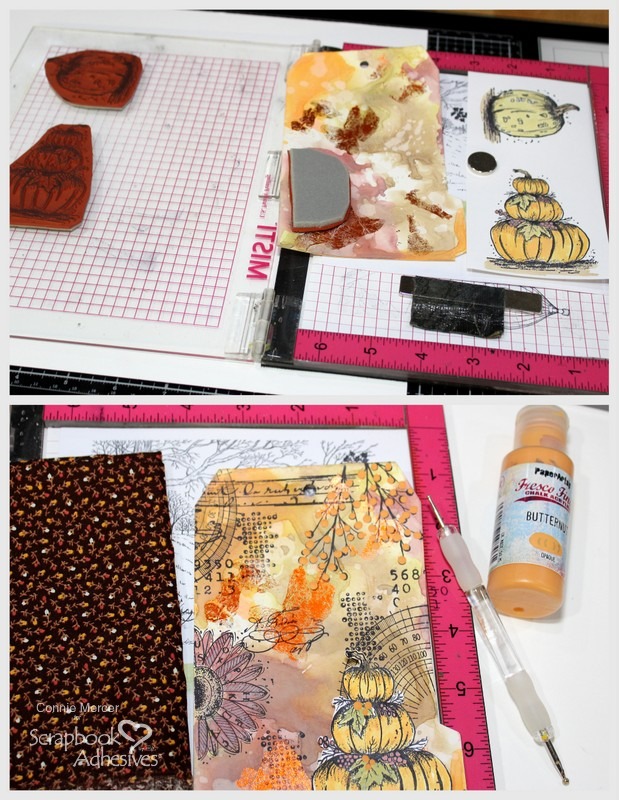
- 1. Stamp focal images, color, and trim out. Add background stamps, to the tag, to enhance and add interest to the tag. Be creative with the stamps and ink, that’s the fun part.
2. Add color to the tag using acrylic paint. All images are colored with Distress Oxide inks watered down. It gives a distressed watercolor look.
Assembling the Tag
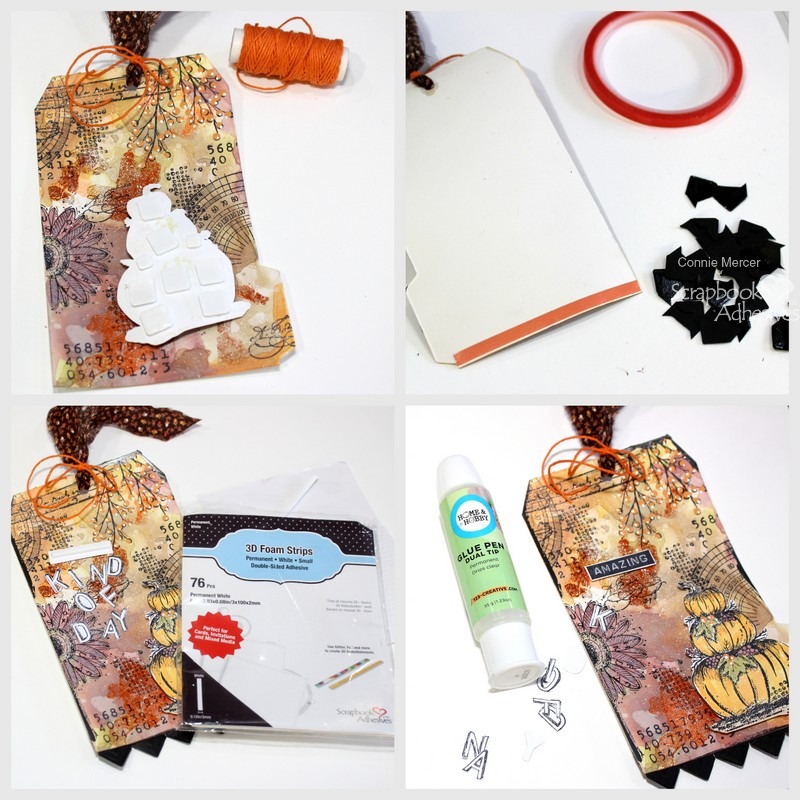
- 1. Adhere the Pumpkin focal to the tag front using the 3D Foam Square White Mix.
2. To make a fun border at the bottom of the tag, adhere the Creative Photo Corners/Black with the Extreme Double-Sided Tape 1/2″.
3. To adhere the words, the 3D Foam Strips worked perfectly!
4. The letters were adhered with the fabulous Dual Tip Glue Pen. To complete the tag add twine or fabric for the tie.
Thanks for stopping by!
Connie Mercer
Creative Time: 60 minutes
Skill Level: Intermediate
Materials Needed:
Scrapbook Adhesives by 3L®
Metallic Transfer Foil Sheets Nature Colors
Creative Photo Corners Black
Adhesive Sheets 4×6
3D Foam Squares White Mix
3D Foam Strips
HomeHobby™ by 3L
Dual Tip Glue Pen
Extreme Double-Sided Tape 1/2″
Other: Stamps: Katzelkraft, Darkroom Door., Ink: Distress Oxide ink. Wax: Hero Arts., Acrylic Paint: Paper Artsy. Tags: Studio Light.
Save to Pinterest!
Visit our Website and Blog!
Sign up for our Newsletter so you never miss a contest or giveaway!


