
Well, its hard to believe, but I guess its time to start thinking about Halloween projects. Maybe I am saying this because I have a tendency to forget to put out the decor until about a week before the holiday. Not this year! The other day I made a fun yet spooky canvas with adhesive as my helper.
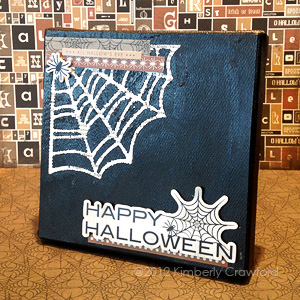

Start with a blank canvas. This one measures 6″ x 6″. Paint the edges with black paint. Cut a piece of patterned paper to fit and paint the edges of it black also. Adhere the paper to the canvas using E-Z Dots® Permanent.
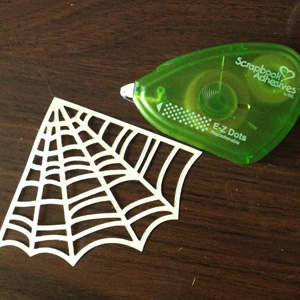
Die cut a spider web from cardstock. Use E-Z Dots Repositionable adhesive to adhere it to the canvas. The spider web will be used as a mask.
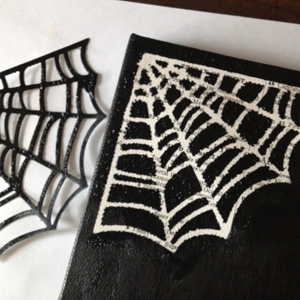
Apply paint over the top of the entire surface. Once slightly dry, carefully peel the spider web off the canvas. Allow to dry completely and then embellish. To add more dimension, I added 3D Foam Squares to the backs of several of the stickers. (For a tutorial on how to use 3D Foam Squares and stickers click here Hi Sunshine. )
Happy Haunting!
Supplies: Scrapbook Adhesives by 3L-E-Z Dots Permanent, E-Z Dots Repositionable, 3D Foam Squares Black Small, Spellbinders Paper Arts (Spider Web), Patterned paper & Stickers-Carta Bella All Hallow’s Eve (Skeleton, Borders, Element Stickers), Canvas-Michael’s, Paint-Martha Stewart (Beetle Black)
Visit our Website and Blog!
Sign up for our Newsletter so you never miss a contest or giveaway!


By ava September 9, 2012 - 11:44 am
great card kimberly…..nice to see 3L has a nice range of products to help create this card.
ava
By Brenda B. September 9, 2012 - 1:05 pm
Kimberly, this is a great canvas. I really like the text in the spider web. Great technique.
By Dorina D September 9, 2012 - 4:42 pm
Great project. Love how the web pops Great idea of fun decor