
Welcome to Day 5 of our Blog Hop with Quietfire Designs!
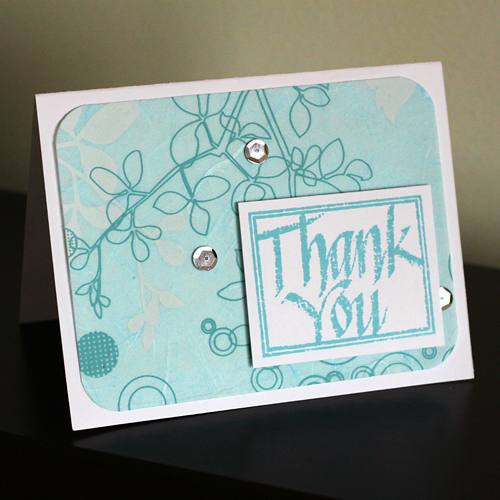
It’s Angela hosting today and I am sharing a tutorial for how to incorporate Art Paper into your crafting projects using the Scrapbook Adhesives by 3L® Adhesive Sheets. I used the technique to create this Thank You card:
 There is a small art supply store near my house and they have a frequently changing inventory of archival quality art papers….all of which are so very pretty. It got me thinking as to how I could incorporate these materials into my cards and scrapbook layouts. Since some of the papers, like the one shown in the project above are translucent, the right adhesive was key! Turns out, the right adhesive was the Adhesive Sheets – 4×6″. Let’s get started!
Step by Step Instructions
1. Gather your supplies. Cut a card base from white card stock (5.5 x 8.5 inches folded to 5.5 x 4.25 inches).
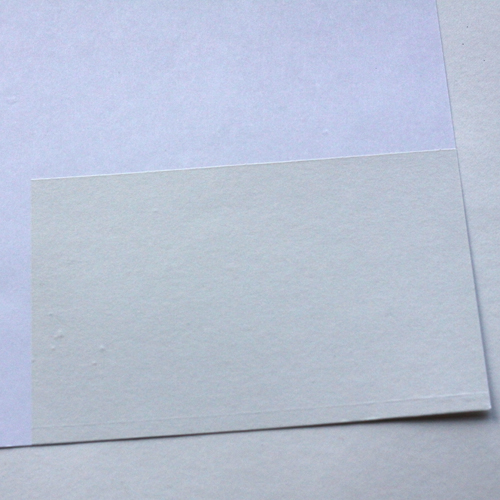 2. Apply an Adhesive Sheet – 4×6″ to white card stock by removing the yellow backing layer and applying the exposed adhesive to the card stock. Burnish the white backing to ensure complete transfer.
 3. Peel the white backing from the adhesive layer and cover the exposed adhesive with the art paper. Burnish lightly to smooth out any wrinkles.
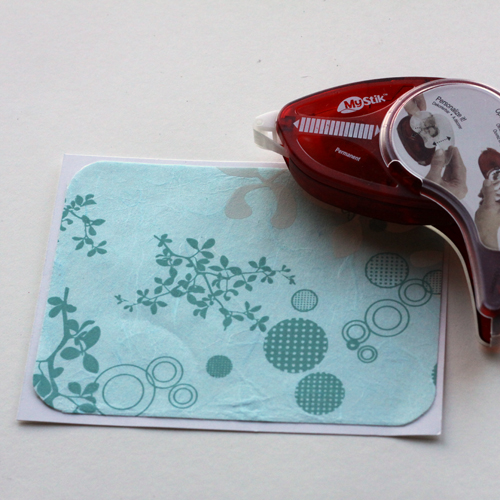
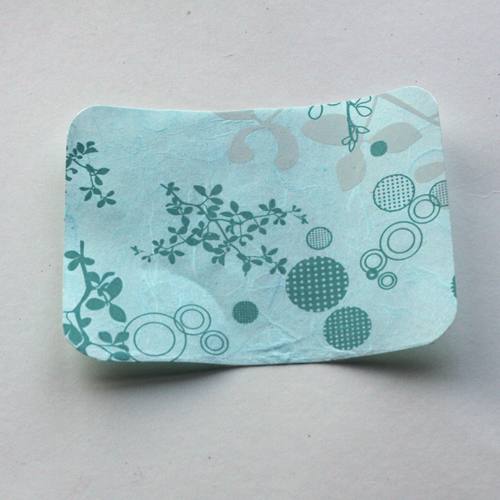 4. Trim to 4.00 x 5.25 inches and round the corners. Adhere to the card base with MyStik® Permanent Strips.
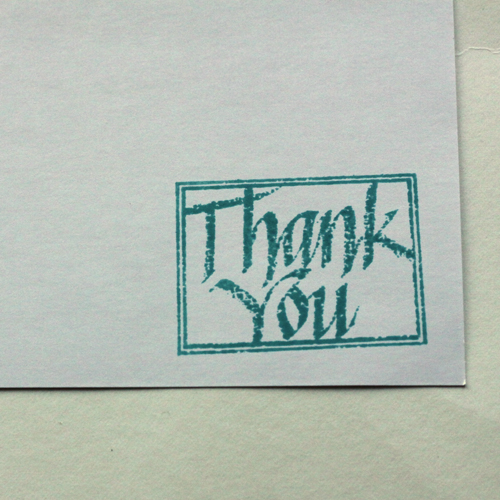
 5. Stamp the Quietfire Thank You, Rough Hewn sentiment onto white card stock with an ink in a matching color.
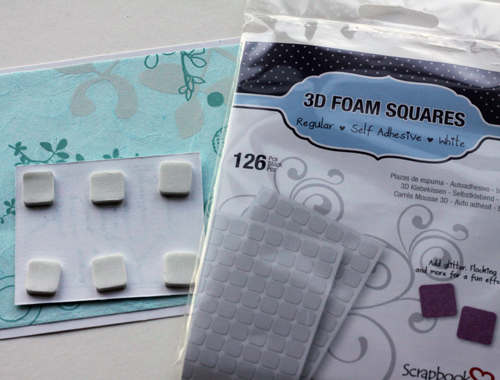
 6. Trim, leaving a thin white border and adhere 3D Foam Squares – White, Regular to the backside of the trimmed sentiment.
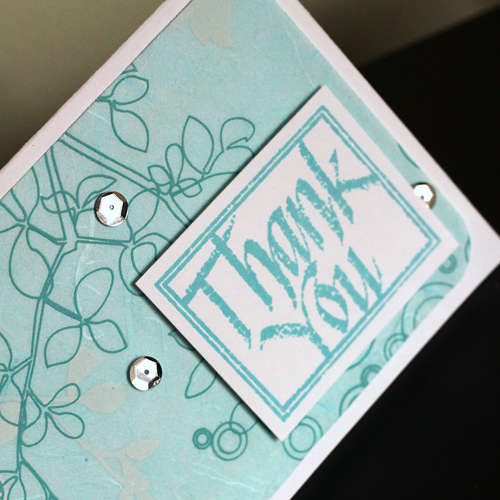
 7. Adhere to the card base and embellish with silver sequins. I used the DODZ™ – Small to adhere the sequins.
Here’s a close up view of the finished card:
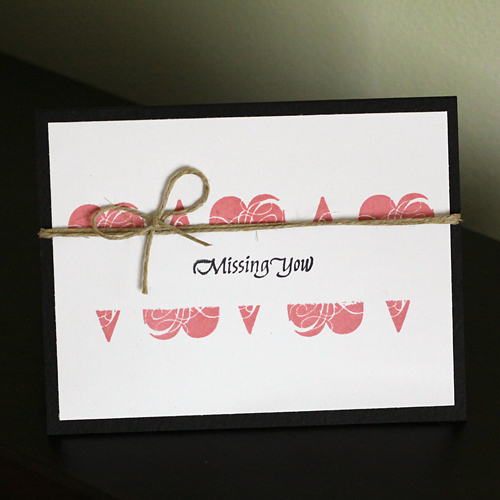
 And since I had my Quietfire stamp stash out, I created a clean and simple second card (no art paper on this one!) using the Flourishing Inside – Hearts and the Ten Tiny Tag Sentiments stamp sets.
Thanks for stopping by today.
Join us all week for the Blog Hop with Quietfire Designs!
Remember, there is a generous prize package up for grabs this week, worth approximately $60 in Scrapbook Adhesives by 3L® and Quietfire Designs products! To enter you must leave a comment here on our blog. Then check out how to get additional entries, and come back all week to comment on each post! Then visit Quietfire to see their inspiring projects and enter their giveaway too!
Angela
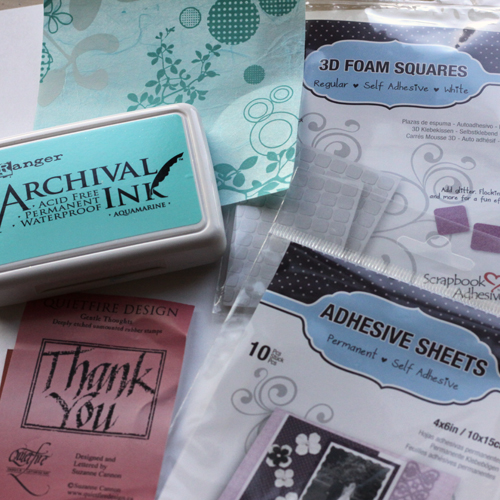
Scrapbook Adhesives by 3L® Supplies used: Adhesive Sheets – 4×6″, MyStik® Permanent Strips, 3D Foam Squares – White, Regular, DODZ™ – Small
Quietfire Designs Supplies used: Thank You, Rough Hewn, Flourishing Inside – Hearts, Ten Tiny Tag Sentiments
Other Supplies used: Ranger Archival ink, Bazzill Basics Paper card stock, misc. sequins, art paper, twine
By Janis in ID March 21, 2014 - 2:08 am
Lucky you with an art store nearby stocking such lovely papers!!! I’d be down there TOO often! Ha.
Love this pretty card you made. The colors are pure bliss!
<3 J
jwoolbright at gmail dot com
HerPeacefulGarden.blogspot.com
By Kathy Eddy March 21, 2014 - 6:10 am
What a pretty card! I love the addition of the sequins. Gotta go shop the adhesives now to see what I need.
By christi March 21, 2014 - 7:14 am
what a cool way to add thin paper to a card. I will have to see what I can find for art paper too. both cards are very pretty. great adhesive and beautiful stamps.
By Heather Thompson March 21, 2014 - 8:43 am
very delicate. Both of them, nice tutorial, Thank you for sharing.
By Amy C. March 21, 2014 - 9:28 am
Very pretty card! I like the color and the sequins!
By Leslie Loutit March 21, 2014 - 9:31 am
Thanks for sharing your tutorial. Now I know what to do with my thin paper. Beautiful cards.
By Debbie V March 21, 2014 - 9:38 am
Thanks for informative tutorial
By Jutta M March 21, 2014 - 11:58 am
Lovely cards Angela, thanks for the inspiration.
By Deborah S March 21, 2014 - 12:19 pm
Love what you did with the first card you would never know how simple the steps are, your second card is such a pretty little card love what you did withe hearts!
By barbara macaskill March 21, 2014 - 12:30 pm
You are so lucky! the closest craft supply store to me is an hour away and I don’t drive so I don’t get there often. Love your card and the great tutorial! TFS~
By Denise Bryant March 21, 2014 - 2:58 pm
Beautiful cards! Love that pretty “Thank You” stamp!
I’m anxious to try out the Adhesive Sheets. I can think of a couple of projects I’d love to try and this seems like a great product for it!
By InezbyDesign March 21, 2014 - 3:39 pm
I have often tried using special papers and could never get the hang of having the glue not show on these flimsy papers. Thanks for the tip.
By Anne from France March 21, 2014 - 3:58 pm
I love the simple elegance of both your cards, they are gorgeous! TFS!
By Carla Hundley March 21, 2014 - 6:33 pm
Lovely card. I
do like how
you used the
4×6 adhesive
paper.
Carla from Utah
By Wendy Orme March 21, 2014 - 6:53 pm
Fabulous cards…LOVE your innovative products!
By Joan Stoneking March 21, 2014 - 7:55 pm
Very nice – I really liked that first card…wishing I had that supply for art paper close to me. Love the colors you chose and the technique you used. Also really liked the second project….this has been a very fun week, watching what everyone is doing and sharing!
By Robin Buchholz March 21, 2014 - 8:05 pm
What a pretty, creative card! Thanks for the tutorial.
By Sue D March 21, 2014 - 9:16 pm
Lovely cards and thanks for the advice on using the art paper.
By Dawn Skene March 21, 2014 - 9:48 pm
Great cards! Thanks for the ideas and the chance to win.
By Teresa Horner March 21, 2014 - 10:38 pm
I love your card Angela what a super cute idea!! Love the colors too..
By Iris Soscia March 22, 2014 - 9:23 am
Sweet card – love the colors.
isoscia at aol dot com
By Jean Bullock March 22, 2014 - 1:56 pm
Those adhesive sheets certainly look handy! Great job on the cards. Thanks for sharing the process.
By marylouh March 22, 2014 - 4:27 pm
Very pretty card. The sheets would make it easier to put a large sheet of paper on the card backing. You would want a little crinkling so you could incorporate those into the design. Love this card.
By Saundra A. March 22, 2014 - 5:39 pm
Love the card and the techniques. Very inspiring!
By Danielle March 22, 2014 - 7:05 pm
Wow, these are some really inspiring crafts! Thanks for the opportunity 🙂
Best,
Danielle
By Pam Rudzki March 22, 2014 - 7:24 pm
Love the Thank You card. The Missing You card is simple but elegant. Nice job ladies!
By Wanda Hentges March 23, 2014 - 6:18 pm
Both cards are beautiful!!!!!!!!!!!!!!!