
It’s almost the 4th of July! What a great time to celebrate all things patriotic! Today my flag project is something that I’ve been tossing around in my head for a little while, and I’m so happy that it worked out the way I imagined it would.
I love how the Creative Photo Corners stack and create chevron patterns, so I combined the two concepts for this:
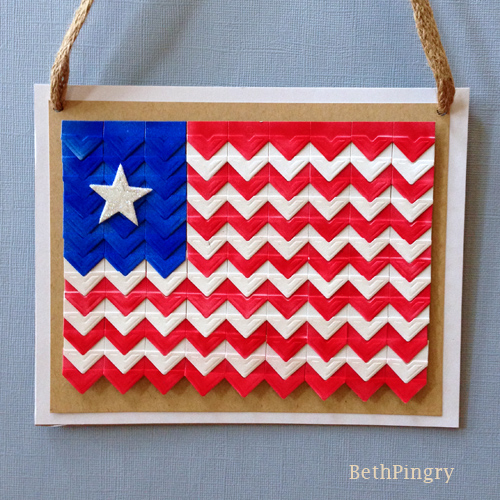 It’s really pretty easy to make, and only took one package of white Creative Photo Corners!
Creating a Photo Corner Chevron Flag
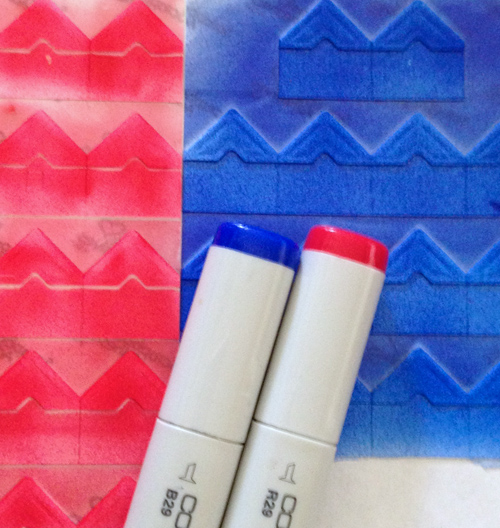
I airbrushed the white Creative Photo Corners with markers. You could color them directly, but I like the variations in color from airbrushing.
Then I layered them across a piece of paper in rows. I went with 9 across, with the blue field having 3 across.
Tip: trim the sheet into rows of Creative Photo Corners, then peel back part of the backing paper and align on the project. Then you can pull the rest of the paper off and they stay straight. This is easier than applying them one by one by hand.
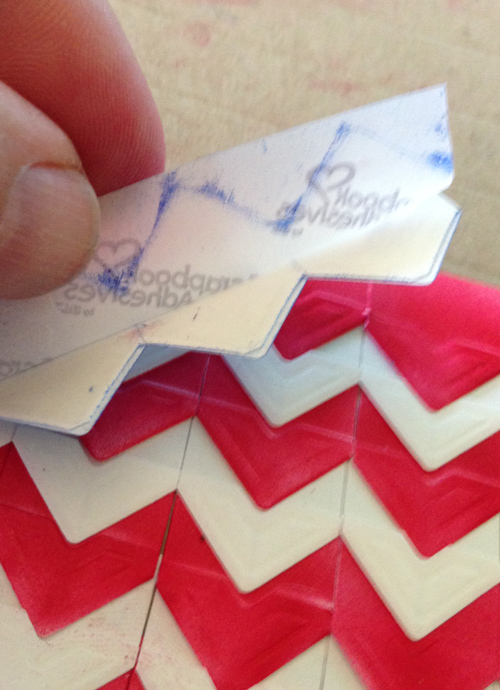 Also, you may need to wipe excess ink from the backing paper, as it does not completely dry, and will get on your fingers. But hey, it adds to the character of the project, right?
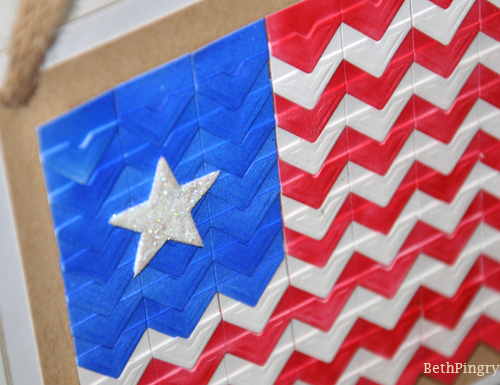 Last, add glitter to a 3D Foam Star and add it to the blue field.
To finish, I mounted the flag to kraft cardstock with E-Z Runner® Permanent Strips, then a white chipboard base using Crafty Foam Tape for dimension. I punched holes and pulled a jute ribbon through and secured it to the back side with the Crafty Foam Tape.
You could also frame it!
Thanks for coming by today!
Click to see more patriotic projects!
I used these supplies:
- Scrapbook Adhesives by 3L: Creative Photo Corners White, 3D Foam Stars, Crafty Foam Tape, E-Z Runner® Permanent Strips
- Clearsnap: White Glitter
- May Arts Ribbon: jute ribbon
- Copic Markers: R29 B29 markers, airbrush system
- Kraft cardstock, hole punch
By Deborah S July 1, 2014 - 3:47 pm
Beth you are a very clever gal this project rocks I would have never thought of this! I think this would make a lovely hostess gift especially if put in a pretty frame have a great 4th and thank you for sharing this wonderful project!
By MargieH July 3, 2014 - 10:00 pm
WHOA~! That is SO COOL!! LOVEd how it turned out – just stunning!!