
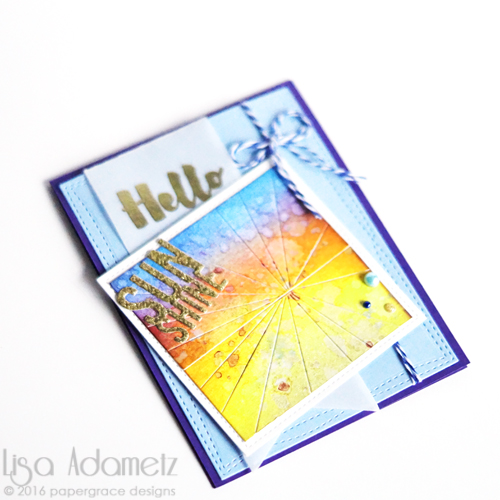
Hi there crafty friends! It’s Lisa here with you and I’m happy to share a bright and colorful Hello Sunshine card today.
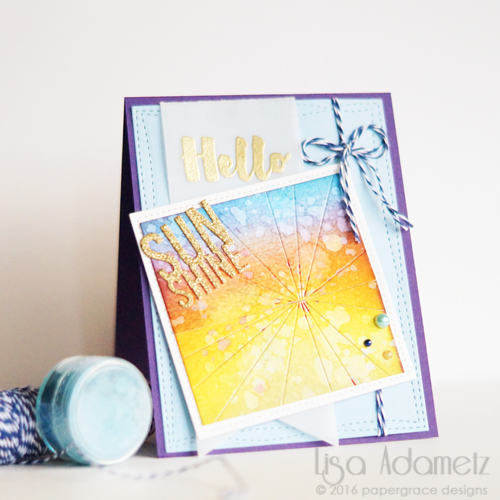
Prior to cutting and scoring the center “rays”, the paper was colored with a variety of dye inks. Color was lifted off using water. It gives a bleached effect.
Using three colors of pigment powder I mixed a small amount of three colors with water: blue, gold, and pink. Each color was flicked separately onto the card to allow the pigment to “settle”, if you will, then I dabbed off the excess and heat set. I did that with each color. So shimmery!! (See below)
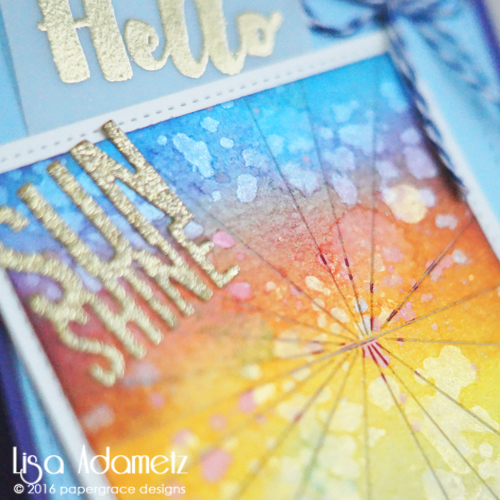
The Sunshine die cut was adhered using the super fabulous 4 x 6″ Adhesive Sheets. So easy to use these. I love how strong the adhesive is and that they leave no stringy, goopy stuff in between the die-cut.
Everything is held together using the E-Z Runner® Ultra Refillable Dispenser. This is an immediately tacky, ultra-strong adhesive and my absolute go-to adhesive. I also used the Thin 3D Foam Squares Mix White (using the Large Squares) on the back of the rays panel to give it a very slight amount of dimension. Navy twine tied in a bow finishes it all off.
One more look!
Hope you enjoyed my Hello Sunshine card today!
- Creative Time: 60 Minutes
- Skill Level: Intermediate
SUPPLIES
Scrapbook Adhesives by 3L®:
Thin 3D Foam Squares Mix White
E-Z Runner® Ultra Refillable Dispenser
Adhesive Sheets 4 x 6″
Other Products:
Twine
Decoupage Medium
Pigment Powder: Blue, Gold, Pink
Stamp: Essentials by Ellen
Dies: My Favorite Things Die-Namics; Lawn Fawn; Essentials By Ellen (Sunshine and Silver Linings)
Embossing Powder: Wow!
Cardstock: Bazzill Card Shoppe, Darice Glitter Cardstock
Embellishments: Doodlebug, My Mind’s Eye
Ink: Tsukineko Versamark, Ranger Dye Inks

Visit our Website and Blog!
Sign up for our Newsletter so you never miss a contest or giveaway!


By ~amy~ August 27, 2016 - 8:05 am
oooooohhh…love this!
By Lisa - papergrace August 27, 2016 - 2:12 pm
Thank you so much, Amy!! ♥ It’s super easy and I love the effect.