This handsome handmade journal by Judy Hayes is featured today on Day 1 which showcases the gift ideas theme of the Handmade Holidays Blog Hop. Judy teaches you how the technique she uses to make kraft paper look like gorgeous leather with ink. She shows how easy it is to assemble the journal with our Adhesive Sheets 12 x 12in and Premium Double-Sided Tape ½in.
Welcome to the 7th Annual Handmade Holidays Blog Hop!
Not only will you be inspired by 3 days of projects and tutorials, but what’s a blog hop without a giveaway? Read through to the end for each day’s themes (and links to them), plus prizes from sponsors like us!
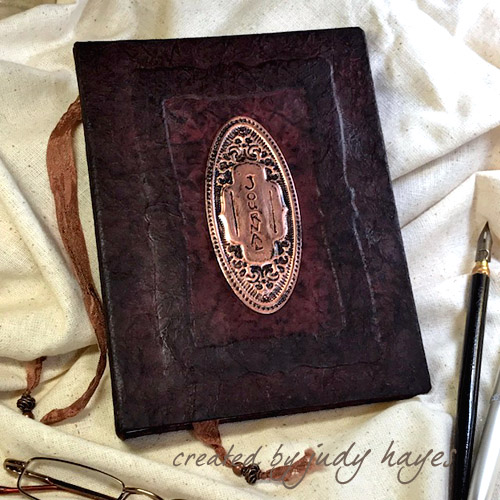
Creating the Journal Basics
This Handmade Gift Journal is completely handmade starting with the cardboard covers and spine fastened together with linen hinging tape. The back cover is scored and folded ⅝in from long edge near the hinge, add the here. Covers measure 5½ x 7¼in, and the spine, 1 x 7¼in.
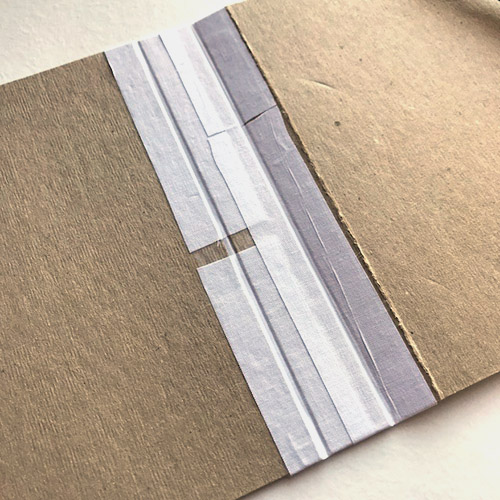
Designing the Journal Cover
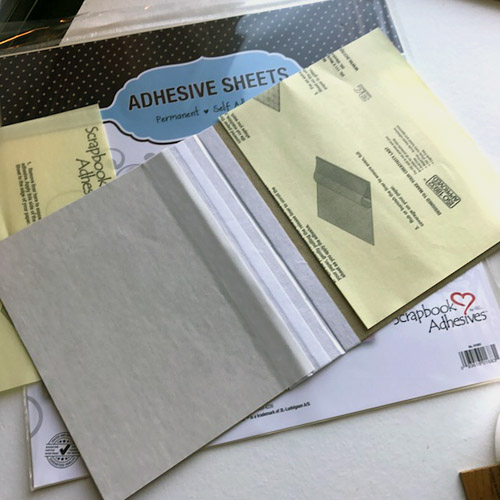
For the front covers, place an Adhesive Sheets 12 x 12in over each cover, remove the bottom liner to apply the adhesive and trim off excess. Keep the top liner on for now.
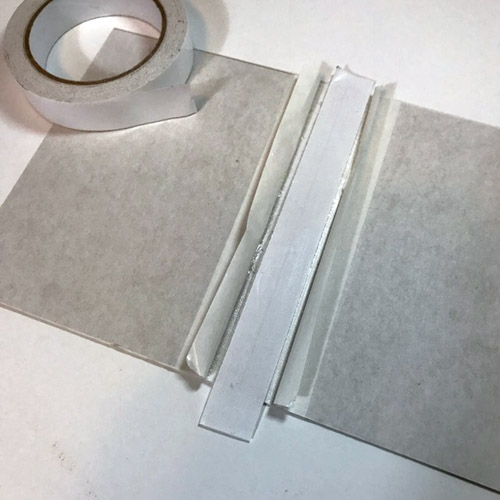
Place a strip of Premium Double-Sided Tape 1in on the spine for added adhesive strength.
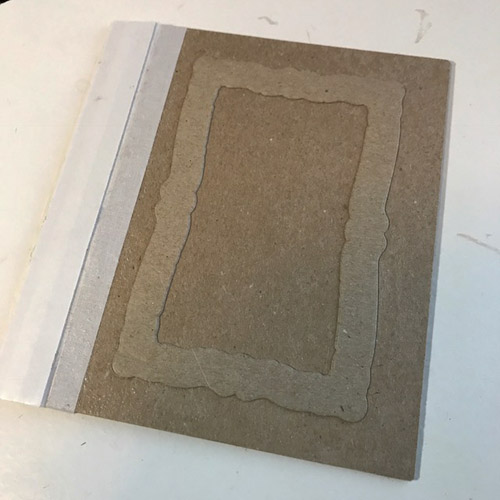
Let’s create the raised frame design on the journal cover. First, apply a sheet of Adhesive Sheets 12 x 12in over a piece of cardboard and die-cut a frame shape. To determine placement on the journal cover, trace the frame with a stylus over the adhesive sheet liner of the front cover. It will show the outline when removing the liner.
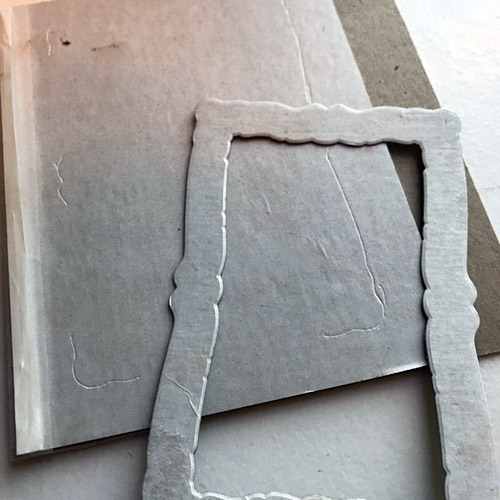
Remove the liner from the front cover and place the frame die cut on the cover. Set aside.
Making Faux Leather Paper
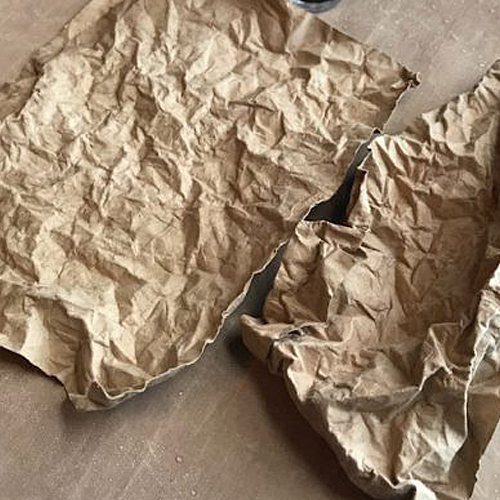
Cut two pieces of kraft cardstock about 2in bigger than each cover on all sides. Next, mist with water and crumple well. Flatten and crumple again for a distressed leather look.
Next, spray with an ink and water mixture for its first layer of color.
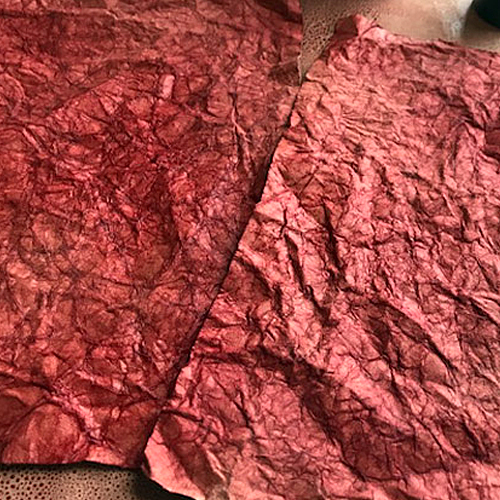
This time add more ink by directly using the ink pad to paper for a bolder effect.
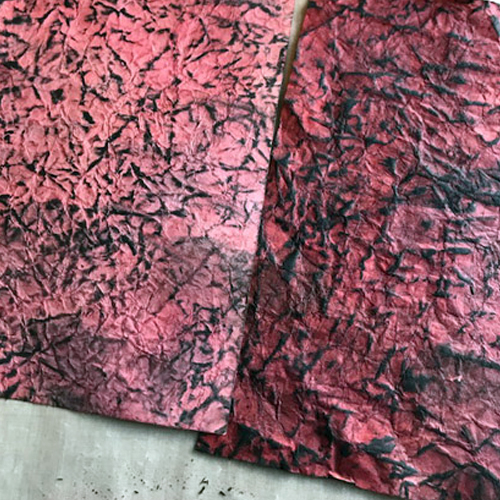
Go back and forth on the water misting and inking until you get your desired coloring and design. Note that the color will be lighter when dry.
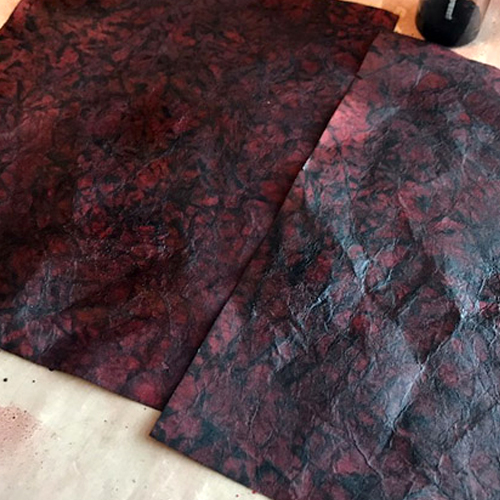
Finally, press paper with a dry iron to flatten and dry faster.
Now it’s ready to apply onto the journal covers. Press each piece of faux leather paper onto covers, with a seam along the spine. Carefully outline the frame on the front with a stylus to bring out its design.
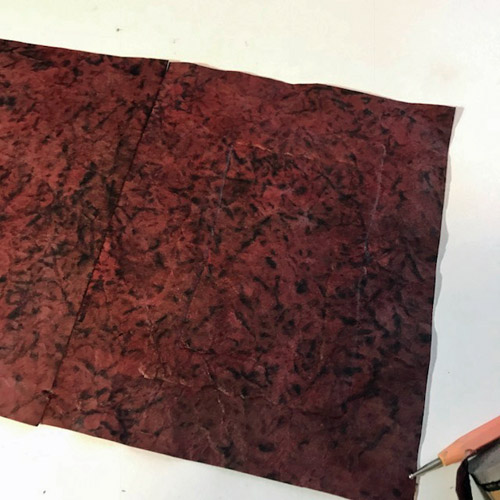
Trim edges about ½in from outside edges of cover. From the excess piece, cut 1 x 8½in. strip and apply Premium Double-Sided Tape 1in to it. Then fasten it over the seam on the spine.
Finishing the Inside Covers
On the inside covers, apply Premium Double-Sided Tape ½in along all of its edges.
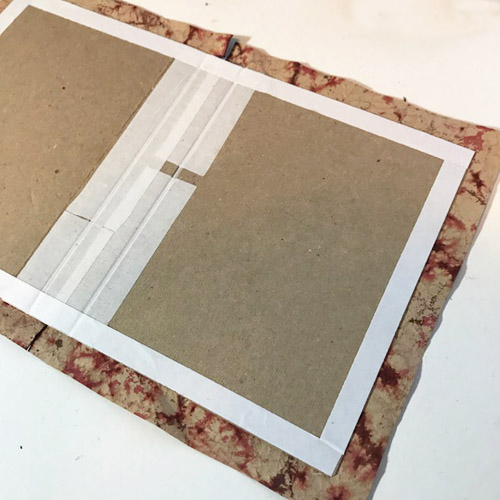
Miter cut the paper at its corners. Then start working on one side at a time to remove tape backing and fold paper to the inside, mitering each corner. Repeat on all edges.
Apply Adhesive Sheets 12 x 12in to patterned paper. Cut paper to fit and cover the inside covers.
Use a binding machine to cut holes along the fold of the back cover. Add more ink along edges and over the frame for a finished look. When dry, spray cover with a sealer.
Embellishing the Front Cover
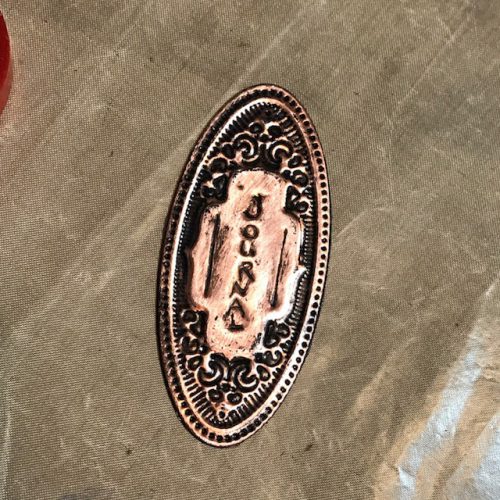
Die cut an etched die with thin copper metal. Also, die cut the same etched die with a thin cardboard that has a piece of Adhesive Sheets 12 x 12in applied on its front. Fasten to the back of copper and lightly sand the copper. Hand write “journal” on a piece of paper and tape on top of the copper. Firmly trace letters with a stylus and add vertical lines. Flip the copper piece over and trace around letters. Then go over letters again on the front.
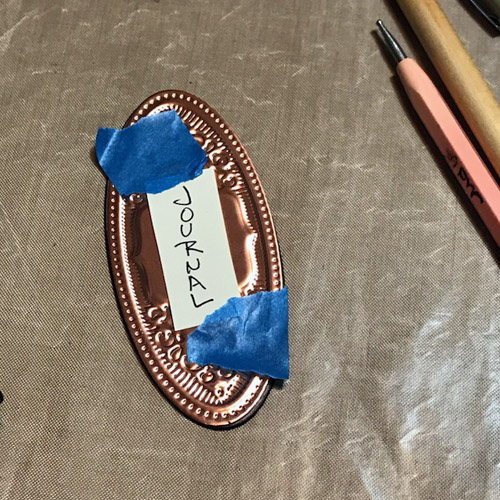
Apply Extreme Double-Sided Tape ¼in and Extreme Double-Sided Tape ½in over the back of the copper piece. Trim tape around edges.
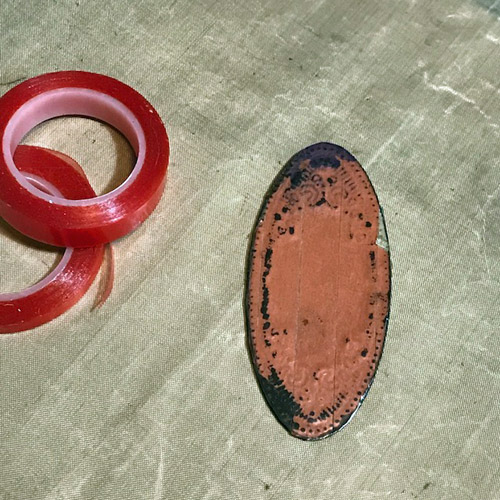
Sponge black craft paint over the copper. Allow to dry slightly and then buff off raised areas. Repeat as needed. Remove tape backing and fasten to journal cover.
Making the Inside Pages
For the inside pages, cut paper to 4½ x 7¼in. The stack should be about ½in thick. Cut holes with a binding machine and insert wire binding through pages and journal cover. Then close with the machine. Tie seam binding to wire on the back of the journal. Embellish by adding beads to ends of the seam binding and knot to secure.
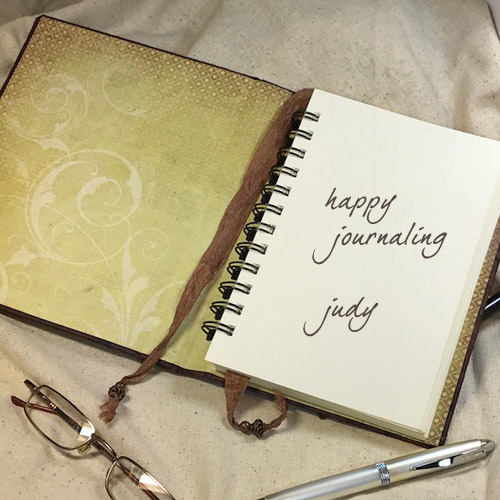
Now give this handmade journal to someone special! Thanks so much for visiting!
Scrapbook Adhesives by 3L®:
Adhesive Sheets 12 x 12in
HomeHobby by 3L®:
Extreme Double-Sided Tape ¼in
Extreme Double-Sided Tape ½in
Premium Double-Sided Tape ½in
Premium Double-Sided Tape 1in
Other Supplies:
Zutter Bind It All and ¾in O-wire; Dark Reds, Dark Browns and Black Inks; Spellbinders® Paper Arts: Radiant Rectangles Dies; Cardboard; Copper Craft Sheet; Kraft Cardstock; Patterned Paper; Text Weight Paper; Seam Binding Tape; Beads; Spray Sealer
HANDMADE HOLIDAYS PRIZE DETAILS

This is a gathering of our favorite companies and blogger friends to share their best handmade gift ideas. These ideas are not only great for the holidays but can be used all year long.
Be sure to leave a comment on the blogs, pin your favorites, and give the gift of handmade!
This giveaway is over, thank you for visiting!
Visit all the Participating Bloggers and Sponsors by clicking the blue icon below.
Day 1 – November 7, 2017
If you cannot see the comment section (at the bottom of this post), please click: Handmade Holidays Gift Journal and scroll down to the bottom of the post.
Stick with 3L!
Visit our Website and Blog!
Sign up for our Newsletter so you never miss a contest or giveaway!


By Kelli November 7, 2017 - 10:28 am
So beautiful! I didn’t realize how simple something like this was to put together. I need to make a few dozen I think! Thanks so much!
By Dana Tatar November 7, 2017 - 10:46 am
Wow! Stunning project Judy! You definitely had me fooled with your first photo. I thought you used real leather for this project. I’ll definitely be trying your techniques. Thanks for the inspiration!
By Judy Hayes November 7, 2017 - 8:40 pm
Thank you Dana!
By Sue LD November 7, 2017 - 10:59 am
Beautiful journal. Love the faux leather.
By Dee Earnshaw November 7, 2017 - 1:52 pm
OMG this is stunning and so real looking – I must give this technique a try. Thanks for sharing:)
By Beverly Jordan November 7, 2017 - 1:59 pm
This is such a fabulous idea!! Love making journals and have to find me some 12×12 adhesive sheets!! Off to go shop online!! Thanks for the inspiration and loved the crinkled and aged look of the faux leather cover especially! You have taught me so much!
By Therese Arsenault November 7, 2017 - 2:22 pm
Love this technique of faux leather. Great project! Great tutorial!
By Ava Gavloski November 7, 2017 - 3:14 pm
Just love the how to get the look with these albums made from scratch. Well done, lucky scrapbook adhesives to have Judy “stick” with you.
By Marjorie Dumontier November 7, 2017 - 3:58 pm
That’s such an impressive creation !! Thanks for this fun hop !
By Cat November 7, 2017 - 5:20 pm
This is awesome! Thanks for sharing!
By Bibiana Martinez-ziegler November 7, 2017 - 8:19 pm
beautiful
Thanks! Bibiana
By Pam Larmore November 7, 2017 - 8:56 pm
This is beautiful. I love the faux leather cover.
By Crystal DeJesus November 7, 2017 - 11:29 pm
Wow! What a work of love! It’s amazing!
By Cathy Lillie November 8, 2017 - 2:39 am
Beautiful journal! The cover looks like real leather! It’s way beyond my skill set but would be a great gift. Thanks for sharing!
By scrappyrat November 8, 2017 - 2:53 am
I love how pretty the final result is, that it’s a totally vegan “leather” option, and that you can make “leather” in pretty much any color you want. So cool! 🙂
By Patti November 8, 2017 - 6:12 am
I love this homemade journal. You’ve given my so many ideas and I can’t wait to make one. Thanks!
By Jo Ann November 8, 2017 - 7:45 am
With the popularity of journals right now, this is a wonderful idea for a gift. I especially like the faux leather paper. Thank you!
By Toni | Small Home Soul November 8, 2017 - 9:55 am
This is so cool, I didn’t now they sold kits to customize your own journals. These would be fun to make or receive.
By Monika.buzsy November 9, 2017 - 8:08 am
What a fantastic handmade journal. Love the faux leather look. Great tutorial! Thanks!
By Helen Gullett November 9, 2017 - 10:33 pm
Wow this is amazing mixed media project!
By Marlene F. November 14, 2017 - 10:33 pm
Very nice projects.
By elia johnes November 23, 2017 - 6:24 am
What a wonderful idea and such a beautiful project! I loe it and I know ecaxtly who I can give it!