
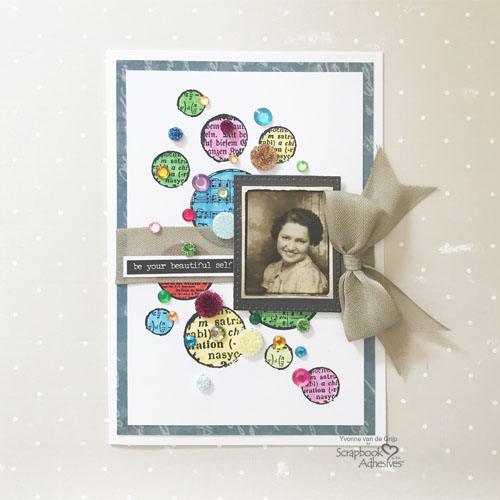
Hi everyone, Yvonne here with a happy colored card with lots of dots: stamped dots, glittered 3D Foam Circles and rhinestone “dots”. With the great Scrapbook Adhesives by 3L® products, this card is really easy to make and embellish.
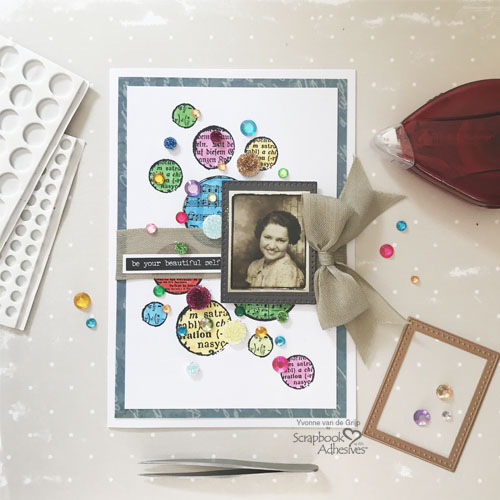
Yes…let me show you how to “Wear your Adhesive on the Outside!” with this card! That’s where I use Adhesives as embellishments instead of hiding them between layers.
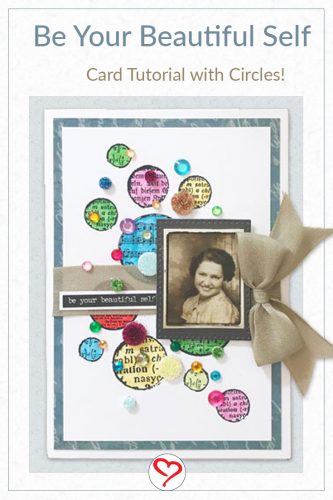
Dotted Card Step-Outs
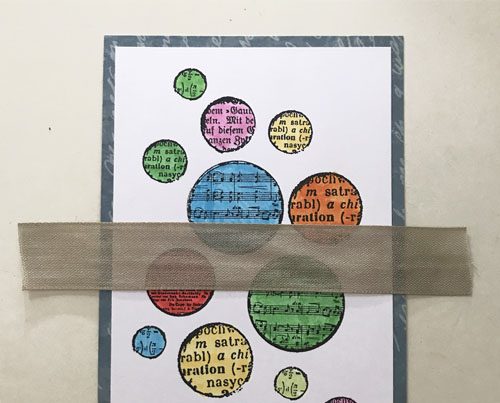
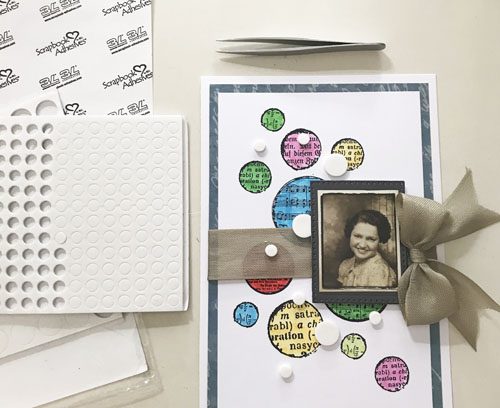
First stamp text circles onto a rectangle piece of white cardstock using a black ink pad.
Then color the circles in pastel colors with markers.
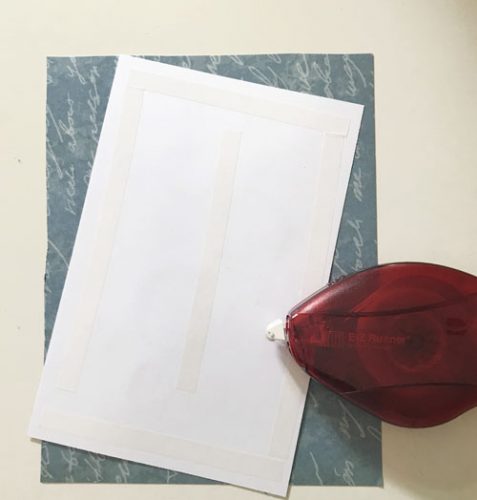
Next, trim a piece of blue patterned cardstock to a rectangle size that is slightly smaller than the top layer.
Now adhere the stamped top layer onto the blue panel using the E-Z Runner® Permanent Strips Refillable Dispenser.
Wrap beige ribbon around the panel and adhere the ends to the back of the panel using the E-Z Runner® Permanent Strips Refillable Dispenser.
Then trim a folded piece of cardstock to make a card base and adhere the panel on top, using the E-Z Runner® Permanent Strips Refillable Dispenser.
Embellished Details
Cut out an old photo using scissors and adhere it onto a slightly larger rectangle-shaped die-cut using the E-Z Runner® Permanent Strips Refillable Dispenser.
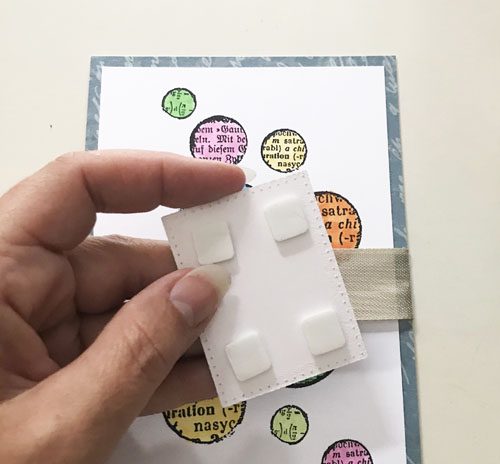
Adhere the photo panel onto the card front using 3D Foam Squares Regular Size.
Next, adhere a bow to the card with Adhesive Dots Large. Adhesive Dots are provide a strong hold without staining!
Dot the Card
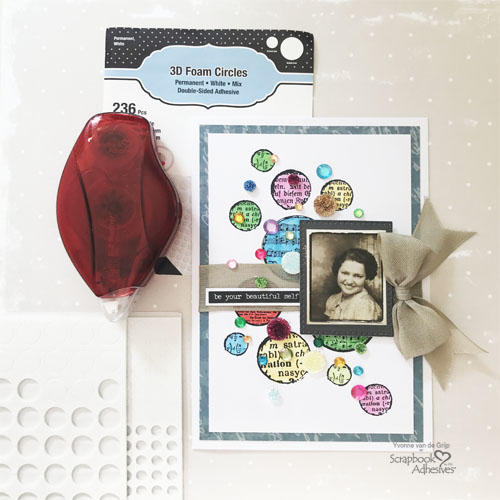
Now it’s time to dot the card! Start by randomly adding White 3D Foam Circles on the card front. Remove the liners one at a time and sprinkle different colors of glitter to the top of each dot. Press with your finger to secure and tap off the excess between colors.
Adhere rhinestones to the card using Adhesive Dots Micro and finish the card with a “Be Your Beautiful Self” sticker sentiment.
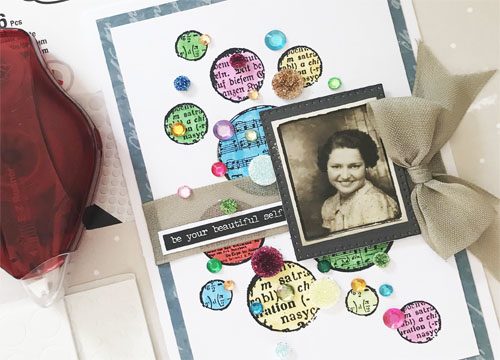
And voila…your Dotted Card is ready. I hope you are inspired to make your own version of this card. Happy crafting!
Thanks for visiting!
Yvonne van de Grijp

Skill Level: Intermediate
Creative Time: 30 minutes
Materials needed
Scrapbook Adhesives by 3L
- E-Z Runner® Permanent Strips Refillable Dispenser
- 3D Foam Squares Regular Size
- 3D Foam Circles White Mix
- Adhesive Dots Large
- Adhesive Dots Micro
Other
Etched Dies and Die Cutting Machine: Spellbinders® Paper Arts (Scored and Pierced Rectangles Etched Dies, Platinum 6 Die-Cutting and Embossing Machine); White, Dark Grey Metallic, and Blue Patterned Cardstock; Black Ink Pad; Photo Strips and Stickers: Tim Holtz; Markers; Glitter; Rhinestones; Ribbon; Scissors; Paper Trimmer
Love It. Pin it!
Visit our Website and Blog!
Sign up for our Newsletter so you never miss a contest or giveaway!


