
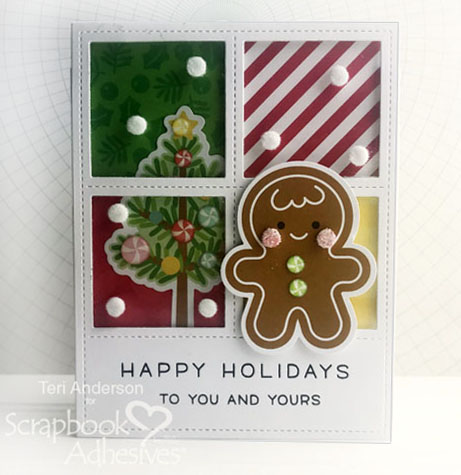
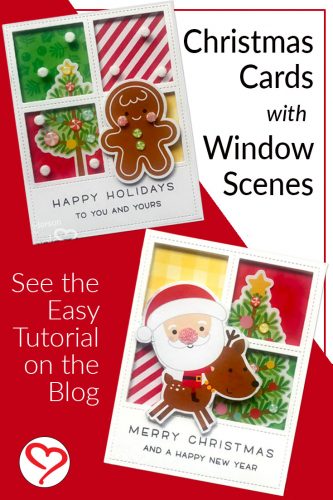
Hi, everyone! Are you looking for a unique Christmas card to send out this year? It’s Teri here, and I’m going to show you how to make window scene Christmas cards that are sure to wow your friends!
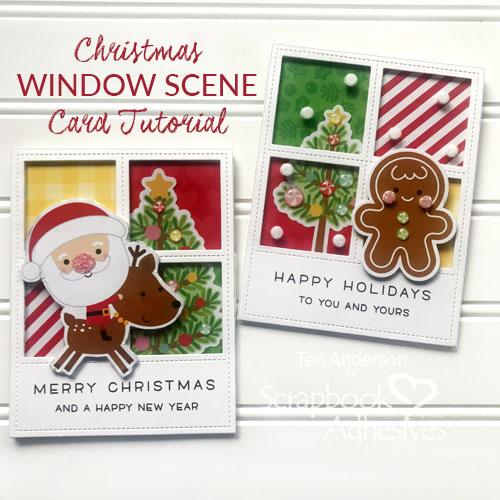
These cards are easy to make with a little creative muscle and a few basic paper crafting supplies!
Starting the Window Scene
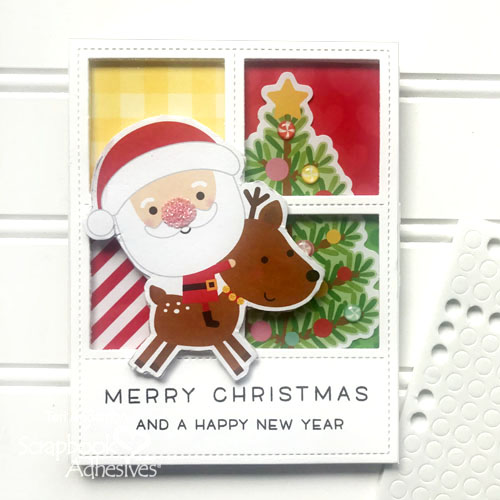
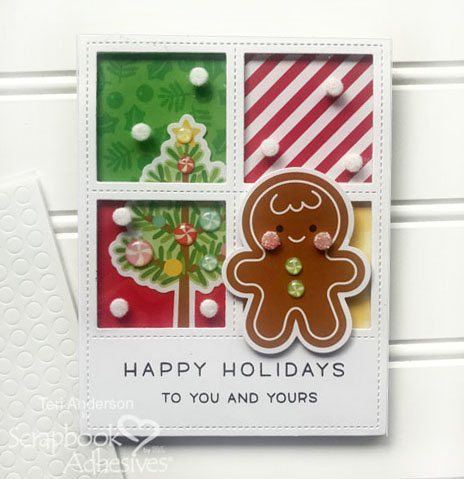
Start by cutting a window from cardstock. You can either use a window die or a paper trimmer. If you are using a paper trimmer, simply cut a rectangle and then cut four squares out of it.
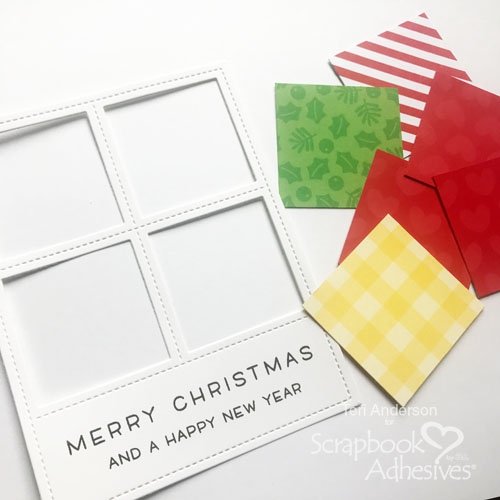
You’ll also want to cut four squares of patterned paper slightly larger than the openings, to place behind the windows.
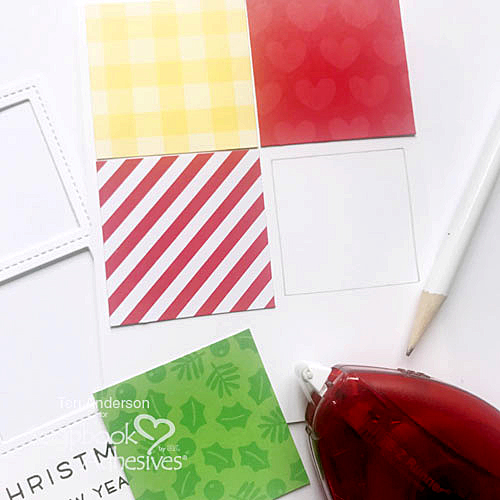
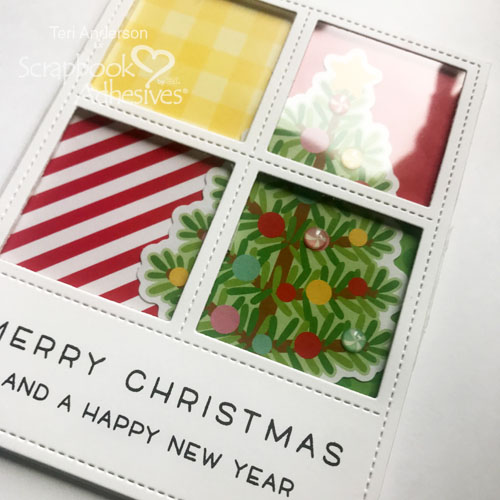
Stamp or write a sentiment on the front of the window. Set the window on a card base. Use a pencil to mark the window’s openings. Adhere the patterned paper squares to the card.
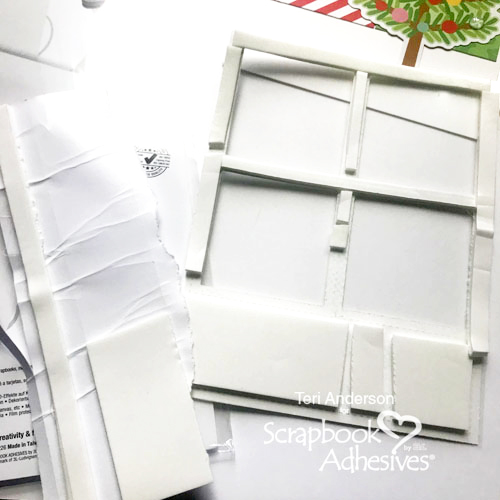
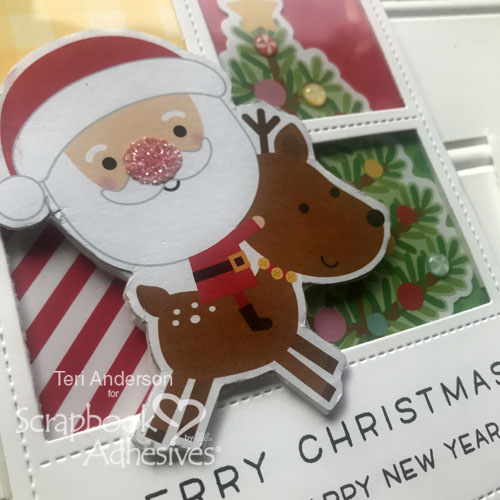
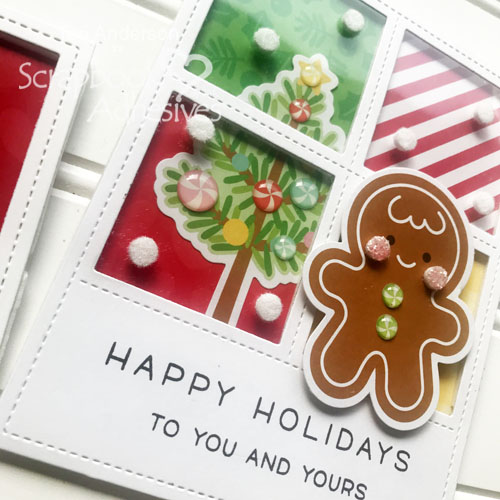
Place a piece of transparency film on the back of the window panel. Add a die-cut tree the card. Use the tree as it is or decorate it by adding gems or enamel dots to it.
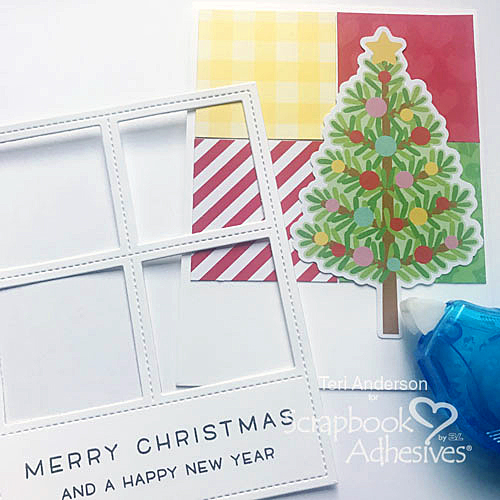
Flip the window panel over and add strips and blocks of 3D Foam to it. You can use Crafty Foam Tape or you can make your own strips and blocks by freehand cutting them from a 3D Creative Foam Sheet.
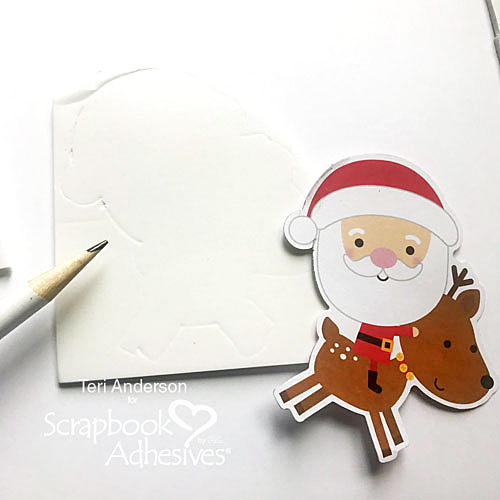
Complete your window scene by adding a Christmas die-cut, like a Santa or reindeer. To make it pop, adhere it with 3D Foam. I decided to trace the shape with a pencil on a piece of 3D Foam Creative Sheet, cut it out with my scissors and affix the die-cut right onto it.
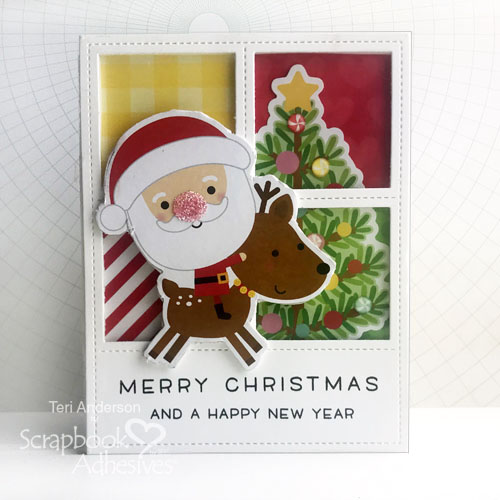
You can kick things up a notch by decorating the die-cut. I gave Santa a glittery nose by mounting an Adhesive Dot to it and dumping glitter on top. So fun!
Kicking Up Your Window Scenes Even More
Another fun way to kick up your window scene Christmas cards is to add a little snow to the windows. Randomly apply 3D Foam Circles to the windows and the dump white flock or glitter on them.
Craving more realistic snowflakes? Try using the 3D Foam Snowflakes instead!
I hope you enjoyed this tutorial! I’d love to see your window scenes! Share your links with me in the comments section so I can leave you some love!
Creative Time: 60 Minutes
Skill Level: Beginner
Materials Needed
Scrapbook Adhesives by 3L®
- 3D Foam Circles White Mix
- 3D Foam Creative Sheets Medium White
- Adhesive Dots Medium Ultra Thin
- E-Z Runner® Permanent Strips Refillable Dispenser
- E-Z Runner® Petite Permanent Dots Refillable Dispenser
Other
Patterned Papers, Die-cuts, Enamel Dots: Doodlebug Design; White Cardstock: Neenah Paper; Stamp: Lawn Fawn (Simply Winter Sentiments Stamp Set); Dies: Lawn Fawn (Foursquare Backdrops: Portrait); Black Ink Pad: Ranger Ink; Flock: Stampendous!; Glitter: Ranger Ink
Save It to Pinterest!
Visit our Website and Blog!
Sign up for our Newsletter so you never miss a contest or giveaway!


By Andre M. December 7, 2019 - 9:07 am
These scene cards are so sweet and festive, thanks for sharing.