
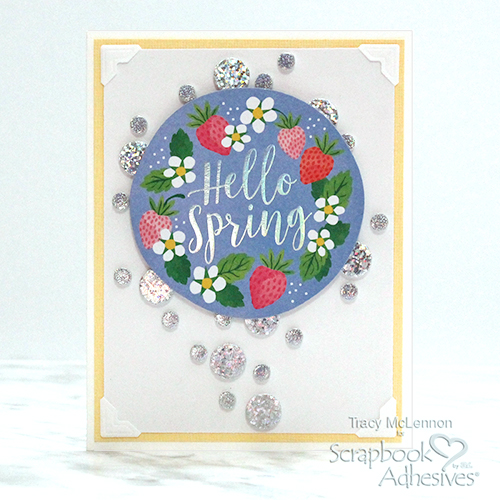
Welcome back crafty friends, Tracy here, and today I have this quick and easy Circled Hello Spring Card to share. Let’s celebrate the arrival of spring after a long winter with a little sparkle.
Circled Hello Spring Card Panel
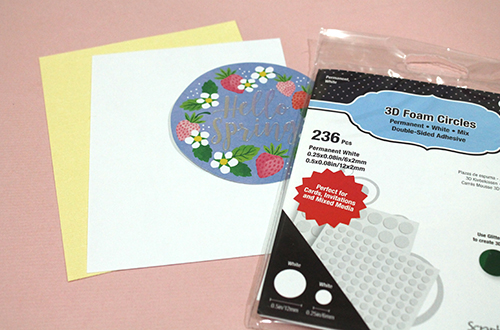
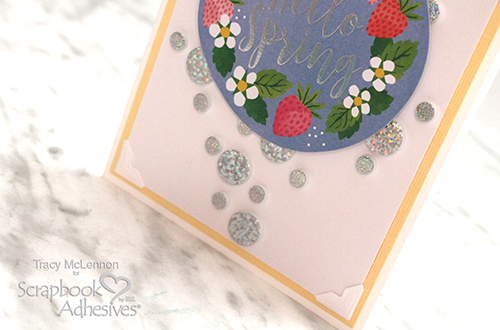
Start this Circled Hello Spring Card by cutting your cardstock layers. Cut the yellow cardstock to 4 x 5.25-inches, and the white cardstock to 3.75 x 5-inches.
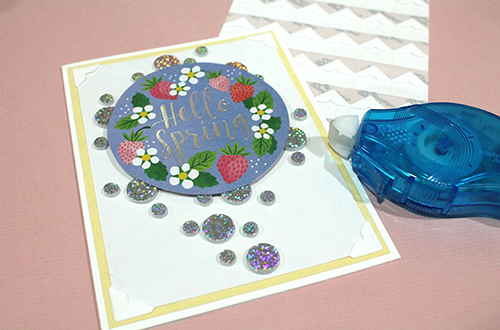
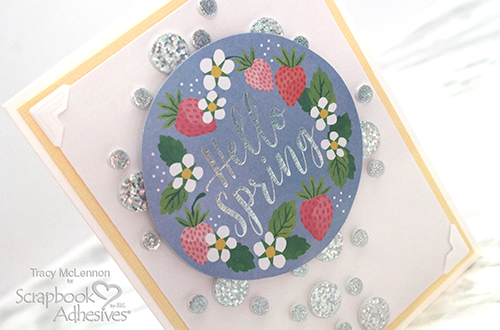
I was inspired by this sweet die cut circle with its adorable design and foiled Hello Spring sentiment so it became my focal point for the card. You’ll see why when you see my embellishment!
Wear Your Adhesive on the Outside with Circles
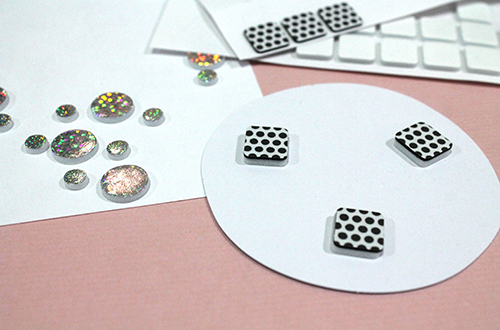
On the white cardstock panel with the die cut circle as a guide, I determined the placement of the regular size circles from the 3D Foam Circles White Mix first. Once I’m satisfied with the design, I adhered them down by removing the back liners.
Next, I applied foil onto the foam circles without any special tools. Simply take off the top liner of each 3D Foam Circle, place the silver holographic foil from the Metallic Transfer Foil Sheets Holographic FOIL side UP over the circle and gently rub the foil color to transfer it to the foam circle. See how it tied in with the foiled sentiment?
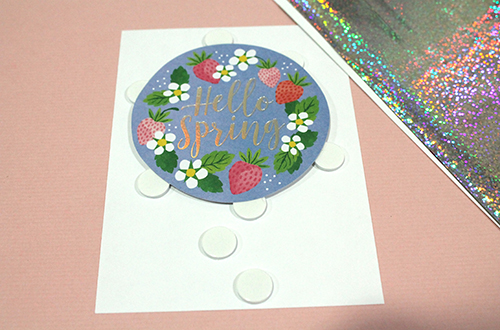
Now to add the small circles from 3D Foam Circles White Mix around the larger circles and Circled Hello Spring die cut. I switched to the silver glitter foil color from the same Metallic Transfer Foil Sheets Holographic. To apply the foil, repeat the same steps as above. Super Easy!
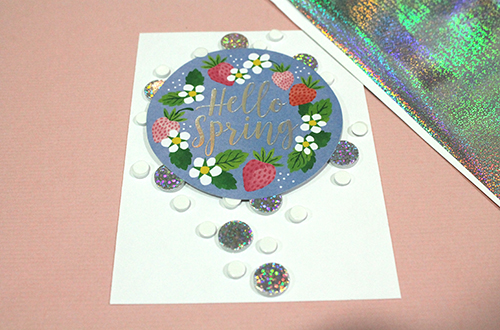
To lift and support the Hello Spring Circle die cut, use a combination of the 3D Foam Squares White Regular Size and the Thin 3D Foam Squares Black Mix. It also adds more dimension between the 3D Foam Circles White Mix and the die cut.
Finishing the Card
Add the white cardstock card panel to the yellow cardstock panel using Creative Photo Corners White. Then adhere the layered Circled Hello Spring front panel to the white cardstock card base with the E-Z Runner® Petite Permanent Dots Refillable Dispenser.
The sparkly Circled Hello Spring Card is now complete and ready to brighten someone’s day. Are you ready for Spring?
Thanks so much for stopping by!
Tracy McLennon
Creative Time: 30 minutes
Skill Level: Beginner
Materials Needed:
Scrapbook Adhesives by 3L®
Thin 3D Foam Squares Black Mix
3D Foam Squares White Regular Size
Metallic Transfer Foil Sheets Holographic
3D Foam Circles White Mix
Creative Photo Corners White
E-Z Runner® Petite Permanent Dots Refillable Dispenser
Other
Hello Spring Circle Die Cut: Pink Paislee (Bloom Street Die Cut); White and Yellow Cardstock
Save It to Pinterest!

Visit our Website and Blog!
Sign up for our Newsletter so you never miss a contest or giveaway!


