
Hi, all! Looking to send a little cheer in the mail? Teri here to show you how to make some adorable window cards.
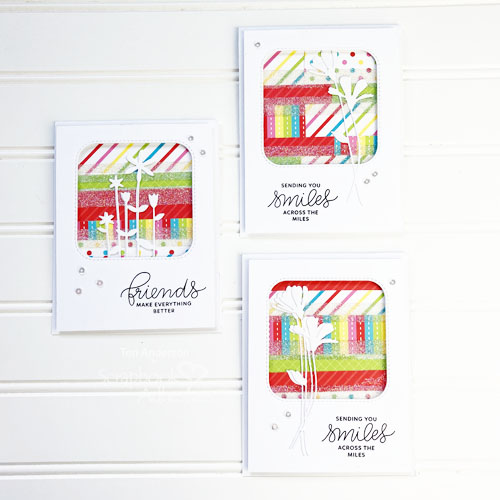
These cards are sure to make your loved ones smile! And they are easy to make and a great way to use up any paper scraps you have laying around!
Creating the Flower Window Card Panels
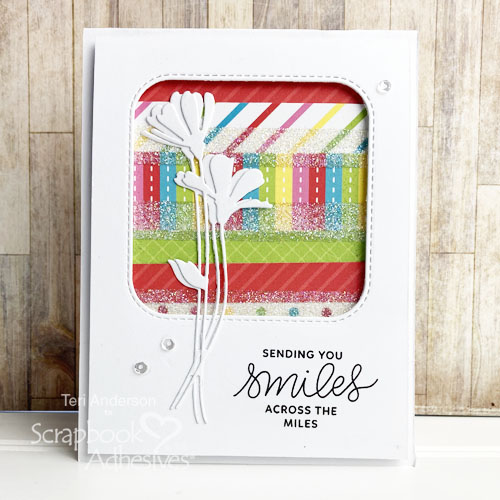
Start by cutting two rectangle panels of cardstock to fit on the front of card. Cut a rectangle out of one of them to make a window.
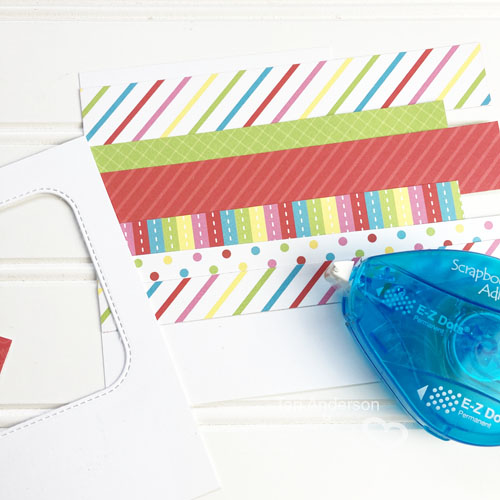
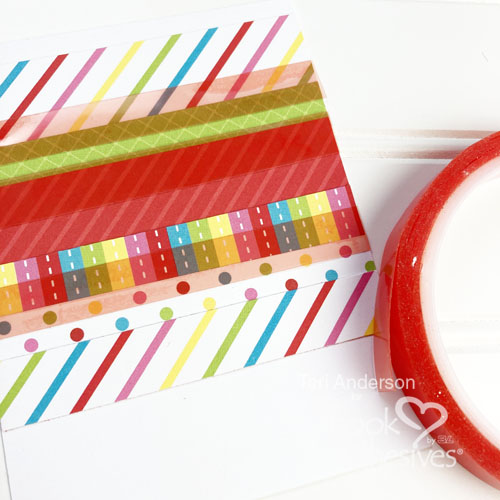
Take the solid rectangle and adhere several strips of patterned paper onto it. Trim away any excess with your scissors. Set the panel aside.
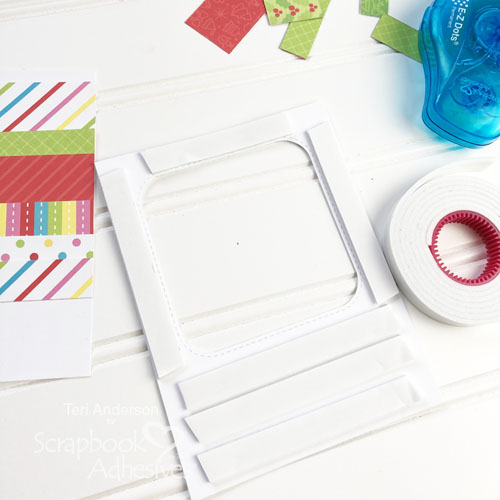
Take your window panel. Stamp a sentiment onto it. Flip it over and adhere strips of Crafty Foam Tape all over it. The more tape you apply, the firmer your panel will be.
Embellishing the Panels
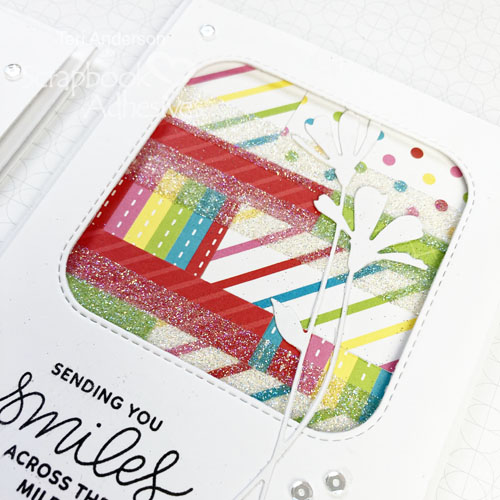
Take your patterned paper panel and add three strips of Extreme Double-Sided Tape to it.
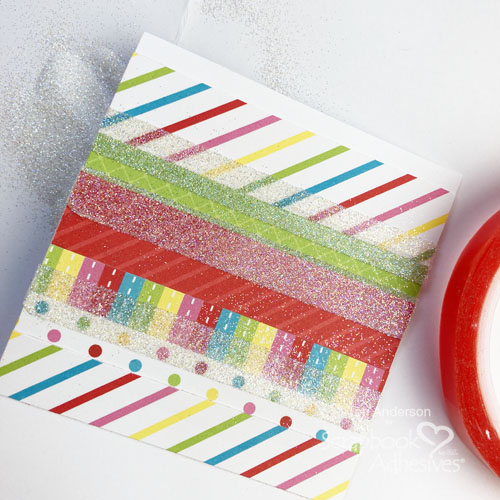
Dump glitter onto the tape strips. Be sure to tape the panel a few times to remove any excess glitter.
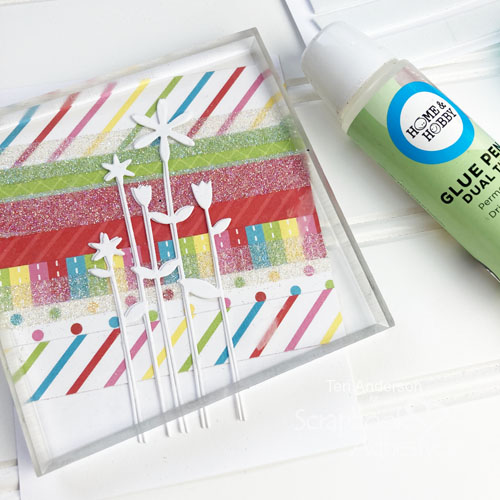
Adding Flowers
Die-cut a flower from cardstock a couple times and mount it onto the panel. To ensure the flower is fully affixed to the panel, place a stamping block on it for a few minutes while the glue dries.
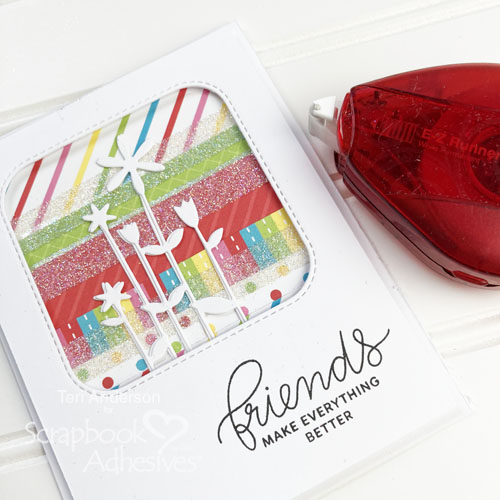
Place the window panel on top of the patterned paper panel. Then adhere the panels to a top-folded card.
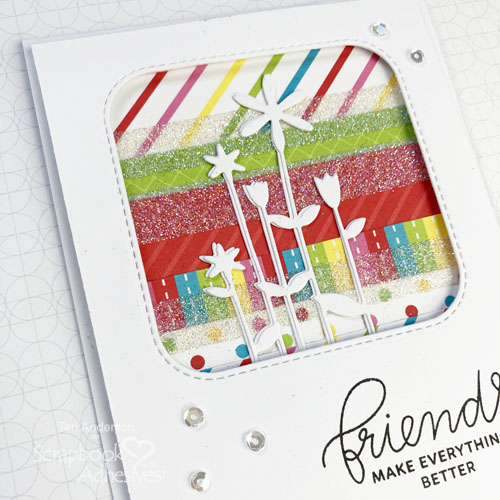
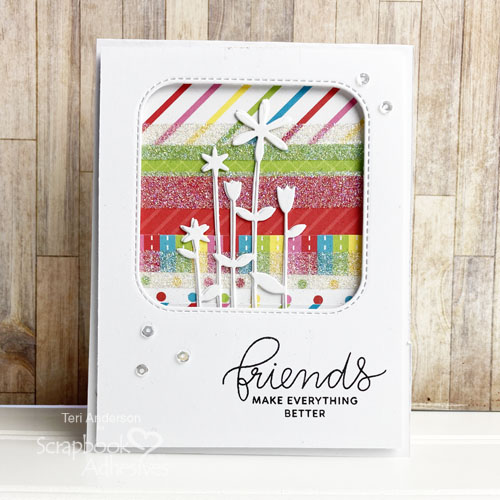
Complete your Flower Window Card by adding a couple sequins or gems to it.
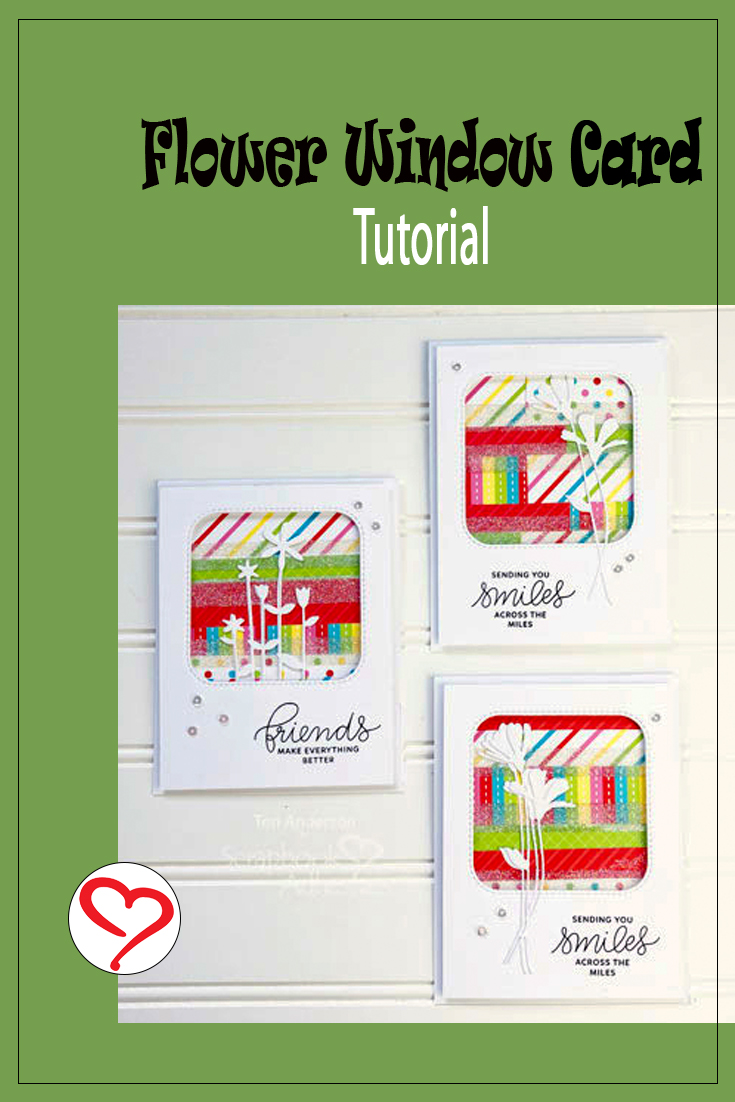
A Simple Flower Placement Change
You can easily change up your window card. Rather than mounting your flowers inside the window, adhere them on the outside.
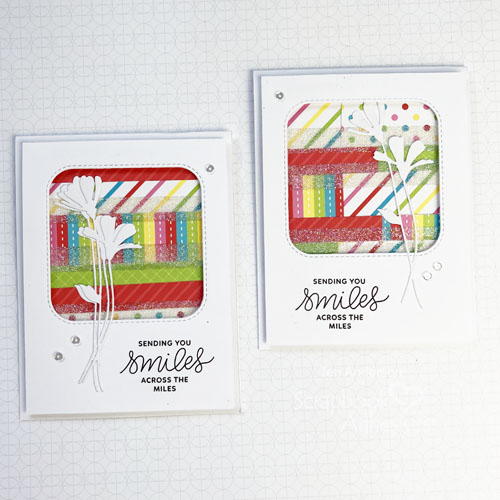
You can use just one flower or you can stack two, slightly offsetting them as you affix them to the card.
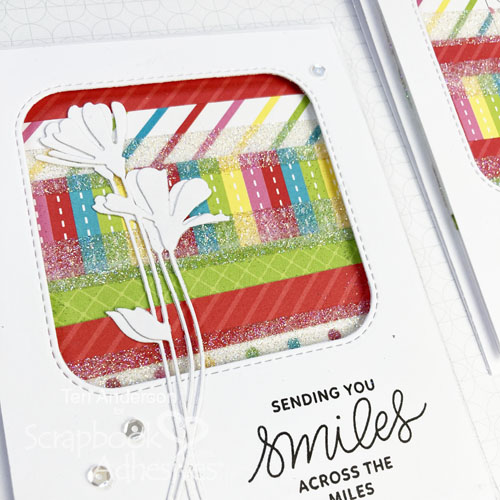
The end result is a nice layered look!
I hope you are inspired by today’s Flower Window Card tutorial! If you are, please share your projects with me! I’d love to take a look!
Happy creating!
Teri Anderson
Creative Time: 60 Minutes
Skill Level: Intermediate
Materials Needed
Scrapbook Adhesives by 3L®
- Adhesive Dots Micro
- E-Z Runner® Permanent Strips Refillable Dispenser
- E-Z Dots® Permanent Refillable Dispenser
- Crafty Foam Tape White
HomeHobby™ by 3L
Other
White Cardstock: Neenah Paper; Patterned Papers: Sunny Studio Stamps (Very Merry 6×6 Collection); Stamps: Pretty Pink Posh (Encouraging Greetings Stamp Set); Dies: My Favorite Things (Stitched Square), Simon Says Stamp! (Tall Flowers, Fresh Daisies) Sequins: Pretty Pink Posh; Black Ink Pad: Ranger Ink; Glitter: A Muse Studio
Love It? Save It!
Visit our Website and Blog!
Sign up for our Newsletter so you never miss a contest or giveaway!


