
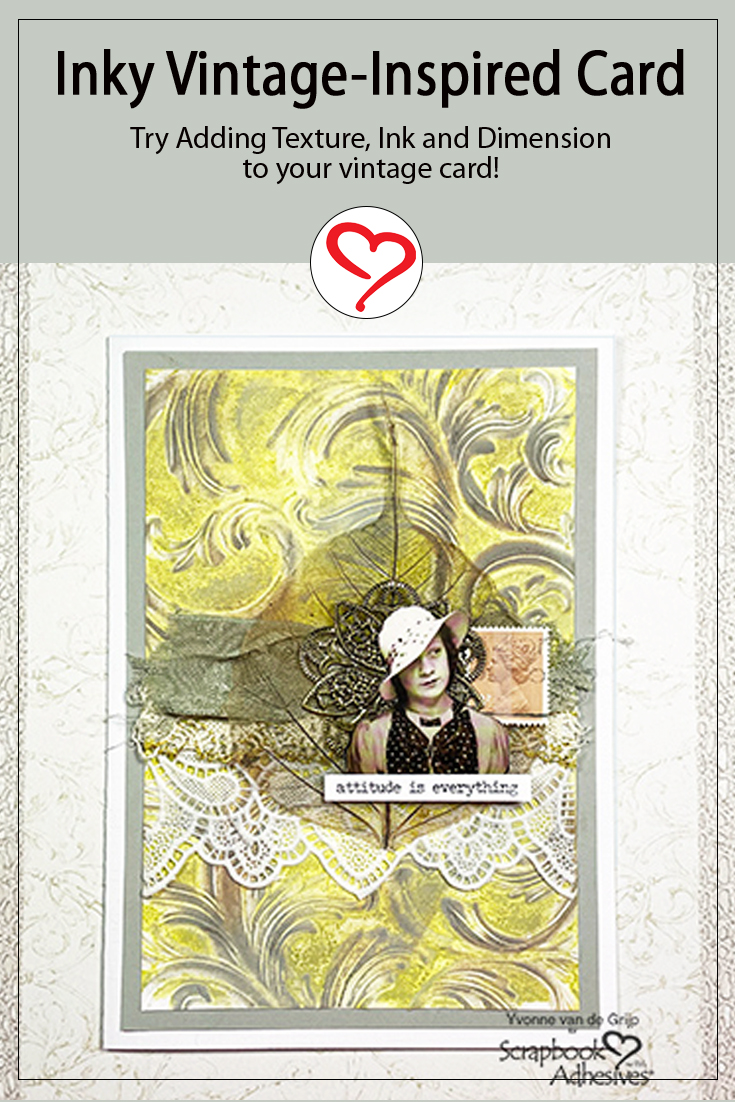
Hi everyone, Yvonne here with an inky vintage-inspired card. If you like multiple layered cards with perfect adherence, Scrapbook Adhesives by 3L is the best.
For my card, I used different adhesives for different products. I would love to share with you how I made my vintage-styled card. Come join me!
Embossing Vintage-Inspired Card Panel
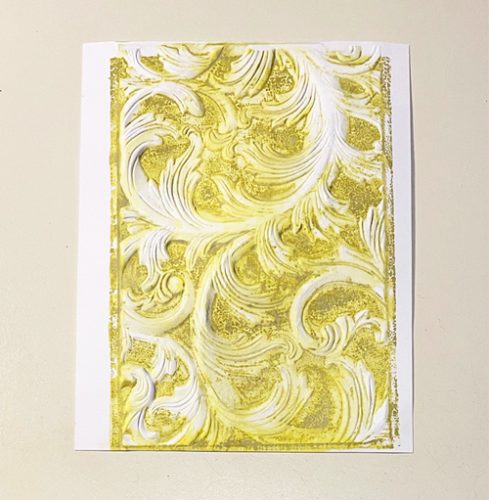
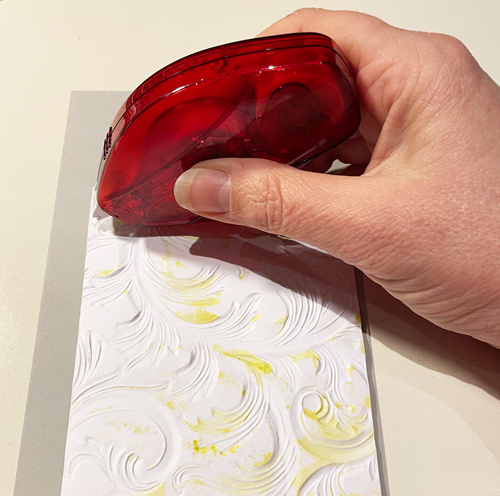
First, trim a piece of white cardstock to a size that fits the embossing folder you want to use. Then ink the front inside of the embossing folder with olive green chalk ink.
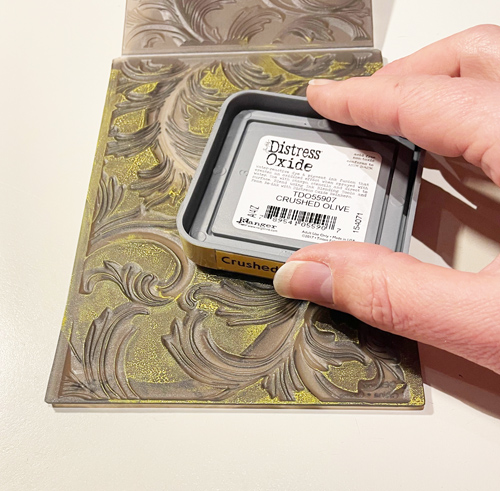
Mist a little water over the inked embossing folder. Do not overspray you don’t want the ink to run down the embossing folder. Next, with the inked side up, place the white cardstock panel into the folder. Now run through your die-cutting machine as instructed.
Vintage-Inspired Layered Look
To alter the embossed card panel I first used some grey ink and an ink blending tool. Gently rub the inked ink blending tool over the embossed parts to highlight them. Repeat the step with brown ink.
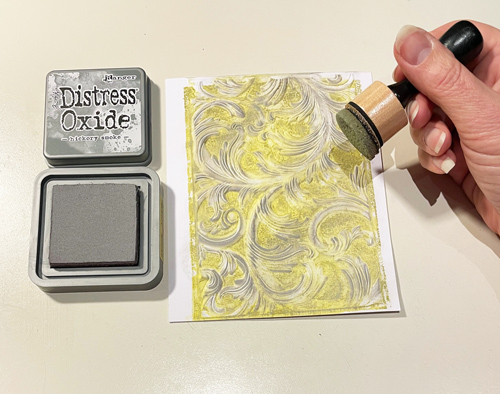
For my vintage-inspired card, I used chalk ink pads to create a velvety look. I love how it turned out!
Assembling the Card Front
Trim the edges of the inked embossed card panel to the desired size. Then mat upon a grey card panel and use the EZ Runner® Permanent Strips Refillable Dispenser to adhere.
Next, adhere onto a white card base using the EZ Runner® Permanent Strips Refillable Dispenser.
Adding Lace and Ribbon
Adhere a piece of white lace onto the card using Crafty Power Tape Dispenser 81ft.
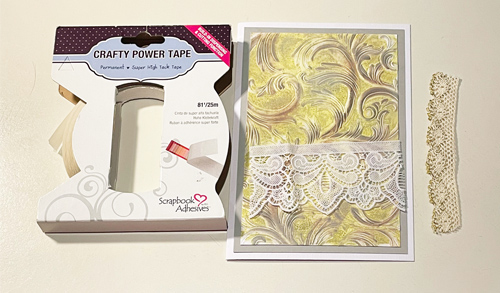
Adhere some creme lace on top also using Crafty Power Tape Dispenser 81ft. For an extra vintage touch, I tore some olive ribbon and wrinkled it. Then adhere to the card using Crafty Power Tape Dispenser 81ft again.
Adding a Skeleton Leaf
As you know the EZ Runner® Permanent Fine Adhesive Dispenser is perfect for invisible adhering of vellum paper. But did you know it is also perfect for adhering skeleton leaves? Because it dries to become invisible without a trace!
Finishing the card
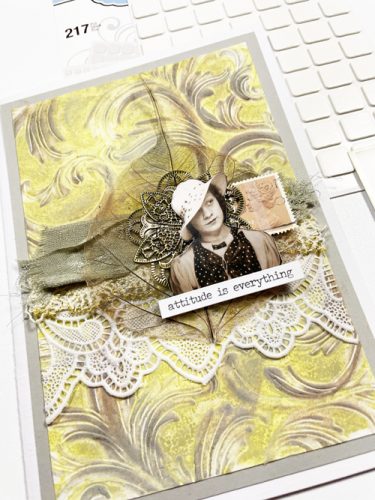
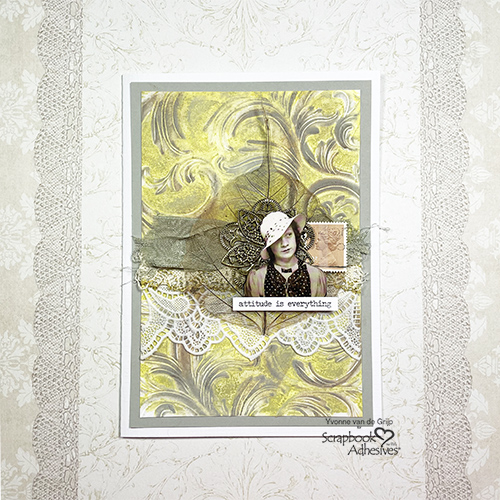
I used Crafty Power Tape Dispenser 81ft to secure my metal finding to the card front. Then tuck an old stamp behind the metal finding with again the Crafty Power Tape Dispenser 81ft.
To pop up the image of the lady slightly, I used Thin 3D Foam Squares White Mix. Lastly, I add a sentiment sticker to the card and voila…your vintage styled card is ready.
I hope you enjoyed this Vintage-inspired Card tutorial and wish you happy crafting!
Yvonne van de Grijp
Creative Time: 45 minutes
Skill Level: Intermediate
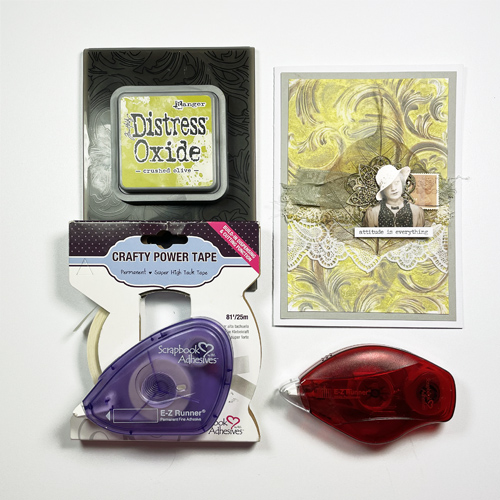
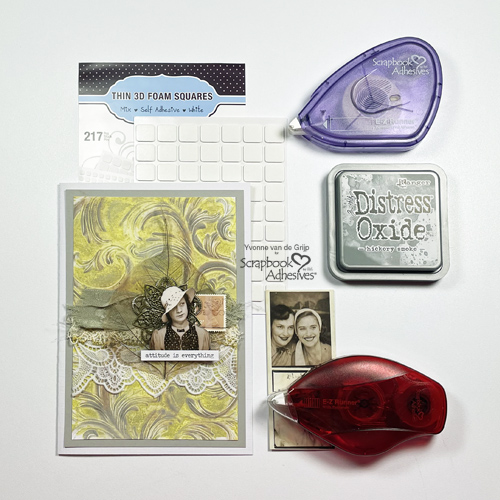
Materials needed:
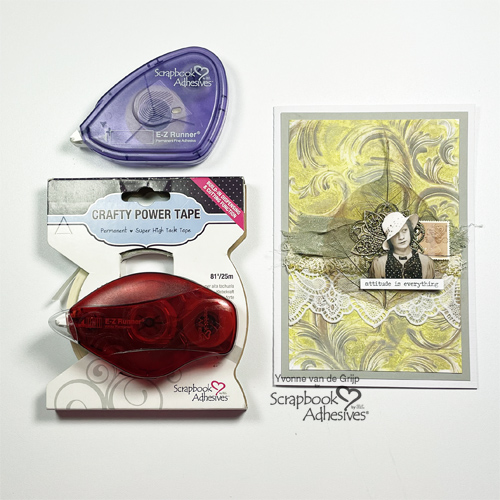
Scrapbook Adhesives by 3L®
Crafty Power Tape Dispenser 81ft
EZ Runner® Permanent Strips Refillable Dispenser
EZ Runner® Permanent Fine Adhesive Dispenser
Thin 3D Foam Squares White Mix
Other
Embossing folder (Sizzix 3D Texture Fades Embossing Folder Elegant); Die Cutting Machine Spellbinders® Paper Arts (Platinum 6 Machine); Inkpads (Distress Oxide Hickory Smoke, Crushed Olive, Vintage Photo); Ink Blending Tool; Lace and Ribbon; Photo and sentiment (Tim Holtz Idea-ology: Photobooth, Small Talk); Metal Finding; Old Stamp; Skeleton Leave; Paper Trimmer; Scissors
Save It to Pinterest!
Visit our Website and Blog!
Sign up for our Newsletter so you never miss a contest or giveaway!


