
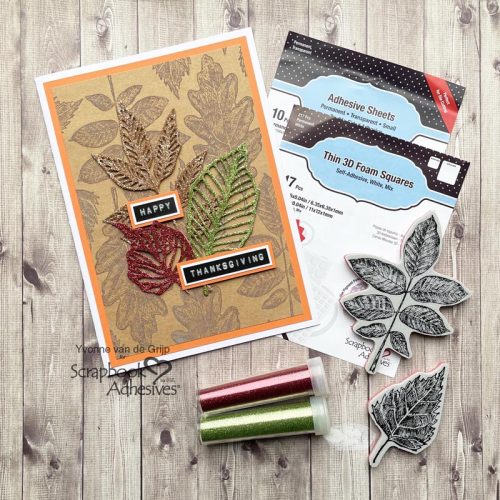
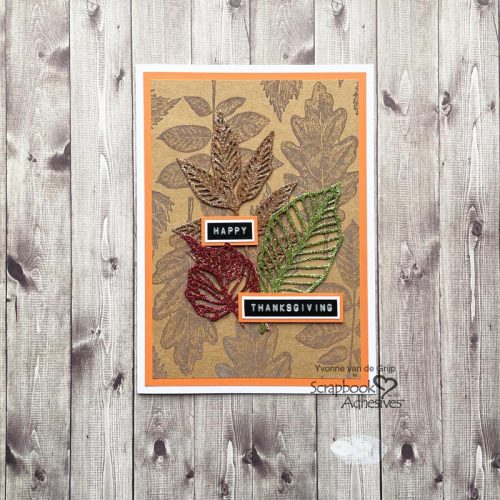
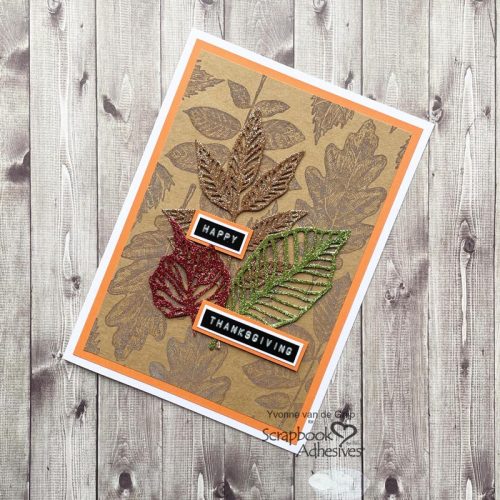
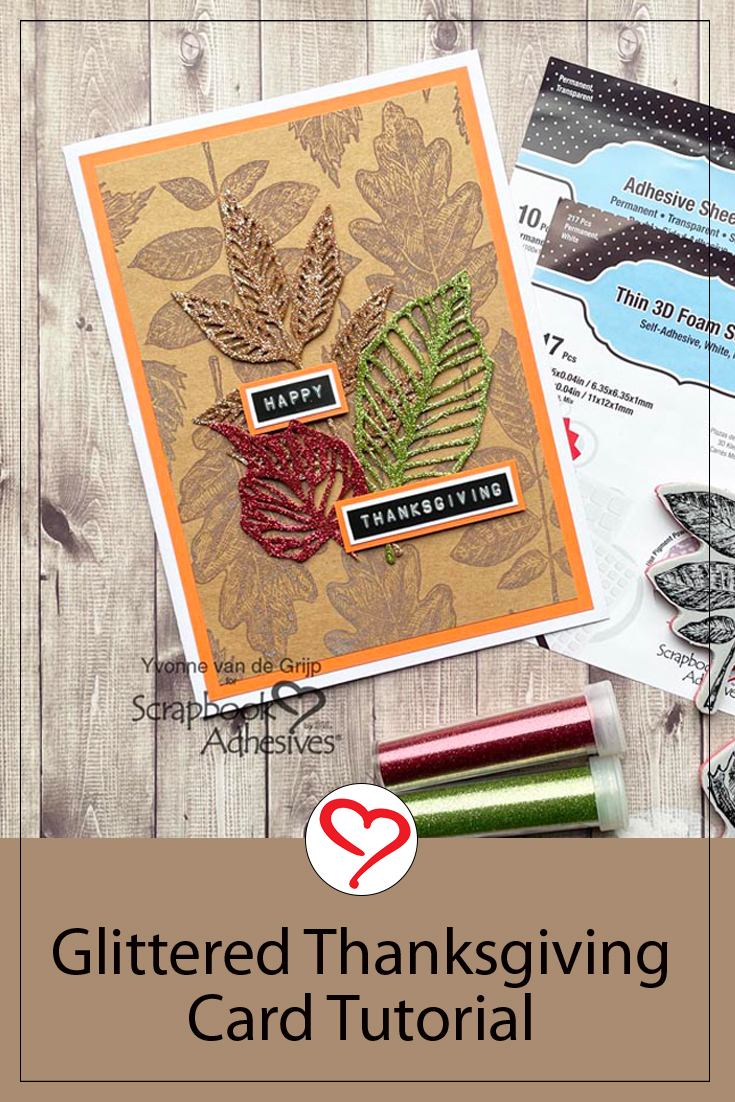
Hi everyone! With Thanksgiving coming up I made this Glittered Thanksgiving Card. Combine Adhesive Sheets and the technique called Wear Your Adhesive on the Outside to create a gorgeous glittered effect on a card. Yvonne here, I would love to share how I made my card. Wanna join me?
Top Card Panel
To create the background of the Glittered Thanksgiving Card, start by stamping leaves onto a piece of kraft cardstock. Use brown ink for stamping the leaves.
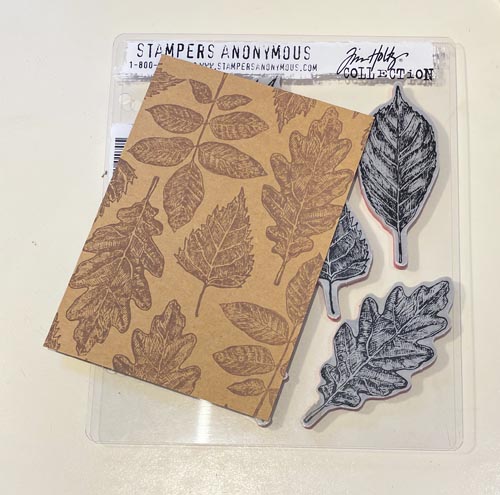
Then trim the stamped cardstock to the size of a top card panel.
Wear Your Adhesive on the Outside with Glitter
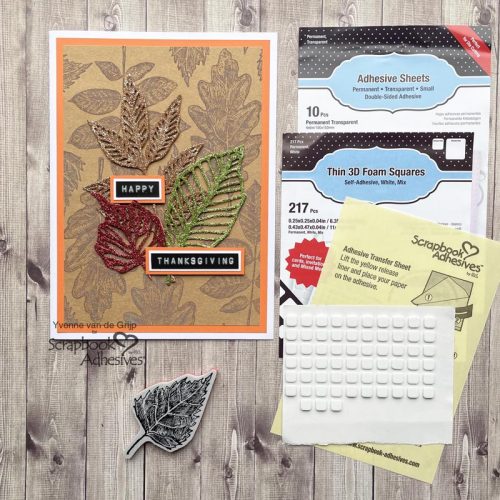
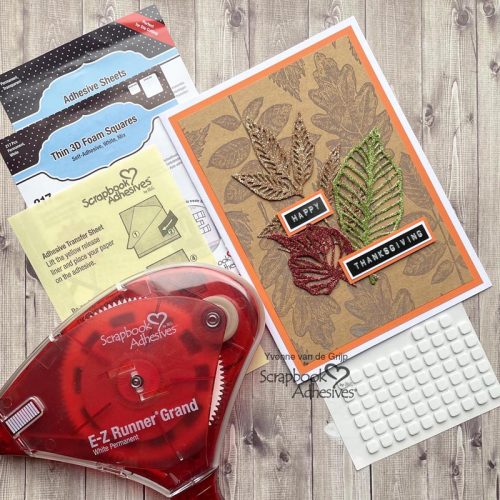
To create the glittered leaves for the Glittered Thanksgiving card, start by removing the yellow liner of Adhesive Sheets 4×6 inch and adhere it onto a piece of kraft cardstock.
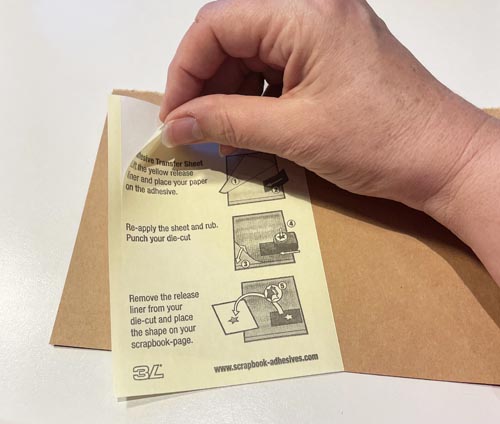
Then rub the Adhesive Sheets 4×6 inch for secure adhering to the cardstock. Then die-cut some leaves from it, with the white liner facing upwards.
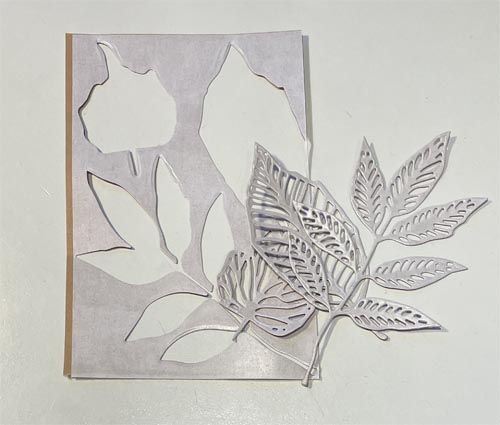
Now carefully remove the white liner from the die-cuts and sprinkle glitter upon it. Rub the glitter and remove the excess glitter. For my card, I used three colors of glitter to create three leaves in autumn colors. This technique of making your adhesive shine is called Wear your Adhesive on the Outside.
Creating the top Card Panel
To create a subtle uplifting effect on my Glittered Thanksgiving Card, I cut small stripes from 3D Thin 3D Foam Squares White Mix and then adhered to the back of the die-cut leaves.
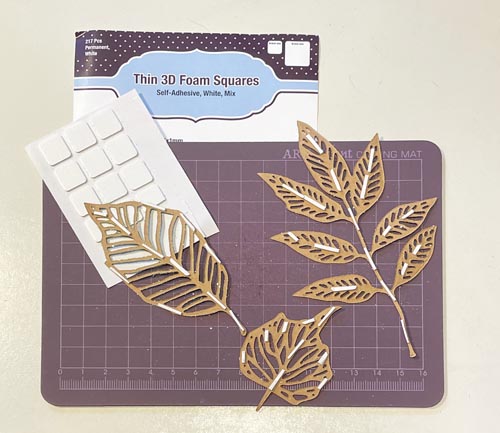
Then remove the liner of the Thin 3D Foam Squares White Mix and adhere the leaves onto the stamped card panel.
Create a Card Base
To create the card base for the Glittered Thanksgiving Card I adhered the stamped top card panel onto an orange card panel and next onto a white folded card base. To adhere the panels I used the E-Z Runner® Grand Refillable Dispenser.
Embellishing
For a simple finishing touch on the Glittered Thanksgiving Card, I adhered a sentiment onto a white banner and next adhered it onto a slightly larger orange banner. For adhering the banner layers, I used the E-Z Runner® Grand Refillable Dispenser. Then adhere the sentiment onto the card using 3D Foam Squares White Small Size.
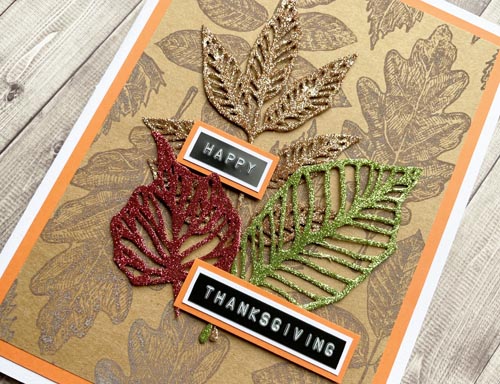
Voilá, your Glittered Thanksgiving Card is ready. I hope you enjoyed this tutorial and wish you happy Thanksgiving crafting.
Creative Time: 45 minutes
Skill Level: Intermediate
Materials needed:
Scrapbook Adhesives by 3L®
Thin 3D Foam Squares White Mix
3D Foam Squares White Small Size
E-Z Runner® Grand Refillable Dispenser
Other
Etched Dies and Die-Cutting and Embossing Machine (Spellbinders Paper Arts®: Platinum 6 Machine; Sizzix: Tim Holtz: Thinlits Skeleton Leaves); Cardstock (White, Kraft, Orange); Inkpads (Rangerink: Distress Oxide ink: Vintage Photo); Stamp (Stampers Anonymous: Tim Holtz: Skeleton Leaves); Glitter (Copper, Green, Red); Dymo; Scissors; Paper Trimmer
Save to Pinterest!
Visit our Website and Blog!
Sign up for our Newsletter so you never miss a contest or giveaway!


