
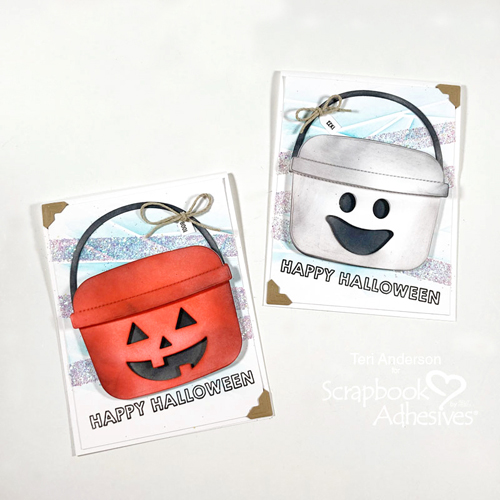
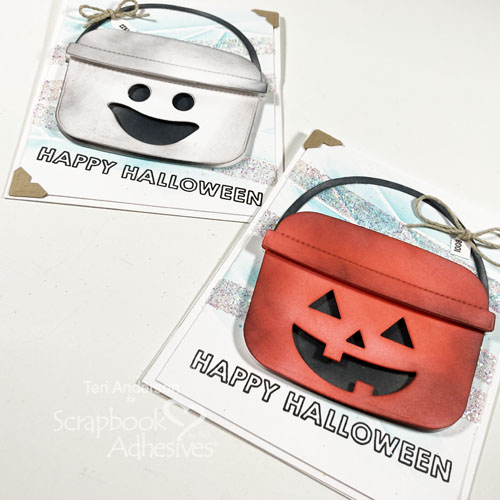
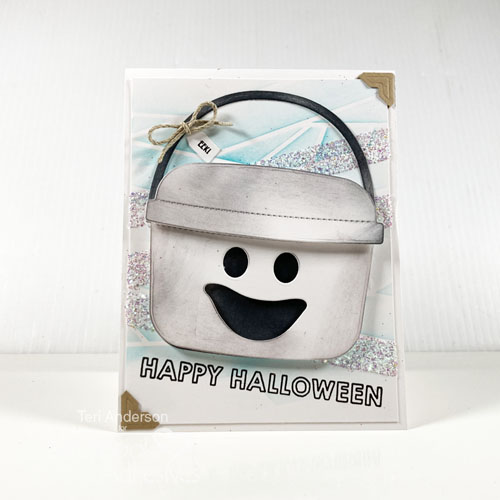
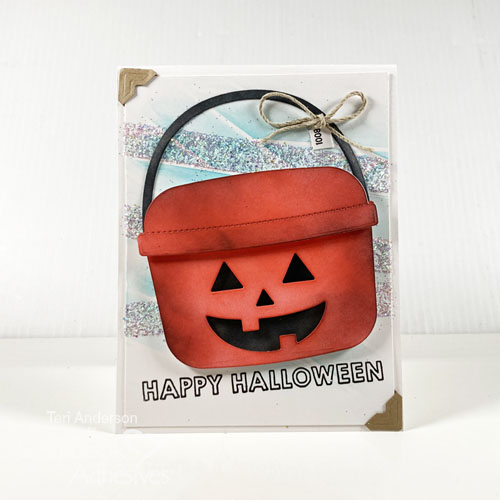
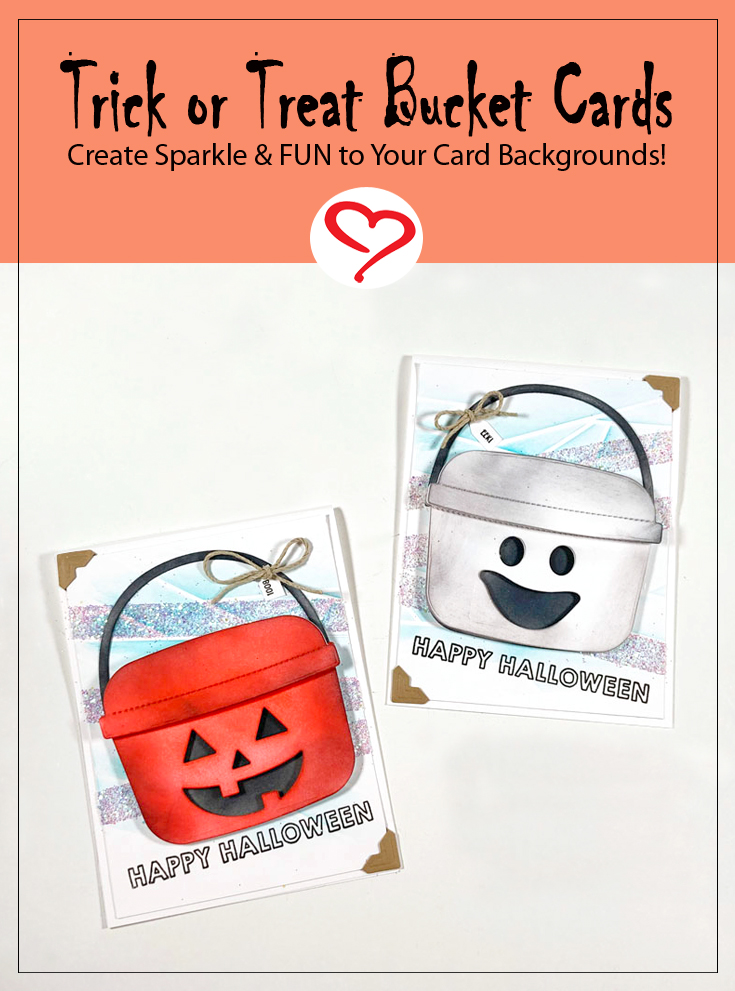
Hi, everyone! Halloween will be here before you know it! Teri here to show you how to make these Trick-or-Treat Bucket Halloween Cards – perfect for your favorite Trick-or-Treaters!
Create the Trick-or-Treat Buckets
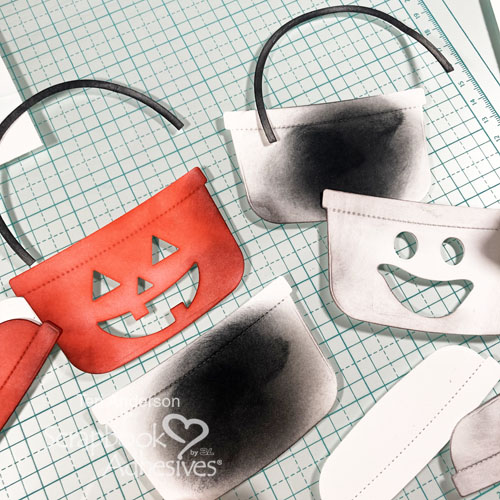
Start by die-cutting several bucket shapes from white cardstock. Apply ink or markers to cut shapes. This gives you control over how you want to shade and color your elements.
Assemble the Buckets
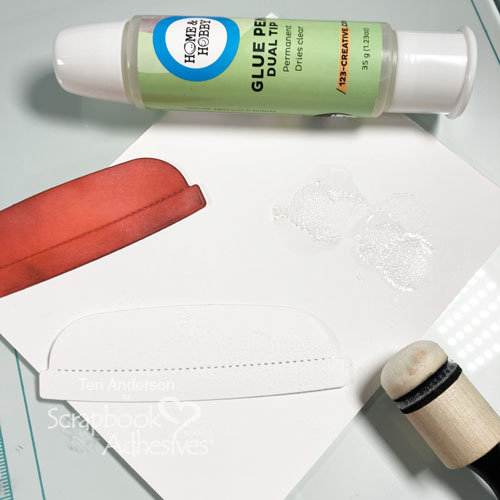
Stack the two lids, and apply Dual Tip Glue Pen to adhere them together. Designer’s Tip: Squirt the glue on scratch paper. Then use a blending tool or sponge dauber to pick up the glue and lightly dab it on the elements. This will keep them from warping.
Add handles to your buckets. Use your scissors to cut down pieces of Crafty Foam Tape in White 54ft. and place them on the back of the front piece of each bucket. Be generous with the foam.
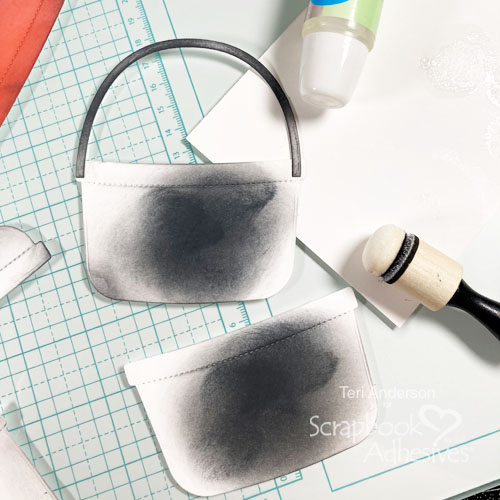
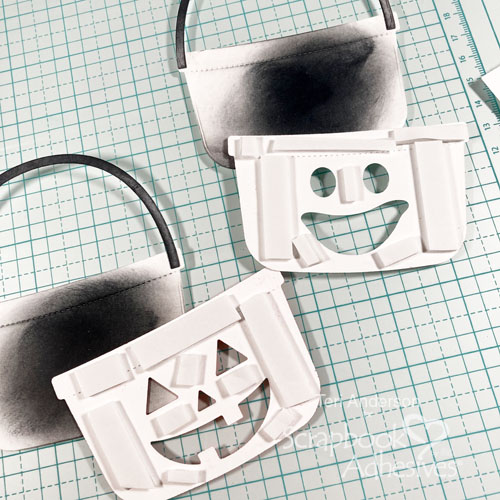
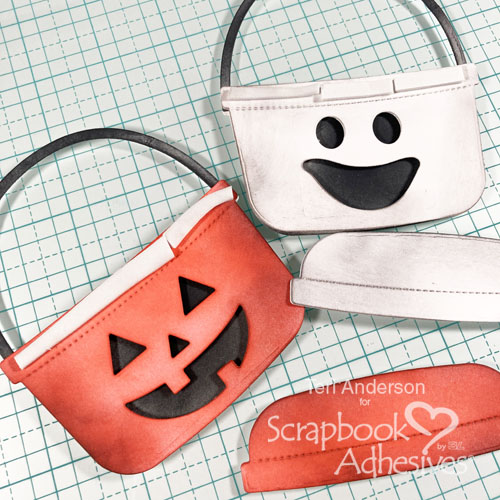
Secure the front of your buckets to the bases. Add more Crafty Foam Tape in White 54ft. to the top of each bucket. Lastly, add the lids.
Create a Background
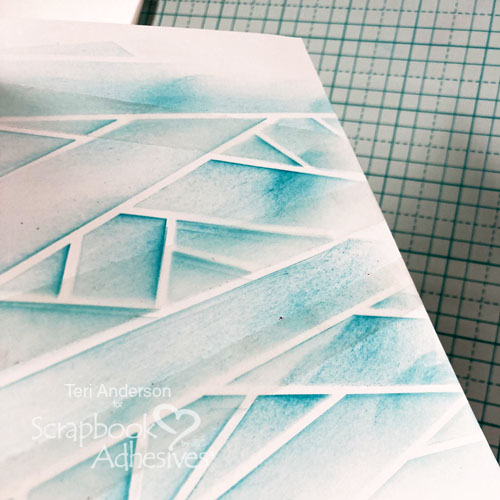
With a stencil to ink the background of the white cardstock panels. For more interest, place strips of Premium Double-Sided Tape 1/2″ across the panels. Make sure to leave room at the bottom to add sentiment later. Mount the panels onto the white card bases and remove the top liners. Cover them with glitter, and press the glitter into the tape to secure. Tap off excess.
Add the Sentiment and Finishing Touches
Stamp a sentiment on each card with black ink. Add your buckets to them. I felt like my buckets were a little plain so I stamped a small sentiment on narrow strips of cardstock and cut them to look like tags. I hung them on the buckets’ handles with jute bows.
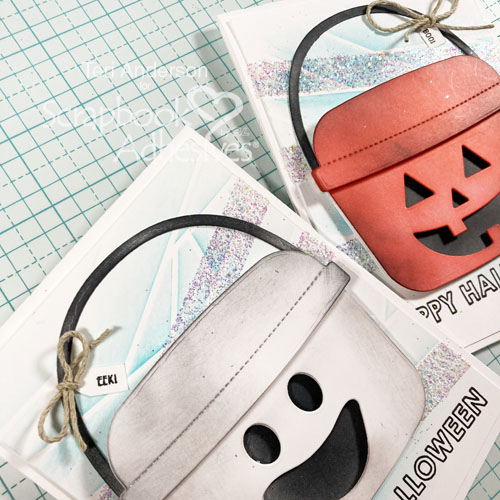
Complete your cards by adding a couple of Kraft color corners from the Creative Photo Corners Variety Pack to each card. It matches my jute bows.
I hope you are inspired by today’s Trick or Treat Bucket Card tutorial. Use the techniques in this post and apply them to your next card creation. Thanks so much for stopping by again!
Happy Creating!
Teri Anderson
Creative Time: 60 minutes
Skill Level: Intermediate
Materials needed:
Scrapbook Adhesives by 3L®
Creative Photo Corners Mix Pack
HomeHobby by 3L®
Premium Double-Sided Tape 1/2in
Other: Cardstock: Neenah; Stamps: Lawn Fawn (Fangtastic Friends Stamp Set); Dies: Pretty Pink Posh (Candy Bucket); Stencil: Pretty Pink Posh (Mummy Wrap); Inks: Catherine Pooler (Orange, Blue), Ranger Ink (Black); Glitter: American Crafts; Jute: Lawn Fawn
Save to Pinterest!
Visit our Website and Blog!
Sign up for our Newsletter so you never miss a contest or giveaway!


