
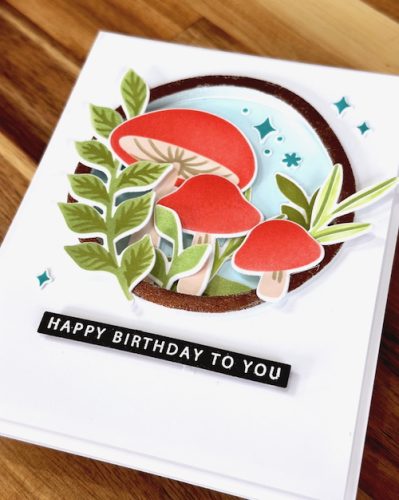
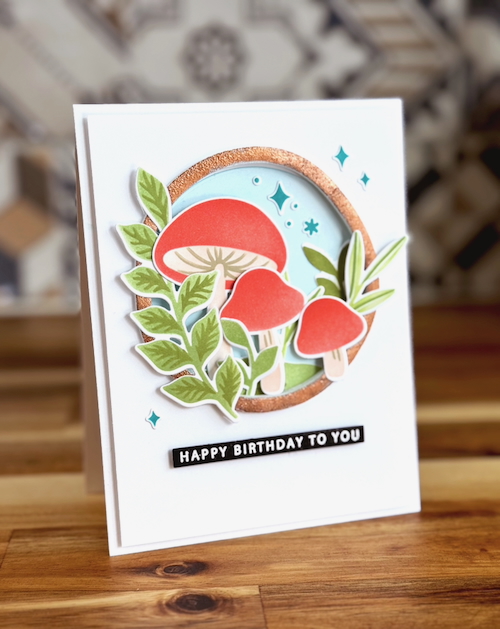
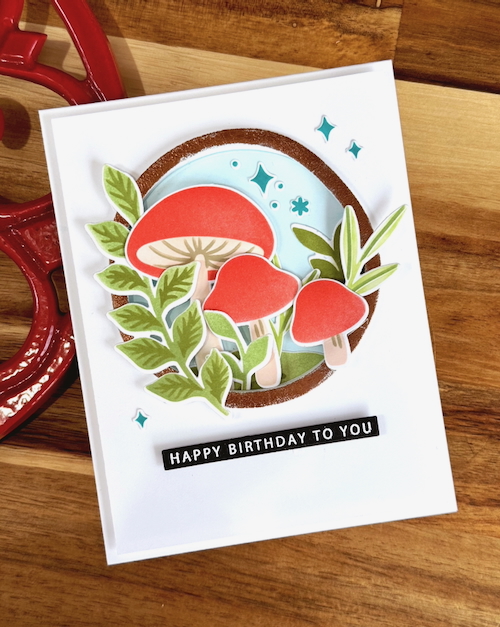
Hello, and welcome! This is Jingle here today sharing a Sweet Forest Shadow Box Card I created with a birthday theme in mind!
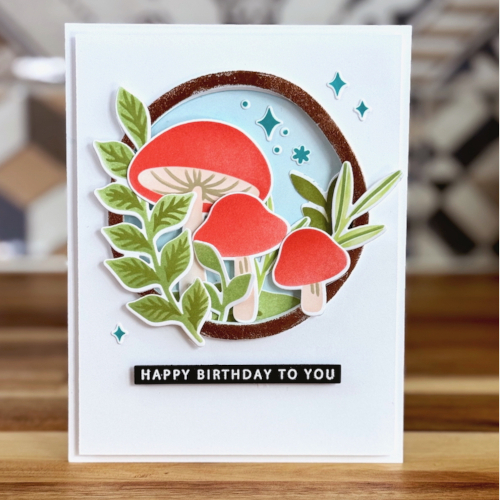
Forest Shadow Box Construction
For this card, I used some of the same construction principles that I used in my last post, Blooming Birthday Shaker Card. This one, however, is a shadow box instead of a shaker. I popped up the circle window using 3D Foam Circle Frames and arranged my die cut pieces to create my scene inside!

Not only is this a great way to add dimension and depth, it looks like a LOT of work. The truth is, however, it is super simple with great dimensional adhesives!
Wear Your Adhesive on the Outside with 3D Foam Circle Frames
For a bit of shine and a whole lot of pizzaz, I added a foil frame to the window. How? Simply place the frame that best fit the opening from the 3D Foam Circle Frames White. Remove the top liner and place a piece of bronze foil from the Metallic Transfer Foil Sheets Nature Colors (color side facing you). Rub the foil into the frame to transfer the color. Peel to reveal the shine!
I hope you give the Sweet Forest Shadow Box Card idea a try! I’d love to see what you create, so don’t hesitate to tag me!
Thanks for stopping by!
Jennifer Ingle (aka Jingle)
Creative Time: 40 mins
Skill Level: Intermediate
Materials Needed:
Scrapbook Adhesives by 3L®
E-Z Runner® Petite Permanent Dots Refillable Dispenser, Crafty Power Tape Polybag 81ft., 3D Foam Squares White Mix, 3D Foam Strips Large White, 3D Foam Circle Frames White, Metallic Transfer Foil Sheets Nature Colors
Other: Stencil: Pinkfresh Studio (The Magic is in You); Ink: Concord & 9th (Aqua Sky, Pimento, Pistachio, Nectar, Avocado, Sprout, Oceanside, Wheat); Craft Dies: Pinkfresh Studio (The Magic is in You), Waffle Flower Crafts (Nested Circles); Embossing Powder; Black and White Cardstock
Click Preferred Retailers List
Save to Pinterest!

Visit our Website and Blog!
Sign up for our Newsletter so you never miss a contest or giveaway!


