
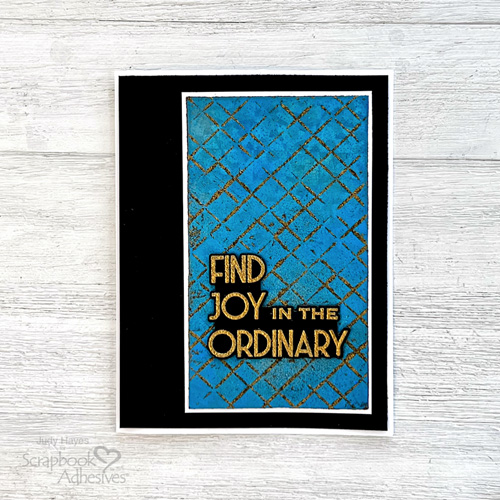
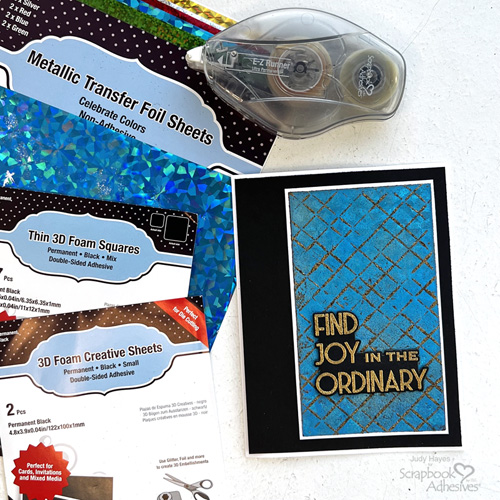
Hi, Judy here today! I’ve been experimenting with embossing a pattern into 3D Foam Creative Sheets Small Black with an embossing folder. Then I apply foil from Metallic Transfer Foil Sheets Celebrate Colors to raised portion of embossed pattern and cover with embossing powder to fill recessed areas. After much trial and error, I made this Find Joy Embossed Panel Card. When heat melts the embossing powder, it changes the texture and color of the Metallic Transfer Foil. I really like the effect!
Cut Paper
Cut white cardstock 5.5 x 8.5 inches, score and fold to form 4.25 x 5.5 inch card. Also from white cardstock, cut piece 2.875 x 5 inches.
From black cardstock, cut piece 4.125 x 5.375 inches.
Emboss 3D Foam Creative Sheet
From 3D Foam Creative Sheets Small Black, cut piece lengthwise that is 2.75 inches wide (2.75 x 4.75 inches)
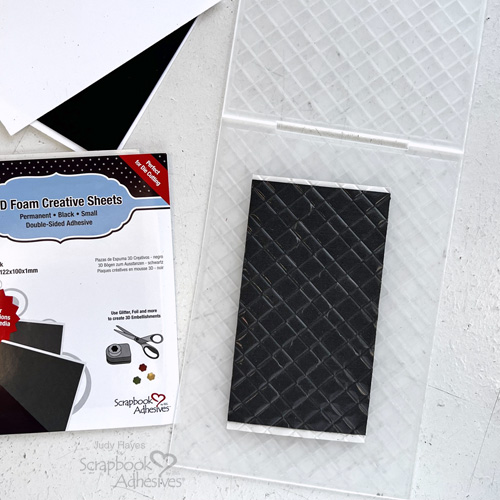
Place in embossing folder so that paper side (white) is on recessed part of embossing folder and shiny side is up and will be against raised pattern of folder. Pass through die cutting machine with sandwich firm enough to emboss but not too much pressure.
Fasten to Cardstock
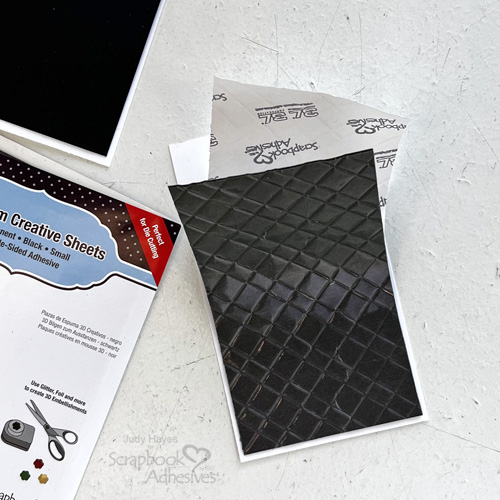
Cut white backing even with one end of embossed 3D Foam. Carefully peel back end of paper backing that extends (white side), align opposite end with one end of white cardstock allowing a narrow reveal. Hold in place and press end with backing pulled back onto cardstock. Then lift end to completely remove backing and press firmly onto cardstock. White cardstock is sized to be slightly long as 3D Foam often gets longer after embossing. Trim white cardstock as needed for even white borders.
Apply Metallic Foil
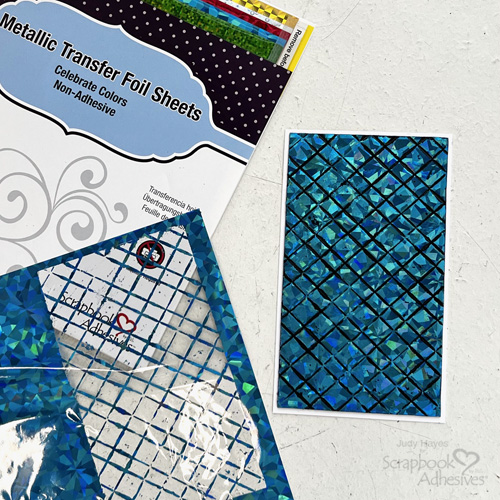
Remove liner from embossed 3D Foam Creative Sheet and cover with blue foil from Metallic Transfer Foil Sheets Celebrate Colors. Lightly rub fingers flat over foil to attach to 3D Foam. Do not press foil into recessed areas. Lift foil away and repeat if there are raised areas without foil. Important: the foil should be only on top of embossed pattern, not in grooves.
Add Embossing Powder
Cover foiled 3D Foam piece with gold embossing powder and gently rub powder into grooves with fingers. Brush off excess embossing powder with fingers as it tends to cling to foil. Use heat tool to melt embossing powder moving tool constantly to avoid overheating the foam.
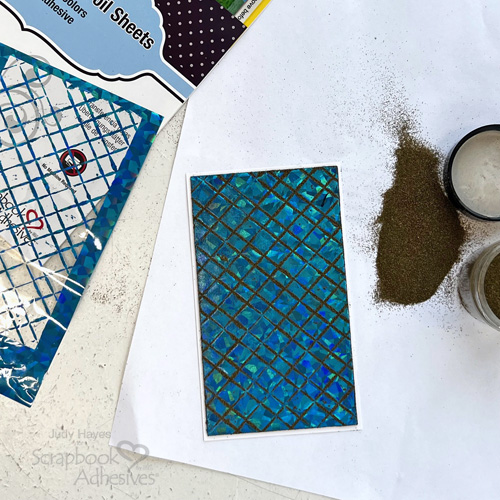
Metallic foil will react to heat and change color and texture. While still warm, press blue foil from Metallic Transfer Foil Sheets Celebrate Colors on again to add touches of shiny foil to any sticky area.
Attach to Card
Use E-Z Runner® Ultra Strong Refillable Dispenser to apply adhesive to back of black cardstock and fasten on card front.
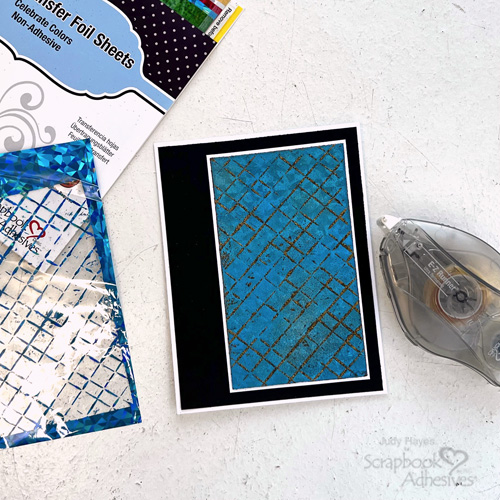
Apply adhesive to back of embossed panel and fasten on card.
Stamp Verse
On piece of black cardstock, stamp verse with Versamark ink and heat emboss with gold embossing powder. Use coordinating die and die cutting machine to cut out verse.
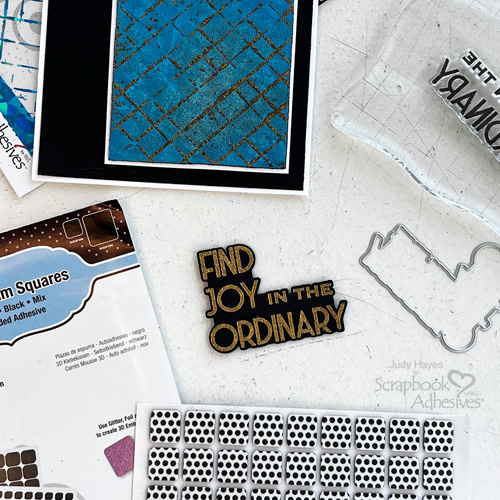
Fasten Thin 3D Foam Squares Black Mix to back of verse, peel off liners and fasten on card
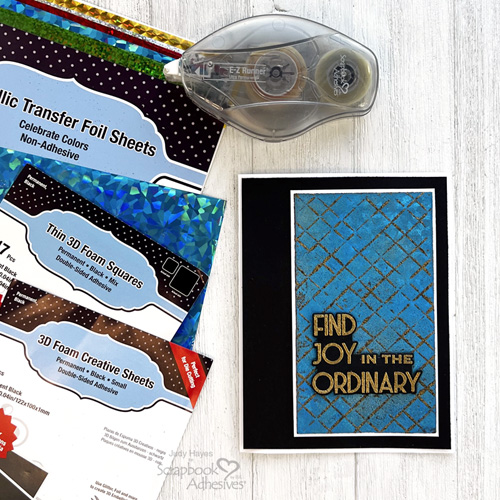
Thanks for visiting!
Judy Hayes
Creative Time: 20 mins
Skill Level: Intermediate
Materials Needed:
Scrapbook Adhesives by 3L®
E-Z Runner® Ultra Strong Refillable Dispenser
Thin 3D Foam Squares Black Mix
3D Foam Creative Sheets Small Black
Metallic Transfer Foil Sheets Celebrate Colors
Other: Stamp: Simon Says Stamp! (Be Your Beautiful Self); Ink: Tsukineko (Versamark); Embossing Folder: Lisa Horton Crafts (Lattice); Embossing Powder: Ranger Ink (Gold); Craft Dies: Simon Says Stamp! (Be Your Beautiful Self); Black + White Cardstock
Click Preferred Retailers List
Save to Pinterest!
Visit our Website and Blog!
Sign up for our Newsletter so you never miss a contest or giveaway!





