
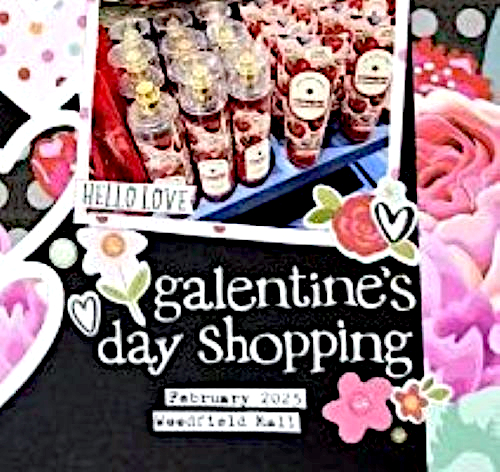
Hello crafty friends! I hope you had a sweet Valentine’s Day. It’s Kristin here with a fun Galentine’s Day Shopping Layout to share. Valentine’s layouts are some of my favorites to create. This page started with a February outing to Bath & Body Works with my sister. Their Valentine’s display was full of pinks, reds, and heart details. I snapped a photo, and knew it needed its own layout. Here is how I put the entire page together step by step.
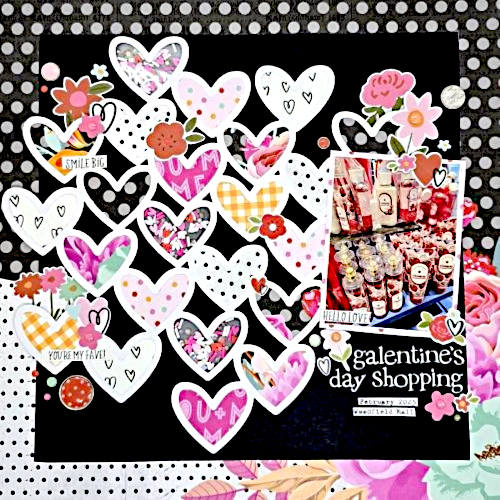
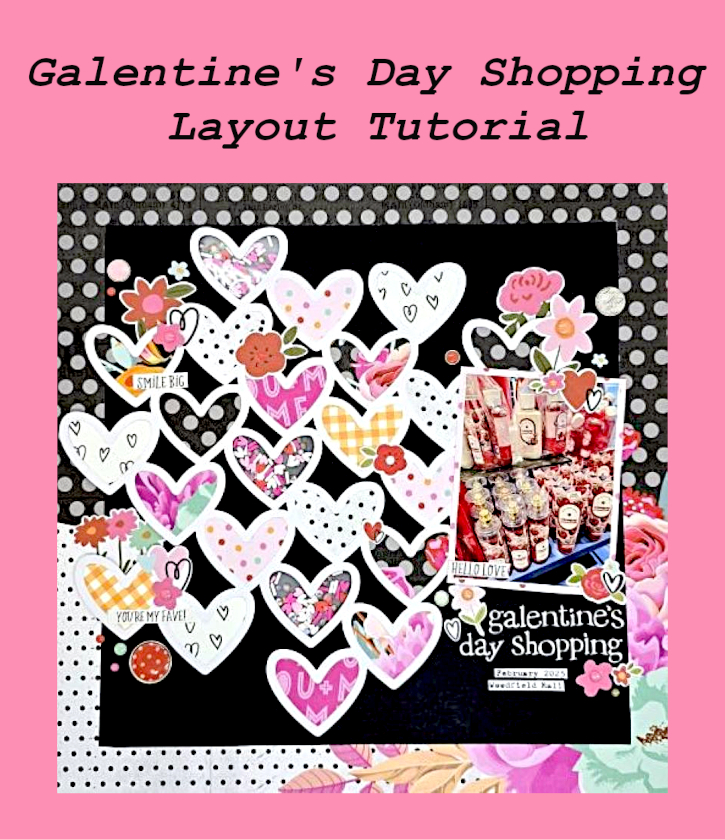
My Galentine’s Day Focal Point
The focal point of my page is a heart-themed cut file to highlight the Valentine theme. When I’m backing a cut file, I like to choose my photo first. Then I can pull colors that complement, not compete with it. Since the Bath & Body Works display had a lot of pink and red tones, I stayed within that color family. So, I chose papers from the Simple Stories Heartstrings collection.
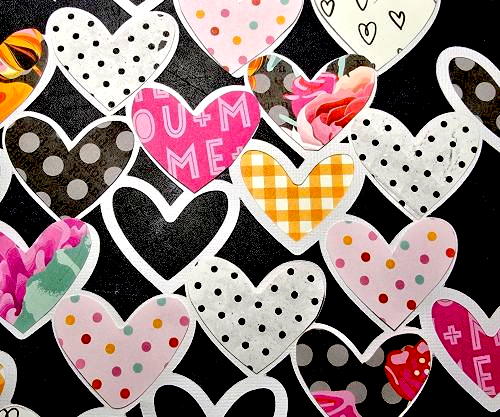
To trace and trim, place the cut file face down on the patterned paper. Lightly traced each opening, and trimmed just inside the pencil line so the paper wouldn’t peek out from the edges. Secure the pieces to the cut file with the E-Z Runner® Grand Refillable Dispenser.
Heart Shakers
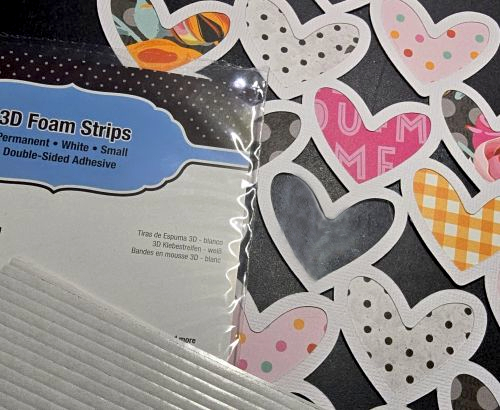
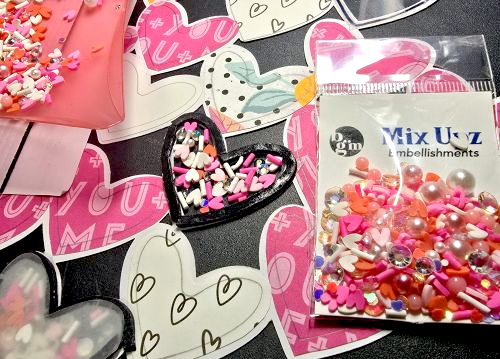
For some movement, two of the hearts were made into shakers. Adhered acetate in the front and then backed the opening with 3D Foam Strips. Next, fill the shaker with an adorable shaker mix and close the sequin by backing it with vellum.
Assemble the Galentine’s Day Layout
To help stand out the cut file, I centered a 10 x 10″ black cardstock against my patterned paper with the E-Z Runner® Grand Refillable Dispenser. Then added pieces of Crafty Foam Tape White 108ft behind the entire cut file to lift it off the background. That extra dimension gives it such a fun, layered look and makes the hearts really stand out.

For the title, I went into my stash and pulled out these white Sonnets letter stickers. Use your stash! The letter stickers added just the right handmade touch and balanced the sweetness of all the hearts.
To finish, small clusters were added around the photo with a few elements popped up with 3D Foam Squares White Mix. Continue to embellish until desired look is achieved but not to crowd on the page. That’s always my rule: stop before it feels like too much.
Document moments of everyday joy…as simple shopping trip turned into a memory worth preserving. That’s what I love most about scrapbooking—it transforms ordinary moments into lasting keepsakes. Remember start with a photo, limit your color palette but mix pattern scales, and don’t forget dimension.
Happy scrapping & thank you for visiting! 💕✂️
Kristin Rizzo
Creative Time: 90 mins
Skill Level: Intermediate
Materials Needed:
Scrapbook Adhesives by 3L®
E-Z Runner® Grand Refillable Dispenser
Other: Patterned Papers: Simple Stories (Heartstrings Collection); Stamp & Dies: Trinity Stamps (This Calls for Toast Set); Ink: Tsukineko (Versafine in Onyx Black); Metallic Rub-Ons: Craft-T Products Inc. (Earth Tones Kit #2); Shaker Mix: Buttons Galore & More (Serenade); Rhinestones; Vellum; Acetate; Black Cardstock
Click Preferred Retailers List
Save to Pinterest!
Visit our Website and Blog!
Sign up for our Newsletter so you never miss a contest or giveaway!


