
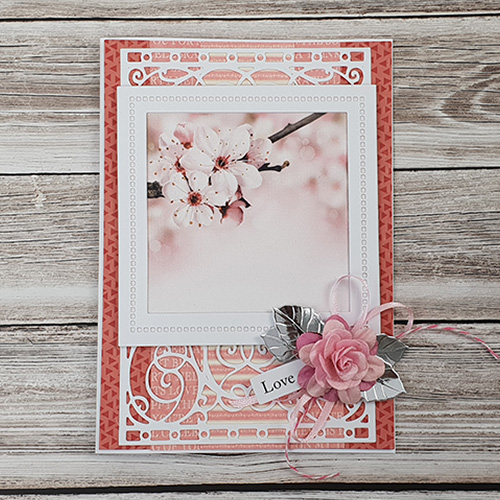
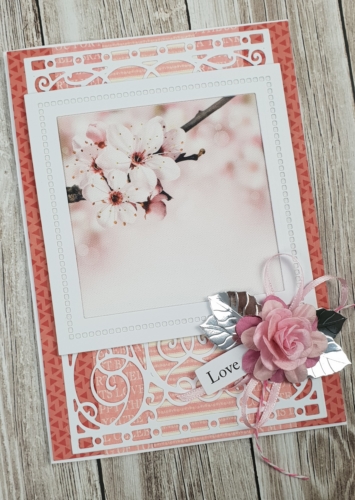
Hi everyone, Christine here today with a Spring blossom card and to show you how to affix those delicate die cuts using Adhesive Sheet 4 x 6″. It’s so easy!
Let’s get started…
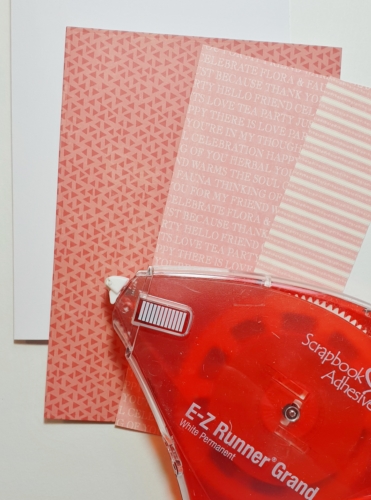
My card base has a patterned paper mat and panels affixed in place with the E-Z Runner Grand® Refillable Dispenser.
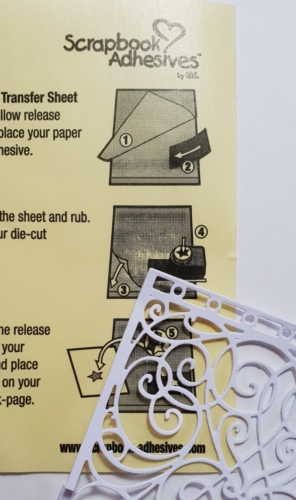
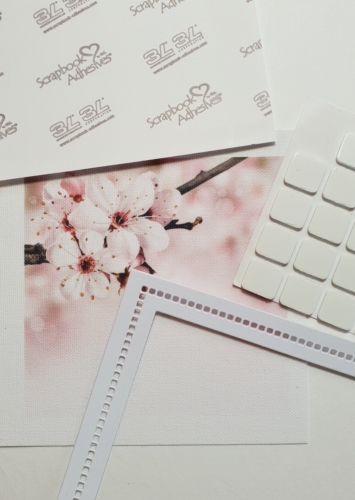
Using Adhesive Sheets…
To adhere those delicate die cuts we all love but find tricky, use Adhesive Sheets. They come in a variety of sizes (12″ x 12″, 6″ x 12″ and 4″ x 6″) perfect for all projects. Take off the top liner sheet of a 4″ x 6″Adhesive Sheet and apply cardstock on to it. Die-cut through your machine with your etched die. When you remove the sheet your die cut has an edge to edge layer of adhesive, not stringy!
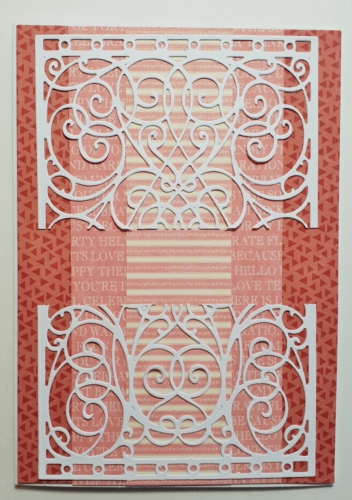
The Adhesive Sheet also provides a more speedy way to affix the die cut onto my card front, no messy liquid glue involved! Using scissors, I’ve sliced the die cut in half to stretch the design on my card.
For the card center decoration, I printed a blossom photo onto canvas card and die cut a frame. This is all secured with 3D Foam Squares White Regular.
With the addition of a small sentiment and a cluster of flowers, leaves and ribbon, again all secured with 3D Foam Squares White Regular my Spring blossom card is finished.
Thanks for stopping by today. Make your next die cutting project with Adhesive Sheets, it’s a breeze! 
Scrapbook Adhesives by 3L® Products used:
3D Foam Squares White Regular
Adhesive Sheets 6″ x 4″
E-Z Runner Grand® Refillable Dispenser
Others:
Dies: Spellbinders Paper Arts (A2 Swirl Background, Hemstitch Squares, 5 x 7 Matting Basics)
White Card; Canvas Print Card; Silver Foil Card; Silk Flowers; Patterned Paper – Jillibean Soup and Graphic 45; Pre-Printed Sentiment