
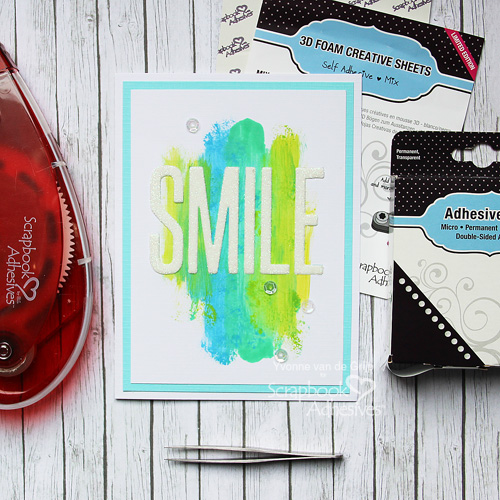
How can you not smile when you receive these cards?! With 3D Foam Creative Sheets it’s ever so easy to lift up and securely adhere the “Smile” sentiment on these CAS (Clean And Simple) cards. Hi everyone, Yvonne here today sharing two different ways to create cards.
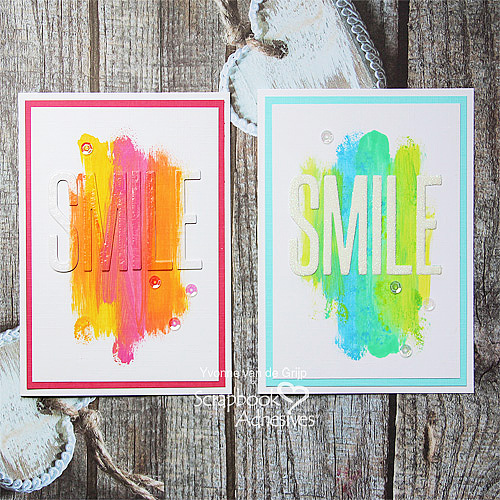
Smile Eclipse Card Making
What is an eclipse card? It is a card that gives subtle dimension to a card front such as the sentiment rising from the background.
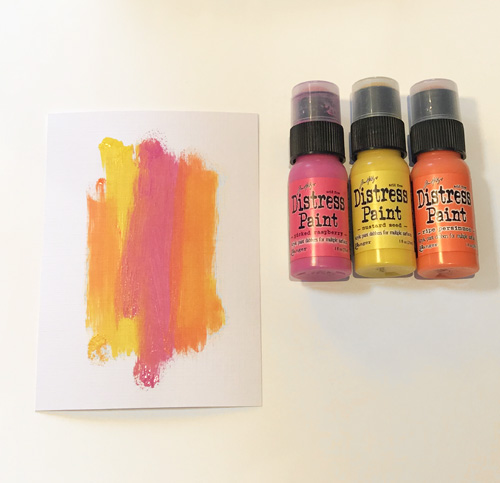
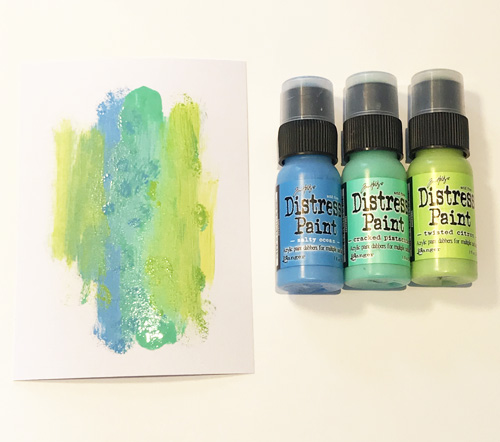
Let’s paint stripes with a paint dabber in different colors on to a rectangle piece of cardstock. Set aside to dry.
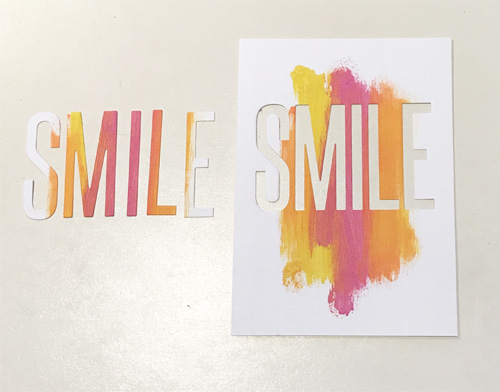
Die-cut the sentiment from the painted cardstock. Make sure you position the metal cutting die exactly where you want it. Maybe use washi tape to secure.
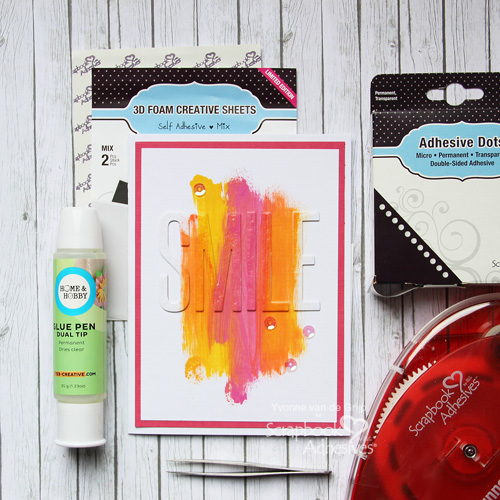
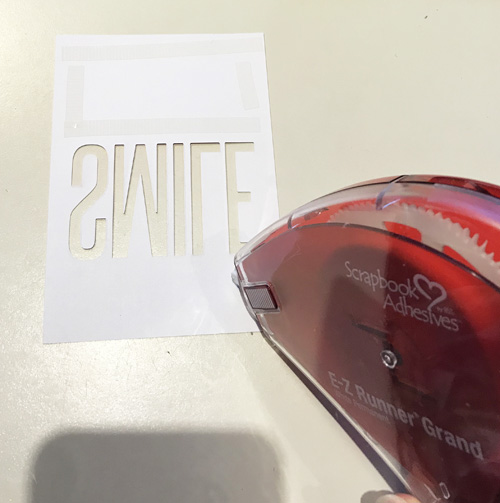
Mount the painted card panel onto a piece of pink cardstock using the E-Z Runner® Grand Refillable Dispenser. For narrow areas, I used Dual Tip Glue Pen to adhere. With the E-Z Runner Grand, I placed the layered panel on top of a white card base.
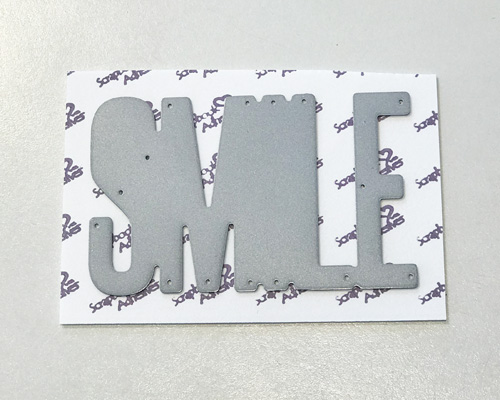
Now the secret of making an eclipse card is the 3D Foam Creative Sheets! Die-cut the sentiment from 3D Foam Creative Sheet. You can use either side of the sheet to cut from.
Lay out the letters and peel off the top liner of each. Carefully place the painted die-cut letters on top of the 3D Foam Letters.
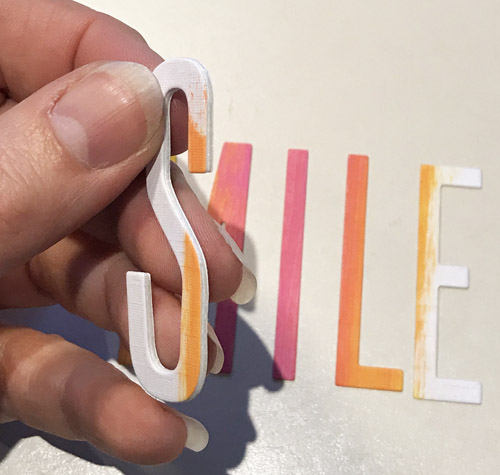
Remove the bottom liner from each letter and place on top of the card front, matching each letter. Using a pair of tweezers will help.

Finish the card by applying dimensional resin to each letter. Adhere sequins to the card with Adhesive Dots Micro. Voila…You made an eclipse card!
Glittered Smile Card Making
Repeating similar steps, I will lift and apply glitter on my card to WEAR YOUR ADHESIVE ON THE OUTSIDE!
Paint stripes with paint dabbers and let dry.
Die-cut the sentiment from the painted cardstock. Then mount onto a piece of blue cardstock using the E-Z Runner® Grand Refillable Dispenser and the Dual Tip Glue Pen for the narrow areas. Finally adhere the layered card panel on to a white card base.
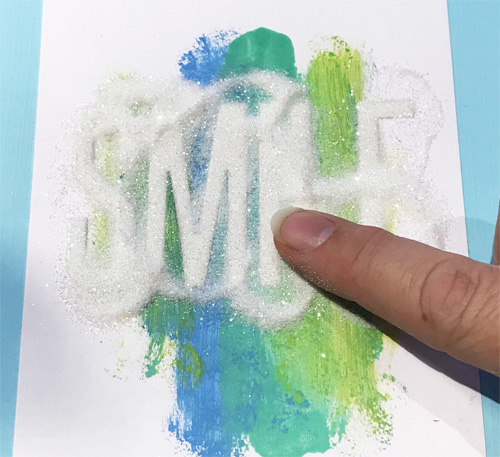
Die-cut the sentiment from a 3D Foam Creative Sheet. You can use either side of the sheet to die-cut from. Lay out the letters and peel off the bottom liner.
Carefully match the letter die cuts into the card front. Remove the top liner from the 3D letter die cuts and sprinkle glitter over the exposed adhesive. Carefully push the glitter into the adhesive with your fingers to secure. Tap off excess to reveal a sparkly sentiment!
Finish by placing sequins to the card front with Adhesive Dots Micro and done!
Materials Needed:
Scrapbook Adhesive by 3L®:
3D Foam Creative Sheets Mix
E-Z Runner® Grand Refillable Dispenser
Adhesive Dots Micro
HomeHobby by 3L®:
Dual Tip Glue Pen
Other:
My Favorite Things (Smile Die-namics), Distress Paints, Glossy Accents, white glitter, sequins, cardstock, paper trimmer, tweezers
Creative Time: 20 – 30 minutes/Intermediate Level
Thanks for stopping by and wishing you happy crafting!
Hugs from Holland,
Yvonne