
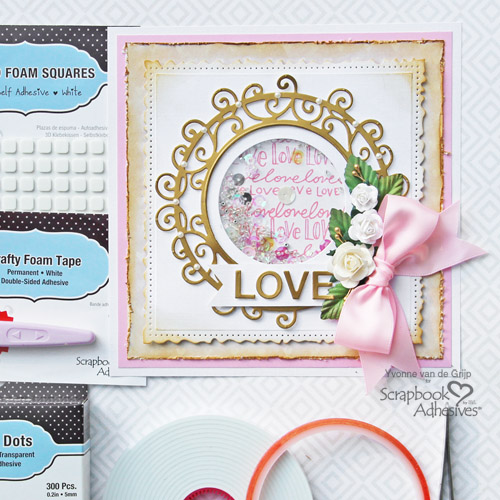
This Love Shaker Card expresses love and appreciation in a fun way to someone special – be it your spouse, best friend or family member! Hello everyone, Yvonne here with a romantic inspired theme that is very easy and securely assembled with Scrapbook Adhesives by 3L® products.
Love Shaker Card Step-Outs:
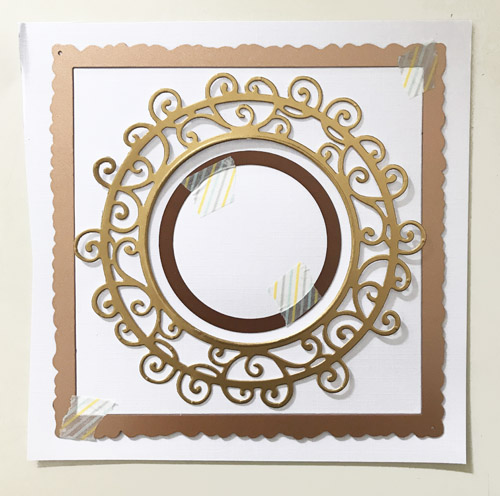
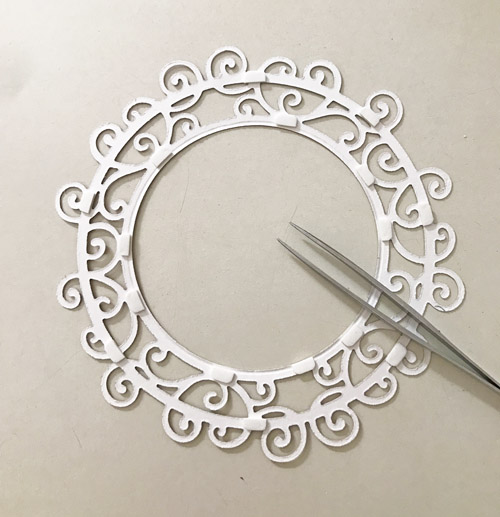
Die-cut the filigree frame from gold cardstock.
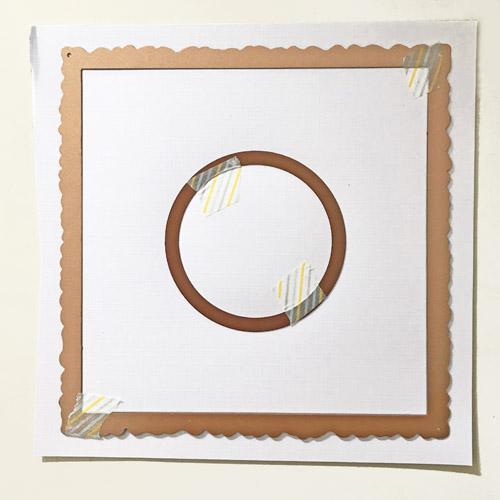
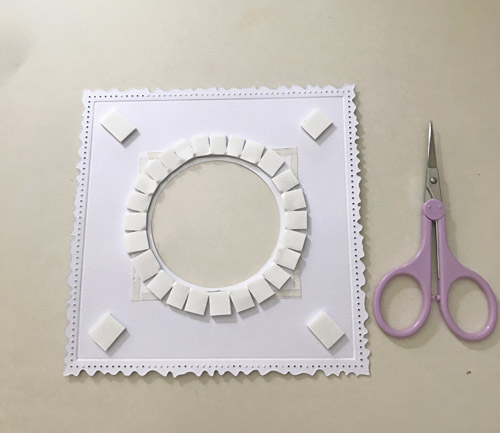
Take a square piece of white cardstock, center the square etched die and secured with removable tape (aka washi tape).
Place the gold filigree frame die cut in the middle. Use it as a guide to place the circle etched die. Secure the circle etched die with washi tape and put the gold frame die cut to the side. Die-cut and emboss the etched dies in a manual die-cutting machine.
Cut a piece of clear plastic that is a bit larger than the circle window to cover and adhere it using Extreme Double-Sided Tape 1/8in.
Cut a strip of Crafty Foam Tape White just enough to connect on the top (as shown in the image below) in 1/4″ width so it can bend to create a foam circle around the (backside) the circle window.
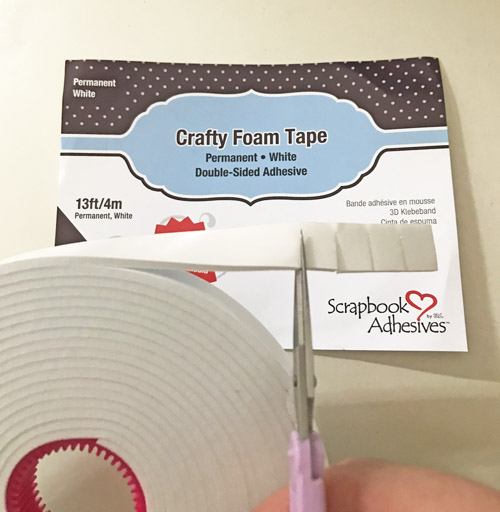
Flip the window card panel to the front to make sure you do not see any Crafty Foam Tape White sticking out. Flip it back and adhere pieces of Crafty Foam Tape White to the corners of the window card panel.
Add shaker materials such as beads, sequins, etc. into the circle window.
Peel off the liner from the Crafty Foam Tape White and adhere a stamped piece of cardstock. Then remove the liner of the Crafty Foam Tape White from the corners and adhere to a piece of (altered) patterned and pink cardstock and then finally to the white card base with the E-Z ®Runner Grand Refillable Dispenser.
Finishing Details:
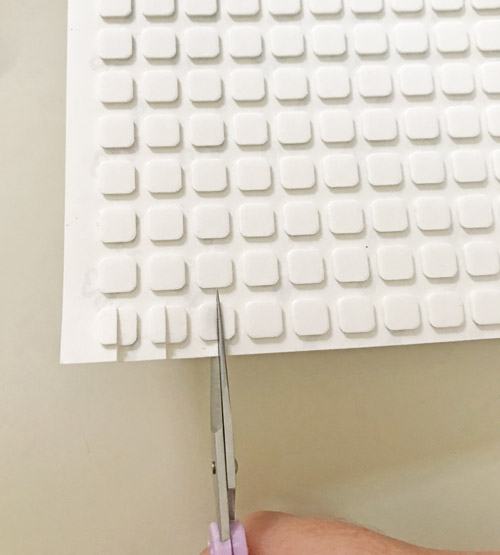
To adhere the filigree frame, I used Thin 3D Foam Squares White Mix cut into small strips using scissors or a craft knife to give a subtle dimension.
Cut a banner from white cardstock and die-cut the sentiment from gold cardstock. Adhere the banner and sentiment to the card using Thin 3D Foam Squares White Mix. For the sentiment, cut the Thin 3D Foam Squares White Mix into small strips.
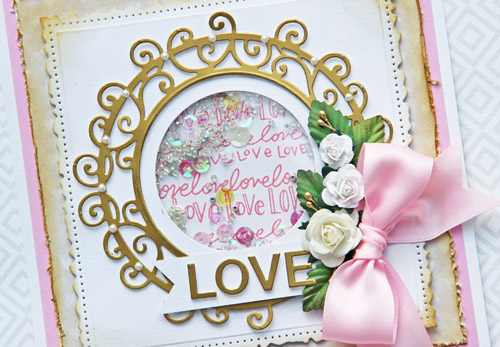
Finally, adhere the bow, leaves and mulberry flowers to the card using Adhesive Dots. Finish the card with self-adhesive pearls and voila…your Love Shaker card is done.

Wishing you happy crafting!
Hugs from Holland,
Yvonne
Creative Time: 75 minutes
Skill Level: Advanced Level
Materials Needed:
Scrapbook Adhesives by 3L®:
Crafty Foam Tape White
Thin 3D Foam Squares White Mix
E-Z ®Runner Grand Refillable Dispenser
Adhesive Dots
Home& Hobby:
Extreme Double-Sided Tape 1/8in
Others:
Etched Dies: Spellbinders Paper Arts® (Standard Circles Large, Miss You Swirl, Vintage Stitched Squares, Marisa Job, Nothing But Love stamp), Cardstock (white, pink, gold, patterned), Pearls, Ribbon, Mulberry Flowers and Leaves, Sequins and Beads, Mica, Brown Ink, Ink Blending Tool, Washi Tape, Tweezers and Paper Trimmer