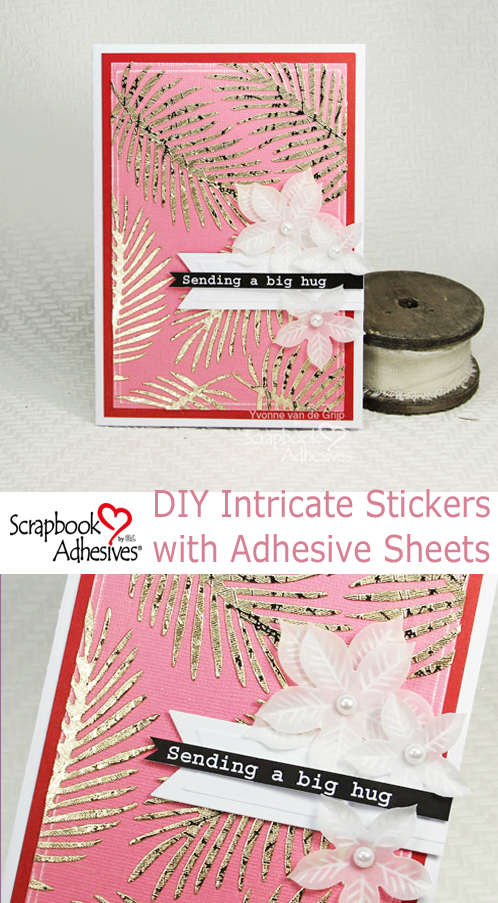
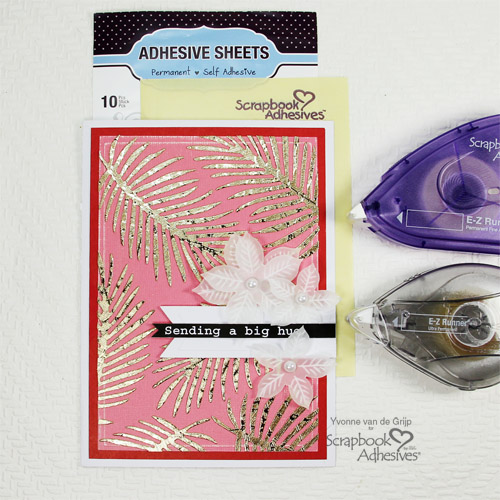
Hi everyone, Yvonne here with a sparkling Golden Leaves Card using Adhesive Sheets 4×6 inch to make gorgeous golden stickers to embellish your card.
Who can resist vellum? It’s very delicate to adhere but I will show you that the E-Z Runner® Permanent Fine Adhesive Dispenser is perfect for adhering without showing! Let’s get to it.
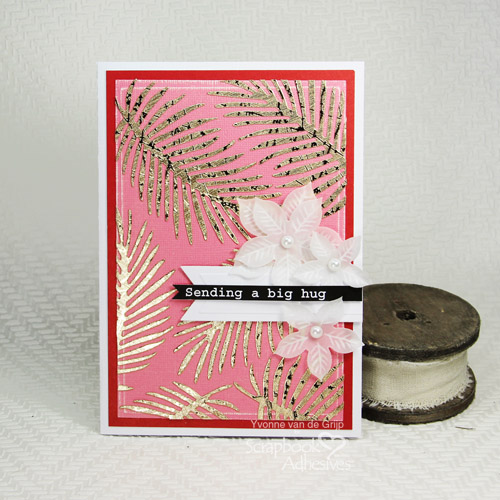
Golden Leaves Card Top Layers
Start with adhering the first layer of dark pink cardstock that is slightly smaller than the white card base using the E-Z Runner® Ultra Strong Refillable Dispenser.
For the second layer, I used a soft pink cardstock. Choose a rectangle die that is slightly smaller than the first layer. Die-cut, emboss and sand the embossed edges of the card layer. Put aside to make the gold leaves.
The Golden Details
Take a sheet of Adhesive Sheets 4×6 inch and remove the yellow liner. Place on the back of a gold mirror cardstock. Now you have made a beautiful sticker sheet that is ready to be die-cut.
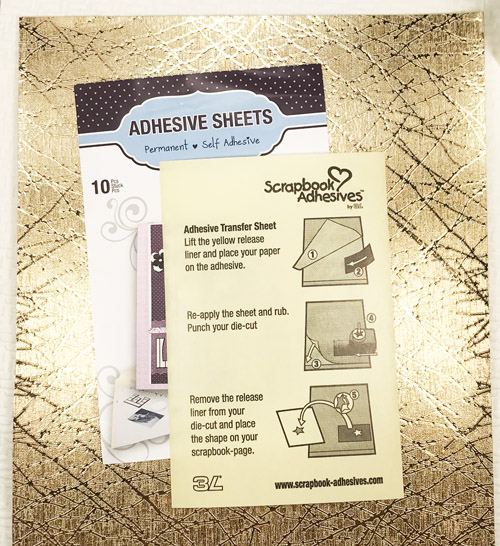
View a quick How to Use Adhesive Sheets video below.
Die-cut several leaves from the gold sticker sheet created. Place them on top of the soft pink layer to determine placement. Don’t forget to place a few off the edges.
After I was satisfied with the number of die cuts and placement, I removed the white liner from the back of each leaf and adhered down to the layer.
Trim off the excess from the edges with a pair of scissors. The reason why I didn’t adhere my top layer to the card base yet 🙂
Finally, adhere the top layer the card base using the E-Z Runner® Ultra Strong Refillable Dispenser.
Embellishing the Card
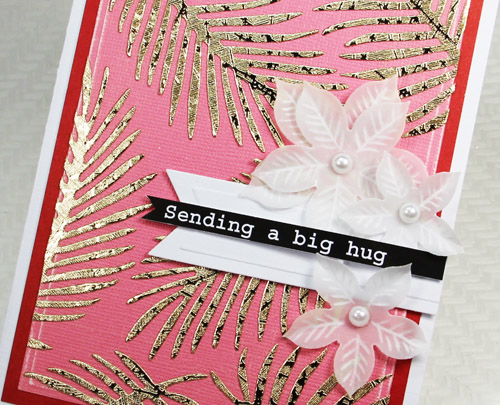
First die-cut a banner from white cardstock and adhere to the card using Crafty Foam Tape White.
Next die-cut and emboss several flowers from vellum. Curl the edges of the flowers using your fingers for dimension.

The best way to adhere these flowers to the card is with the E-Z Runner® Permanent Fine Adhesive Dispenser. The E-Z Runner® Permanent Fine Adhesive Dispenser is slightly opaque, but will dry clear over time! Next, add self-adhesive pearls to the flower centers.
For the final touch, cut a sentiment banner and adhere to the card using two tiny stripes cut from Crafty Foam Tape White.
And voila, your Golden Leaves card is ready! Wishing you happy crafting!
Hugs from Holland,
Yvonne
Creative Time: 40 minutes
Skill Level: Intermediate
Materials needed
Scrapbook Adhesives by 3L®
Adhesive Sheets 4×6 inch
E-Z Runner® Ultra Strong Refillable Dispenser
E-Z Runner® Permanent Fine Adhesive Dispenser
Crafty Foam Tape White
Other
Etched Dies: Spellbinders® Paper Arts (Palm Fronds, Cinch and Go Poinsettia, 5×7 Matting Basics B, Oh Happy Day, and Platinum 6 Die Cutting and Embossing Machine), Gold Mirror, White, Dark Pink, and Soft Pink Cardstock, Vellum, Self-adhesive Pearls, Sentiment Banner, Scissors, Paper Trimmer
Pin It!