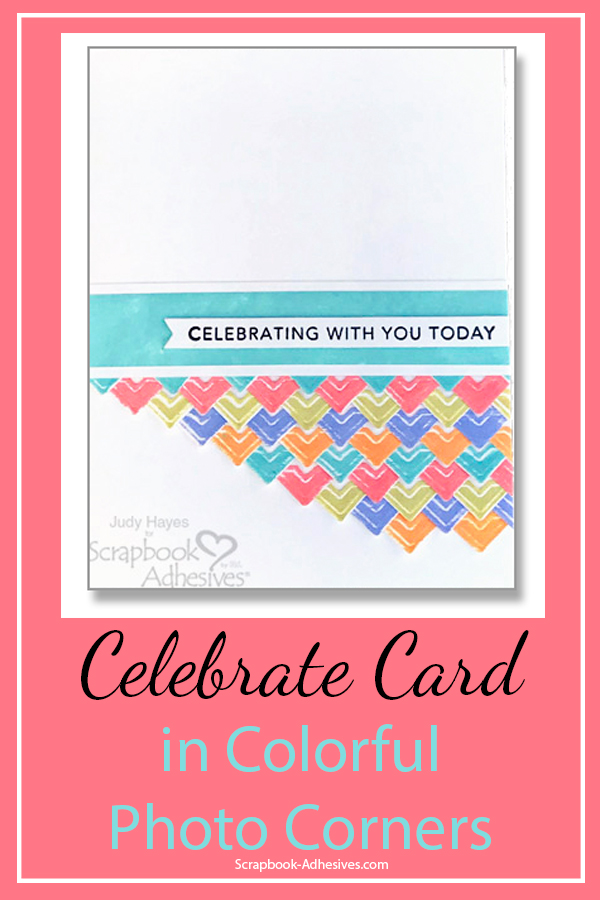
Hello! It’s Judy here today to share a Celebrate Card in colorful corners. How? The hint is Creative Photo Corners White! It’s easy to add color to them with ink and oh, is it colorful!
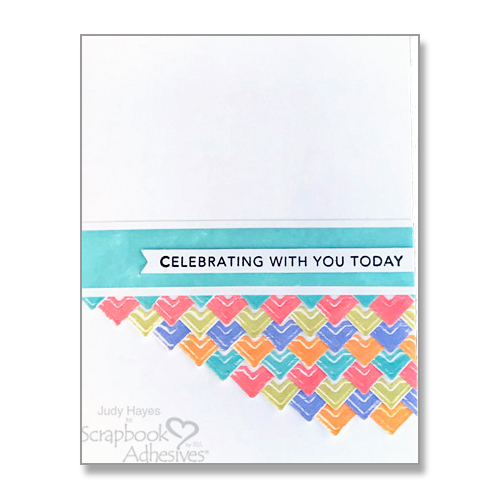
Celebrate Card with Colorful Corners
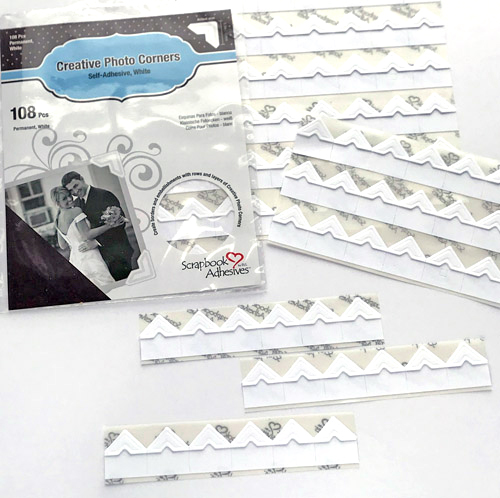
To make this card, cut white cardstock 5.5 x 8.5 inches and fold to form a 4.25 x 5.5-inch card. Cut Creative Photo Corners White sheets into strips.
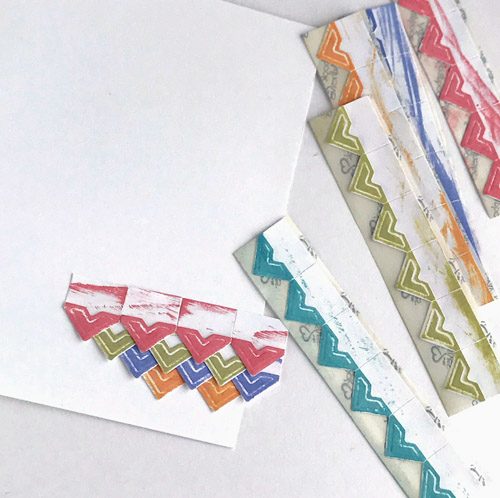
Colorful Corners Step Outs
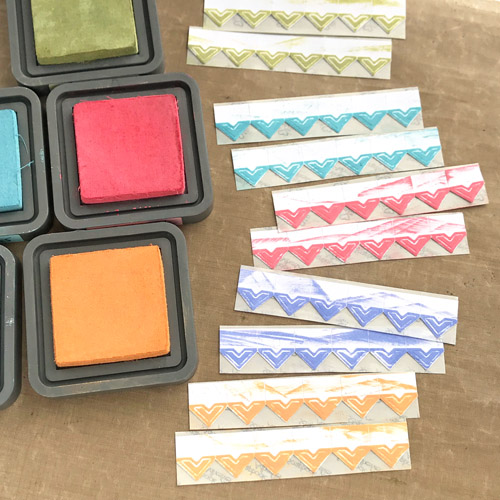
Apply ink by rubbing an ink pad directly over each strip of Creative Photo Corners White. Repeat with different colors of ink.
Line up the Colorful Corners
Place a line of Creative Photo Corners along the front edge of the card toward the bottom. Place another row to overlap it. Fasten the next color of photo corners offset over the first row, increasing by one.
Tip: if you fold the back liner to expose the adhesive on the square part, you can line up and adhere the entire row, and they stay straight. It’s also much faster than placing the corners individually.
Repeat with other colors to make 10 rows of photo corners, two rows of each color.
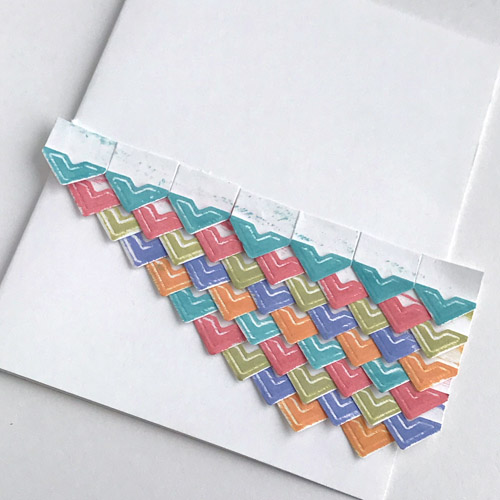
Use a paper trimmer or scissors to trim photo corners even with card edges.

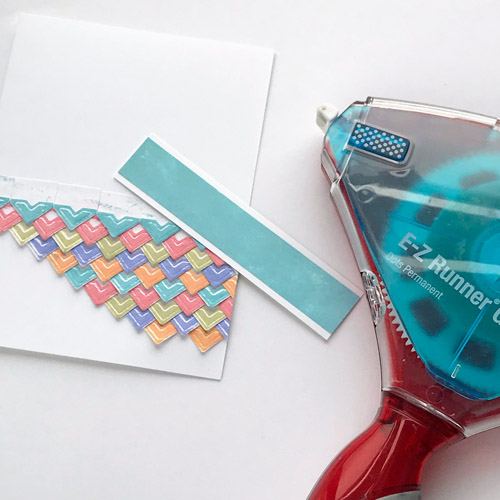
Finishing Touches
Cut white cardstock pieces to ¾-inch and 1-inch wide, and long enough to fit across the card. Rub ink over the ¾-inch piece. Adhere it to the white piece using E-Z Runner® Grand Refillable Dispenser filled with E-Z Runner® Grand Permanent Dots Refill.
View a quick video on How to Use and Refill E-Z Runner® Grand Dispensers.
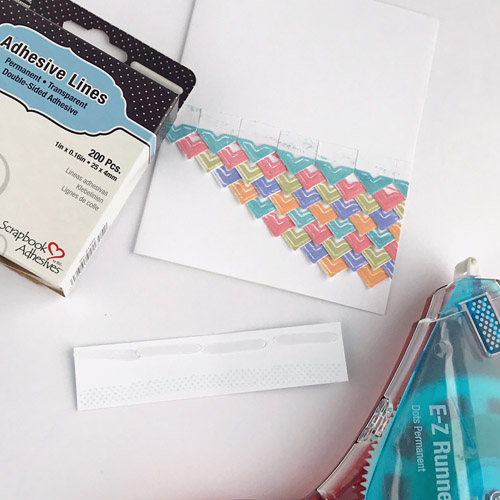
Apply Adhesive Lines to the back of the strip along the top edge. Use E-Z Runner® Grand Refillable Dispenser to apply Grand Permanent Dots Refill adhesive along the bottom edge. Adhesive Lines have a slight dimension. By using them at the top, the band is raised slightly to balance lower edge which is layered over the thickness of the photo corners.
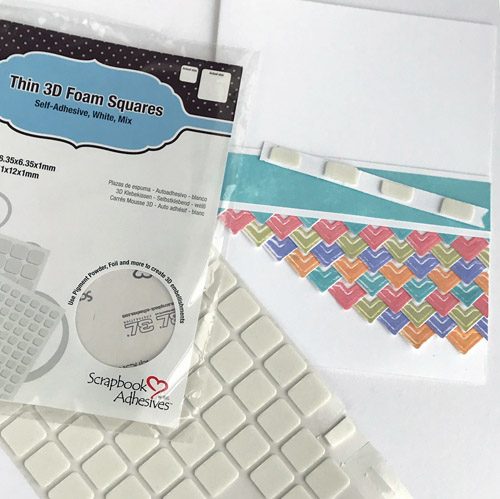
Stamp a verse and use a matching die to cut into a strip of white cardstock. Cut a large Thin 3D Foam Squares White Mix in half. Apply to the back of the verse.
Fasten the verse across the contrast band.
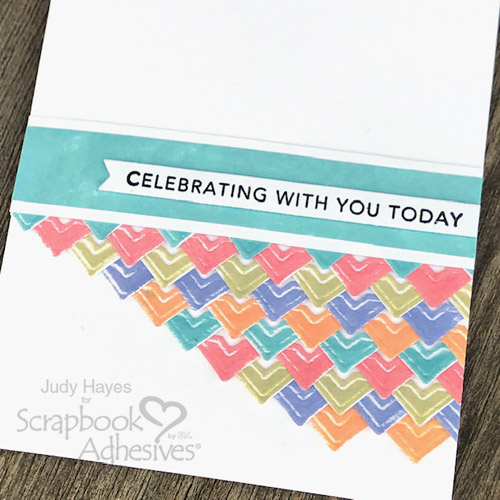
This card can easily be used for another occasion by simply changing the verse. Be creative and try different colors! For an even quicker card, use photo corners without adding ink. There are a total of six Creative Photo Corners to choose from Gold, Silver, Kraft, Black, Ivory, and White. If you are undecided, don’t worry there’s a pack of Creative Photo Corners Mix Pack.
Thanks for visiting!
Judy Hayes
Creative Time: 30 minutes
Skill Level: Beginner
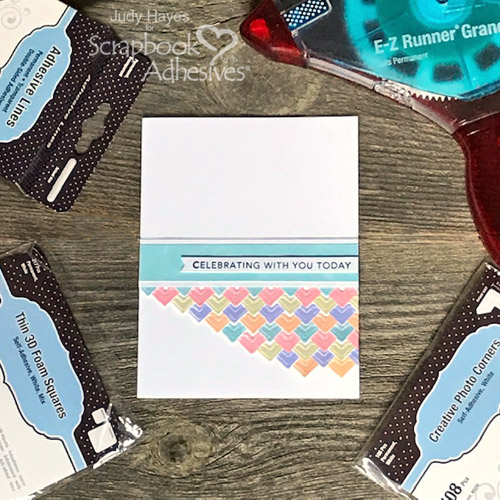
Materials Needed
Scrapbook Adhesives by 3L®
Creative Photo Corners White
Adhesive Lines
E-Z Runner® Grand Refillable Dispenser
E-Z Runner® Grand Permanent Dots Refill
Thin 3D Foam Squares White Mix
Other
Ink: Tsukineko (Versafine Onyx Black), Ranger Ink (Distress Oxides in Tumbled Glass, Worn Lipstick, Shaded Lilac, Dried Marigold, and Shabby Shutters); Clear Embossing Powder: Ranger Ink; Craft Die: Taylored Expressions (Simple Strips Background and Simple Strips Die); White Cardstock
Pin It!