
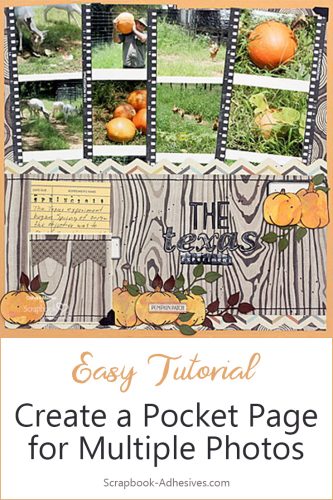
Hi, Connie here! When I scrapbook a page, I like to include ALL the photos of that event. Today I have a scrapbook page with a pocket designed to hold a lot of photos. That is where the pocket comes in.
When creating a pocket to hold photos you need strong adhesives, Scrapbook Adhesives by 3L® to the rescue!
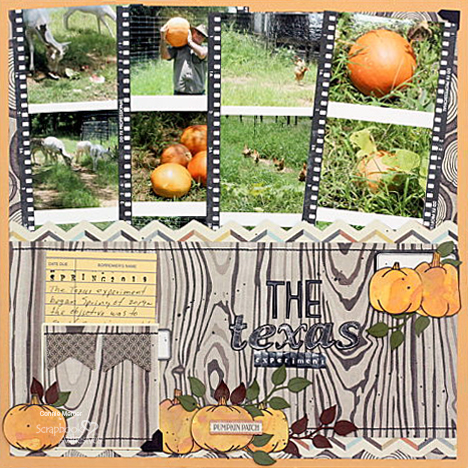
Making a Pocket Full of Photos
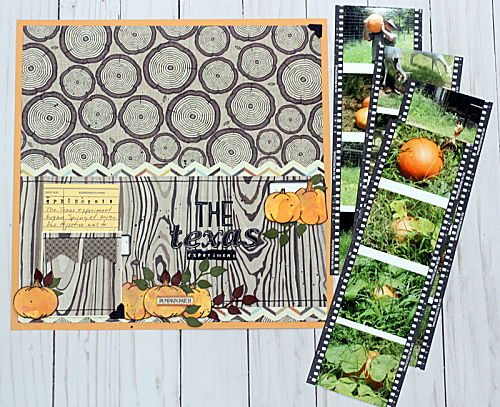
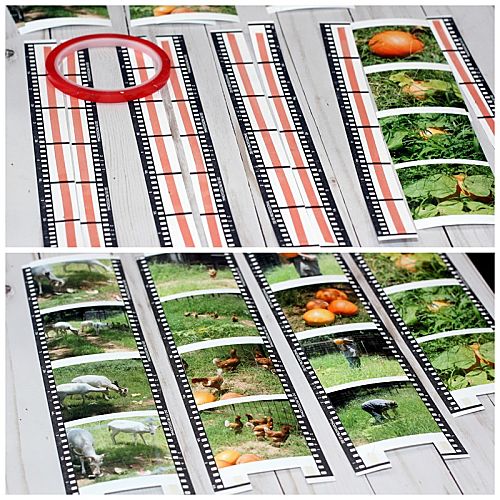
The filmstrip idea is perfect for showcasing many photos on a page. 16 photos tell my story!!
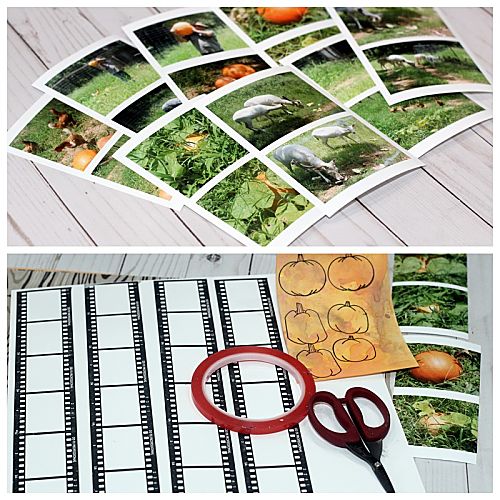
There are two ways to create the filmstrip look: use a stamp like I have, or with cardstock and a white gel pen.
To use the latter method, double mat photos on white and black cardstock. With a white gel pen create the filmstrip slots on the black cardstock.
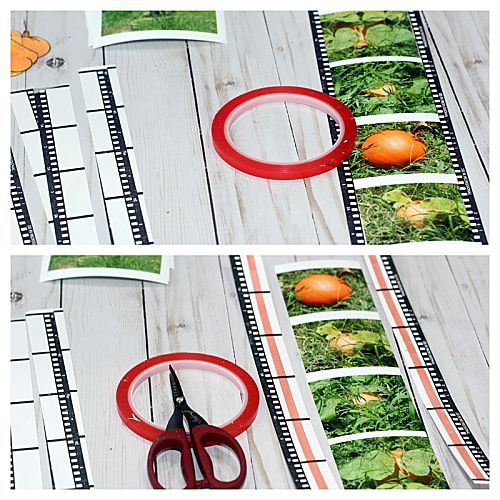
I stamped four images with a filmstrip stamp and black ink. Then cut the stamped design down the middle to create a left side strip and a right side strip. With the Extreme Double-Sided Tape 1/4in., add a line of tape on each side. Refer to the photos to show how the photo filmstrips come together.
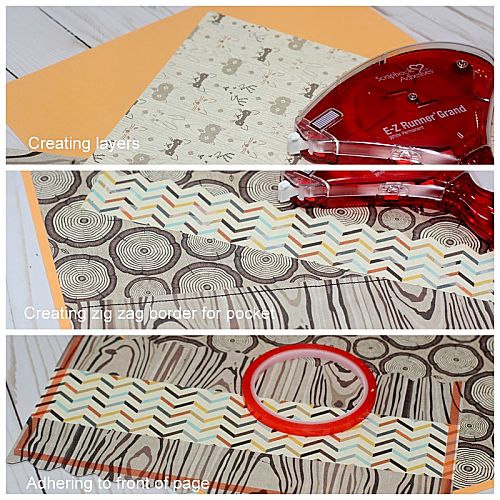
Create the Pocket Page
The next step is to create the pocket page. Layer patterned paper along with coordinating cardstock to create the scrapbook page front with the E-Z Runner® Grand Refillable Dispenser. Add the zig-zag border to the top and bottom of the pocket. Using the Extreme Double-Sided Tape 1/4in. to both sides and the bottom of the pocket. Adhere to page.
Take a few 3D Foam Squares White in Regular size to adhere to the pumpkins to the front of the pocket.
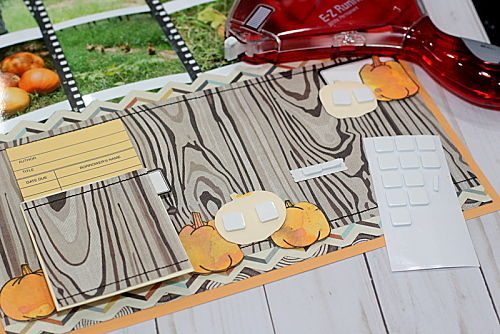
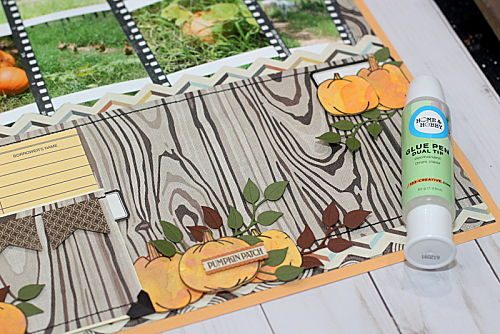
Apply the Dual Tip Glue Pen to adhere the leaves to the pumpkins along with the title of the page. Add stickers to enhance the clusters of pumpkins.
Grab and add a vintage library card and envelope for the journal spot. You need a special place to tell the story.
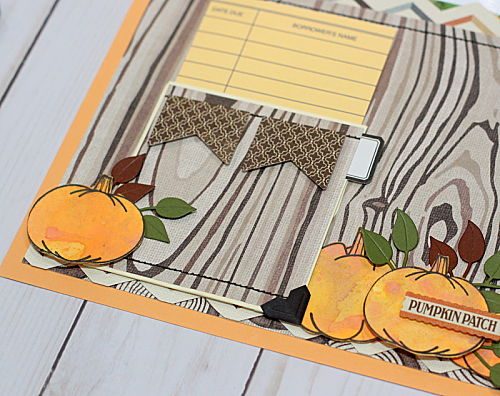
Accent a corner of the envelope with one of the Creative Photo Corners Black. I hope I’ve inspired you to scrap enough photos to tell your story even if that is 16 photos.
Creative Time: 35 mins
Skill Level: Intermediate
Materials Needed:
Scrapbook Adhesives by 3L®
E-Z Runner® Grand Refillable Dispenser
Creative Photo Corners Black
3D Foam Squares White in Regular size
Home Hobby by 3L®
Dual Tip Glue Pen
Extreme Double-Sided Tape 1/4in.
Other
Patterned Papers: Authentique; Stickers: Bella Blvd., American Crafts, Recollections and Idea-ology; Craft Dies: Elizabeth Crafts; Stamps: Darkroom Door and Joy Clair; Ink: Tsukineko (Versa Clair Fine in Noctune)
Save it to Pinterest!
Visit our Website and Blog!
Sign up for our Newsletter so you never miss a contest or giveaway!


