
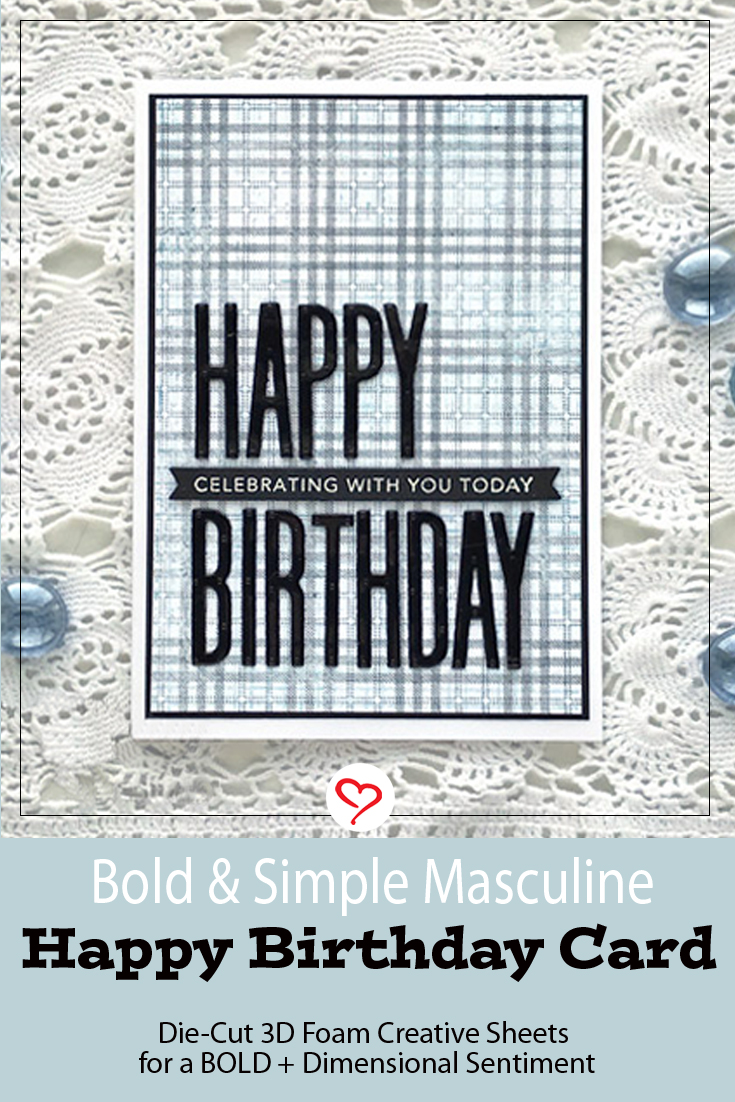
Hey crafty friends! It’s Judy here today with a bold and simple masculine birthday card. It features glossy letter die cuts made dimensional with 3D Foam Creative Sheets Small Black. I’m super happy with how they turned out! I’ve stamped the plaid background but it could easily be made with printed paper.
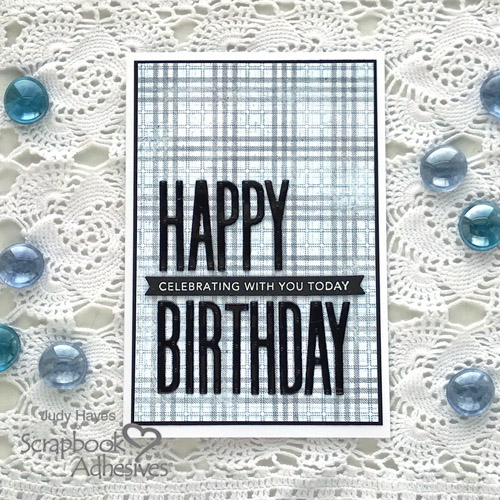
Make it Bold and Simple
To make this card, start by stamping the plaid background. Ink plaid stamp with Cool Graphite ink. Stamp on white card stock.
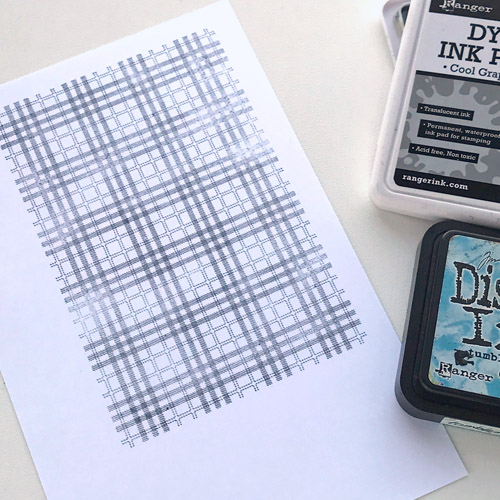
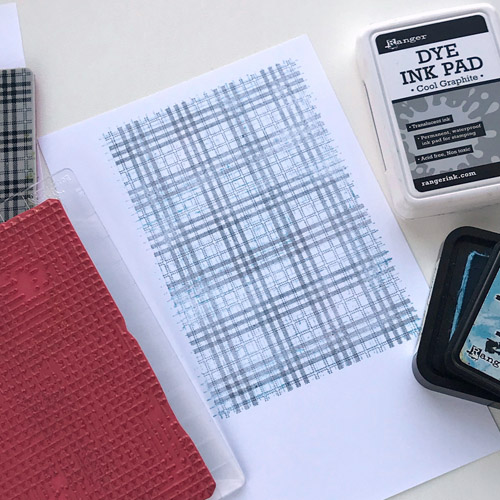
Ink graph stamp with Tumbled Glass ink and stamp over gray plaid. Ink graph stamp again. Stamp over plaid again with stamp slightly offset to the previous stamping. Trim to 3⅞ x 5¾-inch. Set aside for ink to dry while die-cutting letters.
Bold Happy Birthday
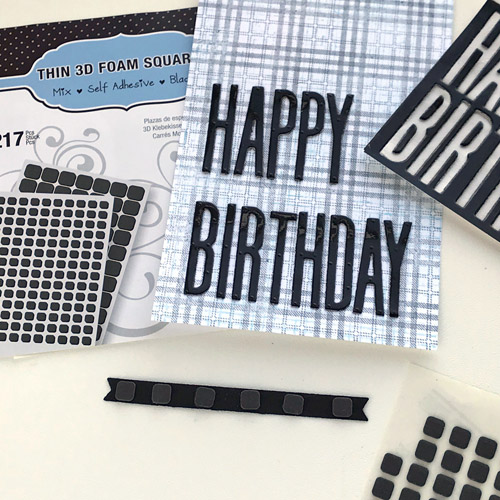
Cut glossy black cardstock to 3¼ x 4-inch. Cut a sheet of 3D Foam Creative Sheets Small Black to the same size. Peel the black liner and place glossy black cardstock on 3D Foam (glossy side up).
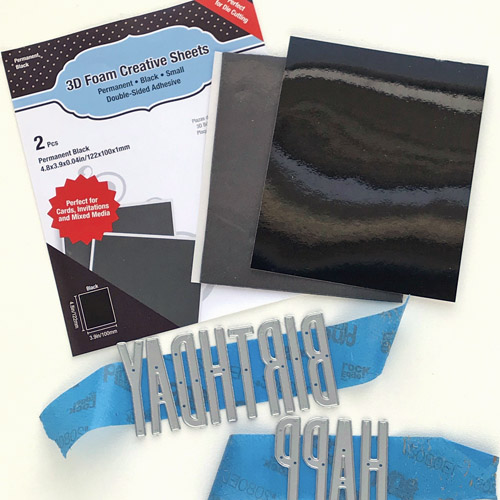
Arrange letter dies to spell BIRTHDAY. Place a piece of low tack tape across letters to hold them in position. Align on glossy black cardstock attached to 3D Foam Creative Sheets Small Black. Put through die-cutting machine 2-3 times to get a good cut. The white liner on 3D Foam Creative Sheets Small Black may not cut through and that’s okay! The letters will stay in place and easily peel off when ready to apply to card.
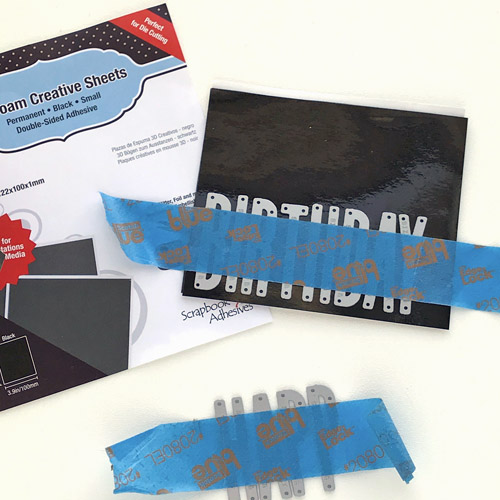
Leave BIRTHDAY letter dies in place except for Y. Add it to dies to spell HAPPY. Apply a strip of low tack tape across letters. Position above BIRTHDAY on glossy black cardstock. Use a die-cutting machine to cut letters with 2-3 passes through the machine.

Carefully loosen the end of the tape and peel back the tape with dies.
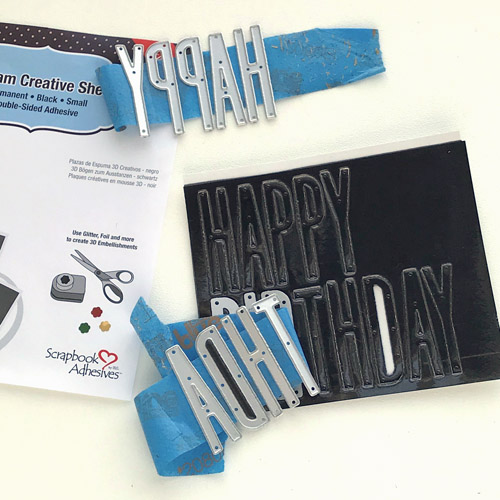
Remove any pieces that stick in dies and put back in place. After letters are removed, use the negative sheet for another card. Perhaps a Wear Your Adhesive on the Outside concept by taking off the top liner, adding embossing powder and heat emboss it. Or add glitter. Or the Metallic Transfer Foil Sheet.
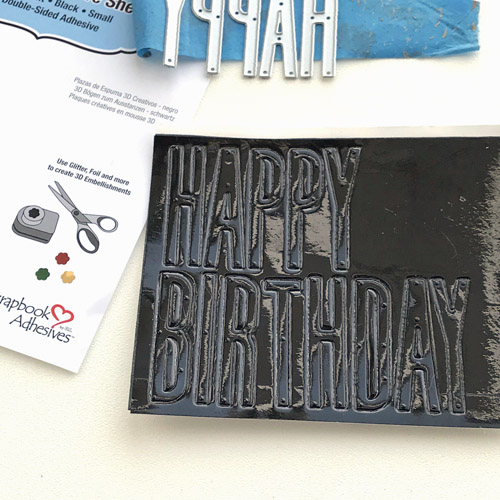
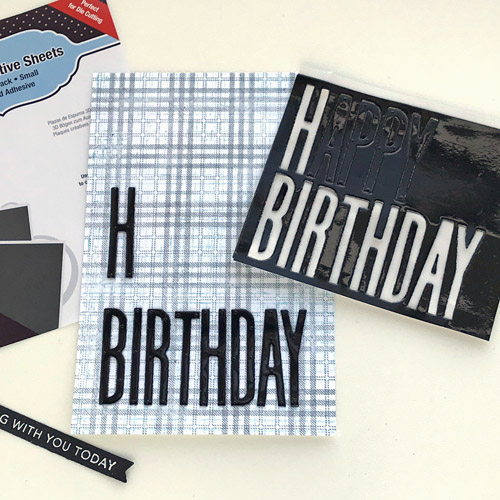
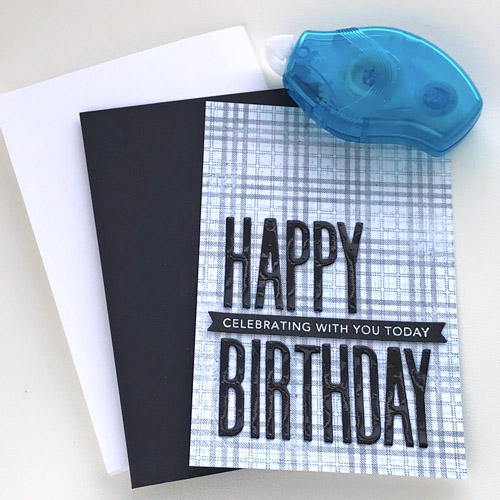
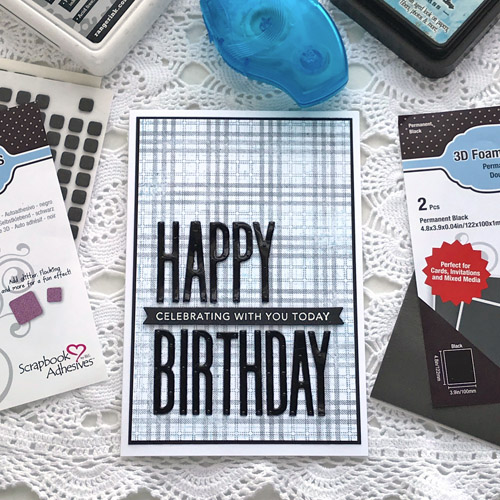
Align BIRTHDAY to the lines of the stamped plaid paper near the lower edge. Allow space for greeting strip between HAPPY and BIRTHDAY. Then place HAPPY on plaid paper.
Adding a Greeting
Stamp Simple Strips greeting on black cardstock using Versamark ink. Heat emboss with white embossing powder. Die-cut with Simple Strips die. Attach small foam squares from Thin 3D Foam Squares Black Mix to the back of the strip. Attach to plaid paper.
Creating the Card Base
Form 4¼ x 6-inch side-fold card from white cardstock. Cut 4 x 5⅞-inch black cardstock mat. Use the E-Z Runner® Petite Permanent Dots Refillable Dispenser to fasten the plaid paper to back mat and then to the card front. That finishes it!
Thanks for Visiting!
Judy Hayes

Creative Time: 30 minutes
Skill Level: Intermediate
Materials Needed
Scrapbook Adhesives by 3L®
- 3D Foam Creative Sheets Small Black
- Thin 3D Foam Squares Black Mix
- E-Z Runner® Petite Permanent Dots Refillable Dispenser
Other:
Imagine Crafts/Tsukineko Versamark Ink Pad; Ranger Distress Tumbled Glass Ink Pad, White Embossing Powder, Cool Graphite Ink Pad; Sizzix Thinlets Tim Holtz Alphanumeric Classic Upper Dies; Stampers Anonymous Tim Holtz Perfect Plaids, Graph & Croc Stamps; Taylored Expressions Simple Strips Background Stamp, Simple Strips Die; Cardstock – White, Black, Glossy Black
Save It to Pinterest!
Visit our Website and Blog!
Sign up for our Newsletter so you never miss a contest or giveaway!


By Verna Angerhofer January 13, 2020 - 3:23 pm
Cool idea of making a sentiment that way. I love the card you created doing that.
By Judy Hayes January 21, 2020 - 10:49 am
Thank you so much!