
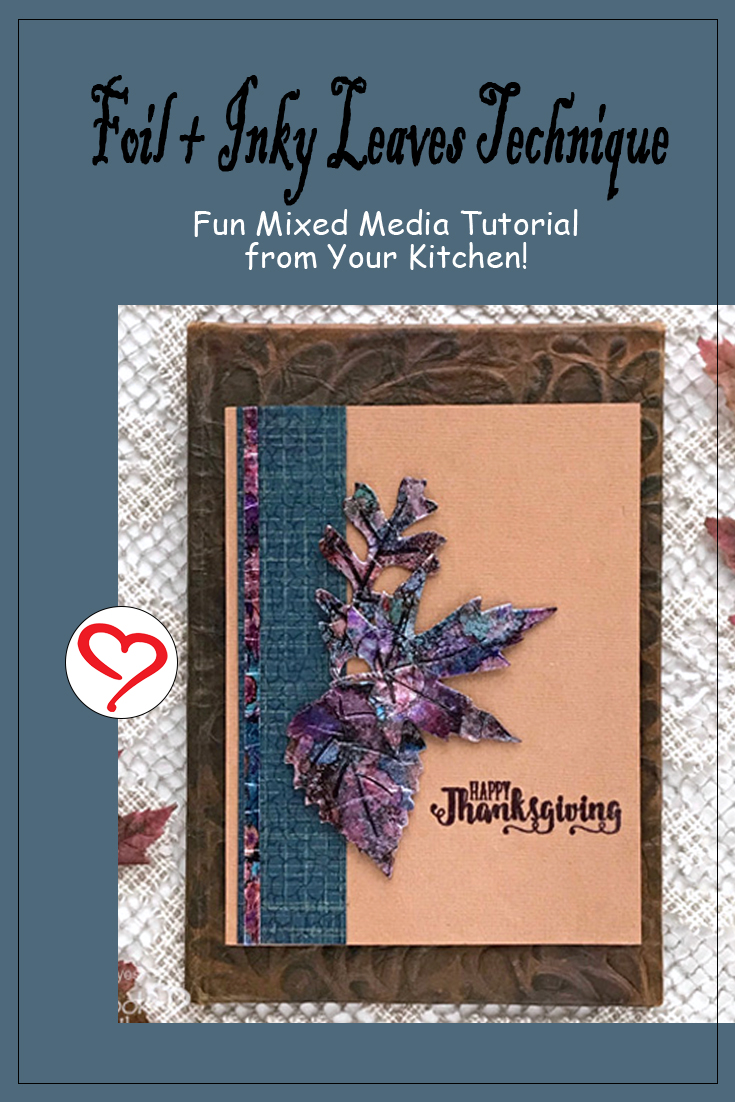
Hello crafty friends! Judy here today. As I put together this Thanksgiving card, the wind was whipping leaves everywhere. Brown crispy leaves not nearly so pretty as the foil + inky leaves on this card!
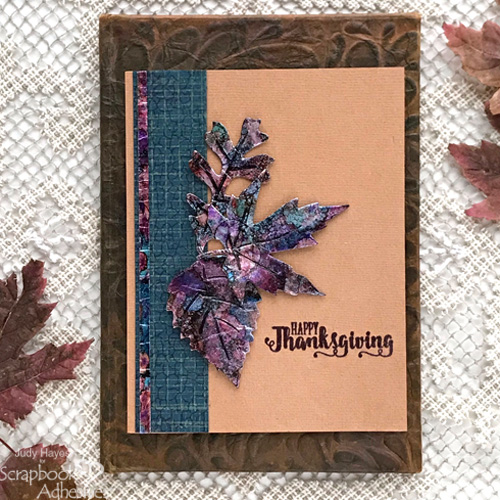
The foiled leaves are made with aluminum foil from my kitchen! Can you believe it? Let me show you how.
Foil + Inky Leaves Technique
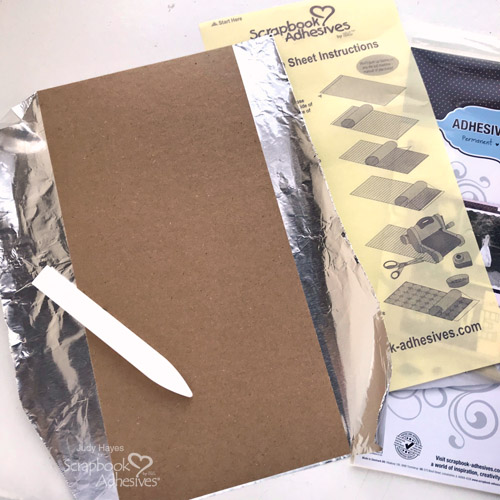
Attach Adhesive Sheets 6×12 inch to the back of a 6 x 12-inch Kraft cardstock. I chose Kraft because I have a lot of it. Black cardstock is also a good choice.
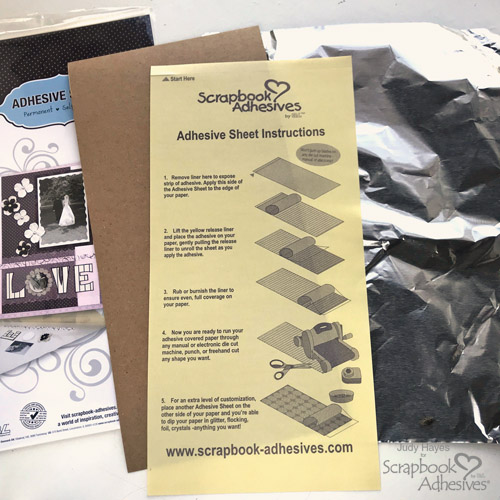
Remove the liner and place the adhesive side down on aluminum foil. I find it easier to keep foil smooth this way.
Next, add various colors of alcohol inks and blend them with a felt blending tool. Mist rubbing alcohol over the inks for a mottled pattern. Repeat these steps until you get your desired color.
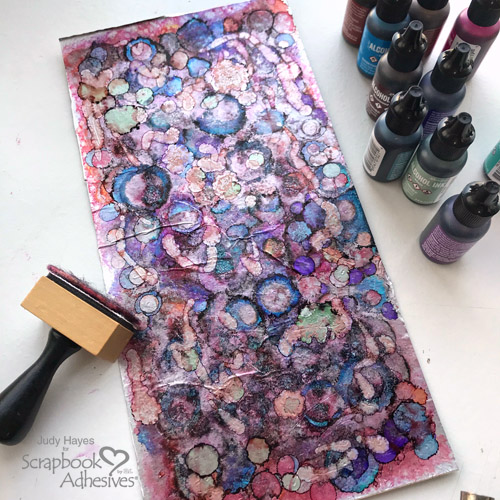
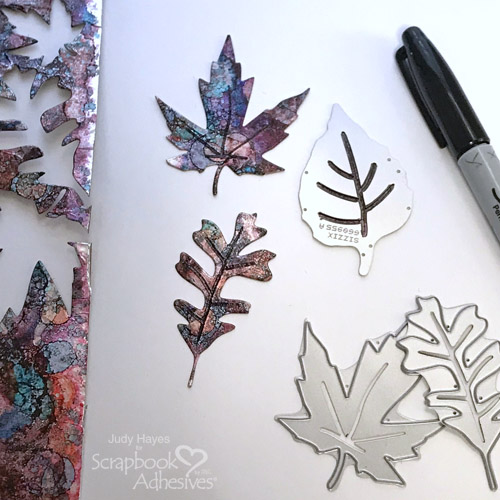
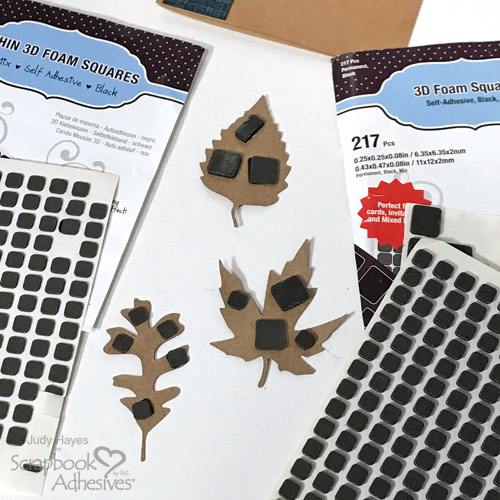
Use a die-cut machine and leaf dies to die cut three different leaf shapes with the foiled paper. With the shape still in the die, trace the vein lines with a black permanent marker using the die as a stencil.
Card Panel Details
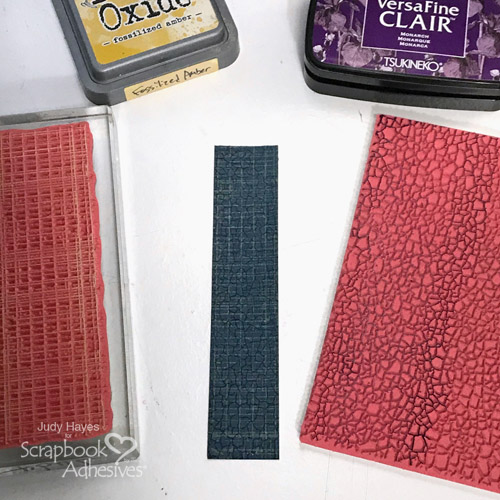
Ink grid design stamp with Fossilized Amber Oxide ink. Stamp on the 1.125 x 5.5-inch piece blue calypso cardstock strip. Re-ink stamp and stamp again to continue pattern over the entire piece. Apply Monarch ink to craze stamp. Stamp over grid pattern.
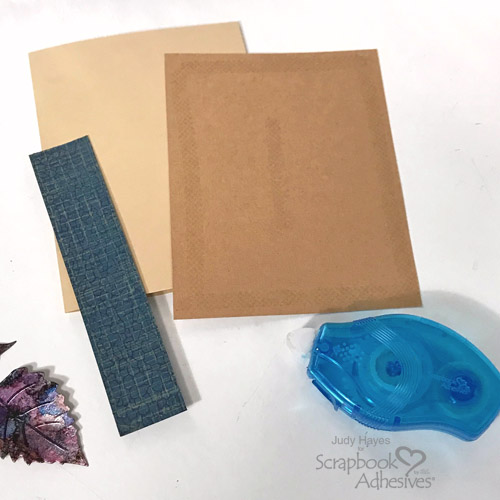
Form into a 4.25 x 5.5-inch card base with a buff-color cardstock. For a card panel, cut a light brown paper to 4.25 x 5.5 inches. My light brown paper was not heavy enough to make the card but I wanted to use this color. Use E-Z Runner® Petite Permanent Dots Refillable Dispenser to secure the light brown paper to the card front.
Card Front Embellishing
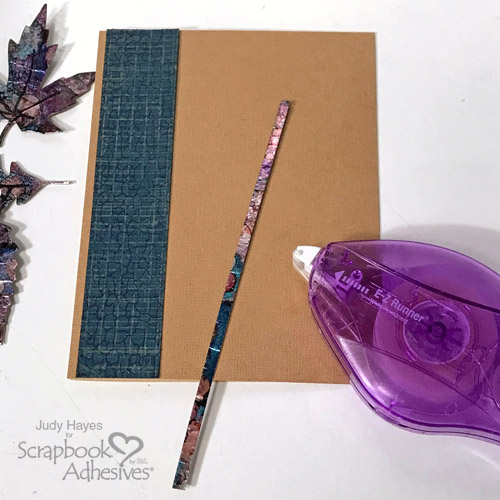
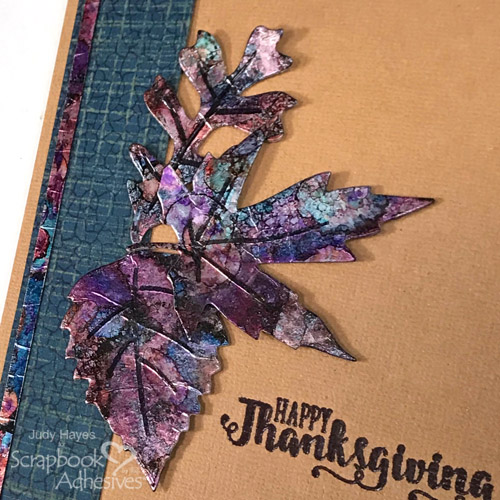
Attach the stamped strip near the left edge using E-Z Runner® Petite Permanent Dots Refillable Dispenser. Cut about a narrow strip of 0.125-inch wide x 5.5-inches long from the alcohol inked foil paper.
Use E-Z Runner® Micro Refillable Dispenser to apply adhesive to the back of the strip. Adhere to the card panel near the edge of the stamped blue calypso border.
Place Adhesive Squares on the back of leaves. I used 3D Foam Squares Black Mix on the maple and solid leaf (not sure what kind it is!) and Thin 3D Foam Squares Black Mix on the oak leaf. Arrange and attach the leaves to the card.
Stamp the sentiment with Monarch ink and heat emboss with clear embossing powder.
Thanks for Visiting!
Judy Hayes
Creative Time: 40 Minutes
Skill Level: Intermediate
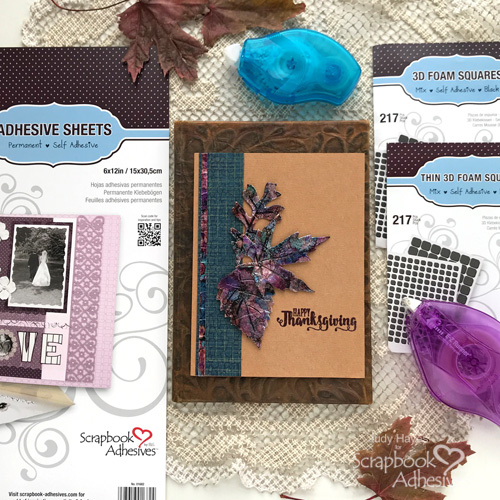
Materials Needed
Scrapbook Adhesives by 3L®
- Adhesive Sheets 6×12 inch
- 3D Foam Squares Black Mix
- Thin 3D Foam Squares Black Mix
- E-Z Runner® Petite Permanent Dots Refillable Dispenser
- E-Z Runner® Micro Refillable Dispenser
Other
Craft Dies: Sizzix/Tim Holtz (Fall Foliage); Stamps: Stampers Anonymous/Tim Holtz (Craze & Planks, Mixed Media) and Taylored Expressions (Bushel of Blessings Stamp Set); Ink: Ranger Ink ( Distress Oxide Ink in Fossilized Amber) and Tsukineko (Versafine Clair in Monarch); Embossing Powder: Ranger Ink; Alcohol Inks: Ranger Ink (Boysenberry, Glacier, Laguna, Monsoon, Moss, Rosewood, Sienna, and Alloy Mined); Cardstock: Bazzill Basics Paper (Blue Calypso); Kraft, Buff and Tan Cardstock; Aluminum Foil; Black Permanent Marker
Save It!
Visit our Website and Blog!
Sign up for our Newsletter so you never miss a contest or giveaway!


