
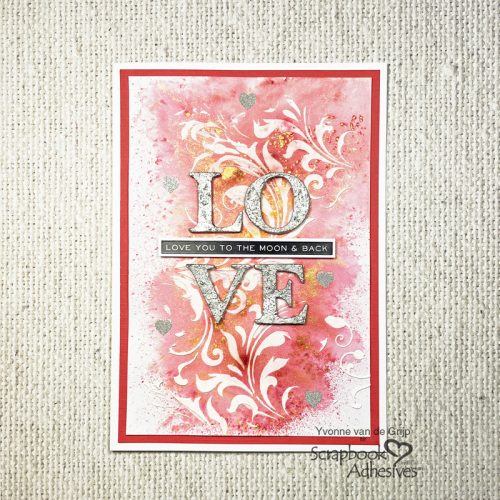
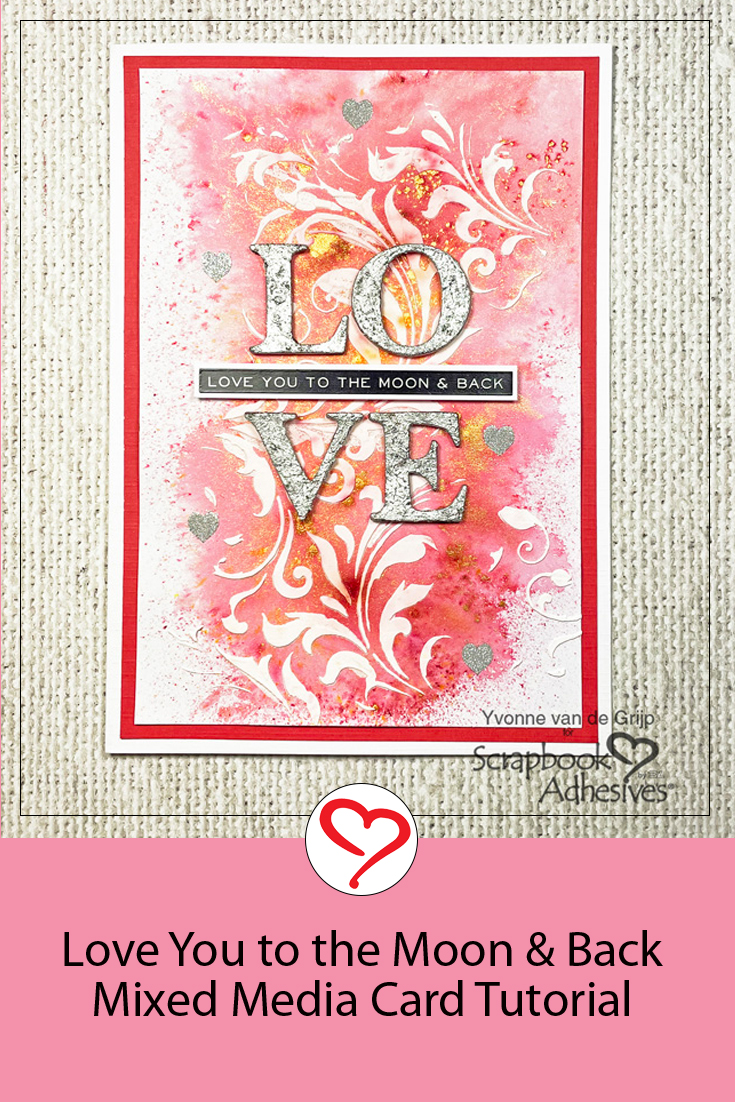
Hi everyone, Yvonne here with Love You to the Moon & Back Valentine’s Day inspiration. A card is such a great way to express your feelings to a loved one and a handmade card is even more special!

A dimensional element makes a card extra special and is super easy to create with 3D Foam Products. And of course no Valentine’s Day card without hearts which were created using a technique called Wear Your Adhesive on the Outside. Shall we get crafty?
Making the Top Card Panel
First Trim a piece of white cardstock to a rectangular size. Then sprinkle upon some pigment powder and use a mister (filled with plain tap water) and spray upon the cardstock so the colours will flow over the card panel.
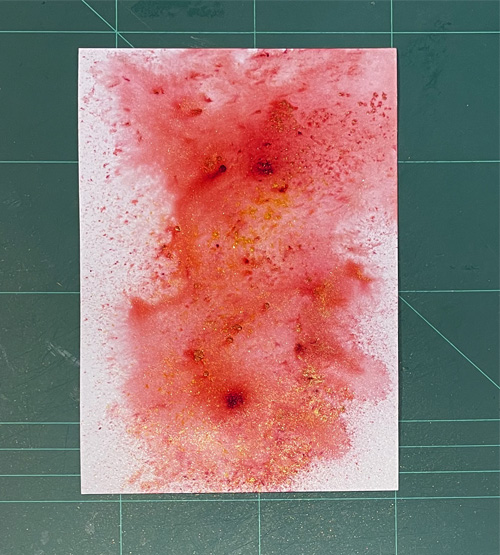
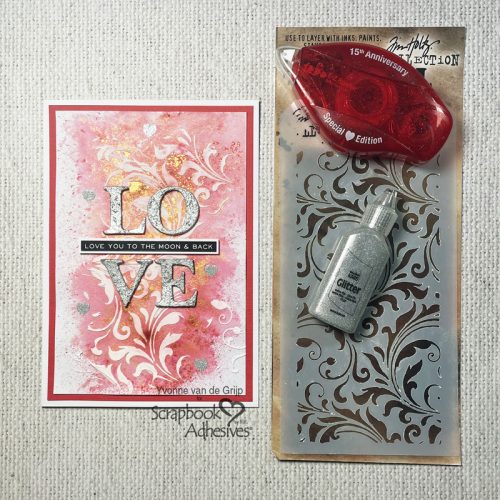
Since it’s a Valentine’s Day card of course I used a red pigment powder! Now let dry. If you want to speed up the drying, use a heat tool. When fully dried, use a flourish stencil and structure paste to create a dimensional pattern on your card panel. Again let dry thoroughly.

Making the Card Base
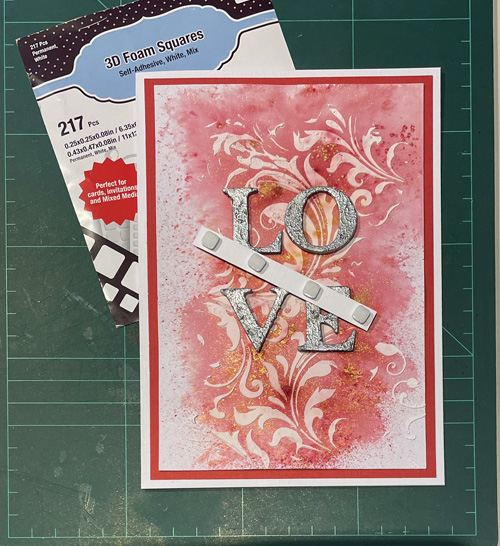
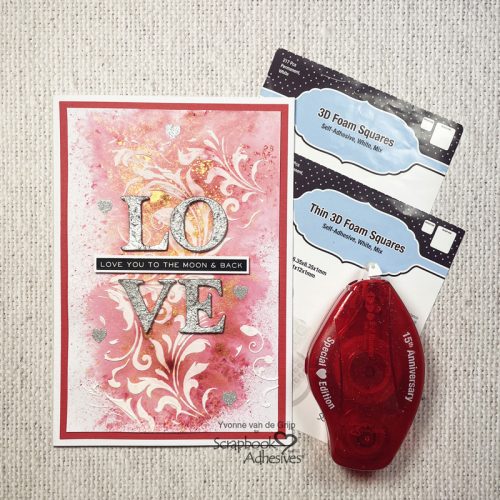
Layer the card panel onto a soft red panel using the E-Z Runner® Permanent Strips Refillable Dispenser. Then adhere onto a white card base again with the E-Z Runner® Permanent Strips Refillable Dispenser.
Embellishing the Valentine’s Day card
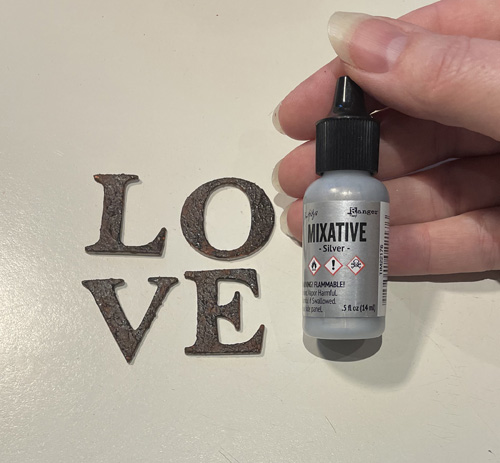
With Valentine’s Day in mind, I used the chipboard “love.” First, I gave them a little support by using paste. The paste color is not important once it dries, it will be colored with silver alcohol ink. To apply the ink, I used a piece of cloth to dab on the letters.
Using Thin 3D Foam Squares White Mix, I secured the letters to the card panel. Next, add the Love You to the Moon & Back sentiment sticker onto a piece of white cardstock strip with Thin 3D Foam Squares White Mix.
Wear Your Adhesive on the Outside
For the finishing touch, I accented some E-Z Runner® Hearts Refillable Dispenser onto the card. Then rubbed silver glitter over the hearts with my fingers. Tap off any excess and done! This technique, making your adhesive shine, is called Wear Your Adhesive on the Outside.
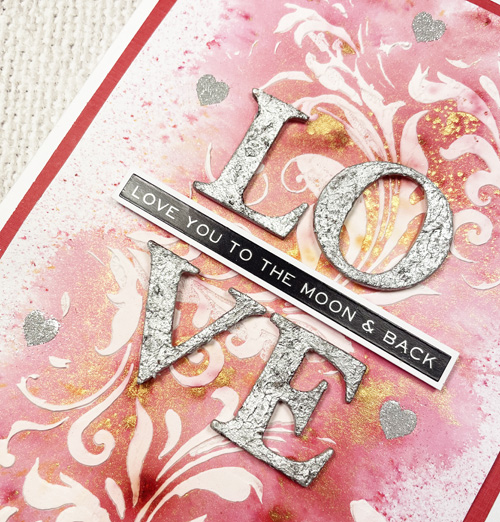
Voila….cute little hearts to finish your Valentine’s Day card!
I hope you enjoyed this Love You to the Moon & Back card tutorial. It is lots of fun creating your own Valentine’s Day card!
Yvonne van de Grijp
Creative Time: 60 minutes
Skill Level: Intermediate
Materials needed:
Scrapbook Adhesives by 3L®
E-Z Runner® Permanent Strips Refillable Dispenser
3D Foam Squares White Mix
Thin 3D Foam Squares White Mix
E-Z Runner® Hearts Refillable Dispenser
Other
Cardstock (White, Red); Etched Dies; Pigment Powder (Fabika Decoru Magic Paint: Rose with Gold); Structure Paste; Stencil (Tim Holtz: Flourish); Alcohol ink (Tim Holtz: Mixative Silver); Sentiment (Tim Holtz: Metallic Stickers: Quotations); Spatula; cloth; Paper Trimmer; Tweezers; Silver Glitter
Save to Pinterest!
Visit our Website and Blog!
Sign up for our Newsletter so you never miss a contest or giveaway!


