You are in our US store • Switch to Europe store

Pastel Love Card

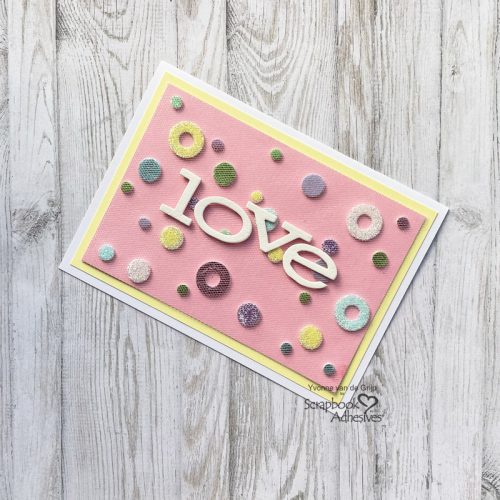
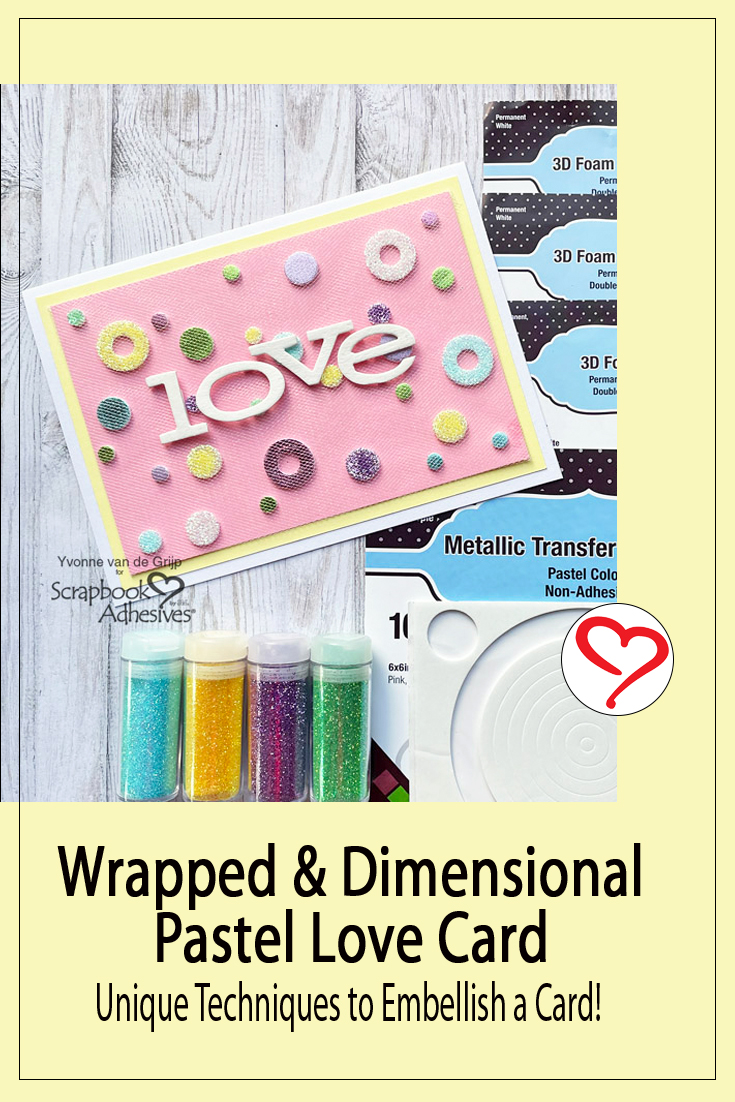
Hi everyone, Yvonne here with a Pastel Love Card. With Valentine’s Day coming up this is a super fun and fairly easy-to-make card. I’ll share some unique ways to embellish the card. So follow along!
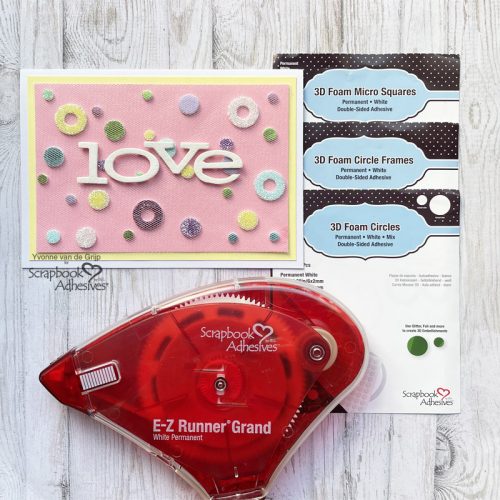
Pastel Love Card by Yvonne van de Grijp for Scrapbook Adhesives by 3L

Wear Your Adhesive on The Outside

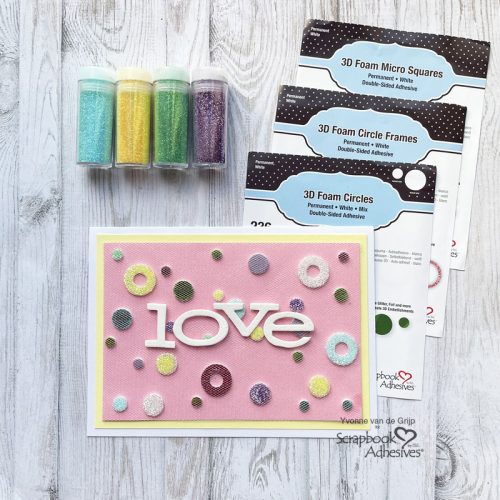
Start by trimming a piece of pink cardstock to a rectangular size for the top card panel of the Pastel Love Card. Then a combination of 3D Foam Circle Frames White and 3D Foam Circles White Mix are randomly placed on the card panel.
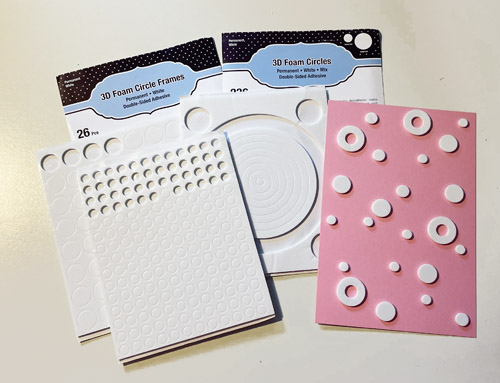
Pastel Love Card by Yvonne van de Grijp for Scrapbook Adhesives by 3L

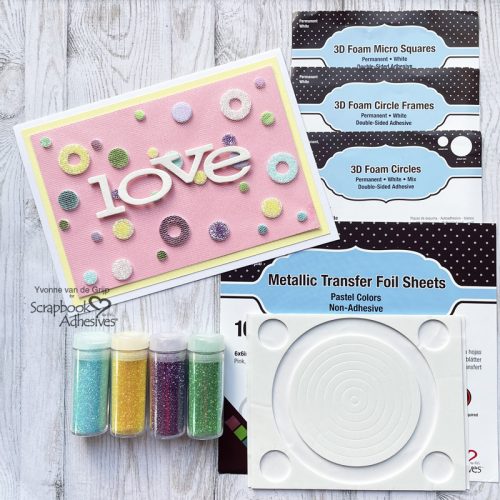
Remove the liner from one of the 3D Foam Circles. Rub a piece of foil from the Metallic Transfer Foil Sheets Pastel Colors (with the colored side facing up) onto the circle. Peel the Metallic Foil off to reveal the color. Repeat with several colors from the Metallic Transfer Foil Sheets Pastel Colors.

For a fun effect, I added glitter to some of the 3D Foam Circles White Mix. Remove the liner, and apply the glitter over the exposed adhesive. Make sure the glitter has securely adhered. Shake off excess.

This type of technique is known as Wear Your Adhesive on the Outside. It is taking the adhesive from between the layers and showcases them as an embellishment. A wonderful way to make the most of your adhesive!

Wrap the Card Panel

For another unique technique, let’s wrap the dotted top card panel with a piece of tulle! Cut a size slightly larger than the top card panel of the Pastel Love Card.
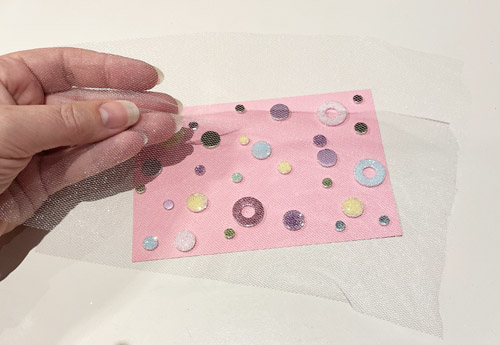
Pastel Love Card by Yvonne van de Grijp for Scrapbook Adhesives by 3L

Flip the top card panel to its back. of the top card panel facing up. Run the E-Z Runner Grand Refillable Dispenser along the edges of the panel.
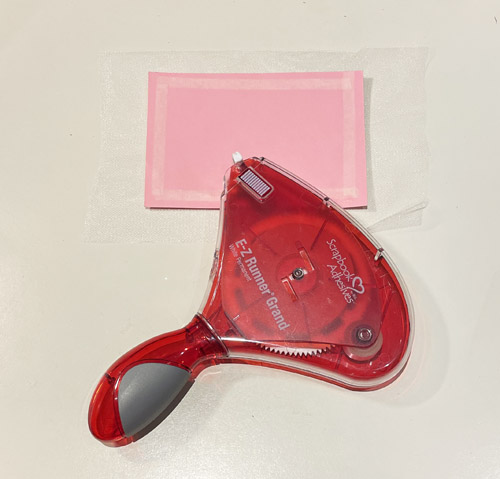
Pastel Love Card by Yvonne van de Grijp for Scrapbook Adhesives by 3L

Carefully fold the tulle around the edges and on top of the adhesive. Press down to secure as shown in the picture.
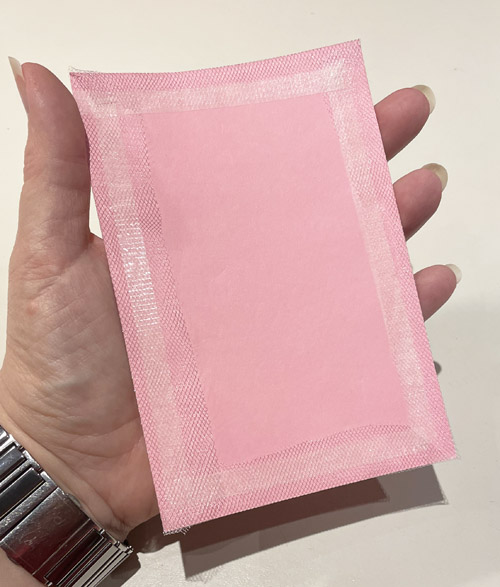
Pastel Love Card by Yvonne van de Grijp for Scrapbook Adhesives by 3L

Making the Card Base

Adhere the wrapped card panel to a yellow mat. Use the E-Z Runner Grand Refillable Dispenser to adhere the layers to the white card base of the Pastel Love Card.

Adding the Sentiment

Die-cut the letters “LOVE” from a white chipboard. Use 3D Foam Squares Micro White to adhere the word onto the card. This helps level the sentiment from the height of the embellishments plus it sticks well on textured surfaces!
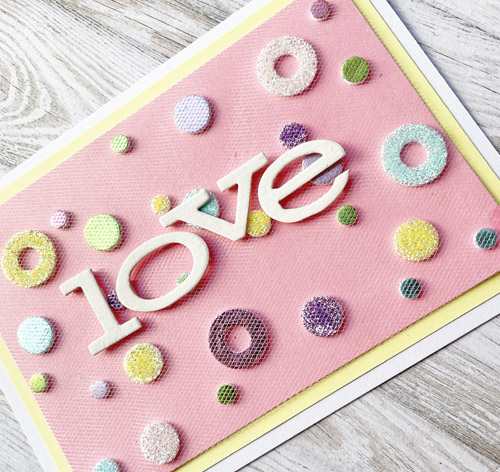
Pastel Love Card by Yvonne van de Grijp for Scrapbook Adhesives by 3L

And voilá, your Pastel Love Card is ready. I hope you enjoyed this Pastel Love Card tutorial and wish you happy crafting!
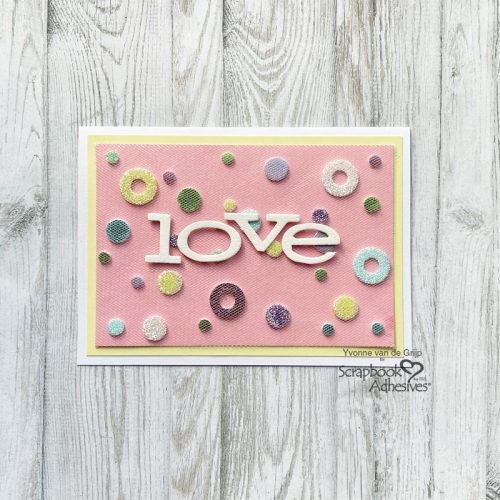
Yvonne van de Grijp

Pastel Love Card by Yvonne van de Grijp for Scrapbook Adhesives by 3L

Creative Time: 40 minutes

Skill Level: Intermediate

Materials needed:

Scrapbook Adhesives by 3L®

E-Z Runner Grand Refillable Dispenser

3D Foam Circles White Mix, 3D Foam Squares Micro White, and 3D Foam Circle Frames White

Metallic Transfer Foil Sheets Pastel Colors

Other

Cardstock (White, Yellow, Pink); Chipboard (White); Etched dies (Sizzix: Tim Holtz Bigz™: Storybook ); Die-Cutting and Embossing Machine (Spellbinders Paper Arts®: Platinum 6 Machine); Glitter; Tulle: Tweezers: Scissors; Paper Trimmer

Save to Pinterest!
Pastel Love Card by Yvonne van de Grijp for Scrapbook Adhesives by 3L Pinterest

Visit our Website and Blog!
Sign up for our Newsletter so you never miss a contest or giveaway!

instagram purple icon facebook icon purple pinterest purple icon twitter purple icon YouTube icon blog subscription purple icon

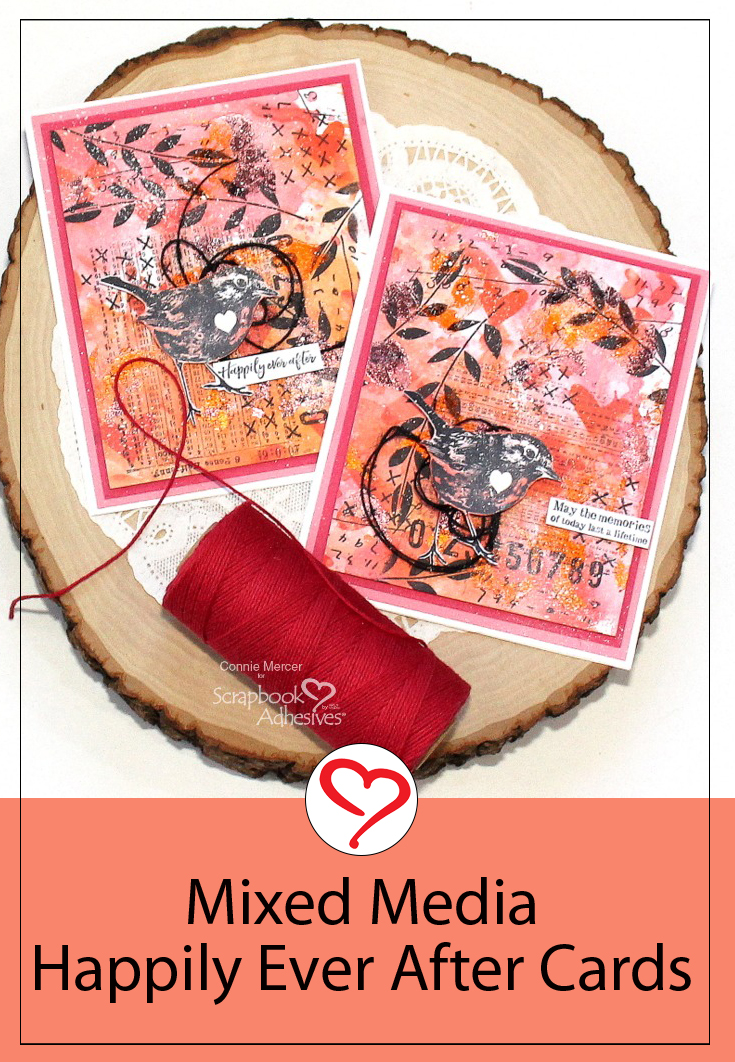
Happily Ever After Card Set

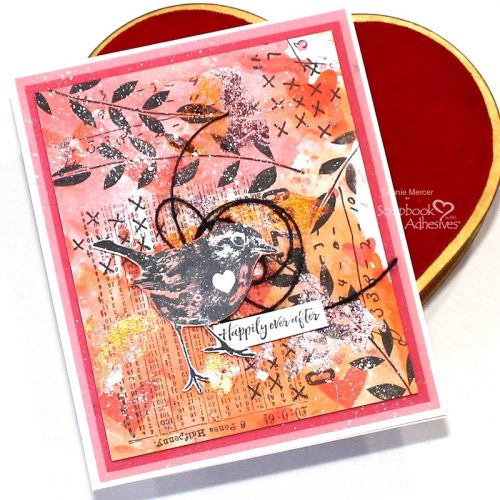
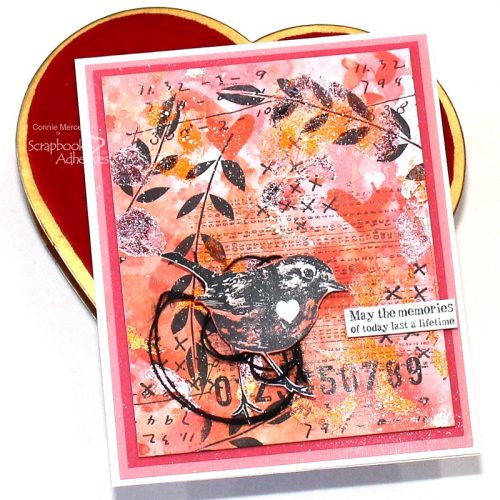
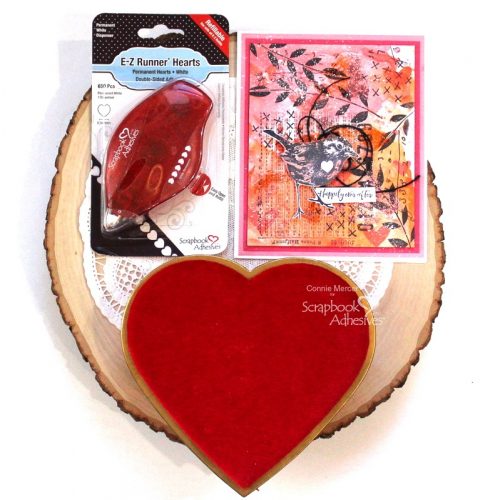
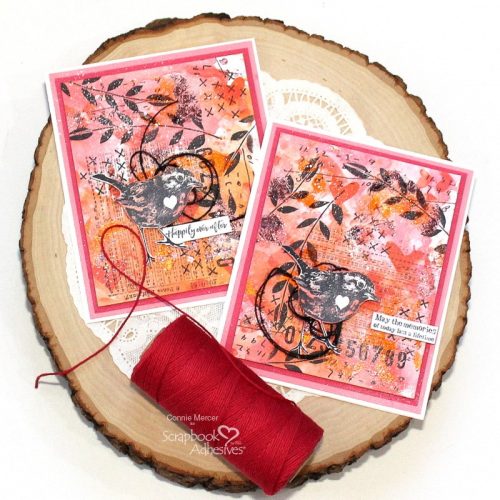
Hi, Connie here with a mixed media style Happily Ever After Card Set using the adhesive on the outside. So fun and easy to do! All you need is the Adhesive Sheets and Metallic Transfer Foil Sheets to get started. Stamps and stencils come in handy too!

Happily Ever After Card Set by Connie Mercer for Scrapbook Adhesives by 3L

Happily Ever After Card Background

Happily Ever After Card Set by Connie Mercer for Scrapbook Adhesives by 3L

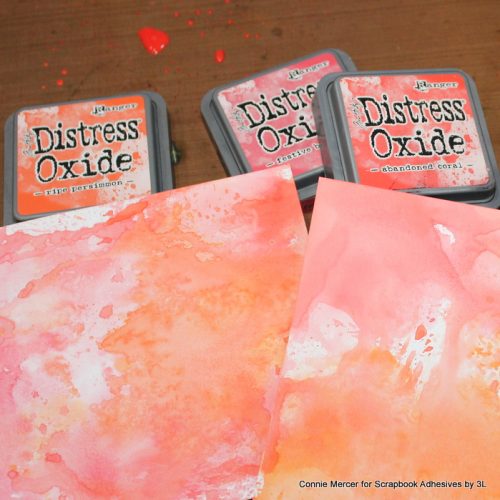
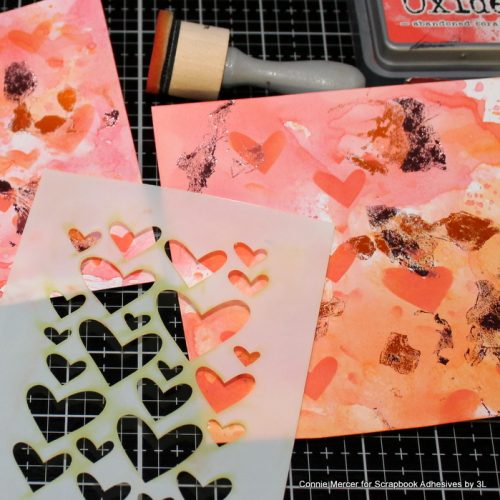
I went with a mix of Distress Oxide colors to give my card backgrounds a distressed look. Red tones are a must for February.

Wear Your Adhesive on the Outside with Metallic Transfer Foil

Happily Ever After Card Set by Connie Mercer for Scrapbook Adhesives by 3L
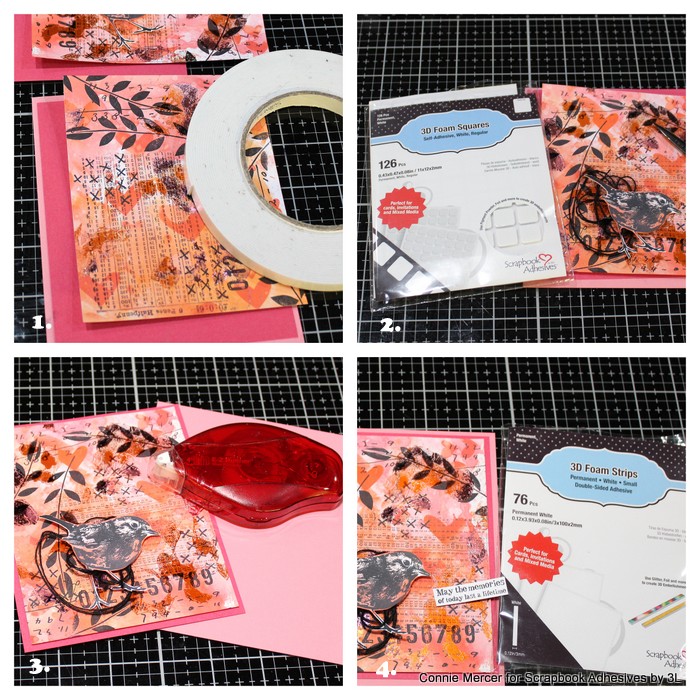
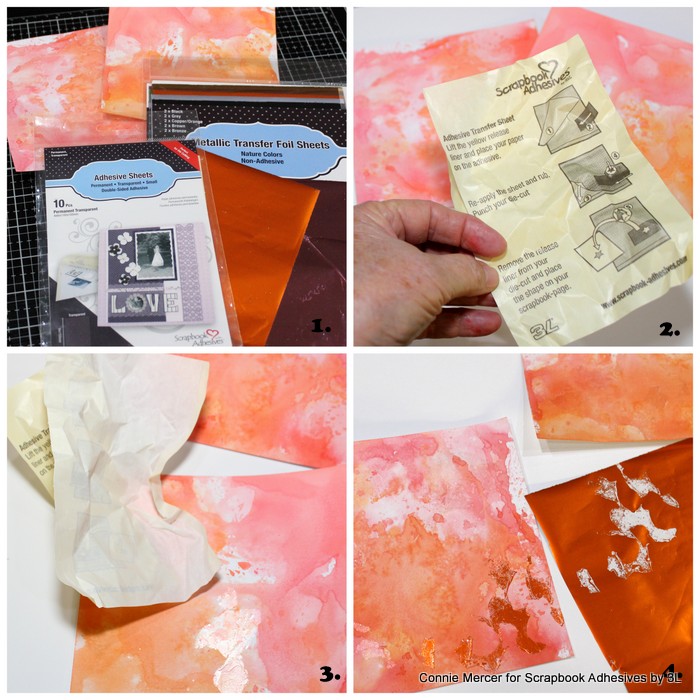
  • 1. I chose a pink sheet from the Metallic Transfer Foil Sheets in Pastel and an orange/copper sheet from the Metallic Transfer Foil Sheets in Nature. I used the Adhesive Sheets 4×6 as the adhesive. The perfect size for a small project.
    2. Take one of the Adhesive Sheets and crumple it up making a loose ball. Uncrumple so it is wrinkled.
    3. Randomly place the Adhesive Sheet on the mixed media background and pull up (leaving the sticky adhesive).
    4. Lay the Metallic Transfer Foil Sheet over the sticky adhesive and pull it up. Continue to repeat this process until
    you get the amount of color that you want on the card backing.
Happily Ever After Card Set by Connie Mercer for Scrapbook Adhesives by 3L

Adding stencils and stamps are also a great way to distress the card front and is so fun!

Assembling the Cards

Happily Ever After Card Set by Connie Mercer for Scrapbook Adhesives by 3L

I hope you enjoyed the Happily Ever After Card Set tutorial. Thanks for stopping by!
Connie Mercer

Happily Ever After Card Set by Connie Mercer for Scrapbook Adhesives by 3L

Creative Time: 90 minutes
Skill Level: Advance

Materials Needed:
Scrapbook Adhesives by 3L®

E-Z Runner® Permanent Strips Refillable Dispenser
3D Foam Strips
Adhesive Sheets 4×6
Metallic Transfer Foil Sheets in Pastel and Metallic Transfer Foil Sheets in Nature
3D Foam Squares White Mix
Crafty Foam Tape 108′
E-Z Runner® Heart Refillable Dispenser

Save to Pinterest!

Happily Ever After Card Set by Connie Mercer for Scrapbook Adhesives by 3L Pinterest

Visit our Website and Blog!
Sign up for our Newsletter so you never miss a contest or giveaway!

instagram purple icon facebook icon purple pinterest purple icon twitter purple icon YouTube icon blog subscription purple icon

Inspirational Floral Card

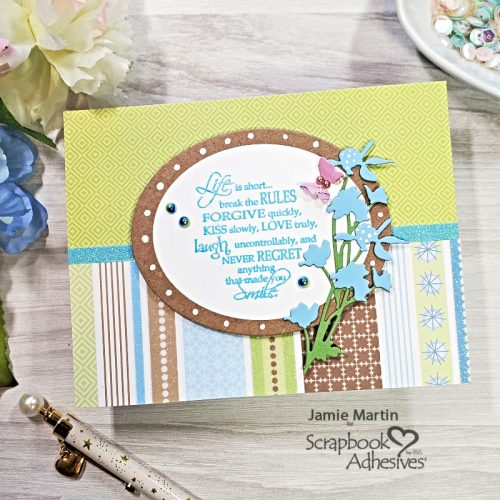
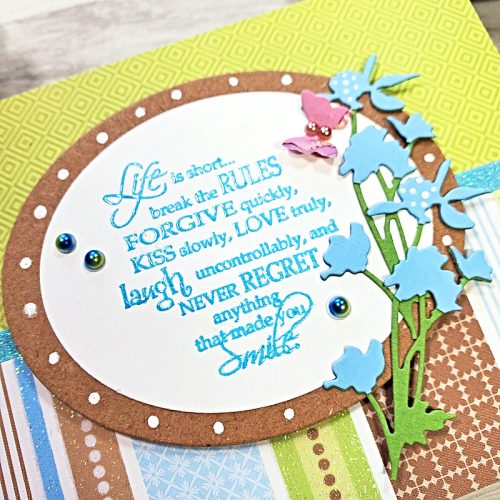
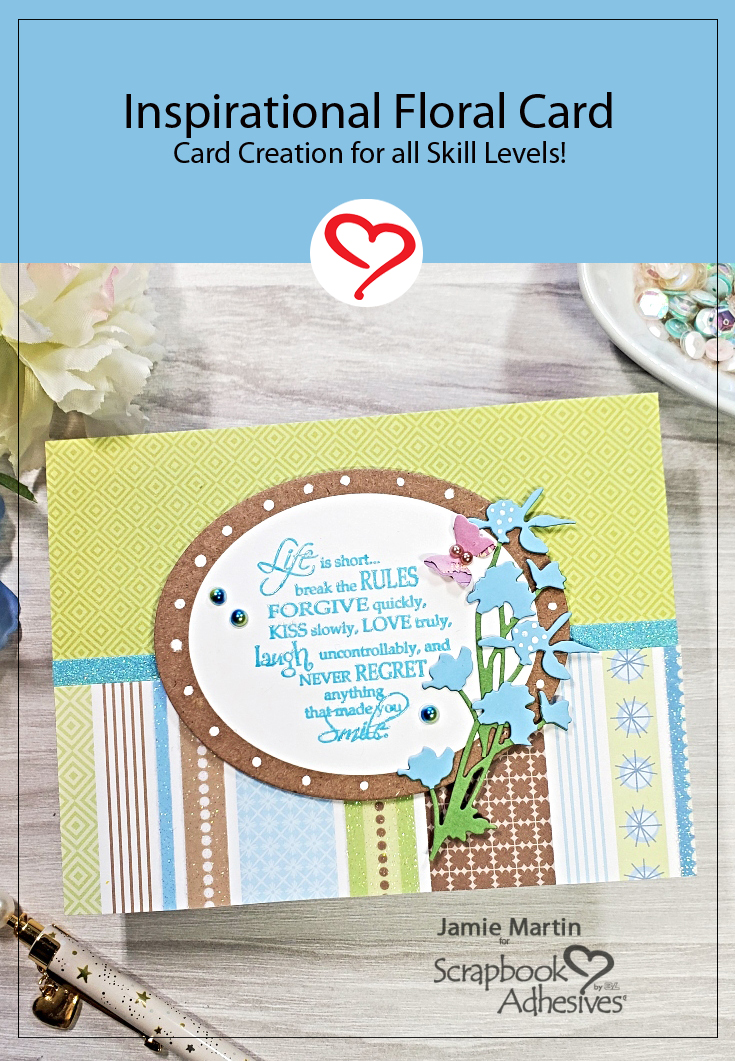
Hi, Jamie here with you today and I have an Inspirational Floral Card that you can make whether you are a beginner or beyond using decorative paper, cardstock, dies, one stamp, and of course adhesives.

Inspirational Floral Card by Jamie Martin for Scrapbook Adhesives by 3L

Creating Layers for the Floral Card

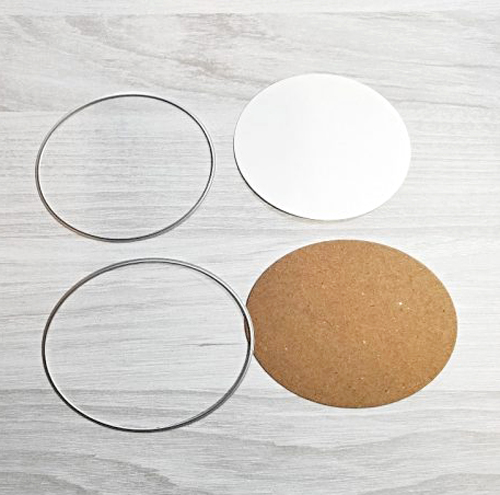
Die-cut an oval from white cardstock and an oval one size larger from kraft colored cardstock.

Inspirational Floral Card by Jamie Martin for Scrapbook Adhesives by 3L

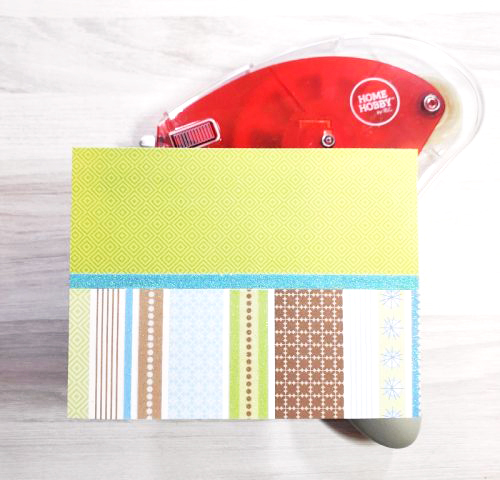
Cut a strip of decorative paper about half the size of your card and attach it to the bottom of a card made of green decorative paper using the E-Z Runner Grand.

Inspirational Floral Card by Jamie Martin for Scrapbook Adhesives by 3L

Setting Up the Sentiment

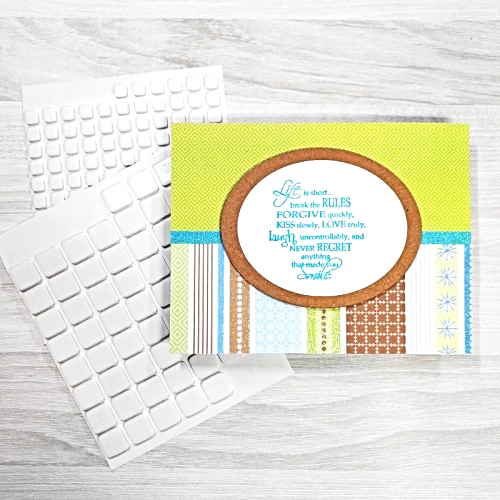
Stamp the white oval with the sentiment using blue ink and layer it to the larger kraft-colored oval and pop it up in the center of the card using 3D Foam Squares White Mix.

Inspirational Floral Card by Jamie Martin for Scrapbook Adhesives by 3L

Adding Elements

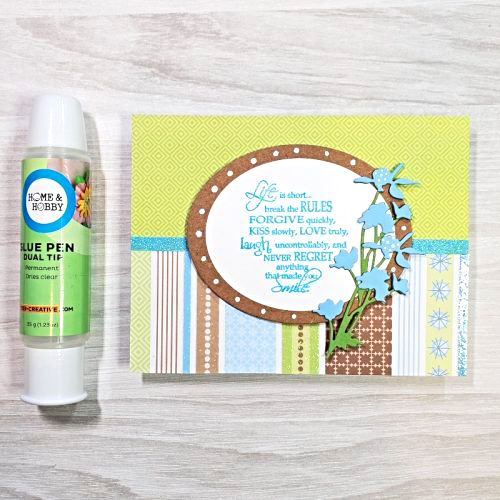
Die-cut flowers from green and blue cardstock and cute the blue flowers off of the stem and glue them onto the green flowers using the Dual Tip Glue Pen.  Glue these flowers to the right side of the oval, also using the Dual Tip Glue Pen.  Use a white gel pen to add dots on the kraft oval and on two of the die-cut flowers.

Inspirational Floral Card by Jamie Martin for Scrapbook Adhesives by 3L

For the final touches add a die-cut butterfly with pearls glued to the body and add several pearls around the sentiment gluing all with the Dual Tip Glue Pen.

Inspirational Floral Card by Jamie Martin for Scrapbook Adhesives by 3L

Skill Level: Beginner
Creative Time: 35 minutes

Materials Needed:
Scrapbook Adhesives by 3L®

E-Z Runner Grand Dispenser
3D Foam Squares White Mix

HomeHobby™ by 3L
Dual Tip Glue Pen

Save to Pinterest!

Inspirational Floral Card by Jamie Martin for Scrapbook Adhesives by 3L Pinterest

Visit our Website and Blog!
Sign up for our Newsletter so you never miss a contest or giveaway!

instagram purple icon facebook icon purple pinterest purple icon twitter purple icon YouTube icon blog subscription purple icon

Mini Watercolor Flowers Card

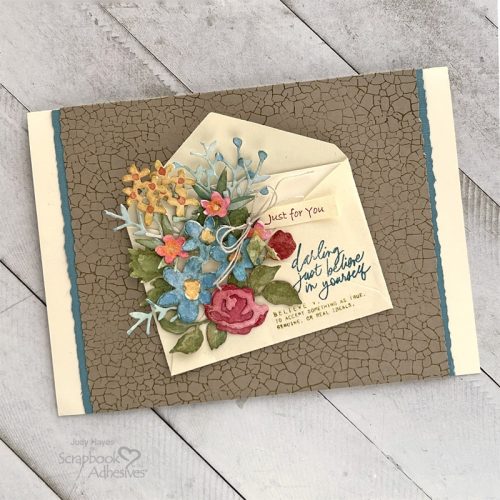
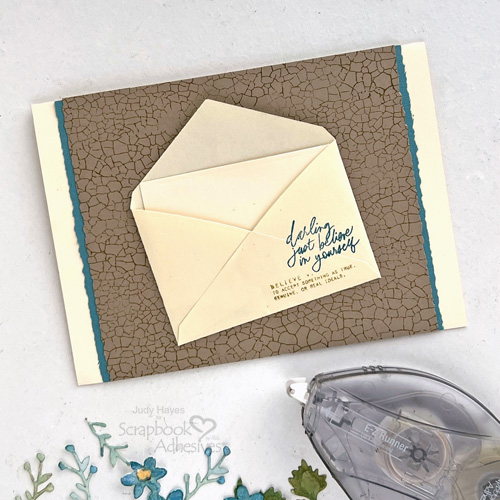
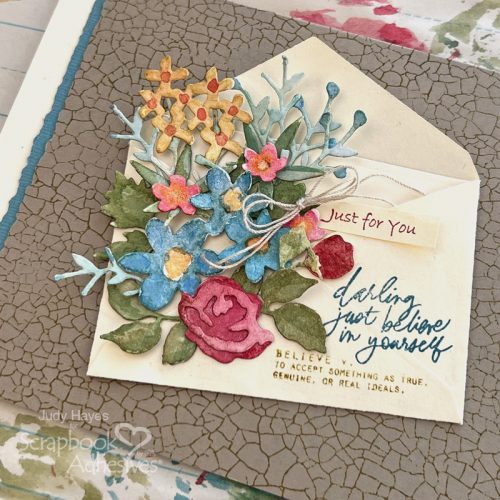
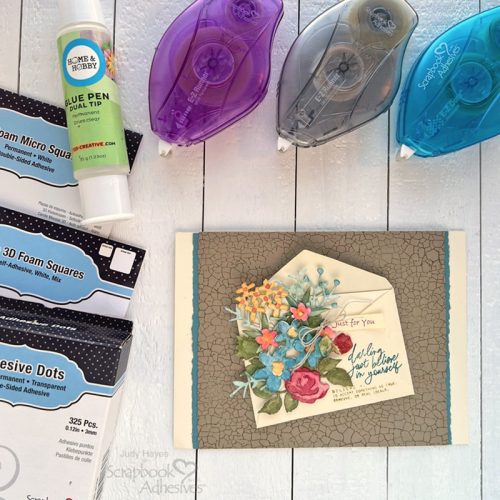
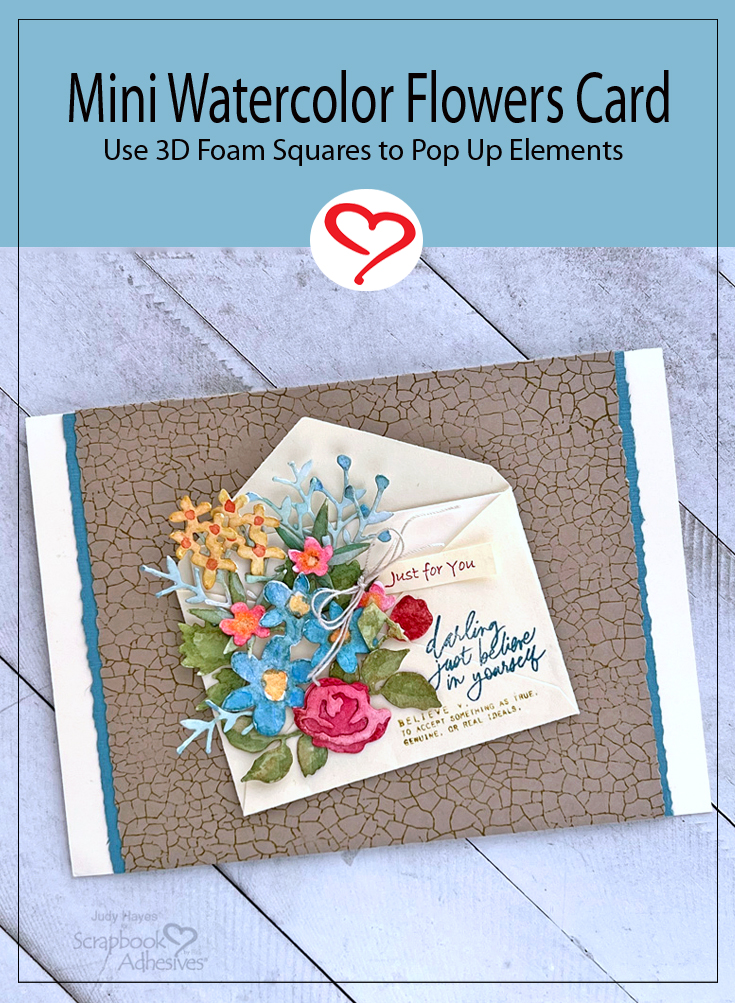
Hello Friends! Today, I’m thinking of pretty spring flowers with this Mini Watercolor Flowers Card! The flowers are die-cut and then I painted them with watercolors. I chose not to use all the layering pieces on most of the flowers, instead, I added shading and different color centers with watercolors.

Mini Watercolor Flowers Card by Judy Hayes for Scrapbook Adhesives by 3L

Layers for the Watercolor Flowers Card

Mini Watercolor Flowers Card by Judy Hayes for Scrapbook Adhesives by 3L

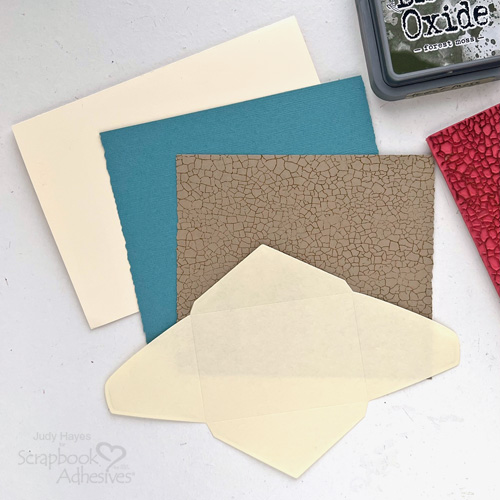
I’ve prepared the pieces for the card by cutting the following:

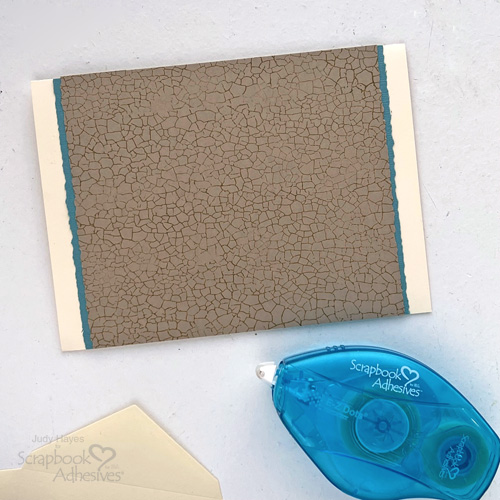
  • Cut a 4.5 x 6.25-inch Cream Card Base (insert for the envelope cut with die – not shown in photo)
  • Trim to a 4.5 x 5.5-inch Blue Cardstock (cut ends with deckle-edged scissors)
  • Cut a 4.5 x 5.25-inch Peanut Cluster Cardstock (cut ends with deckle-edged scissors + stamp Craze Pattern with Distress Oxide Ink in Forest Moss)
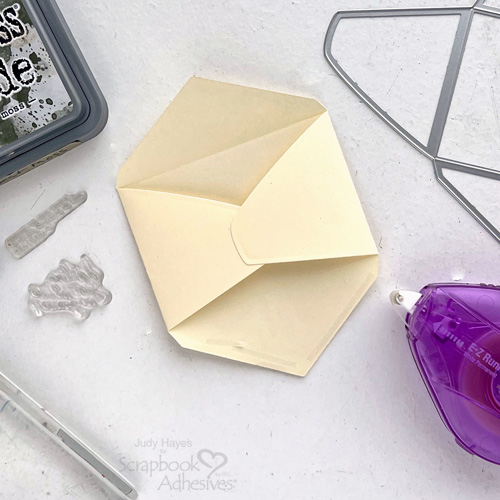
  • Die-cut an envelope die with Cream Text-Weight Paper

Assemble the Card Base

Mini Watercolor Flowers Card by Judy Hayes for Scrapbook Adhesives by 3L

Use E-Z Dots® Permanent Refillable Dispenser (or E-Z Runner® Ultra Strong Refillable Dispenser) to attach the craze stamped piece to the blue cardstock piece and then attach both to the cream card base.

Make the Envelope

Mini Watercolor Flowers Card by Judy Hayes for Scrapbook Adhesives by 3L

Fold the envelope along its crease lines. Use E-Z Runner® Micro Refillable Dispenser to apply adhesive where side pieces overlap and press together. Next, add adhesive along the bottom flap edge and press in place. Leave the top flap open.

Ink definition stamp with Distress Oxide Forest Moss ink, stamp off once and stamp on the envelope. Use Distress Oxide Uncharted Mariner to ink verse and stamp on the envelope.

Apply a small amount of adhesive to the back of the insert and tuck it into the envelope so it’s slightly above the fold of the flap.

Cut and Watercolor Flowers

Mini Watercolor Flowers Card by Judy Hayes for Scrapbook Adhesives by 3L

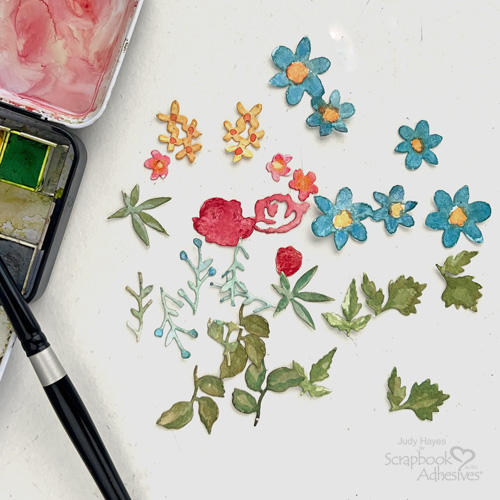
Use mini flower dies and die cutting machine to die-cut an assortment of flowers and leaves from white watercolor paper. Paint flowers and leaves with watercolors.

Mini Watercolor Flowers Card by Judy Hayes for Scrapbook Adhesives by 3L

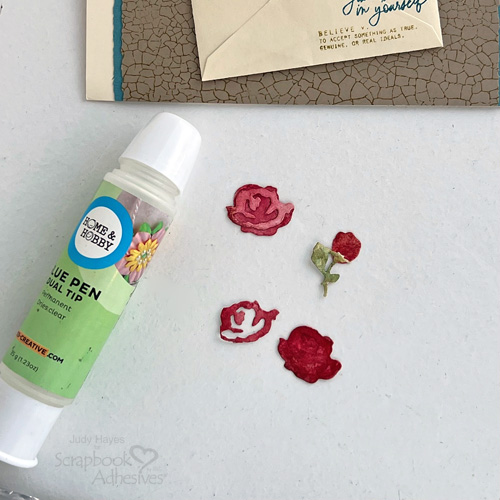
Glue any layers of flowers together using the Dual Tip Glue Pen.

Attach the Envelope

Mini Watercolor Flowers Card by Judy Hayes for Scrapbook Adhesives by 3L

Apply adhesive to the corners of the envelope with E-Z Runner® Ultra Strong Refillable Dispenser and fasten to the card front.

Fasten Flowers and Leaves

Arrange flowers and leaves on the envelope. Fasten them in place using Adhesive Dots Micro, Thin 3D Foam Squares White Mix, and 3D Foam Squares Micro White depending on the size of the flower and the dimension desired. (Designer Tip – I used Thin 3D Foam Squares small on larger flowers, Adhesive Dots Micro on most leaves, and Thin 3D Foam Squares Micro on small flowers.)

Mini Watercolor Flowers Card by Judy Hayes for Scrapbook Adhesives by 3L

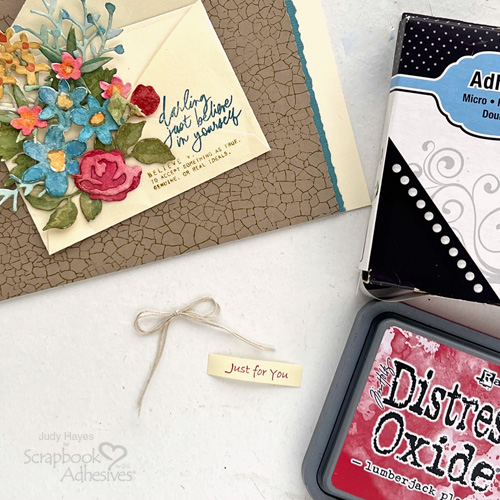
Stamp or write “Just for You” on a strip of text-weight cream paper. Apply Adhesive Dots Micro to end and tuck under flowers.

Tie a small bow with 2 strands of crochet thread and secure it with Adhesive Dots Micro near the “Just for You” strip. (Designer Tip – roll Adhesive Dots Micro into a ball and fasten it behind the bow knot.)

Mini Watercolor Flowers Card by Judy Hayes for Scrapbook Adhesives by 3L

Thanks for Visiting!
Judy Hayes

Creative Time: 30 mins
Skill Level: Intermediate

Materials Needed:
Scrapbook Adhesives by 3L®

E-Z Runner® Micro Refillable Dispenser, E-Z Dots® Permanent Refillable Dispenser and E-Z Runner® Ultra Strong Refillable Dispenser

Thin 3D Foam Squares White Mix

3D Foam Squares Micro White

Adhesive Dots Micro

HomeHobby™ by 3L

Dual Tip Glue Pen

Other

Bazzill Basics Paper (Peanut Cluster), Heidi Swapp Stamps (February Agenda), Prima Marketing (Watercolor Classics), Ranger Ink Distress Oxide Inks (Forest Moss, Uncharted Mariner, Lumberjack Plaid), Ranger Ink (Distress Watercolor Cardstock), Sizzix Tim Holtz Dies (Brushstroke Flowers, Mini, Postale), Stampers Anonymous Tim Holtz Stamp (Craze and Planks), Cardstock (Cream, Muted Turquoise), Text Weight Paper (Cream), Crochet Thread(string)

Save to Pinterest!

Mini Watercolor Flowers Card by Judy Hayes for Scrapbook Adhesives by 3L Pinterest

Visit our Website and Blog!
Sign up for our Newsletter so you never miss a contest or giveaway!

instagram purple icon facebook icon purple pinterest purple icon twitter purple icon YouTube icon blog subscription purple icon

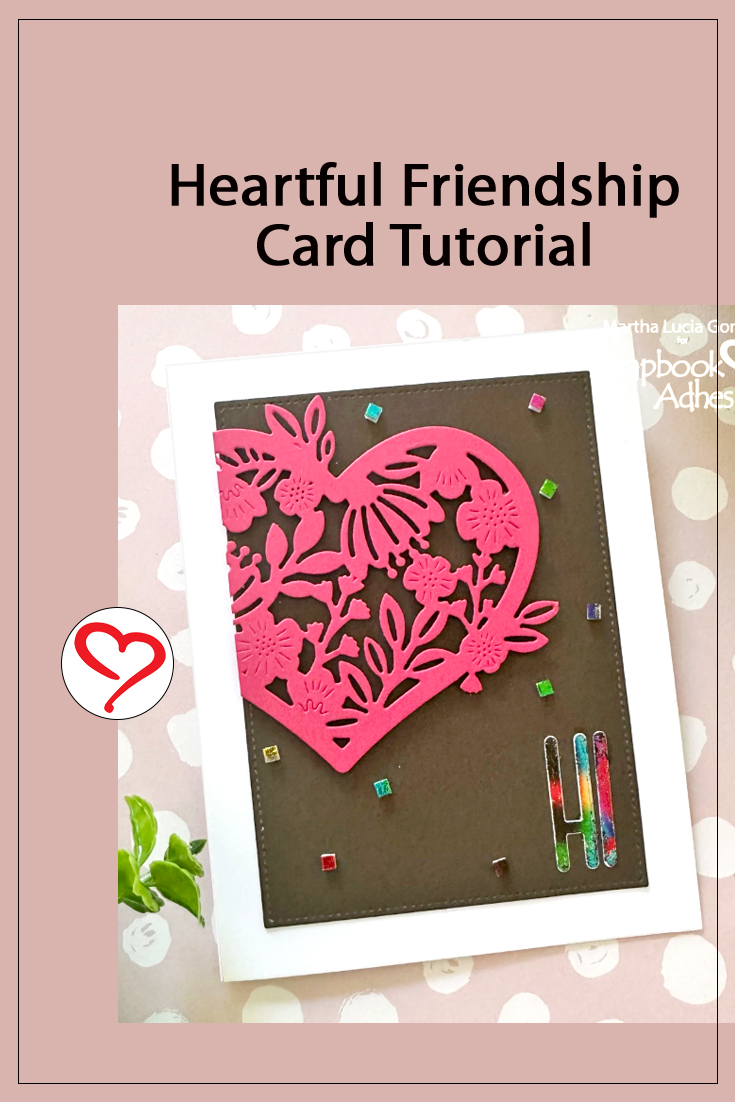
Heartful Friendship Card

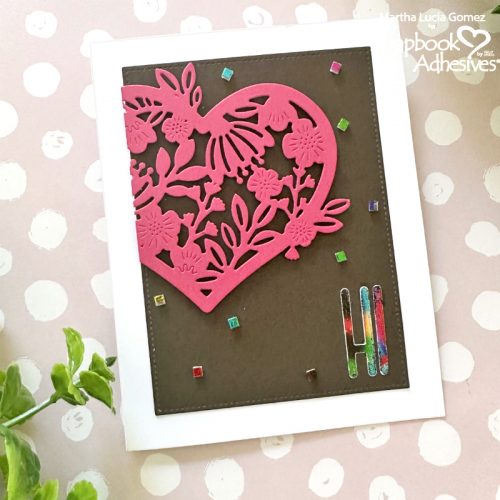
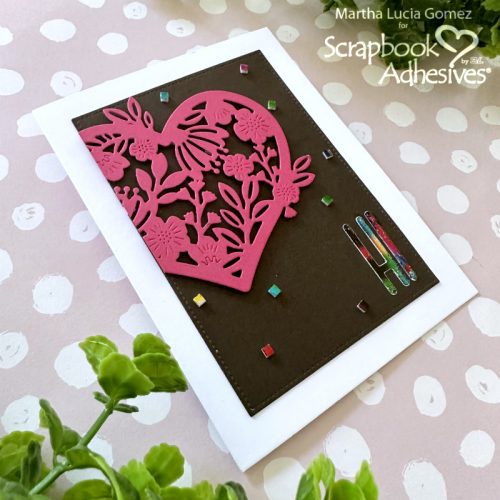
Hi there, Martha Lucia here with a Heartful Friendship Card full of special details just to say HI! This is one of these cards that we always want to send, just to let our friends know that we love them. Let me show you how I assembled this card with some help from Scrapbook Adhesives by 3L!

Heartful Friendship Card by Martha Lucia for Scrapbook Adhesives by 3L

Work on the basics

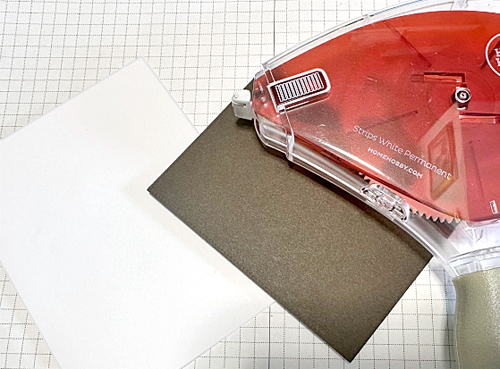
Normally, I start my cards working on this basis. First, I created the card base with White Smooth Cardstock and then decorated the top with a die cut layer. I used a stitched rectangle in brown cardstock.

Heartful Friendship Card by Martha Lucia for Scrapbook Adhesives by 3L

With the E-Z Runner Grand, attach the rectangle panel to the top of the white card base. Additionally, I partially die-cut a detailed heart in a different color of card stock to create a hard contrast of colors. I used melon mambo card stock because I love this combination.

Heartful Friendship Card by Martha Lucia for Scrapbook Adhesives by 3L

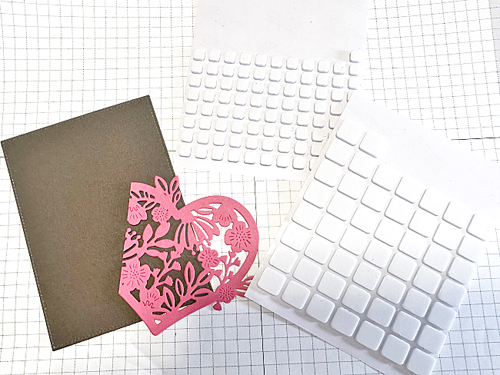
To secure the heart to the brown panel, I used 3D Foam Squares White in Mix. Set the decorated panel aside for a while to work on the embellishments of the card.

Embellish the Card Front

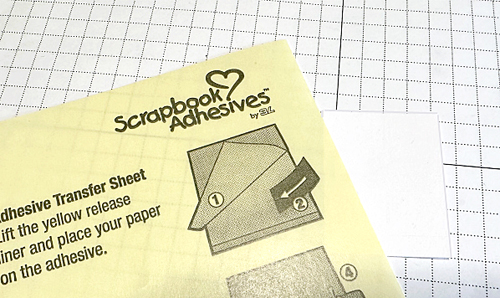
First, I pasted a piece of one Adhesive Sheets 4×6in onto a piece of white smooth cardstock to die-cut the sentiment HI onto it.

Heartful Friendship Card by Martha Lucia for Scrapbook Adhesives by 3L

Then, I die-cut several times the word HI on white smooth cardstock and attached them with the Dual Tip Glue Pen leaving the letters with the Adhesive Transfer on top to can remove the film and embellish it.

Heartful Friendship Card by Martha Lucia for Scrapbook Adhesives by 3L

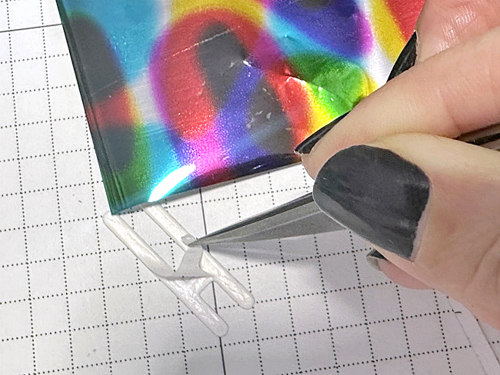
I just peeled the liner and covered the adhesive with a rainbow foil piece from the Metallic Transfer Foil Sheets Holographic colors. Finally, I adhered the foiled sentiment over the decorated card base with the Dual Tip Glue Pen.

Additionally, to embellish the card more, I added 3D Foam Squares Micro White which is 1/8-inch in size around the sentiment – perfect for accents. Then I foiled them with the same rainbow piece from the Metallic Transfer Foil Sheets Holographic colors.

Heartful Friendship Card by Martha Lucia for Scrapbook Adhesives by 3L

Voila, this Heartful Friendship Card is finished just with a few creative steps! Thanks for stopping by and see you soon with more inspiration!
Martha Lucia

Creative Time: 30 Minutes
Skill Level: Beginner

Materials Needed
Scrapbook Adhesives by 3L®

Metallic Transfer Foil Sheets Holographic Colors
3D Foam Squares Micro White
Adhesive Sheets 4×6 inch
3D Foam Squares White in Mix
E-Z Runner Grand

HomeHobby™ by 3L
Dual Tip Glue Pen

Other
White, Brown, and Pink Cardstock; Alphabet Dies; Heart Die Cut

Save to Pinterest!

Heartful Friendship Card by Martha Lucia for Scrapbook Adhesives by 3L Pinterest

Visit our Website and Blog!
Sign up for our Newsletter so you never miss a contest or giveaway!

instagram purple icon facebook icon purple pinterest purple icon twitter purple icon YouTube icon blog subscription purple icon

Kitties Belated Birthday Card

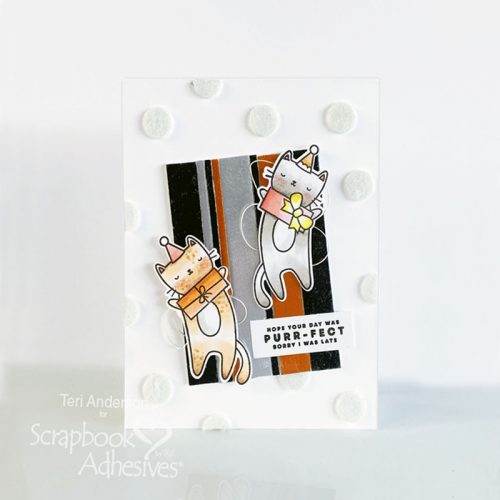
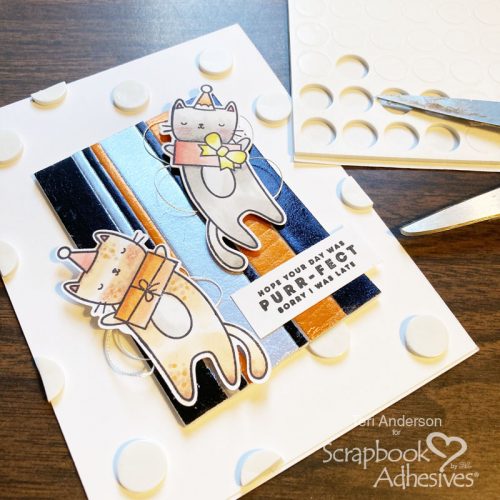
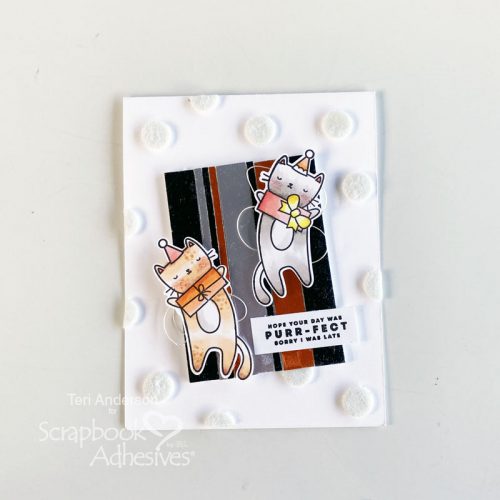
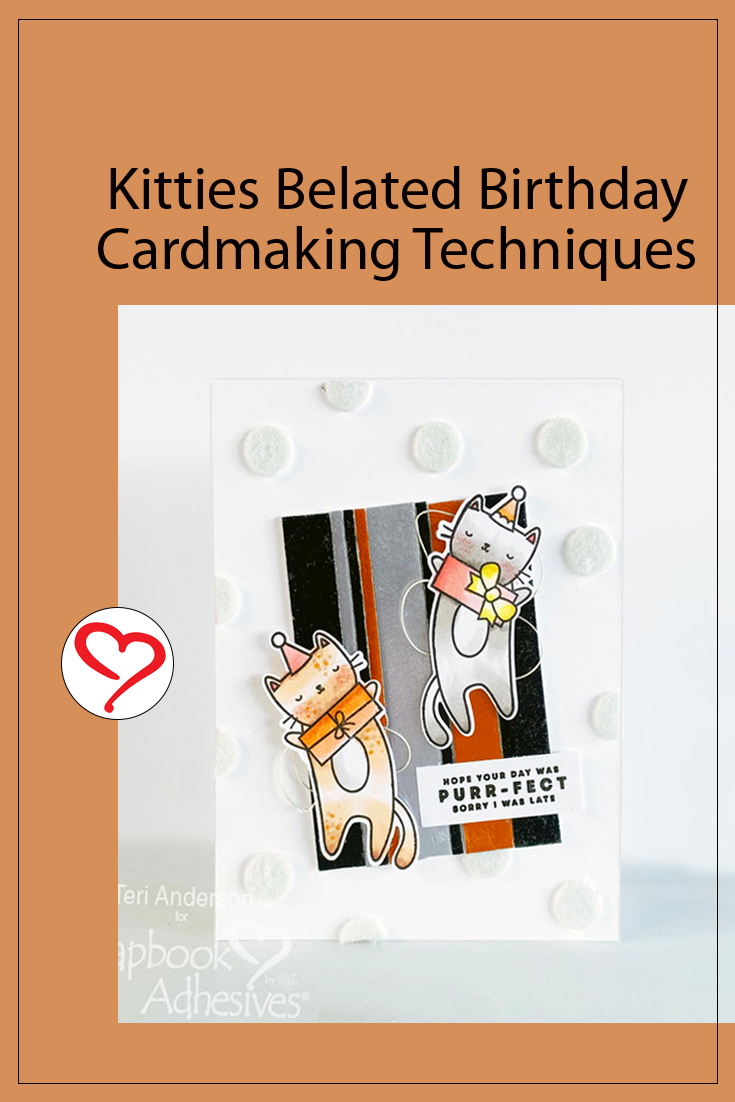
Hi, everyone! Teri here with a fun Kitties Belated Birthday Card that shows you how to make a unique striped background with 3D Foam Strips and Metallic Transfer Foil Sheets!

Kitties Belated Birthday Card by Teri Anderson for Scrapbook Adhesives by 3L

The Striped Panel with Foam and Foil

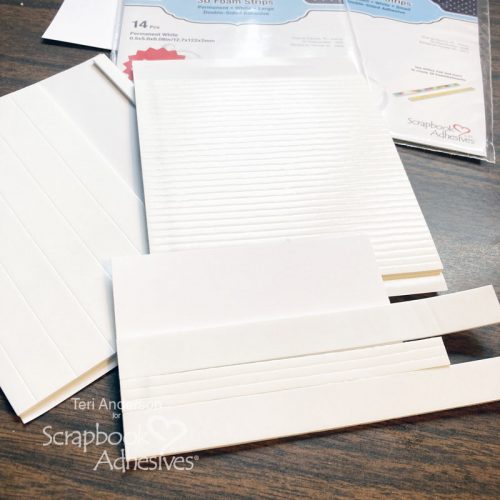
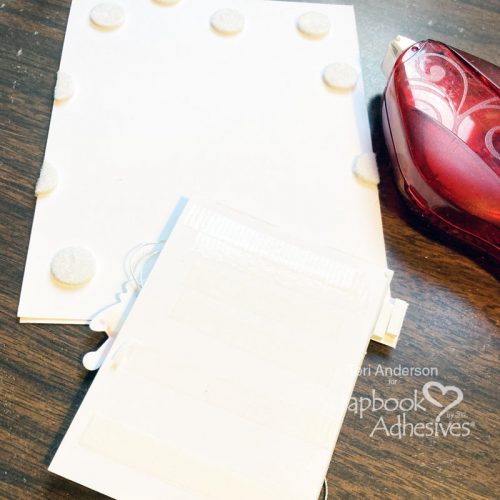
Let’s make the stunning background for this Kitties Belated Birthday Card! Start by cutting a panel of cardstock. It doesn’t matter what color you use because you will be covering it up. Randomly apply a mix of 3D Foam Strips in 1/8″ width and 3D Foam Strips Large in White with a 1/2″ width onto it. The beauty of using these two products together they line up perfectly to make a striped pattern!

Kitties Belated Birthday Card by Teri Anderson for Scrapbook Adhesives by 3L

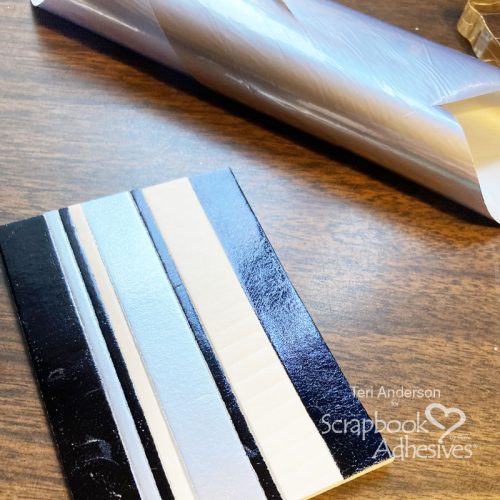
Flip the panel over and use your scissors to trim any excess. Remove some of the release paper from the strips and apply one color of foil onto them. Repeat this process with different colors of foil until your panel is completely covered with foil.

Kitties Belated Birthday Card by Teri Anderson for Scrapbook Adhesives by 3L

Embellish the Kitties Belated Birthday Card Panel

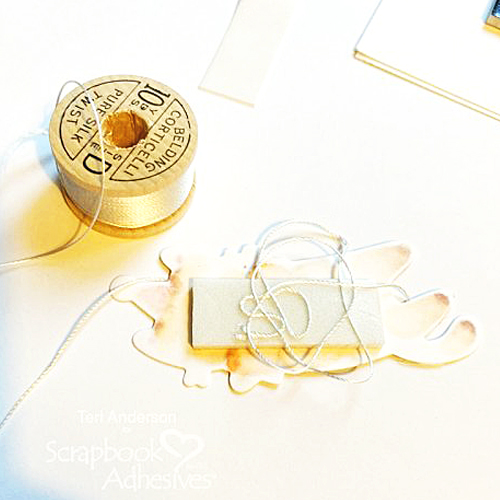
Stamp, color and cut a couple of kitties to place on the panel. Add some foam strips to the back of the kitties, as well as a little bit of thread.

Kitties Belated Birthday Card by Teri Anderson for Scrapbook Adhesives by 3L

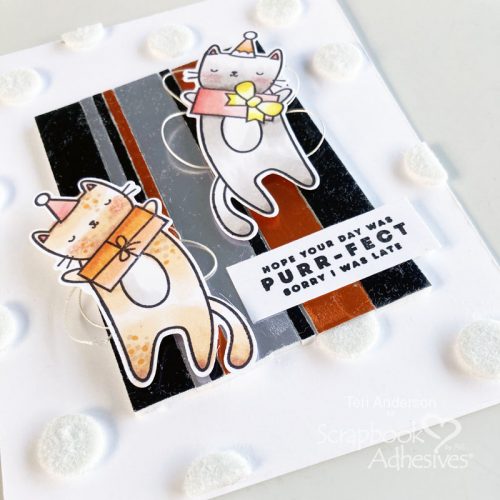
Mount the kitties onto your panel, as well as a stamped sentiment strip. Create a top-folded card from white cardstock. Temporarily set your striped panel on it. Don’t adhere it down quite yet.

Kitties Belated Birthday Card by Teri Anderson for Scrapbook Adhesives by 3L

Randomly apply 3D Foam Circles onto your card. Cut some of them in half and place them along the edges of the card, as well as next to the striped panel.

Kitties Belated Birthday Card by Teri Anderson for Scrapbook Adhesives by 3L

Remove your striped panel and cover your circles with white flock. This will give your card base a fuzzy (and fun) faux-embossed look! Complete the card by adhering the striped panel to it!

Kitties Belated Birthday Card by Teri Anderson for Scrapbook Adhesives by 3L

I hope you are inspired to give the techniques featured on this card a try! Thanks so much for stopping by today!

Happy creating!
Teri Anderson

Creative Time: 60 Minutes
Skill Level: Intermediate

Materials Needed
Scrapbook Adhesives by 3L®

Other
White Cardstock: Neenah Paper; Stamps and Cutting Dies: Waffle Flower (Birthday Kitties Stamps and Dies); Black Ink Pad: Ranger Ink; Flock: Stampendous!; Markers: Copic; White Thread

Save to Pinterest!

Kitties Belated Birthday Card by Teri Anderson for Scrapbook Adhesives by 3L Pinterest

Visit our Website and Blog!
Sign up for our Newsletter so you never miss a contest or giveaway!

instagram purple icon facebook icon purple pinterest purple icon twitter purple icon YouTube icon blog subscription purple icon

Dimensional Winter Layout

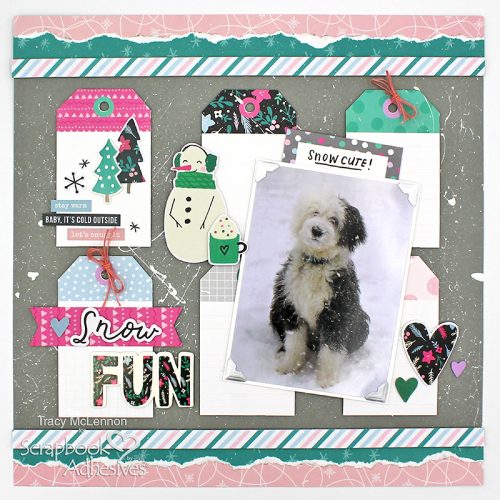
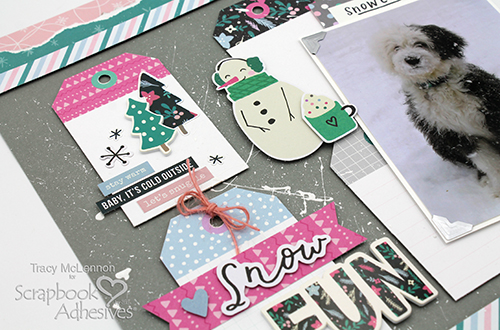
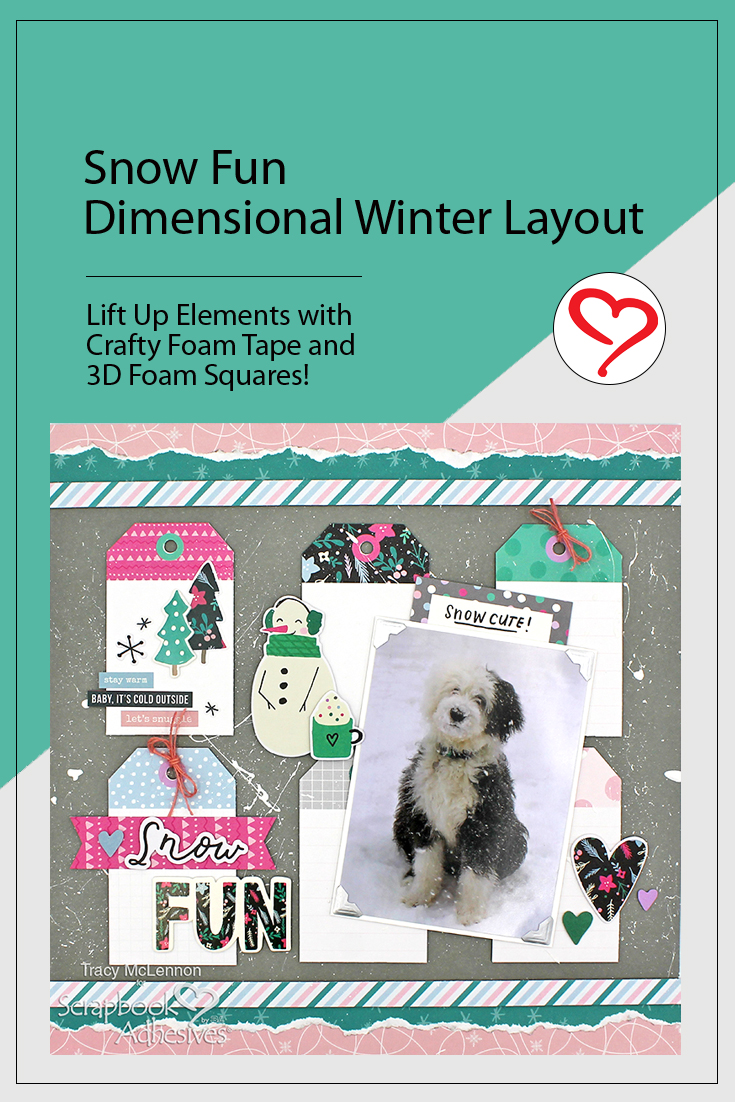
Hello scrappy friends! Tracy here, and today I have a fun little dimensional winter layout to share featuring a fun winter collection and some great Scrapbook Adhesives by 3L products. Here are all of the details.

Dimensional Winter Layout by Tracy McLennon for Scrapbook Adhesives by 3L

Start Your Winter Crafting

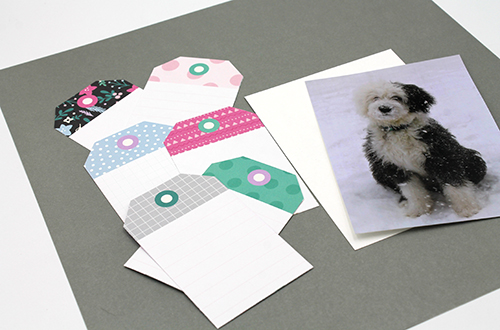
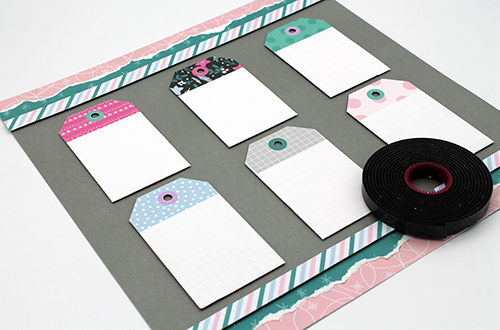
My first step in crafting my dimensional winter layout was to pick out the grey cardstock background. I cut the mat for my cropped 4×6 photo in white cardstock. Cut out the patterned tags that you would like to use for the layout background.

Dimensional Winter Layout by Tracy McLennon for Scrapbook Adhesives by 3L

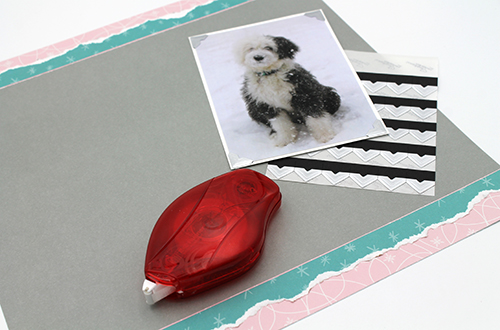
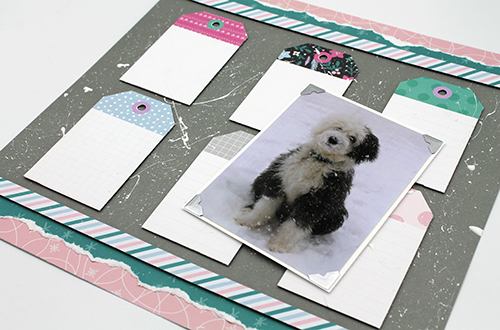
Add the photo to the white cardstock may using Creative Photo Corners Silver. Add strips of patterned paper to the top and bottom of the dimensional winter layout using E-Z Runner® Permanent Strips Refillable Dispenser. Tear the edges of the green patterned paper for that snowy look.

Dimensional Winter Layout by Tracy McLennon for Scrapbook Adhesives by 3L

Start adding dimension by adding a striped patterned paper strip to the top and bottom borders using Crafty Foam Tape Black. The tags also get added to the layout using Crafty Foam Tape Black.

Dimensional Winter Layout by Tracy McLennon for Scrapbook Adhesives by 3L

Splatter white paint all over the background of this dimensional winter layout. Let dry. Adhere the matted photo to the background using Crafty Foam Tape Black. This gives even more dimension to the layout.

Dimensional Winter Layout by Tracy McLennon for Scrapbook Adhesives by 3L

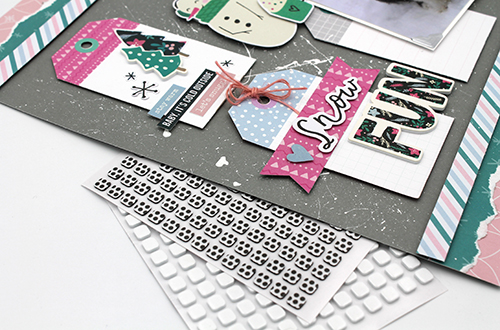
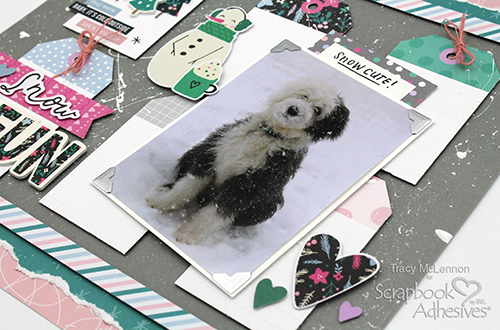
I added burlap string bows to a couple of the background tags. Then began adding stickers, die cuts and foam stickers that coordinated with my photo. Use a combination of Thin 3D Foam Squares Black Mix and 3D Foam Squares White Mix to add the embellishments giving them depth and dimension between all layers of this dimensional winter layout.

Dimensional Winter Layout by Tracy McLennon for Scrapbook Adhesives by 3L

Have you documented your winter photos yet? I hope this layout gives you inspiration! Thanks so much for stopping by!
Tracy

Skill Level: Intermediate
Creative Time: 45 minutes

Materials Needed:
Scrapbook Adhesives by 3L®

E-Z Runner® Permanent Strips Refillable Dispenser
Thin 3D Foam Squares Black Mix
Crafty Foam Tape Black
3D Foam Squares White Mix
Creative Photo Corners Silver

Plus
Simple Stories- Feelin Frosty Collection; Cardstock (White, Grey); White Acrylic Paint; Pink Burlap String

Save to Pinterest!

Dimensional Winter Layout by Tracy McLennon for Scrapbook Adhesives by 3L Pinterest

Visit our Website and Blog!
Sign up for our Newsletter so you never miss a contest or giveaway!
instagram purple icon facebook icon purple pinterest purple icon twitter purple icon YouTube icon blog subscription purple icon

You Are Missed Card

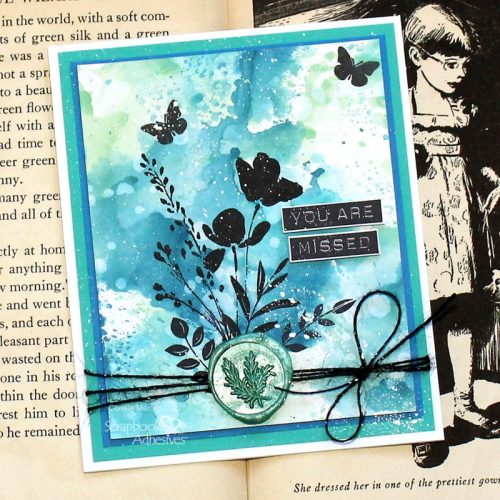
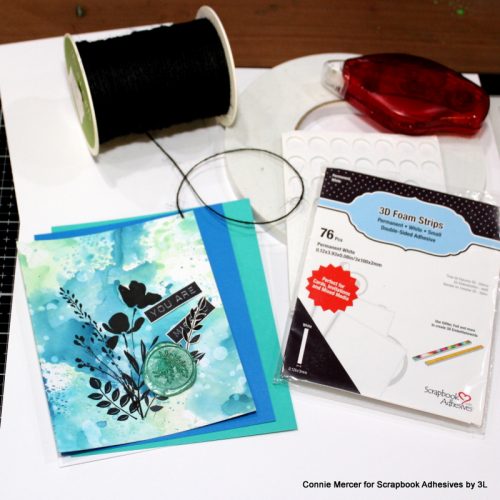
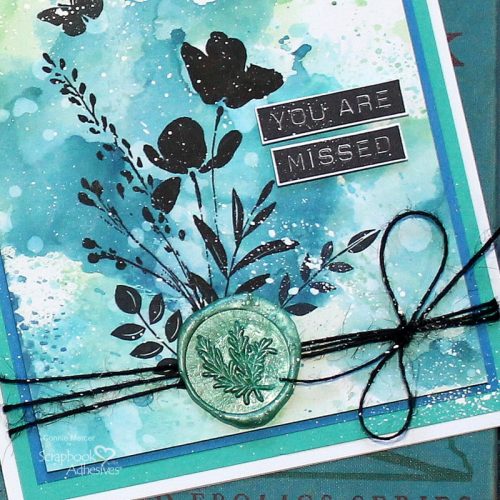
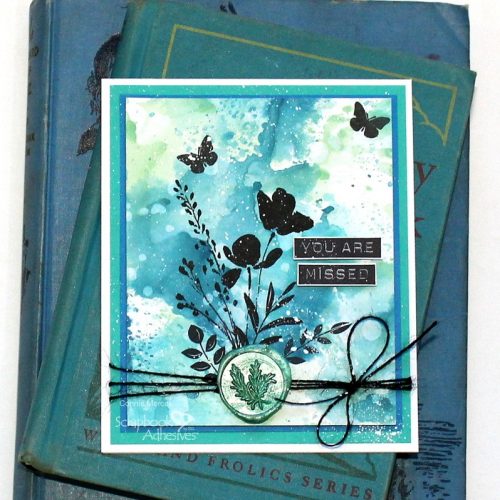
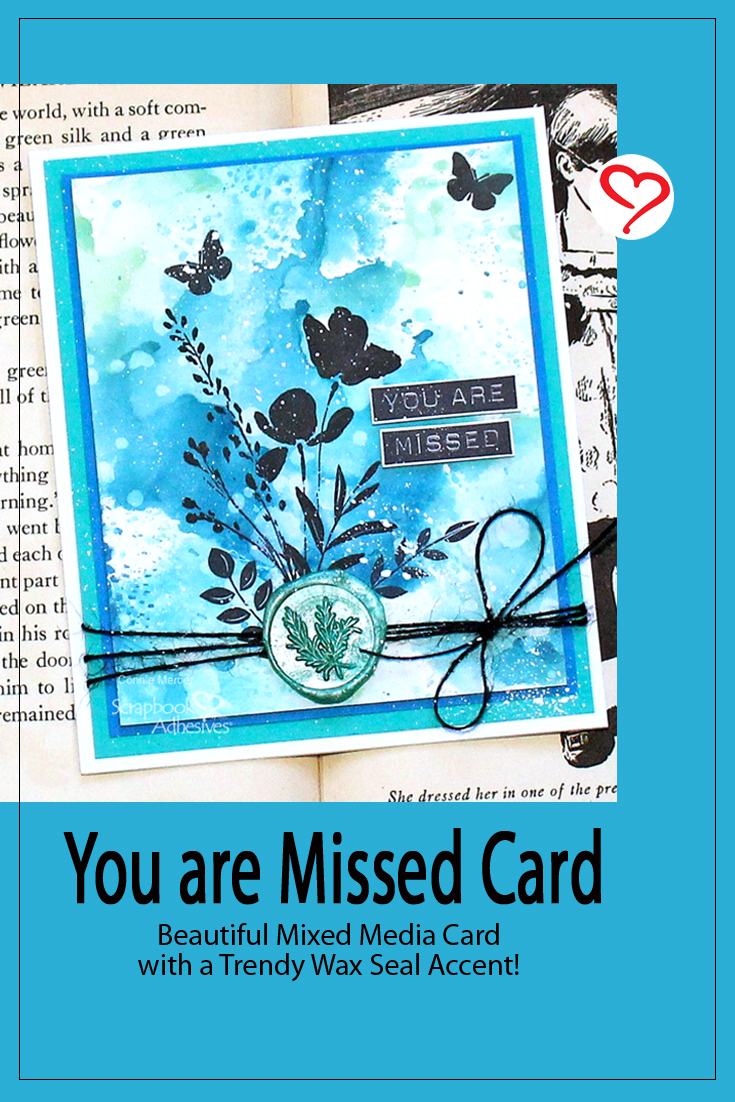
Hi, Connie here with my second blog post starting off the new year. I created a mixed media card, You are Missed Card, with a wax seal accent that is trending in cardmaking. What would secure this wax embellishment to the card? I didn’t want to melt the wax directly on the card but wanted the dimension so this is what I found out…

You Are Missed Card by Connie Mercer for Scrapbook Adhesives by 3L

You are Missed Card Prep

To create the card there are a few things to do first.

You Are Missed Card by Connie Mercer for Scrapbook Adhesives by 3L
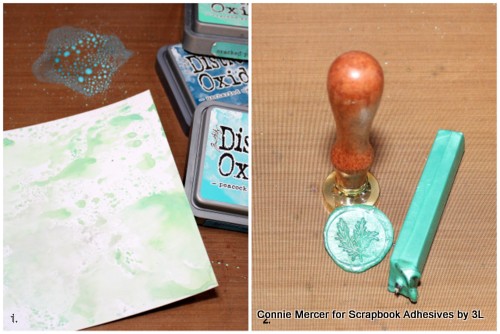
  • 1. Cut a piece of mixed media cardstock and create a background using watercolors or Distress Oxide inks. I used three colors for a nice mix. Stamp the image on the card front. I used silhouette flowers placed on the Misti with Archival ink/Jet Black.
    2. Create a wax seal using a coordinating wax color. Set aside for later.
You Are Missed Card by Connie Mercer for Scrapbook Adhesives by 3L

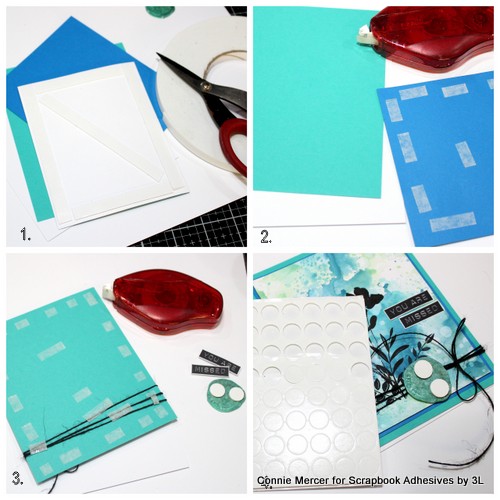
Assemble the Card

You Are Missed Card by Connie Mercer for Scrapbook Adhesives by 3L

Thanks for stopping by and answering my opening question. The 3D Foam Circle White Mix worked perfectly!
Connie

Creative Time: 40 minutes
Skill Level: Intermediate

Materials Needed:
Scrapbook Adhesives by 3L®

Crafty Foam Tape 108′
3D Foam Strips
3D Foam Circles White Mix
E-Z Runner Permanent Strips Refillable Dispenser
E-Z Runner Permanent Strips Refill

Other: Stamps: KatzelKraft and Darkroom Door; Ink: Ranger Ink (Archival, Distressed Oxide); Stamping Platform: My Sweet Petunia (MISTI); Wax Seal; Twine

Save to Pinterest!

You Are Missed Card by Connie Mercer for Scrapbook Adhesives by 3L Pinterest

Visit our Website and Blog!
Sign up for our Newsletter so you never miss a contest or giveaway!
instagram purple icon facebook icon purple pinterest purple icon twitter purple icon YouTube icon blog subscription purple icon

Home Sweet Home Card

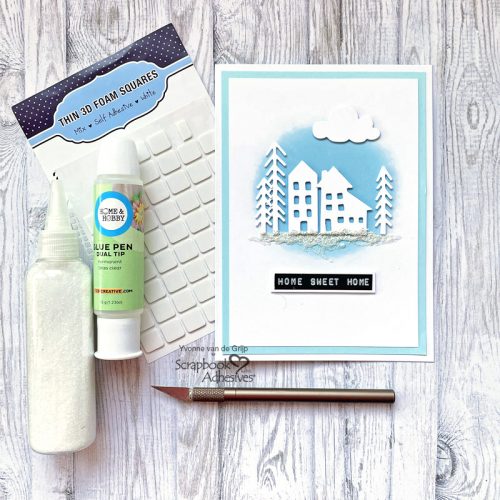
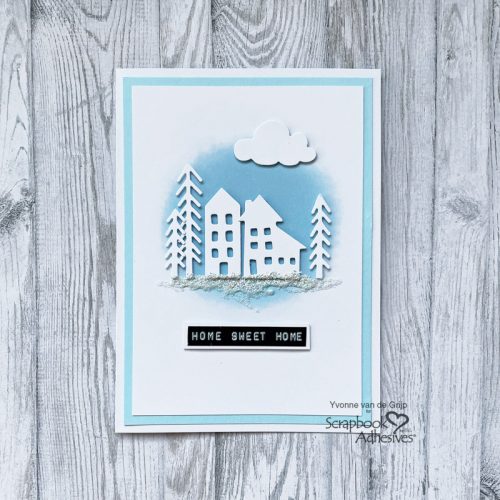
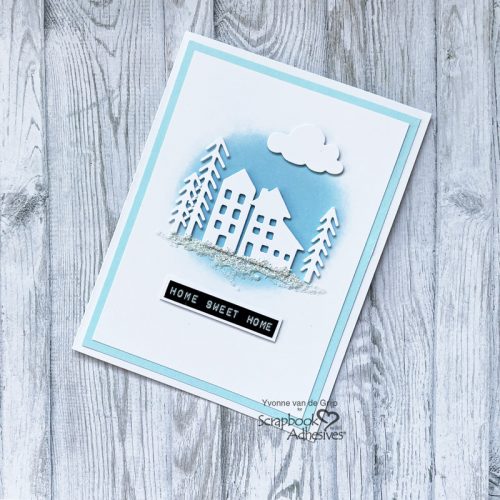
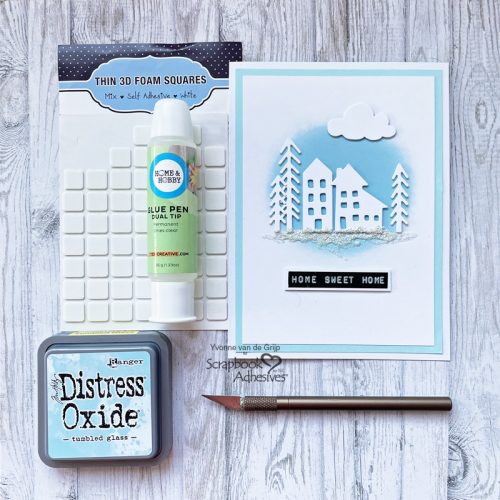
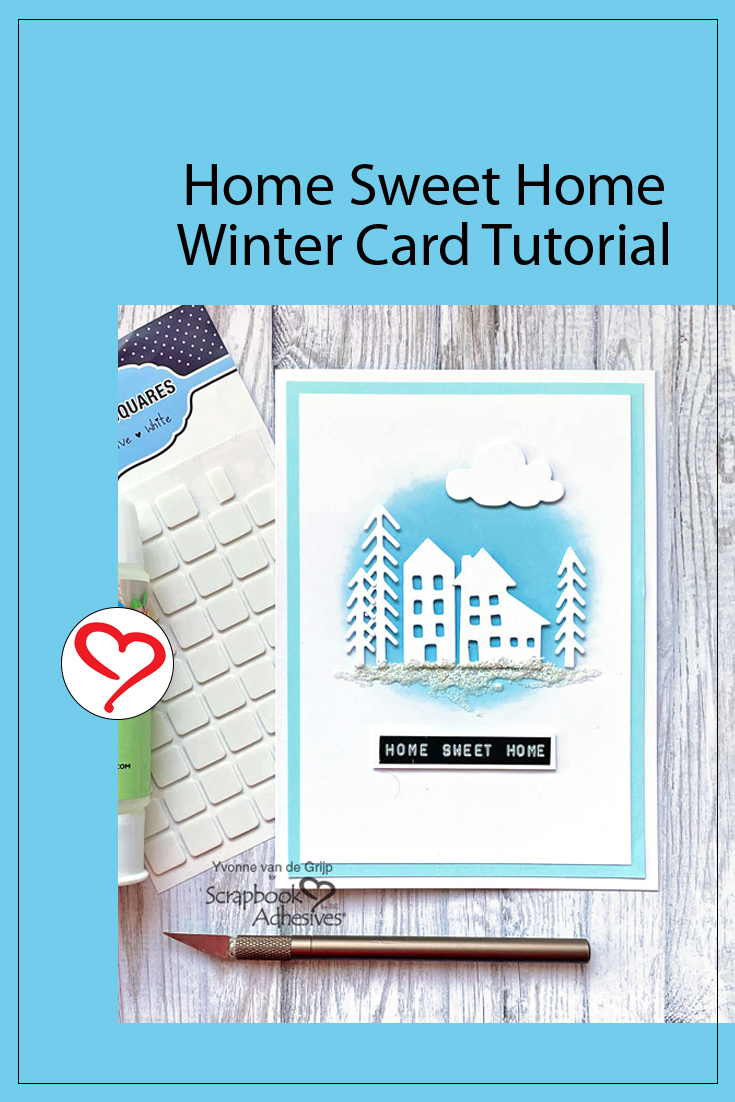
Hi everyone, Yvonne here with a Home Sweet Home Card.  Being January, I chose a winter scene for this card.  The home sweet home sentiment makes the card also suitable to congratulate someone on a new home or as a welcome home card.

Home Sweet Home Card by Yvonne van de Grijp for Scrapbook Adhesives by 3L

The card is very easy to make so also suitable for beginner card makers.   I would love to share how I made the card. Shall we get started?

The Blue Background Circle

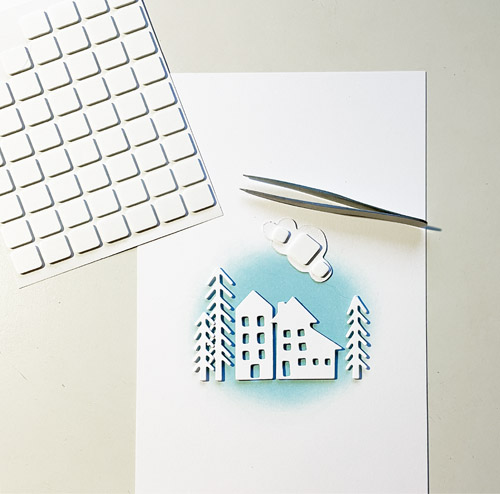
Start by making a soft blue circle on a piece of white cardstock. For this, I used a soft blue inkpad and an ink blending tool. Remember it’s better to add several layers when building up color. By gently adding a little more ink each time you can create that soft fading look for the inked background circle.

Embellishing the Card Panel

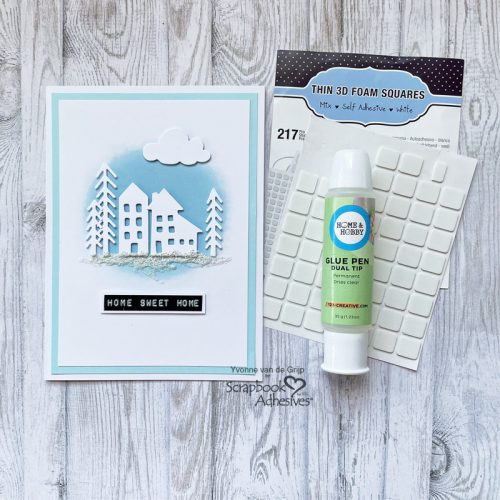
Start by die-cutting the trees, a cloud, and houses from a piece of white cardstock.  Then adhere the die-cuts onto the inked circle using Thin 3D Foam Squares White Mix.

Home Sweet Home Card by Yvonne van de Grijp for Scrapbook Adhesives by 3L

For the smaller parts, I cut some 3D Foam Squares into small strips (using a craft knife) so no adhesive will show. Using Thin 3D Foam Squares White Mix gives adds a lovely subtle uplifting effect to your Home Sweet Home card.

Wear Your Adhesive on the Outside with Glitter

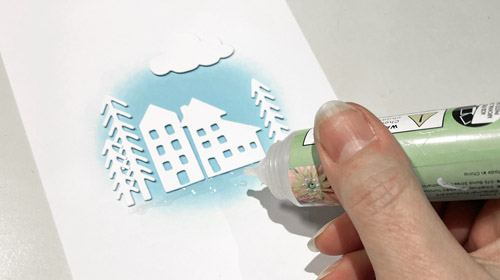
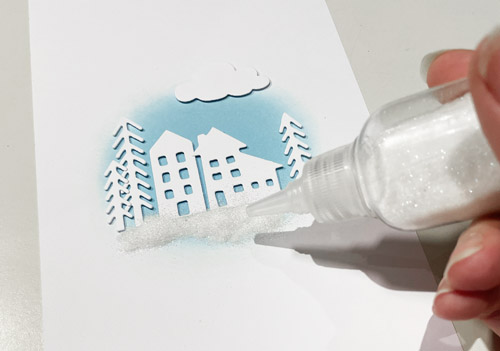
To create a snowy effect on the Home Sweet Home card I used the Dual Tip Glue Pen and glitter. Add glue from the Dual Tip Glue Pen following the bottom line of the houses and trees.

Home Sweet Home Card by Yvonne van de Grijp for Scrapbook Adhesives by 3L

Sprinkle some glitter upon and tap off the excess glitter. Let dry. Next, I added a second layer of glue and again sprinkled glitter over the wet glue. Set it aside to dry.

Home Sweet Home Card by Yvonne van de Grijp for Scrapbook Adhesives by 3L

This technique of making your adhesive shine is called Wear Your Adhesive on the Outside.

Making the Card Base.

Start by trimming the top card panel for the Home Sweet Home card to the size you like. Adhere to a blue card panel using the E-Z Runner® Grand Refillable Dispenser. Then add it to a white card base.

Home Sweet Home

I used my Dymo labeling tool to make a sentiment strip. Simply mat it to a white strip and place it on your card using Thin 3D Foam Squares White Mix. Voilá! Your Home Sweet Home card is ready to be sent!

I hope you enjoyed this tutorial and wish you happy crafting

Yvonne van de Grijp

Home Sweet Home Card by Yvonne van de Grijp for Scrapbook Adhesives by 3L

Creative Time: 20 minutes (drying time not included)

Skill Level: Intermediate

Materials needed:

Scrapbook Adhesives by 3L®

E-Z Runner® Grand Refillable Dispenser

Thin 3D Foam Squares White Mix

HomeHobby™ by 3L

Dual Tip Glue Pen

Other

Cardstock (White, Blue); Etched dies (Sizzix: Tim Holtz Thinlits™ Christmas Cutouts); Die-Cutting and Embossing Machine (Spellbinders Paper Arts®: Platinum 6 Machine); Dymo; Inkpad (Distress Oxide inkpads: Tumbled Glass); Ink Blending Tool; Glitter; Tweezers; Scissors; Paper Trimmer

Save to Pinterest!

Home Sweet Home Card by Yvonne van de Grijp for Scrapbook Adhesives by 3L Pinterest

Visit our Website and Blog!
Sign up for our Newsletter so you never miss a contest or giveaway!
instagram purple icon facebook icon purple pinterest purple icon twitter purple icon YouTube icon blog subscription purple icon

You Brighten My Day Card

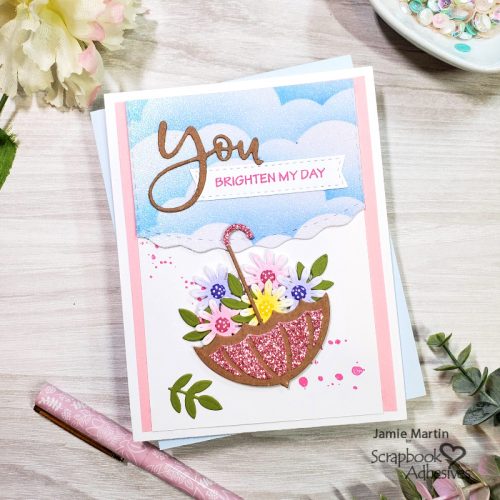
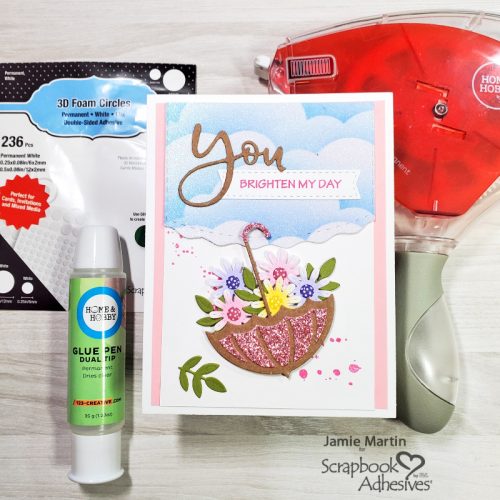
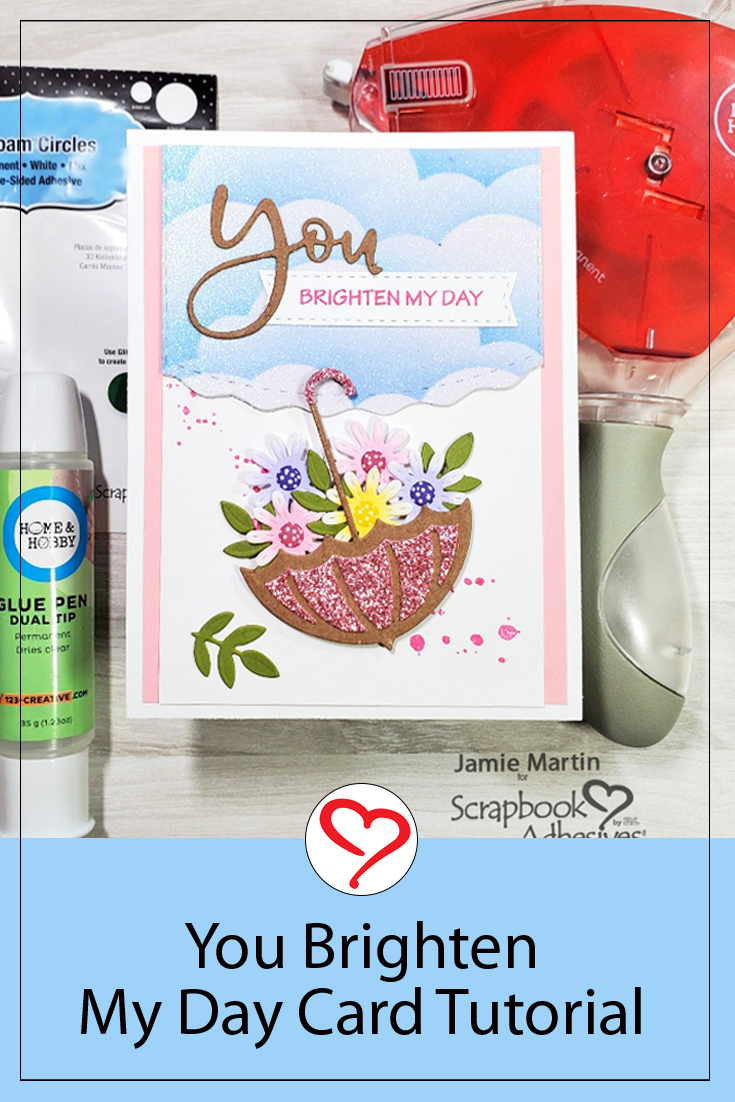
Hi, Jamie here with you today with an umbrella full of flowers to brighten up someone’s day! It is such a sweet friendship card, don’t you think? Let me show you how I assembled this card with some help of liquid, tape and foam adhesives!

You Brighten My Day Card by Jamie Martin for Scrapbook Adhesives by 3L

Brighten My Day Accents

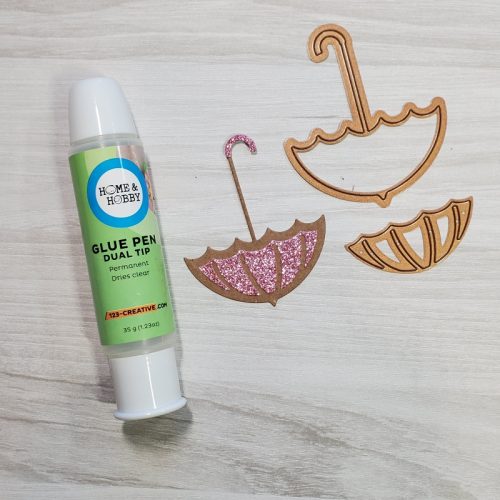
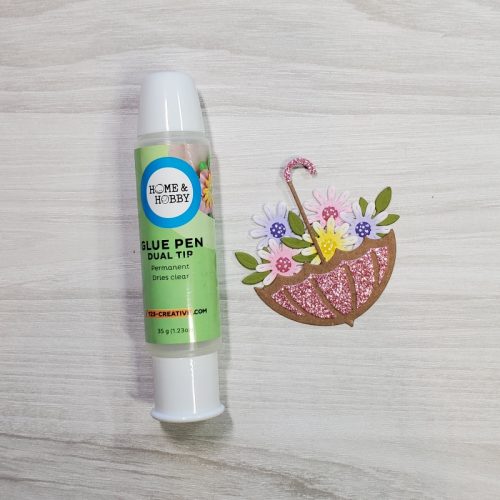
Die-cut the umbrella from kraft color cardstock and pink glitter paper. Glue the pink glitter paper to the kraft umbrella using the Dual Tip Glue Pen.

You Brighten My Day Card by Jamie Martin for Scrapbook Adhesives by 3L

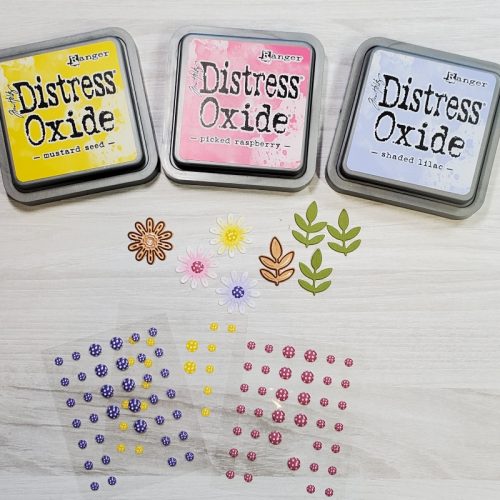
Die-cut flowers from white cardstock and add different colors of ink to the centers using a sponge dauber. Once the ink is dry, place an enamel dot in the middle. Also die-cut leaves from green cardstock.

You Brighten My Day Card by Jamie Martin for Scrapbook Adhesives by 3L

Glue the flowers to the back of the umbrella using the Dual Tip Glue pen.

You Brighten My Day Card by Jamie Martin for Scrapbook Adhesives by 3L

Creating the Background

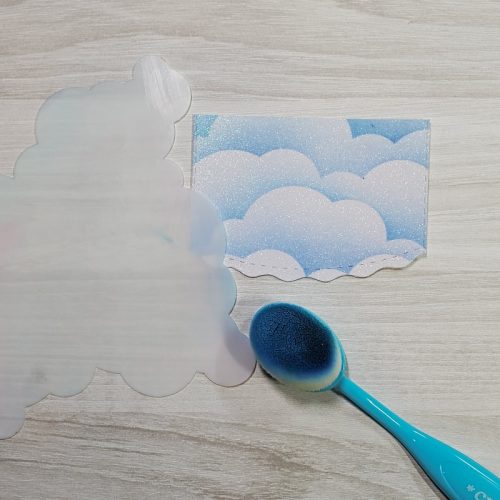
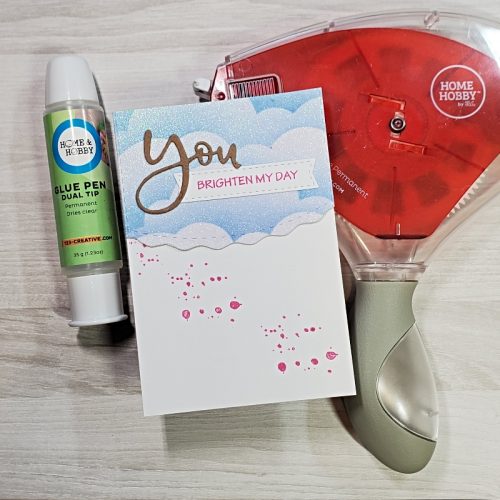
Use a cloud stencil to stencil clouds on white glitter paper with blue ink.

You Brighten My Day Card by Jamie Martin for Scrapbook Adhesives by 3L

The Sentiment

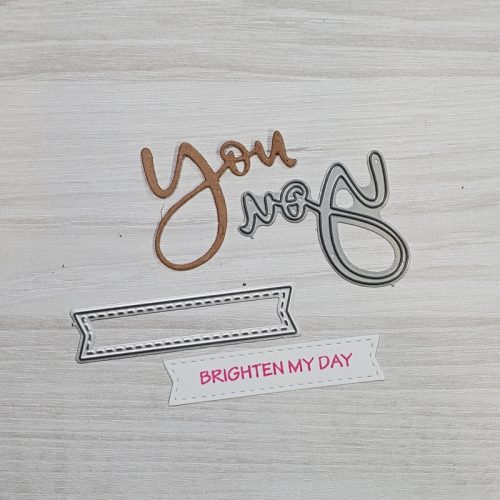
Die-cut “you” from kraft cardstock and the banner from white cardstock.  Stamp the sentiment on the banner with pink ink.

You Brighten My Day Card by Jamie Martin for Scrapbook Adhesives by 3L

Embellish the Card Front

With the E-Z Runner Grand, attach the cloud panel to the top of a white cardstock panel and stamp splatter spots on the panel with pink ink. Use the E-Z Runner Grand to attach the banner to the cloud panel and the Dual Tip Glue Pen to glue the sentiment above the banner.

You Brighten My Day Card by Jamie Martin for Scrapbook Adhesives by 3L

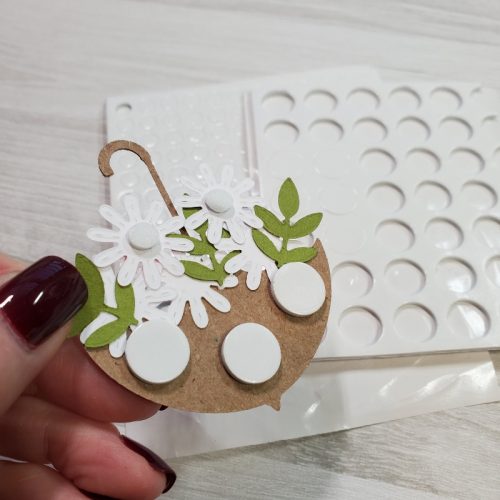
Place 3D Foam Circles White Mix, both big and small on the back of the umbrella and pop it up on the card over the splatter dots.

You Brighten My Day Card by Jamie Martin for Scrapbook Adhesives by 3L

Secure a green die-cut leaf to the bottom left of the card with the Dual Tip Glue Pen, and it’s complete!

You Brighten My Day Card by Jamie Martin for Scrapbook Adhesives by 3L

Skill Level: Intermediate
Creative Time: 35 minutes

Materials Needed:
Scrapbook Adhesives by 3L®

E-Z Runner Grand Dispenser
3D Circles White Mix

HomeHobby™ by 3L
Dual Tip Glue Pen

Plus
Spellbinders Paper Arts- Umbrella Die, Flower Die,
Stampendous Sentiment Rubbernecker Stamps- Cloud Stencil, Splatter Stamp, Word Die
PrintWorks Specialty Paper- White Glitter Paper, Cardstock
Ranger Ink- Distress Inks, Sponge Daubers

Save to Pinterest!

You Brighten My Day Card by Jamie Martin for Scrapbook Adhesives by 3L Pinterest

Visit our Website and Blog!
Sign up for our Newsletter so you never miss a contest or giveaway!
instagram purple icon facebook icon purple pinterest purple icon twitter purple icon YouTube icon blog subscription purple icon