As I was digging through my stash recently, I found some little lunch box shaped metal boxes I had bought on clearance, perfect for altering! So I grabbed one of those, some Graphic 45 Steampunk Debutante paper and some bits and baubles in my fun drawer and went to work! These little boxes would work perfectly for gift cards, candy and other small gift items.
Pin This!
Covering the Box
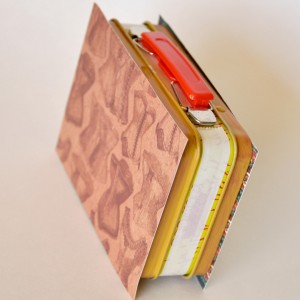
The box had red sides, so I covered that with ochre paint. Next I adhered striped paper to the center, and patterned paper to the front and back sides. Crafty Power Tape does a great job of holding paper to metal! Sand the paper so it conforms to the shape of the box.
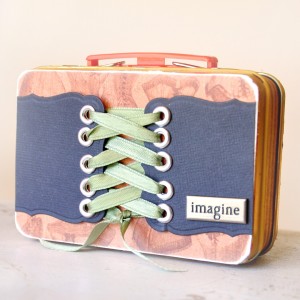
The front of the box is a corset, made by die cutting Spellbinders Labels Seventeen die twice, adding eyelets and weaving a ribbon through them. I applied Crafty Power Tape to the back side of the die cuts, adhered to the box and adjusted the ribbon. The metal charm came with its own adhesive; otherwise I would have used Crafty Power tape on that too!
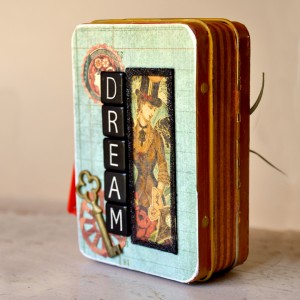
The back side of the box includes a glass slide, die cuts, plastic letters and a metal key.

The Glass Slide
To make the glass slide, set it on an Adhesive Sheet and burnish it carefully, I used a brayer. Remove it from the backing and position over an image on patterned paper. Burnish again. Trim excess around the glass.
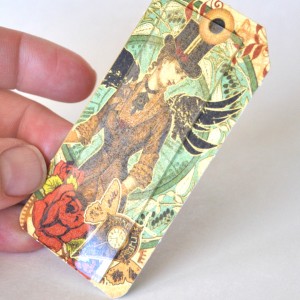
With an Adhesive Sheet,(1/4 inch Extreme Double-Sided Tape would also work here) trim strips to ¼” width, in 1” and 3” lengths, 2 of each. Carefully peel the yellow off then place the adhesive over the edge of the glass, and wrap it around to the back side. Repeat for each side. Burnish carefully! Pour Embossing Powder onto a clean surface (I use a paper plate) and swipe the slide around, covering the adhesive. Heat the embossing powder. (Note: the glass will get hot!) I used a binder clip to hold the glass while heating it.
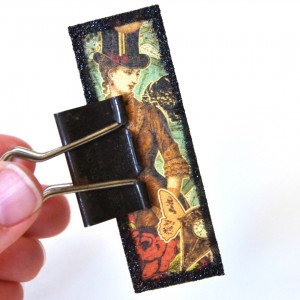
Adhere the slide with Crafty Power Tape. Back the patterned paper with an Adhesive Sheet before die cutting, then peel off the backing and apply to the box. Adhere the letter tiles and the flat backed key with Crafty Power Tape.
On to the Inside!
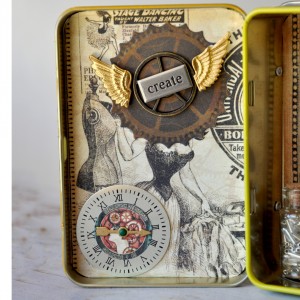
I measured, cut and secured patterned paper to the inside with Crafty Power Tape. Again, I adhered patterned paper to Adhesive Sheets, then cut/embossed my dies. I applied the clock face to an Adhesive Sheet, then applied the die cut, then a metal arrow, which was secured with a tiny brad. The larger circle die cut features a round metal piece backed with an Adhesive Sheet. The wings are attached with 3D Foam Squares, and the “create” came ready to stick.
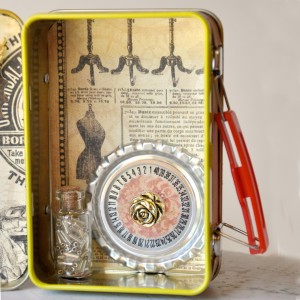
The other side of the box features a large flattened bottle cap, die cut circle, radio dial, and plastic button, as well as a tiny glass jar of beads. The bottle cap was flattened in my Wizard Die Cut Machine. I sandwiched the patterned paper in Adhesive Sheets, to make both sides sticky, so it would stick to the clear plastic dial and the metal bottle cap. The back side of the rose button was placed onto an Adhesive Sheet, the positioned onto the dial.
The tiny glass jar was filled with tiny beads, corked and then adhered to paper, which was then adhered to the ‘floor’. To make it more secure, I applied 3D Foam Squares to the back side of the jar.
The fun patterned paper, the trinkets and findings I’ve been collecting and the versatile box came together in this Steampunk inspired box. It could be displayed as a shadow box or used as a gift card holder! I had so much fun piecing this together, and SCRAPBOOK ADHESIVES BY 3L products are strong and versatile, and make altering things so easy!
Supplies:
- SCRAPBOOK ADHESIVES BY 3L: Crafty Power Tape, Adhesive Sheets, 3D Foam Squares
- Spellbinders: S4-194 Classic Inverted Scalloped Circles, S4-116 Standard Circles SM; S4-268 2010 Snowflake Pendants, S5-025 Labels Seventeen
- Graphic 45: Steampunk Debutante Collection papers
- The Paper Studio: Spare Parts Clock Icons
- Blue Moon Beads : Glass Bottle
- Jacquard: Neopaque Paint, Ochre
- Maya Road: Large Bottle Cap
- Sparkle N Sprinkle: Ebony Spark Embossing Powder
- Colorbok: Silver Eyelets
- Tim Holtz: Sprocket Gears
- Making Memories: Metal Word Charms
- Ranger: Memory Glass slide
- Misc: Ribbon, Rose Button, Wings, Key, Alpha Tiles, Beads

By Deborah Young September 20, 2010 - 2:44 pm
This is amazing, Beth! I love all of your steampunky elements. Thanks for the tips on using the various adhesives!
By MargieH September 20, 2010 - 4:34 pm
Love how this project turned out!
Great job, Beth…keep ’em coming!
By Holly September 20, 2010 - 10:32 pm
Wow – cool project! Love how you put adhesive on the edge of the glass and then used embossing powder. Fabulous idea!