
 Hello, Latisha here today with a simple photo pocket/envelope tutorial. Perfect to store a Valentine’s Day card or photos.
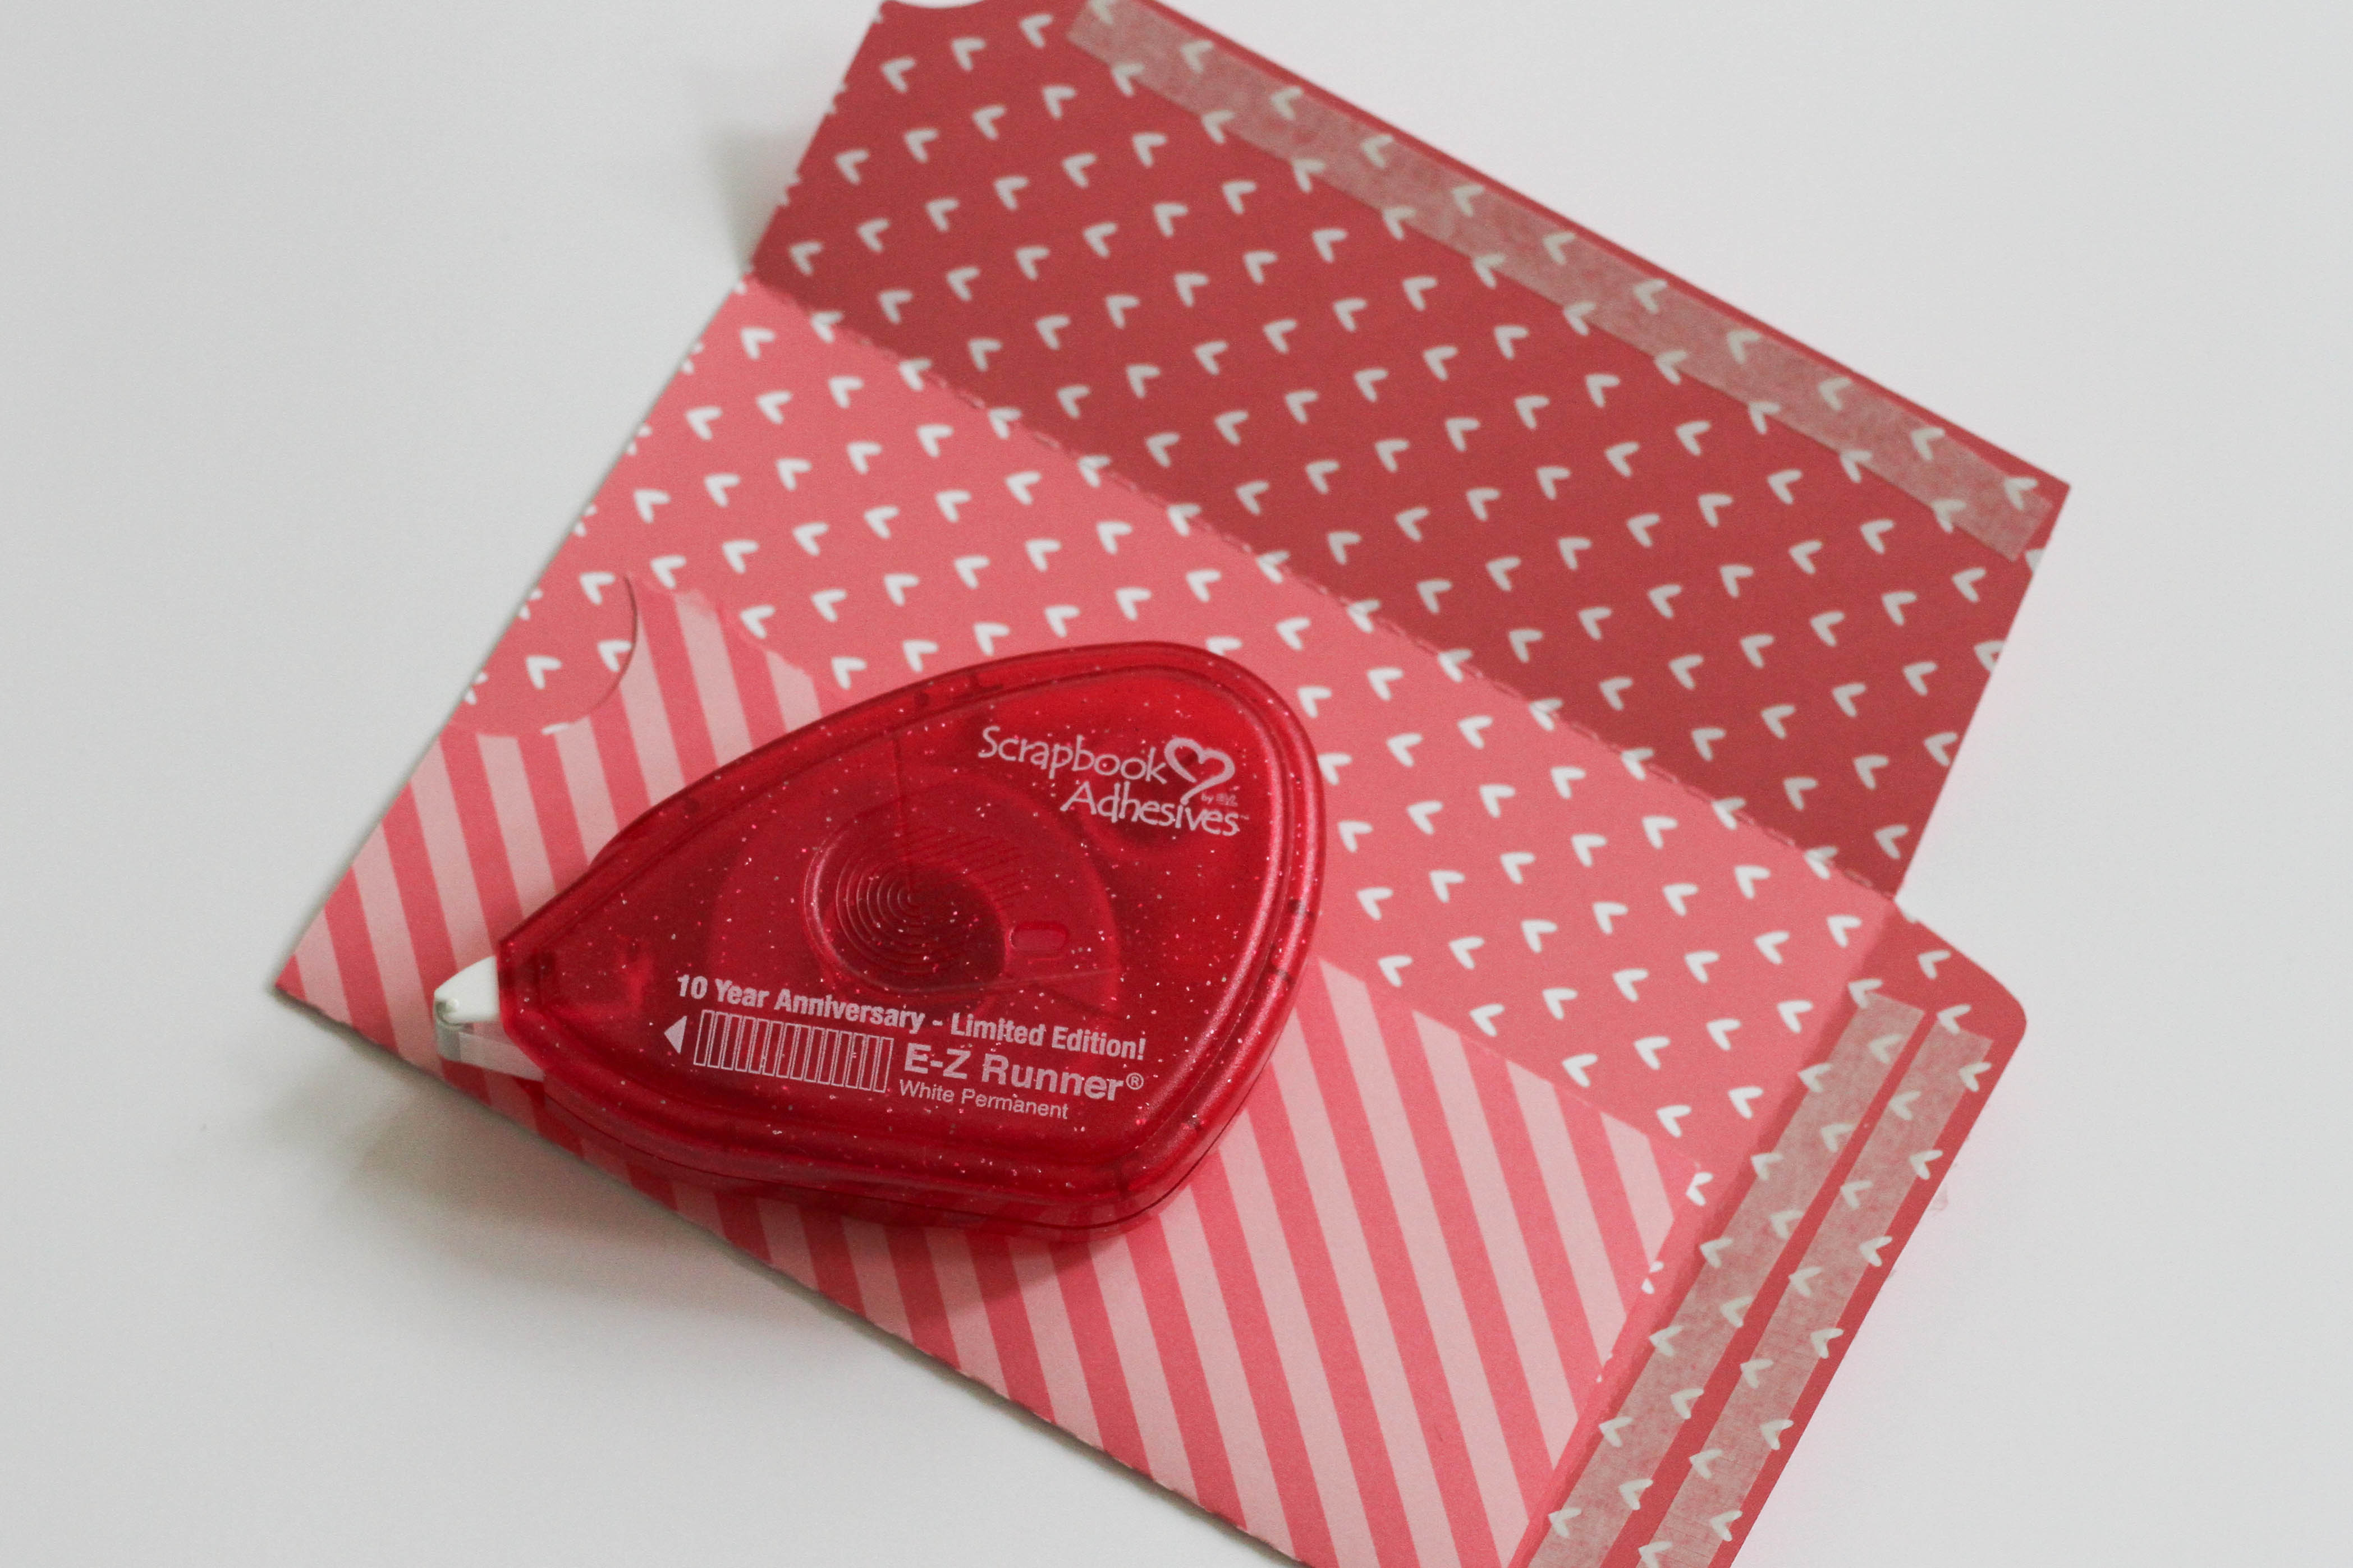 1. After cutting out my Silhouette file, using the Scrapbook Adhesives by 3L EZ Runner, apply adhesive to the edges and seal.
 2. Cut out panel.
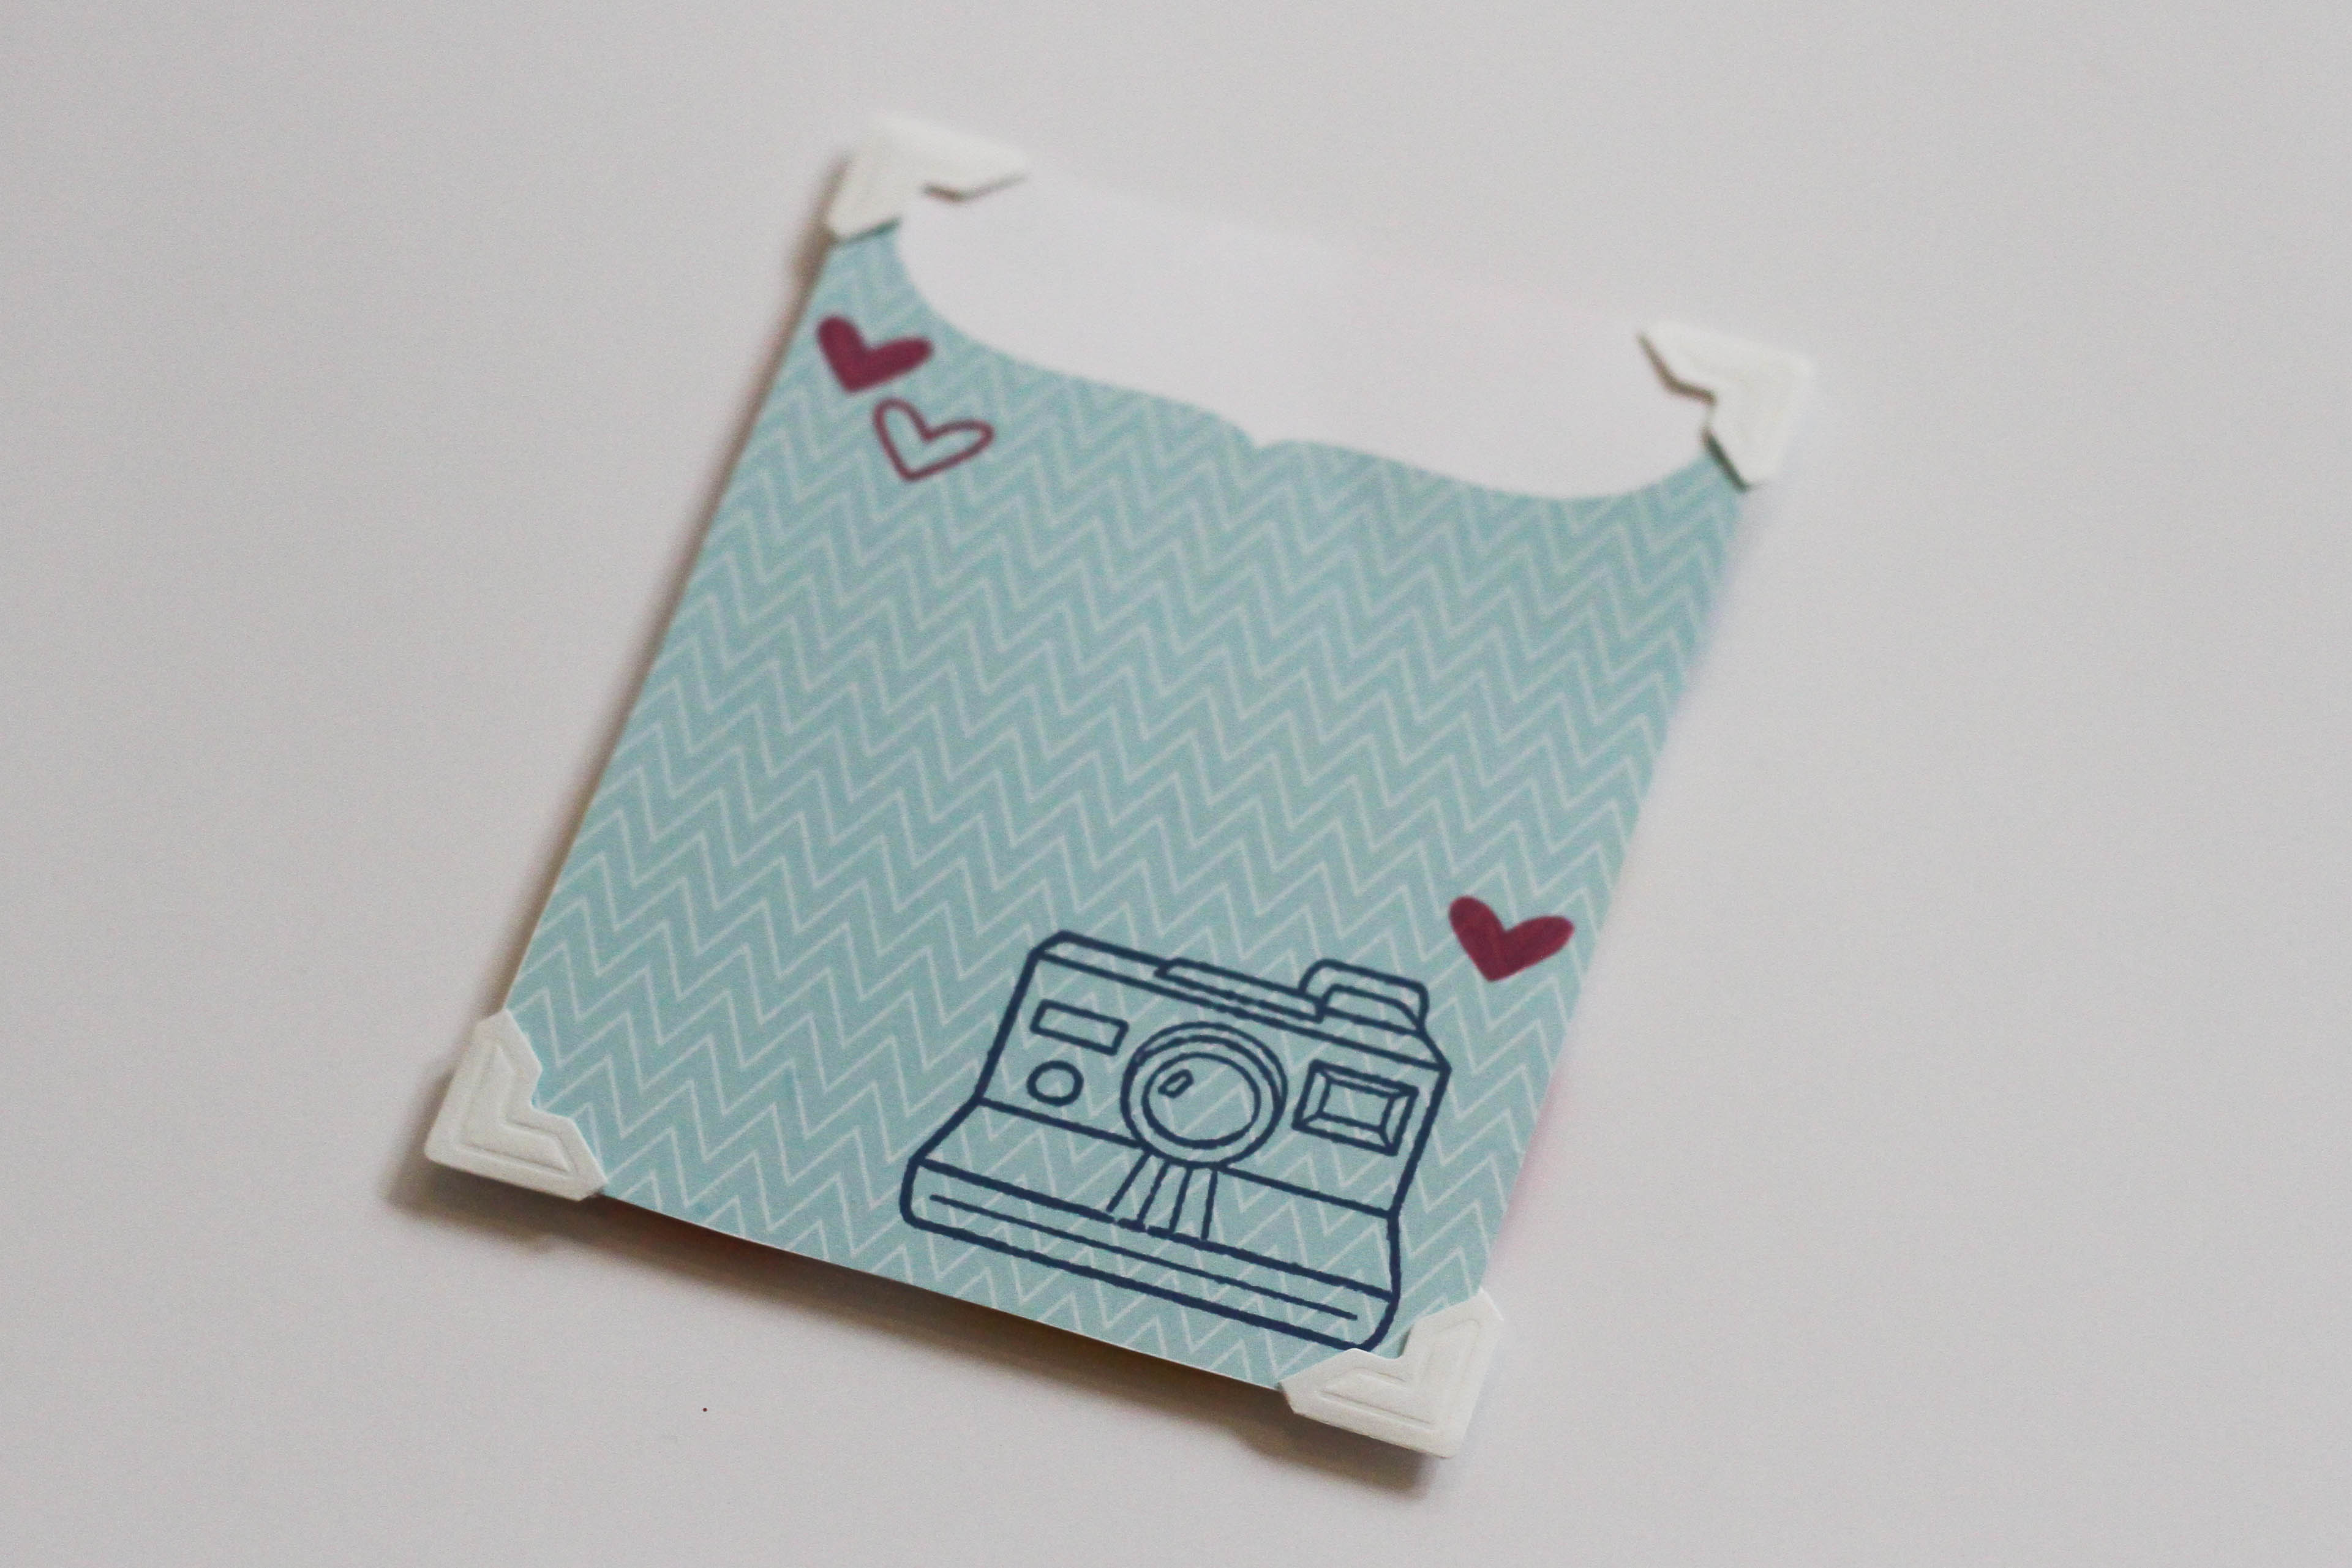
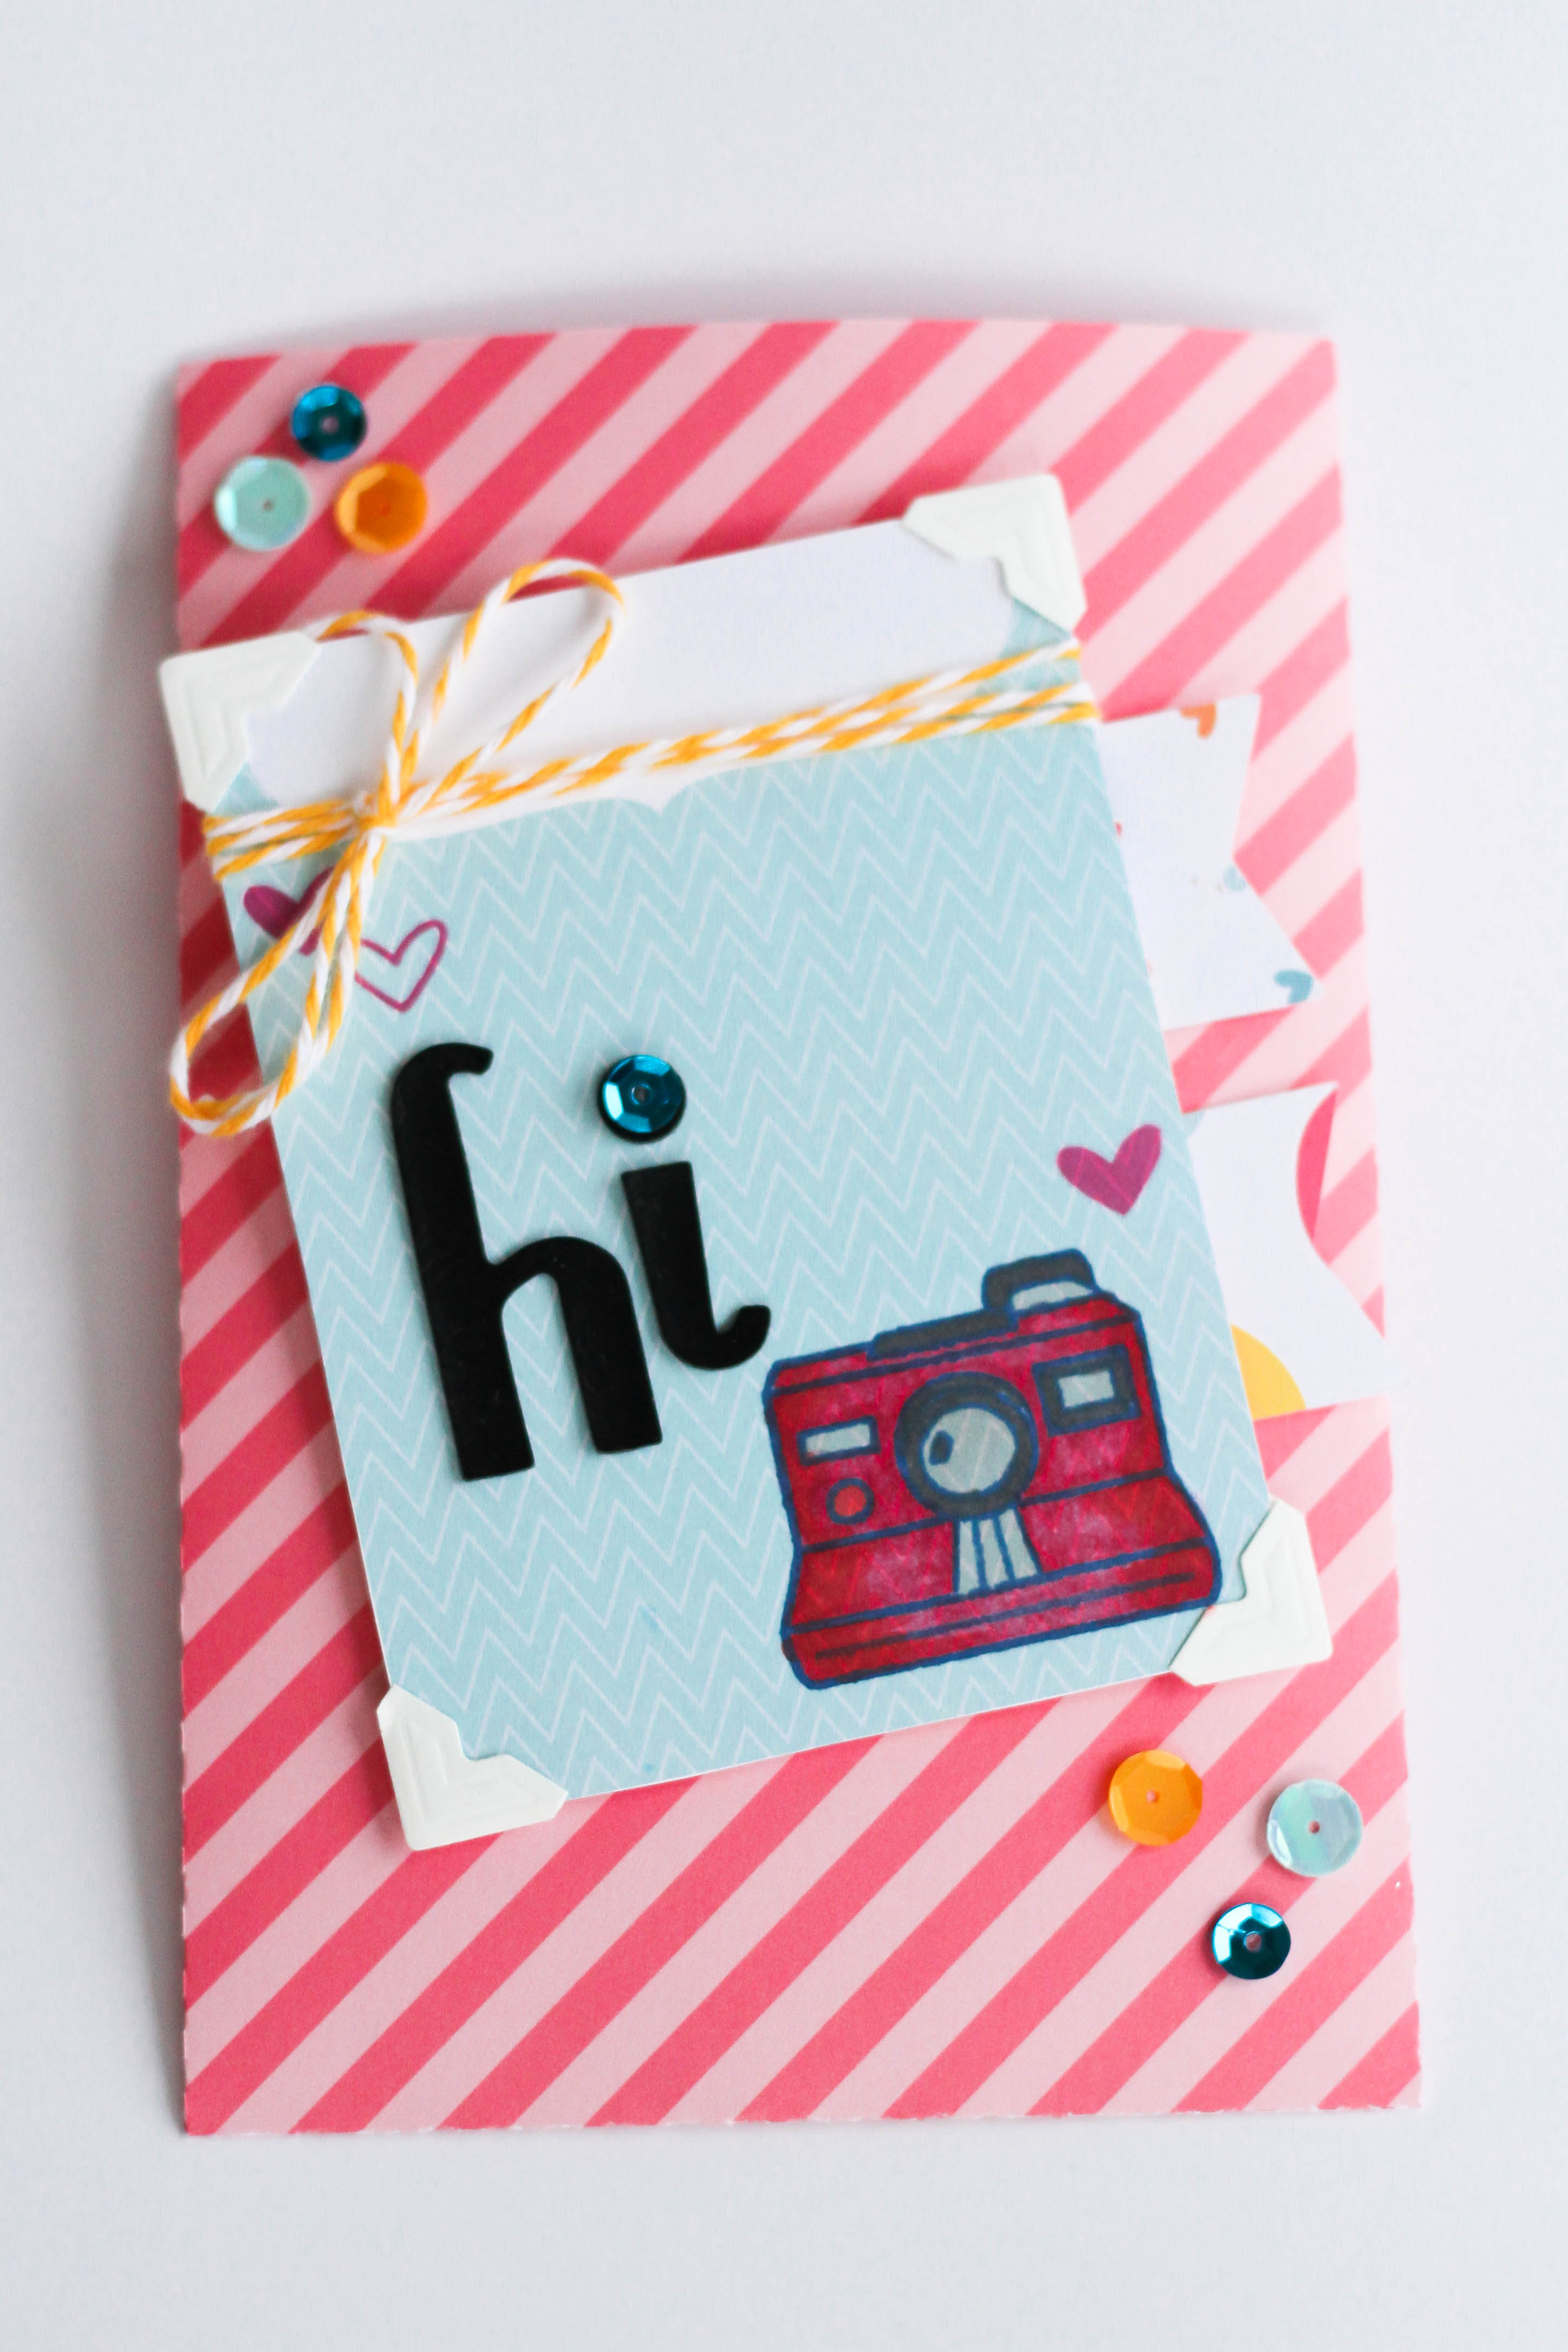
3. Stamp images onto the pattern paper. (Lawn Fawn)
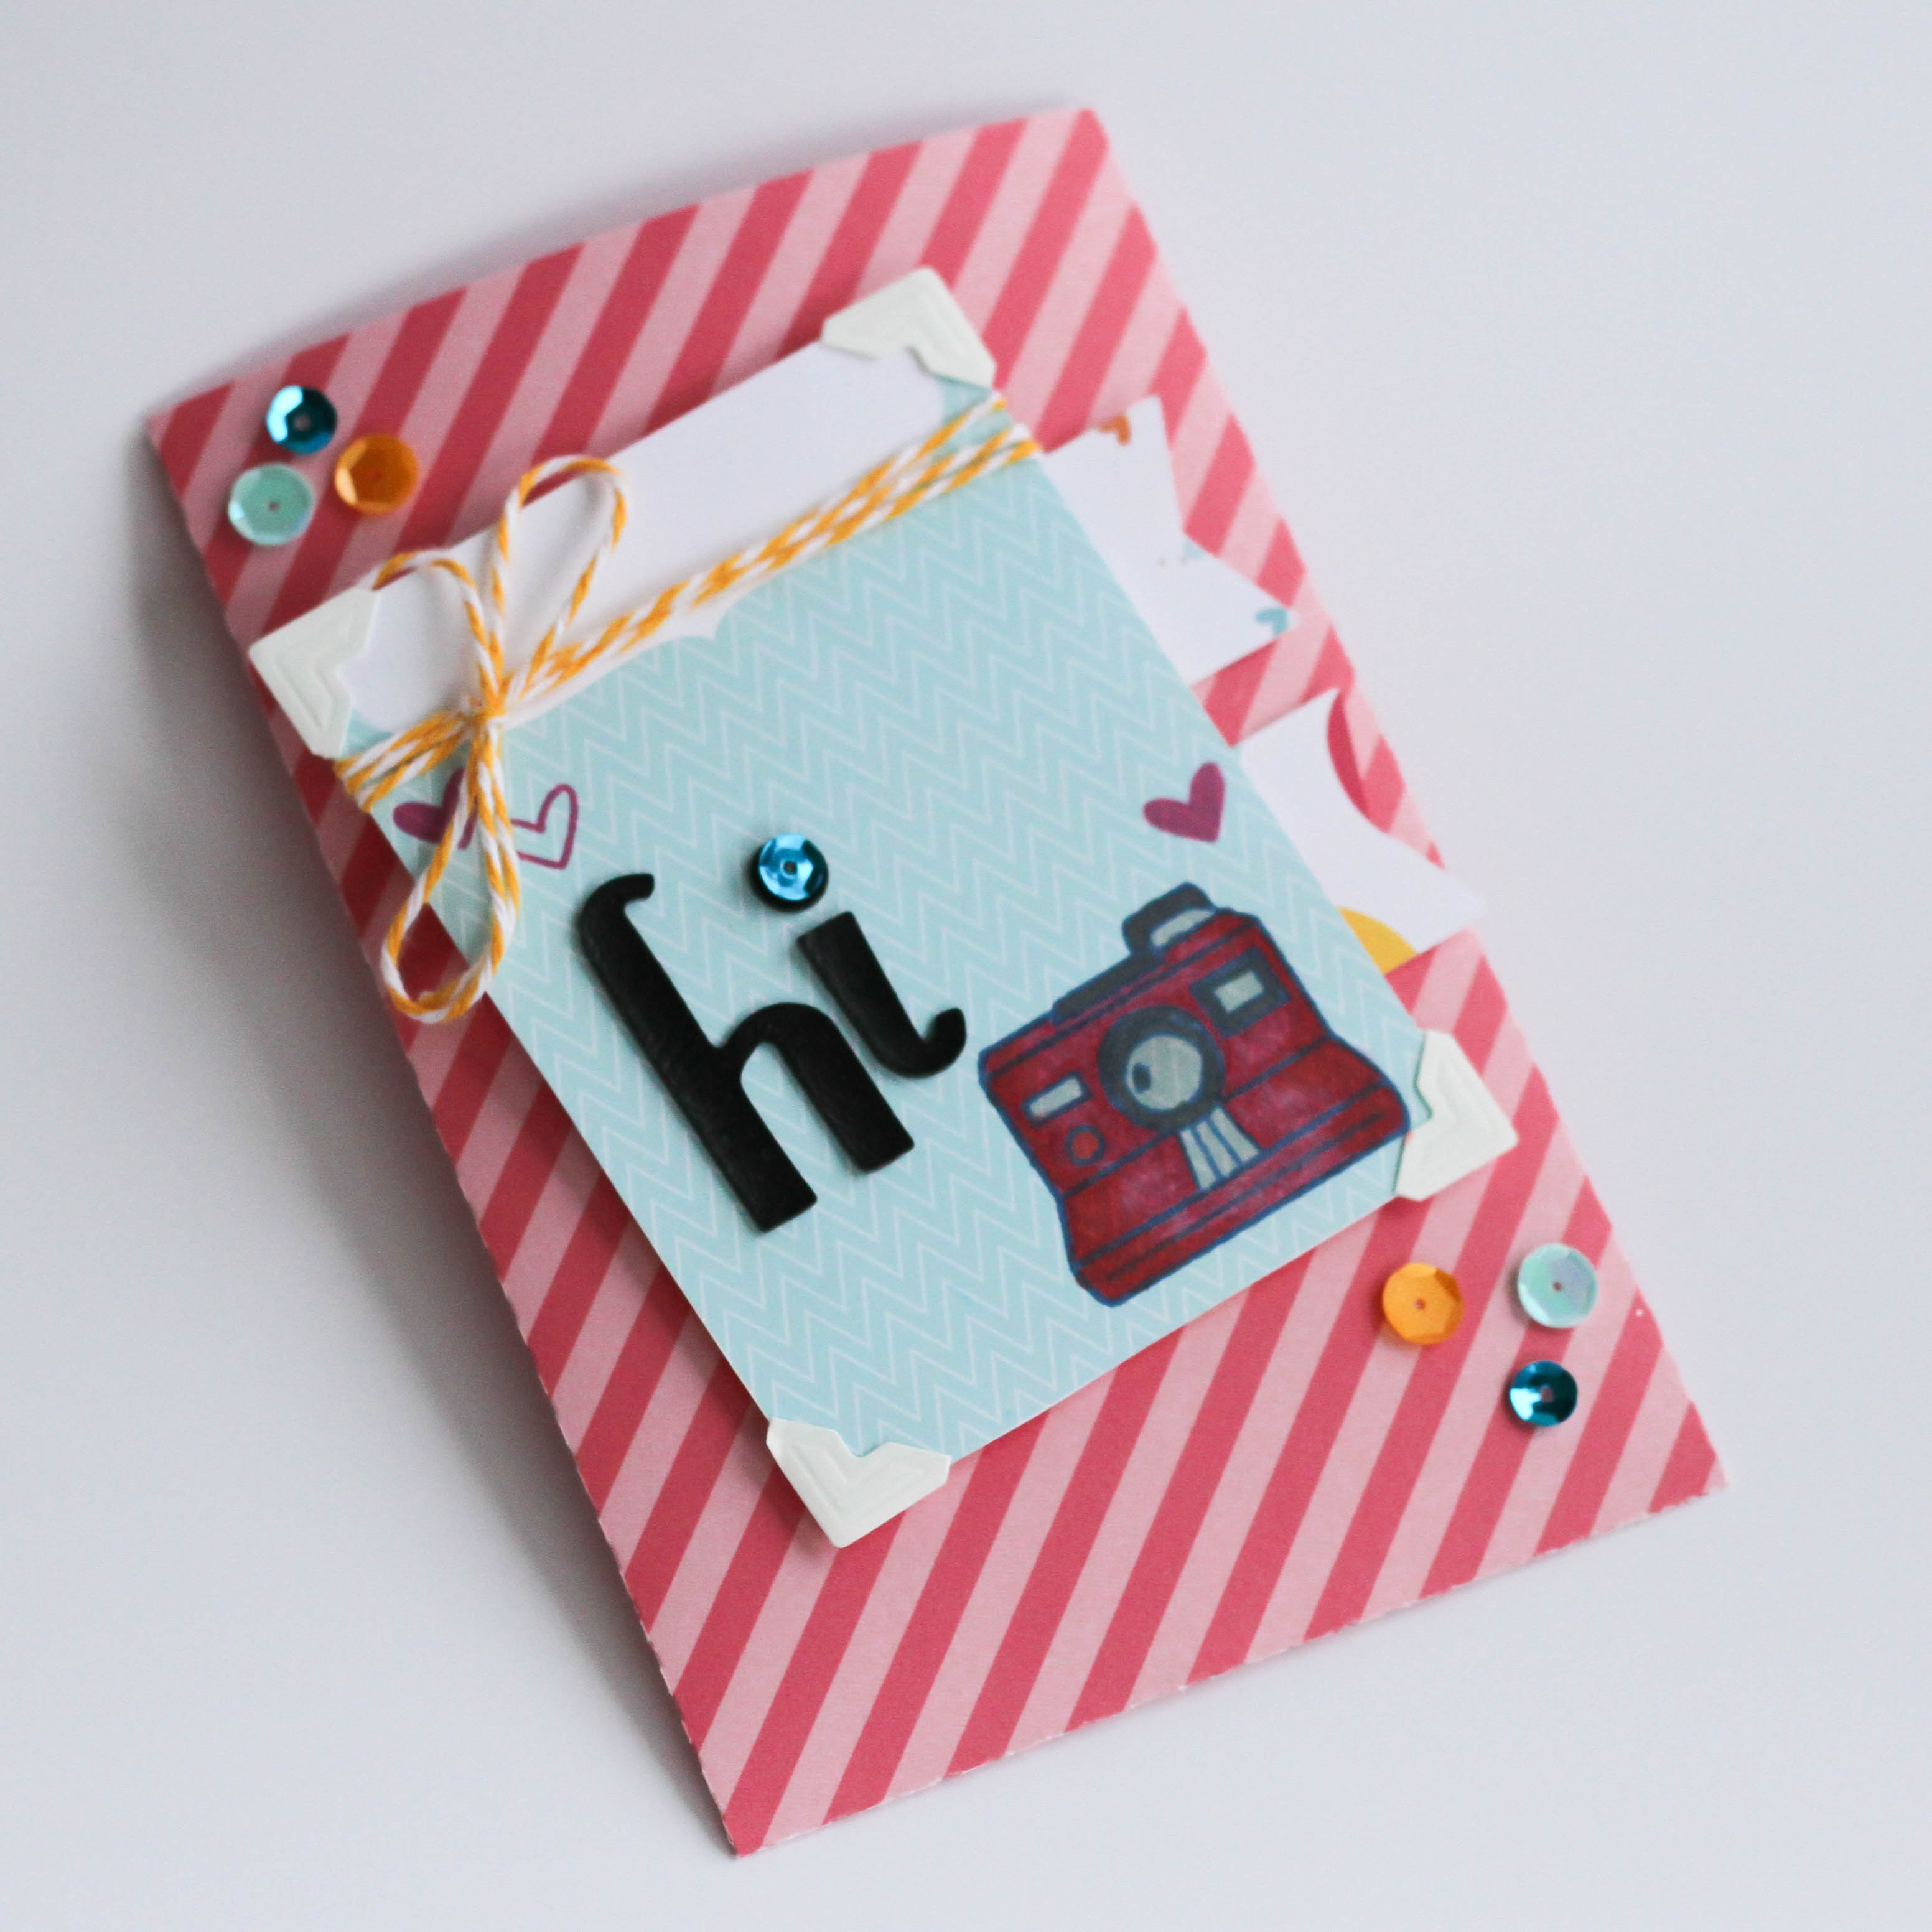
4. Apply Scrapbook Adhesives by 3L White Photo Corners to each corner.
5. Color in camera using Copic Markers.

6. Apply Scrapbook Adhesives by 3L 3D Foam squares (white, regular) on the back of the panel.
7. Tie twine around the panel.
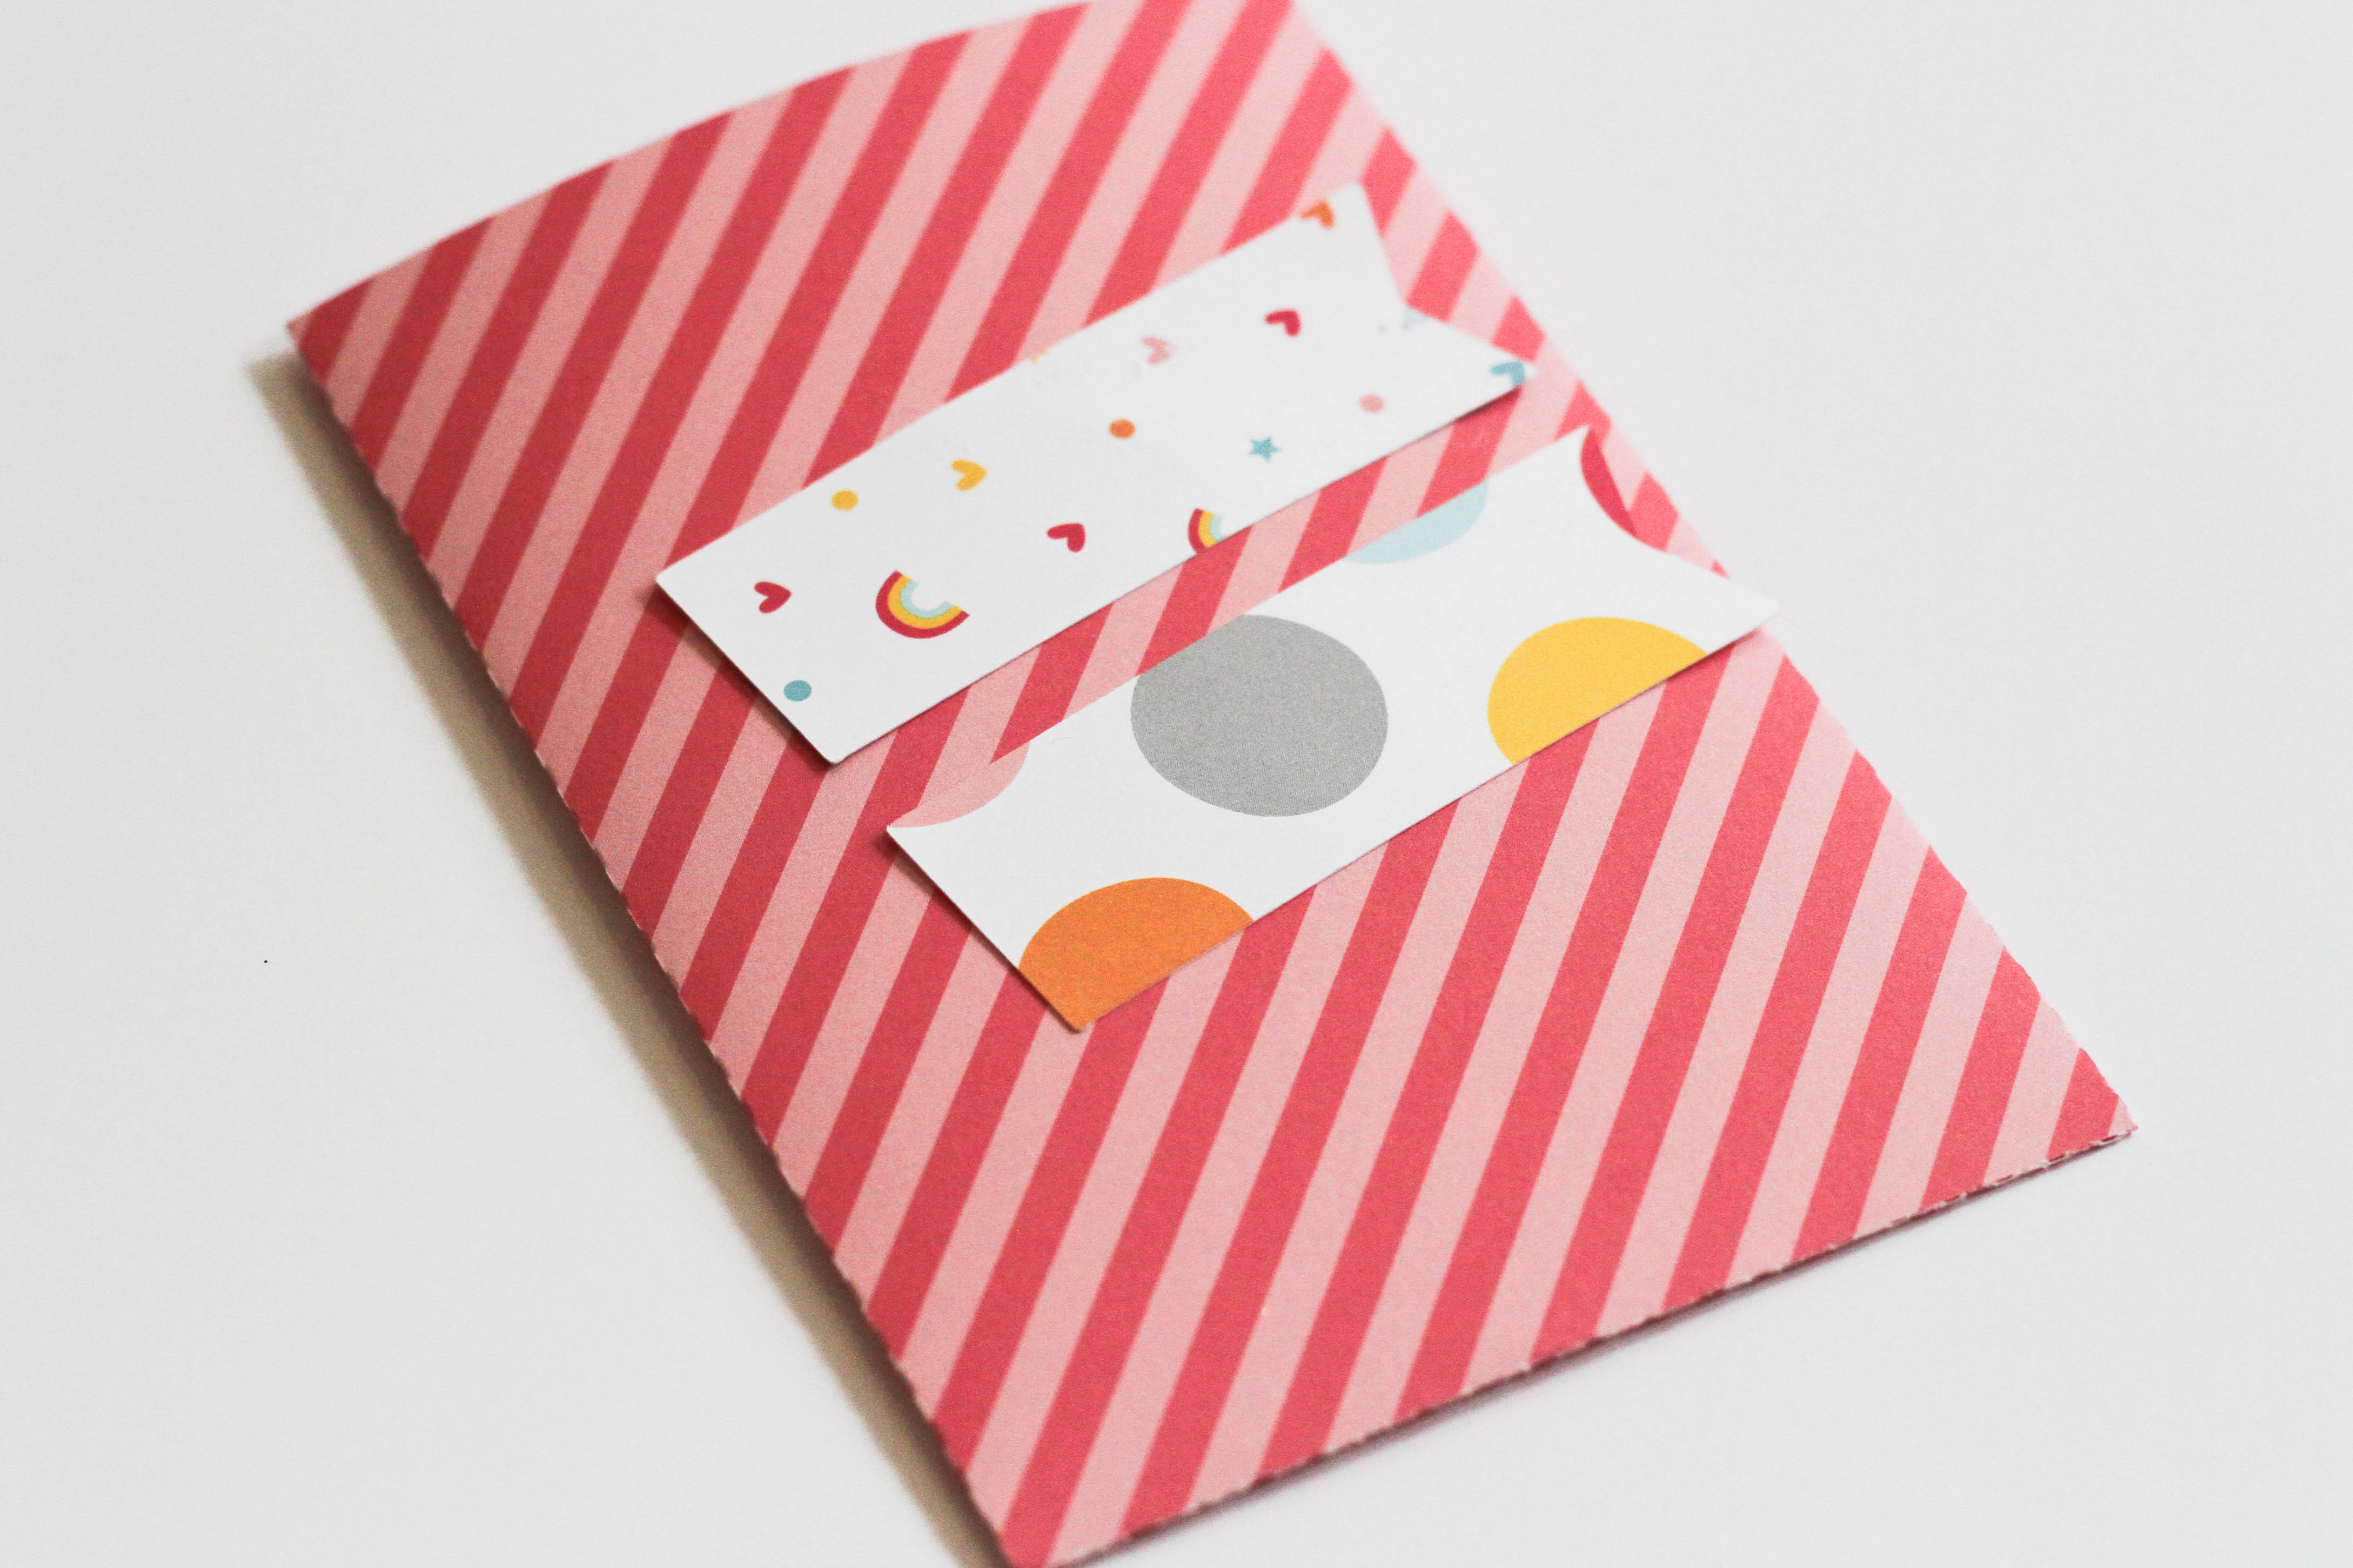 8. Using Scrapbook Adhesive by 3L EZ Runner, adhere die cuts to the front of the envelope.
9. Adhere the panel to the envelope.
10. Apply sequins to the envelope using Scrapbook Adhesives by 3L Dodz Small.
11. Add stickers to create sentiment.
Materials Used: Scrapbook Adhesives by 3L 3D Foam Squares (regular, white), Scrapbook Adhesives by 3L Dodz Small, Scrapbook Adhesives by 3L Photo Corners White, Scrapbook Adhesives by 3L E-Z Runner, Lawn Fawn Pattern paper, Lawn Fawn stamps, Twinery Twine, sequins, Lawn Fawn die cuts, GinaK ink, Silhouette cut file
By Deborah S January 26, 2014 - 2:24 pm
Love this project adorable and so useful. Thanks for the tutorial have a great day!