
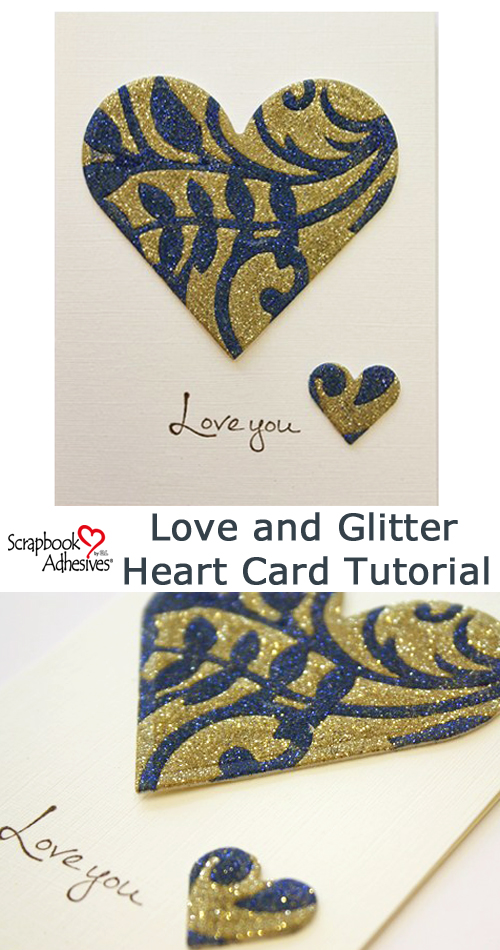
Hi everyone it is Christine here today with some love and glitter! I discovered this technique recently and it works perfectly with 3D Foam Creative Sheets.
Love and Glitter in Action!
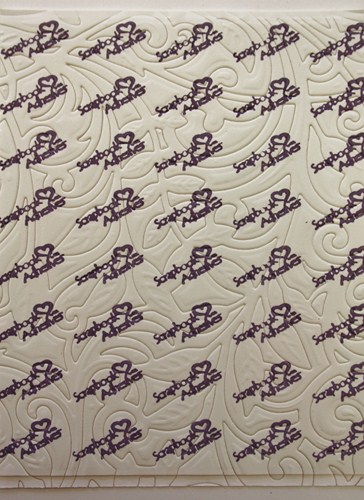
First, I selected an etched die called Botanical Swirls. It is a background die and would cover a large area.
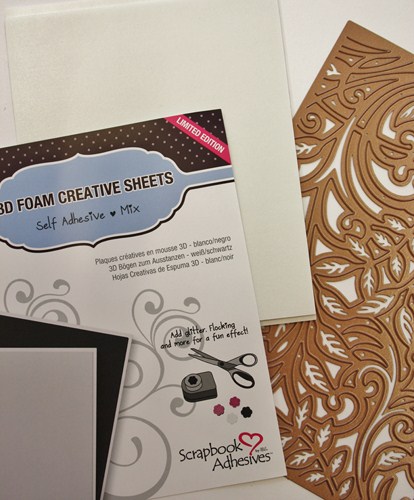
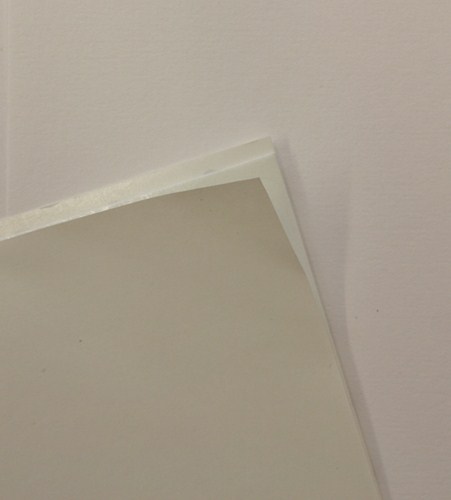
Take a sheet of the 3D Foam Creative Sheet, remove the liner and place a piece of white cardstock on top. Set aside that liner sheet as we will use it later.
On the other side (the liner side), position your die template on top and run through your manual die-cutting machine to cut.
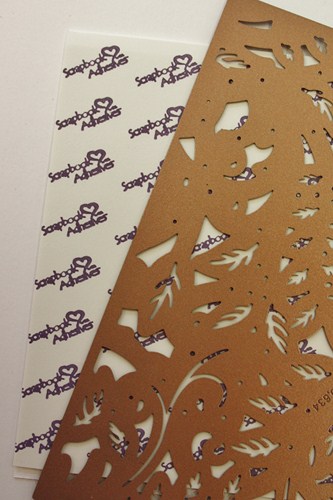
This is how it will look after die-cutting the 3D Foam Creative Sheet.
Using your paper piecer, begin removing certain sections (or designs) of the cut sheet because it’s so much easier than using your fingernails!
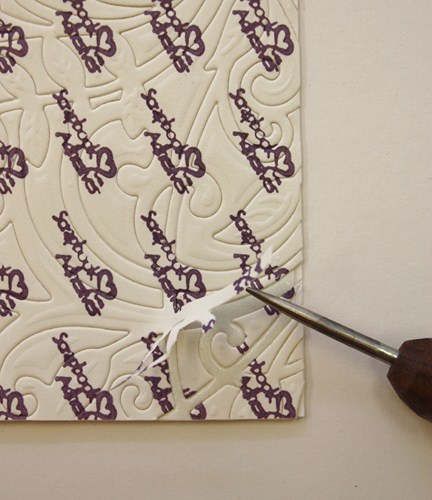
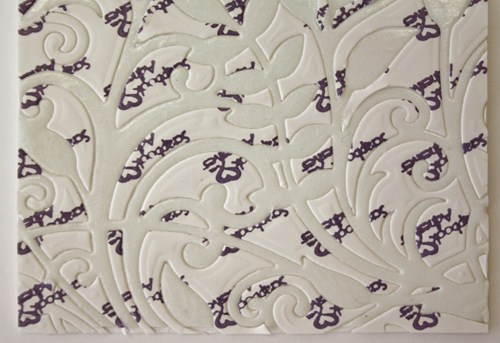
I chose to reveal the leaves and swirls, leaving the background in place. So it ends up looking like this – see below image.
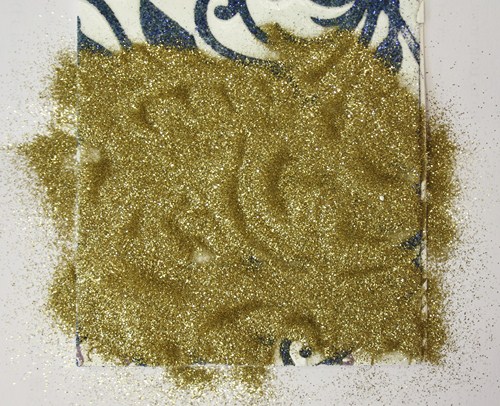
Cover the exposed areas with glitter. I used a lovely blue sparkly glitter color. Make sure to press the glitter in to secure and then tap off the excess.
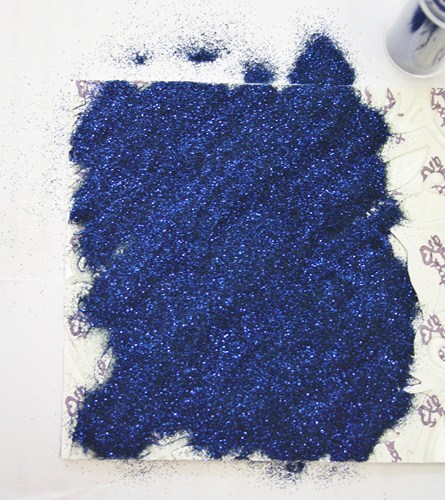
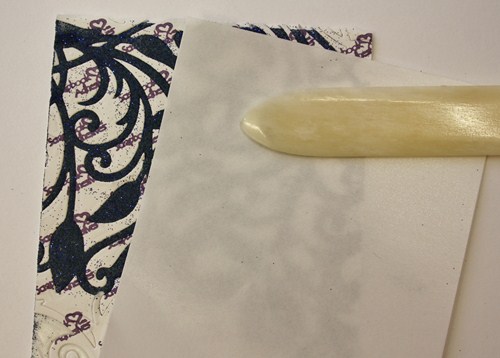
In addition, use that liner sheet you put aside to lay over the glittered surface and burnish lightly with a bone folder. Now you know that glitter will not go anywhere!
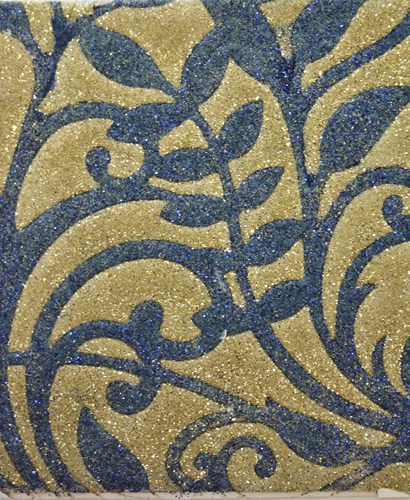
Next, remove the remainder of the liner and cover with a different colour glitter. Repeat the same process as before.
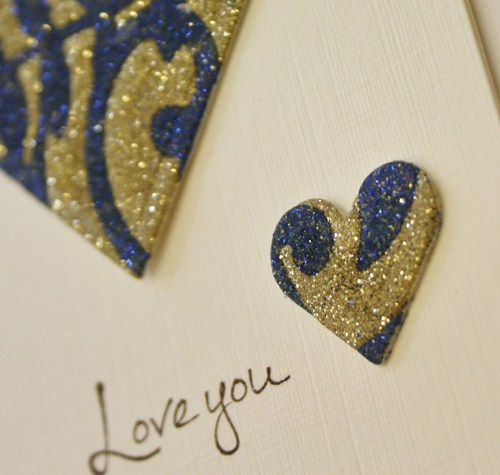
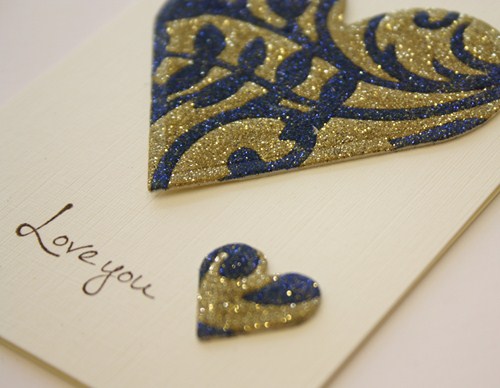
After you burnish the last of the glitter, your sheet is completely decorated. Doesn’t it look stunning?!
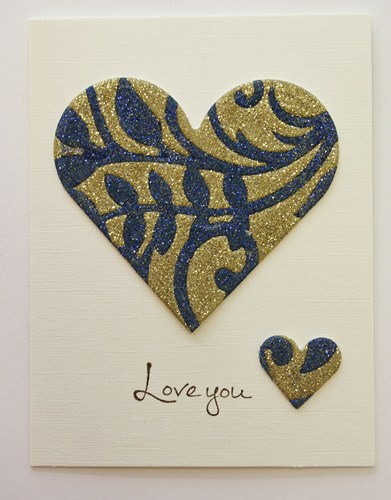
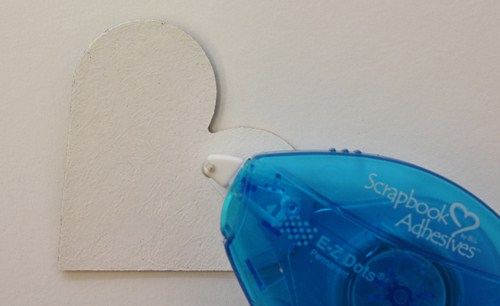
For my focal point on the card, I chose to die-cut three classic heart shapes.
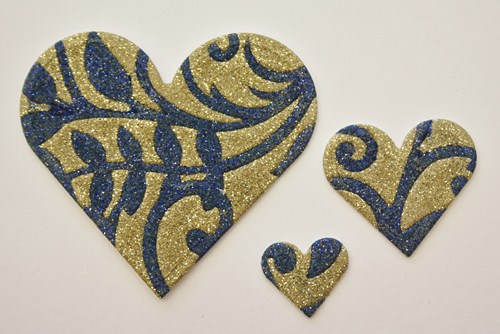
To affix to my card front, I used E-Z Dots® Permanent Refillable. Lastly, I stamped a sentiment in black ink and we’re done!
I created a very simple card to keep the focus on those special glittered hearts.
This would work with many different die cut shapes and glitter colours.
Thank you for joining me today, try some love and glitter with Scrapbook Adhesives by 3L®.
Christine
Creative Time: 40 minutes
Skill Level: Intermediate
Material Needed
Scrapbook Adhesives by 3L®
3D Foam Creative Sheets
E-Z Dots® Permanent Refillable
Other
Etched Die: Spellbinders® Paper Arts (Botanical Swirls and Classic Hearts); Glitter: Stampendous; Stamp; White Cardstock
Pin It!
By Elaine wainwright May 19, 2014 - 10:41 am
What a fabulous idea ! Would never of thought of this. Will give it a go xx
By Pam Rudzki May 19, 2014 - 10:58 am
What a great idea!! This goes into my ‘must try’ file!! Thank you Christine!
By Lisa - papergrace May 19, 2014 - 12:51 pm
Absolutely beautiful results from this technique, Christine. I love how it turns out. So pretty! ♥
By Deborah S May 19, 2014 - 1:53 pm
What a super elegant card thank you for the easy to follow step by step instructions looking at the finished results you would never guess how simple the process was thanks
By Janice May 19, 2014 - 5:04 pm
What a great technique this is Christine, and I love your card, it’s so classy!
Janice x
By Christine Collins May 21, 2014 - 12:55 am
Hi Christine, what a great technique, and it creates a stunning effect. Your card is beautiful .
Chris xx
By Carole Zorzo May 21, 2014 - 1:34 am
Hi Christine, this is fabulous – what a fabulous effect and a very elegant card…thanks for sharing, Carole Z X
By Julia May 21, 2014 - 1:43 am
That is a great technique, definitely one to try.
By Lydia Jordan May 21, 2014 - 2:04 am
Hi Christine,
What a very clever idea, very effective, thanks for the clear instructions.
Lydia
X
By SusanP, Kent May 21, 2014 - 5:03 am
This is a brilliant technique and so effective in this project. Lovely.
By Sarah May 21, 2014 - 6:22 am
Very Clever Christine. I like this idea.
By Elizabeth Sparke May 21, 2014 - 6:59 am
What a brilliant technique and so elegant.
Elizabeth x
By Anne May 21, 2014 - 7:04 am
Great technique, so effective. Anne x
By Janette May 21, 2014 - 2:03 pm
Wow Christine what a fantastic idea! It looks stunning! X
By Maggie May 21, 2014 - 4:44 pm
Great technique Christine, it’s really effective ~ I love it! HUGS,
Maggie x