
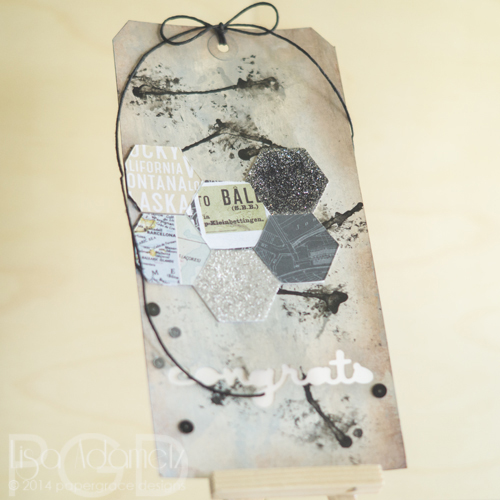
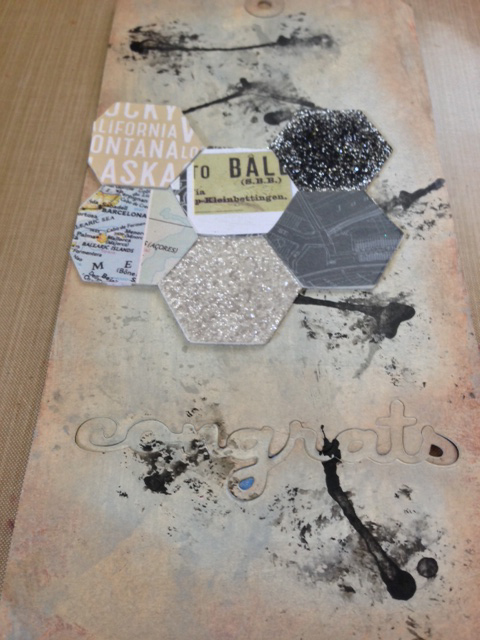
Hi my crafty friends, it’s Lisa here with a mixed media tag for you today. I had SO much fun creating this that in hindsight I wish I had video taped it. Next time, okay?
You can DIE-CUT (oh yes!!) the 3D Foam Creative Sheets using your die cutting machine and that’s exactly what I did here. It’s so easy to do and you get really cool results from it!
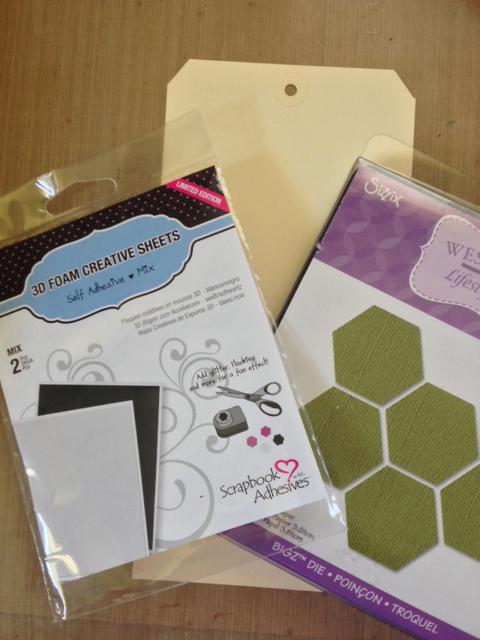
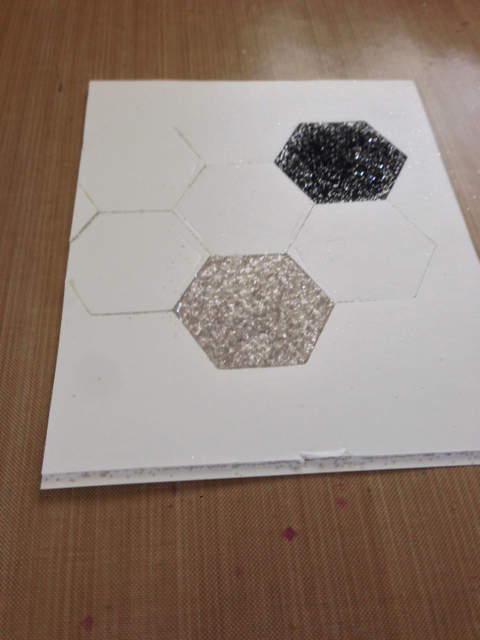
First step? Die cut your 3D Foam Creative Sheet. Keep the sheet in tact with the Scrapbook Adhesives by 3L® logo on the back. Then start applying your glitters and patterned papers. I used two glitters (one coarse, one fine) and then used the same die to cut my patterned paper.
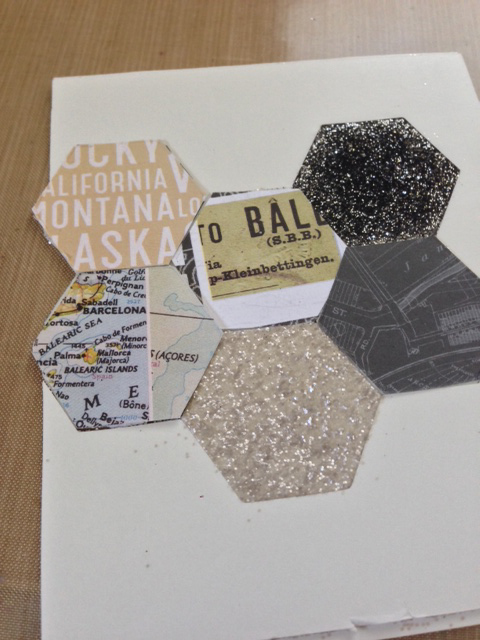
See those little parts of the patterned paper hexagons hanging off the edge? Don’t sweat it. Just trim those off when you apply this gorgeous 3D lovely to the tag!
I then quickly painted up a quick background for my tag before placing the die-cut hexagon 3D Creative Foam Sheet piece on there. I also die-cut the word “Congrats” towards the bottom of the tag, too. (See it?)

Then just lay the entire 3D Creative Foam Creative Sheet down (with the backings removed from the hexagons prior to adhering).

And gently pull away the remainder of the sheet from AROUND the hexagons (and trim those hexies now!). Like this:
Remove the die-cut word “Congrats” and turn the tag over. Cut a strip of vellum cardstock to cover. Use the Crafty Power Tape to hold it in place.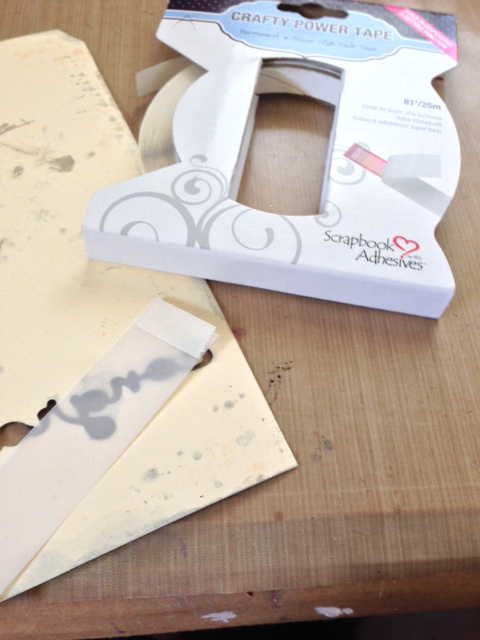
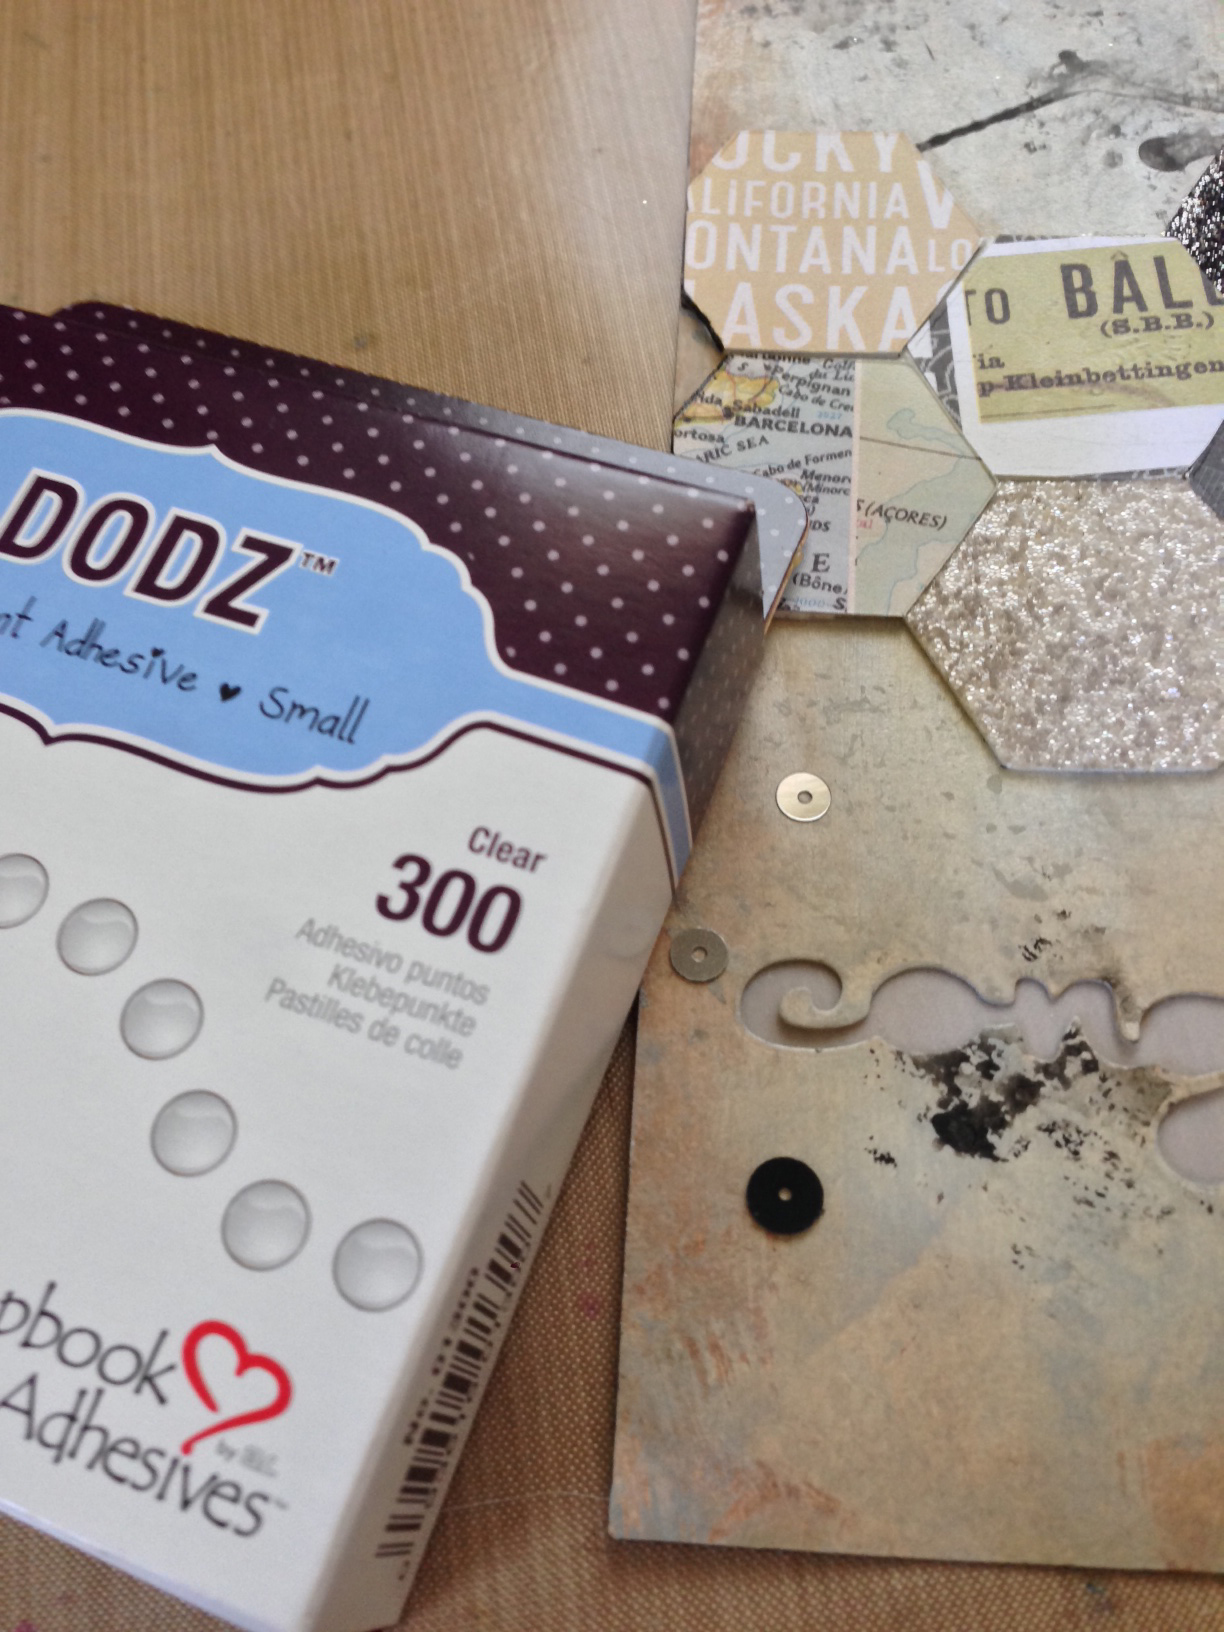
All that’s left is to embellish! I like to use the Adhesive Dots Small when adhering my sequins and other items that don’t have a sticky back already. The Adhesive Dots make it super easy since each one come on their own single dot dispenser. You never get sticky dots everywhere!!
 Wasn’t that easy? This is a #10 size tag and even though it has a few sequins and some glitter I STILL think it’s neutral enough to give to a man. Maybe? Ha! And the back of the tag can be covered with strips of patterned paper, too, which would make it even lovelier.
Thank you for sharing some of your time with me today.
Hugs,
Lisa Adametz
Materials Used:
Scrapbook Adhesives by 3L®
3D Foam Creative Sheets
Adhesive Dots Small
Crafty Power Tape – 81’
Other Supplies:
Dr Ph Martin – India Ink, Black
Hemptique – Twine, Black
Papertrey Ink – Congrats Die
Pretty Pink Posh – Sequins
Ranger Ink- #10 size Manila Tag, Distress Paints, Distress Ink, Chunky glitter
Sizzix – Hexagon BiGZ Die
Studio Calico – Patterned paper
WOW! – Embossing glitter
Visit our Website and Blog!
Sign up for our Newsletter so you never miss a contest or giveaway!


By Wendy Goundrey June 11, 2014 - 8:40 am
I love your glittery hexagons that compliment the patterned paper ones on this fantastic tag!
By Lisa Adametz June 11, 2014 - 12:19 pm
So glad you like it, Wendy!
By Amante del Papel June 11, 2014 - 4:12 pm
so fabulous!
By Lisa Adametz June 11, 2014 - 4:45 pm
I’m thrilled that you think so!!
By Deborah S June 11, 2014 - 4:41 pm
This tag is so elegant I love the hexagon shape and what I great idea to die cut the shapes out of the foam! I must say after seeing your tag and the shaker card I gots to get me some of the adhesive foam lol tfs
By Lisa Adametz June 11, 2014 - 4:48 pm
Hi Deborah! The 3D Foam Creative Sheets are SUPER Versatile! I hope that these tutorials are hoping show you all the different ways to use these amazing products. Browse through the blog and I’m sure you’ll find even more. 🙂 I’m glad you liked the tag (I like it, too – haha!!).