
Hi there,
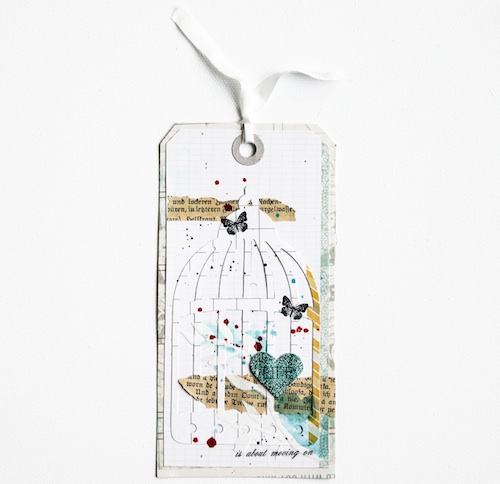
it’s Stephanie here today with a tag I made using the 3D Foam Hearts Designer Shapes as decoration embellishment and the E-Z Dots® Permanent – Refillable.
 I made a tutorial for you how I created this tag.
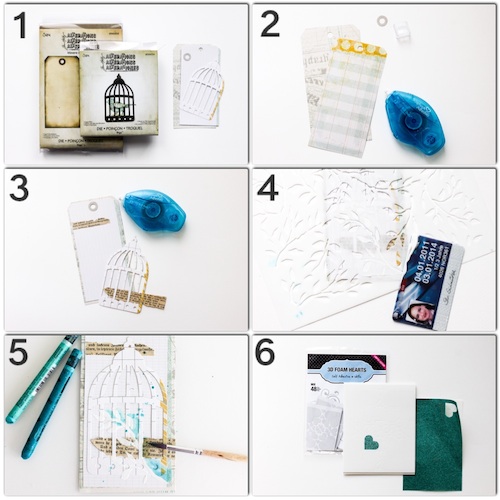
1 – Choose the dies Tag & Bookplates and Caged Bird from Sizzix and use your punching machine
2 – Punch the tag two times and cut one of them a bit smaller and adhere it with the E-Z Dots® Permanent – Refillable
3 – Tear out two small stripes of an old book page and adhere them also with the E-Z Dots® Permanent – Refillable
4 – Add a branch with a stencil and Modelling paste.
5 – Add some blue watercolor and splash a bit with red color.
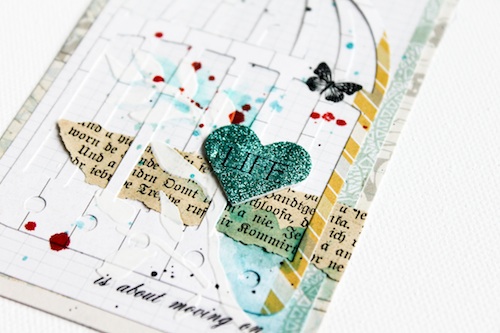
6 – Use a heart from the 3D Foam Hearts and decorate it with glitter foil. Put it on your tag.
Add a title or a sentiment and some rub-ons for the finishing decoration.
Supplies from Scrapbook Adhesives by 3L®
Other supplies:
- Sizzix dies “tag & Bookplates” from Tim Holtz
- Sizzix dies “birdcage” from Tim Holtz
- Paper from Pink Paislee
- Bookpages
- Watercolor Paint
- StencilGirl stencil by Nathalie Kalbach
- Modelling paste
- Rub-ons from Kaisercraft
- Glitter foil from Zoom Creative
Thanks for visiting! I wish you a nice creative day!
By Deborah S July 19, 2014 - 1:14 pm
What a lovely tag I really love that bird cage and do not know why I keep passing that die up hmmm any way the glittered heart was just the eight finishing touch have a wonderful weekend!