
Hello! AJ here to share with you all a hand made holiday home decor piece.
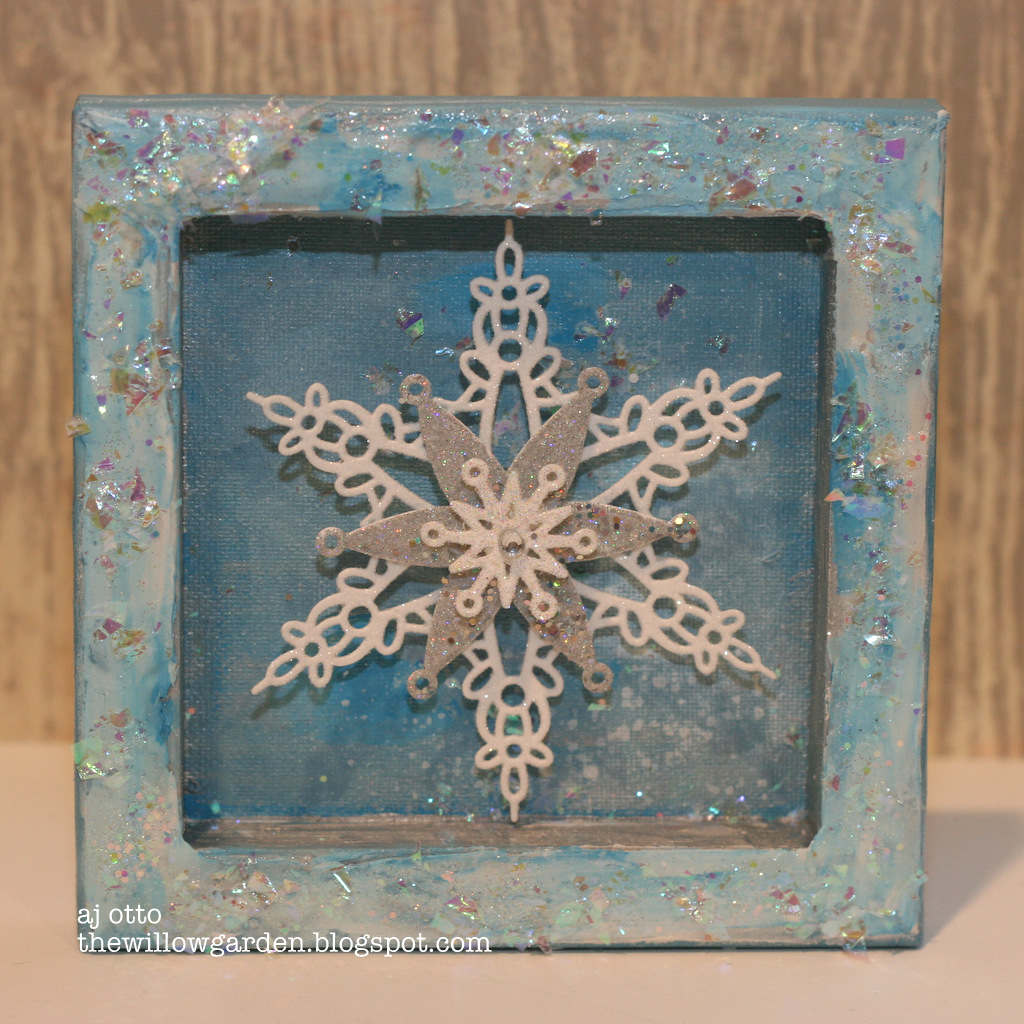 I had a friend give me the most fabulous canvas she created into a shadow box and it totally inspired me to try one of my own. (On a much smaller scale!;) I got this little canvas at the dollar spot eons ago and totally forgot about it- it had a kids cartoon frog on the front of it. I quickly covered the front, and prepped the bottom side, which I ended up using as my shadow box, which I then filled with glittered snowflakes!
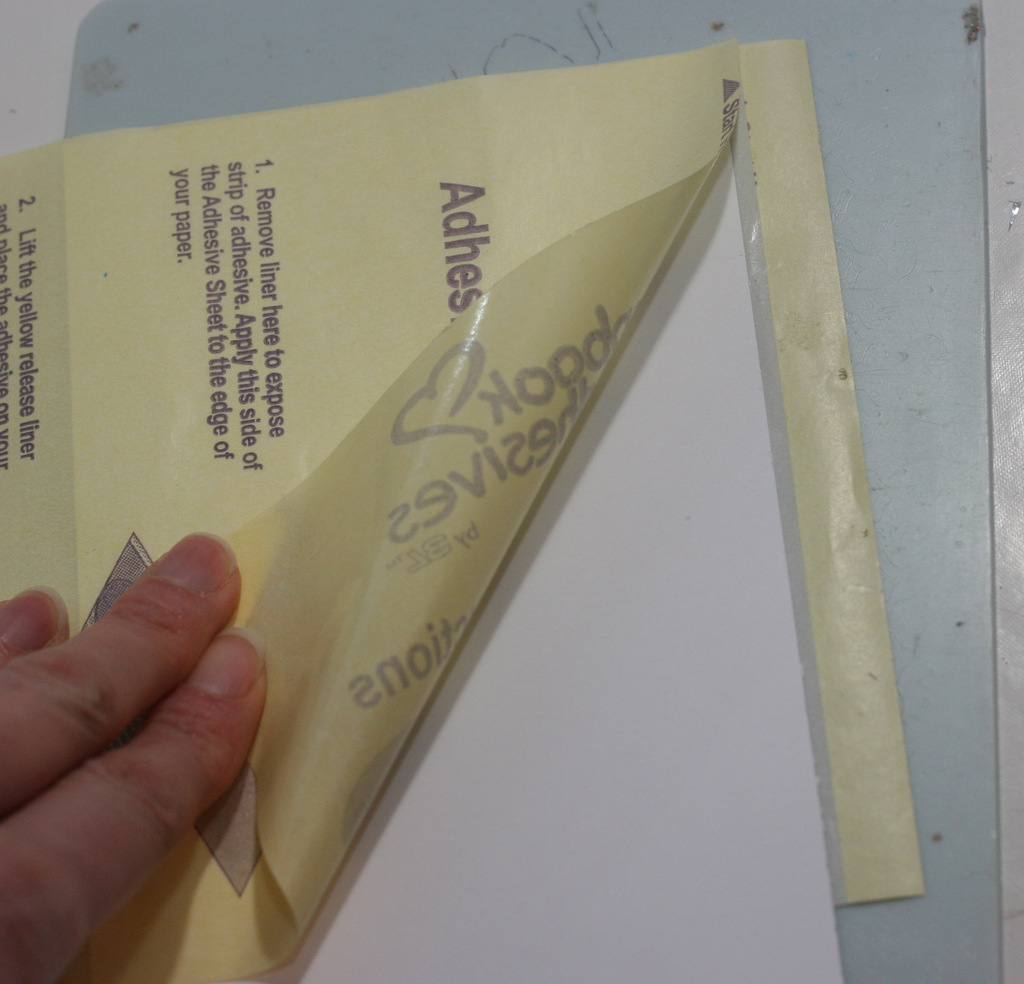 To create the snowflakes, I used the 4 X 6″ Adhesive Sheets. Pull back the yellow lining and place your card stock on the adhesive. Burnish a bit then flip over.

Place your die, cutting side into the backside of the sheet and run through your machine. Now you have a an adhesive backed die cut.
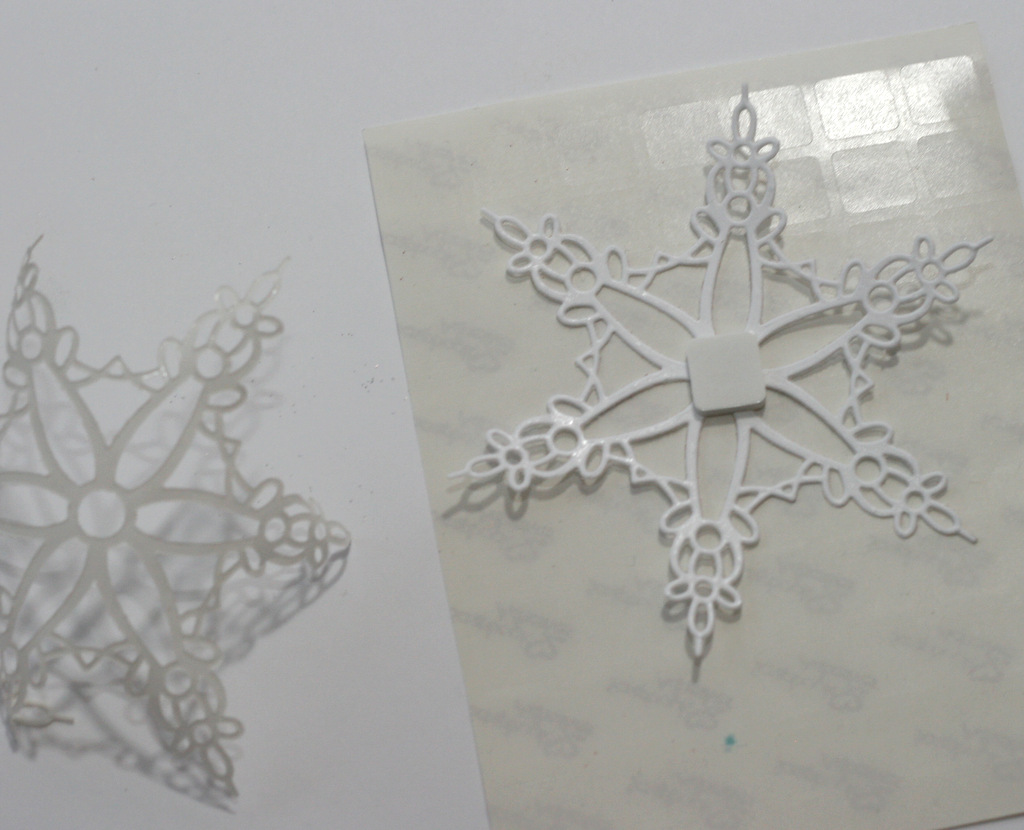 Pull the backing off, and place a 3D Foam Square in the middle. This will allow you can adhere it to something later once covered with glitter.
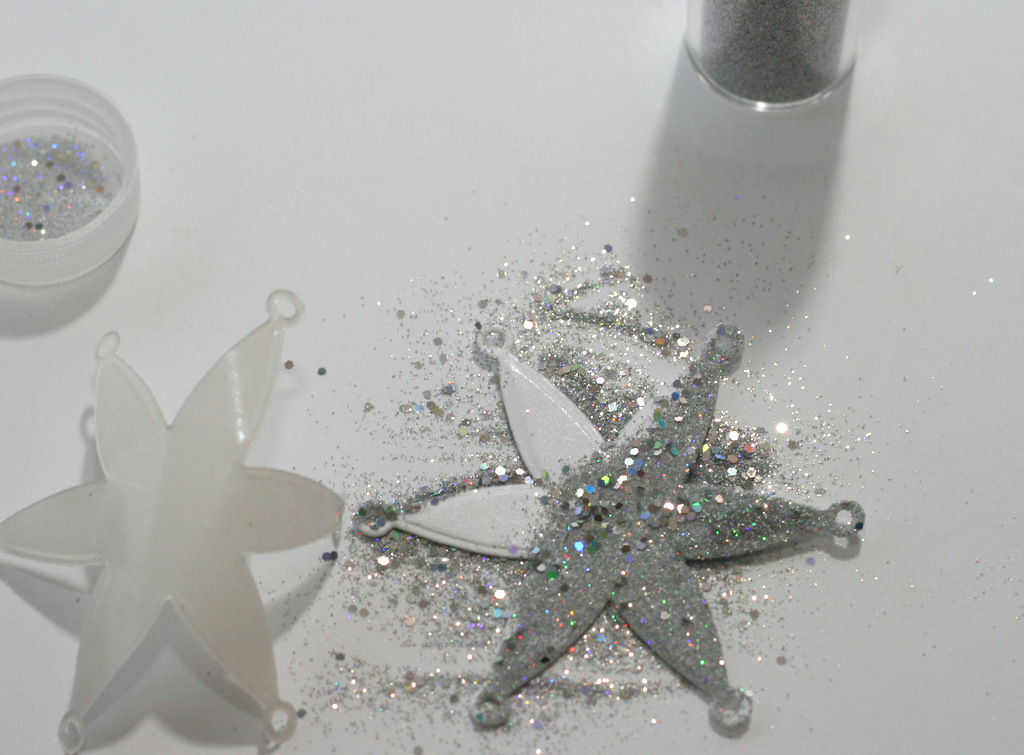 Repeat with all three snowflakes, alternating glitter types, then layer one atop the other.
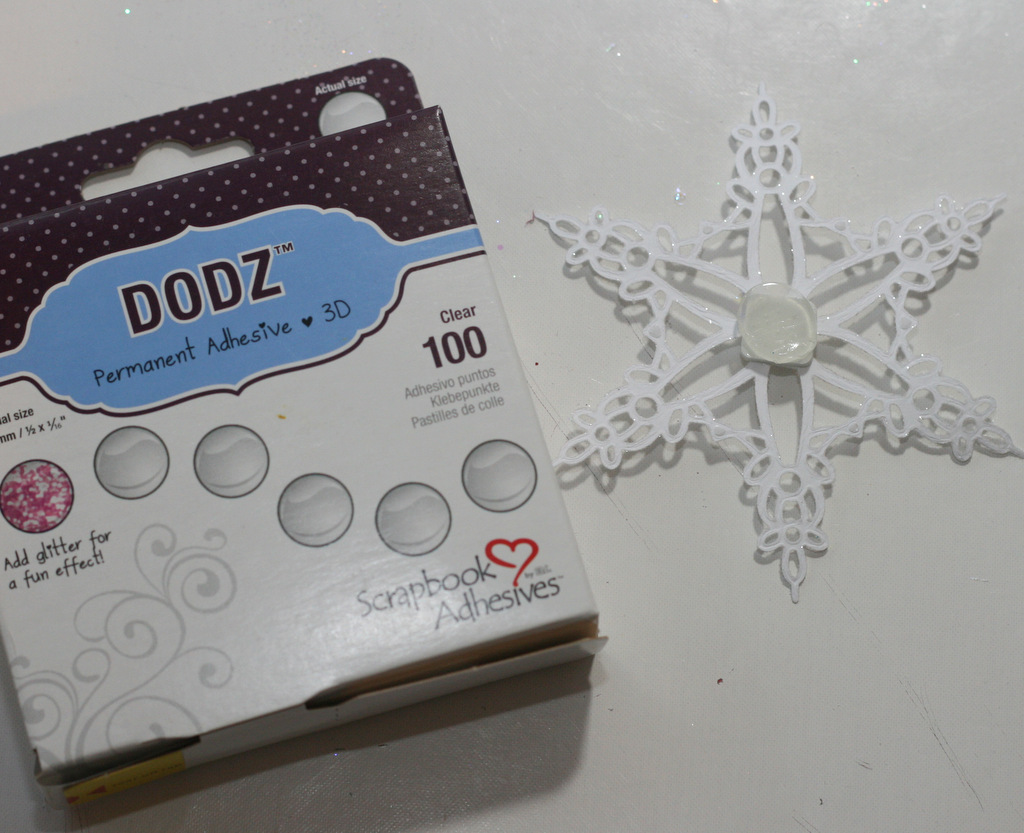 Lastly, I wanted it to have a little dimension, so I adhered the bottom snowflake with a DODZ™ 3D.
Off to make a few more for my mantle! enjoy!
AJ
Scrapbook Adhesives by 3L product used: 3D Foam Square, DODZ™ 3D, & 4 X 6″ Adhesive Sheets.
Other supplies: Spellbinders Dies; Stampendous Glitters; Deco Arts Media Gesso, Modeling Paste, & Acrylic/Media Paints; Kaisercraft Gemstone
By D~DesignsByDragonfly November 29, 2014 - 9:52 am
LOVE it. Thanks for sharing.
Crafty hugs,
D~
DesignsByDragonfly.blogspot
By Beck BT November 29, 2014 - 2:16 pm
WOW AJ love your canvas!! Such a beautiful holiday decoration to put up!! Love how you used the adhesives to add he glitter and dimension to finish it off beautifully too! xxx Beck