
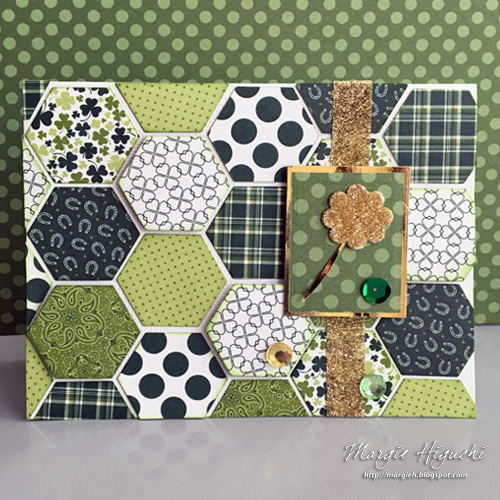
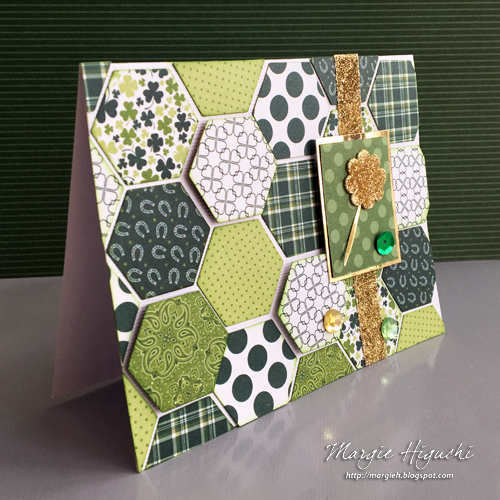
Happy St. Patrick’s Day everyone! I’d like to share a card that has a dimension in my background and in my embellishment, using our 3D Foam products. LOVE how it turned out!
Hexie Shamrock Card Tutorial
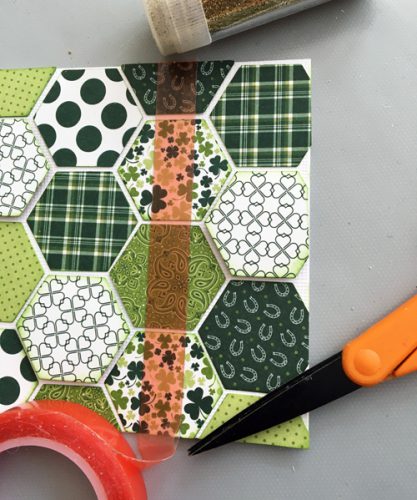
This green collection is the perfect pattern to use for this occasion. I cut about 26 Hexagons from my die and edged them with green ink for a subtle look. I ended up using 24 but I wanted a choice of patterns 😉

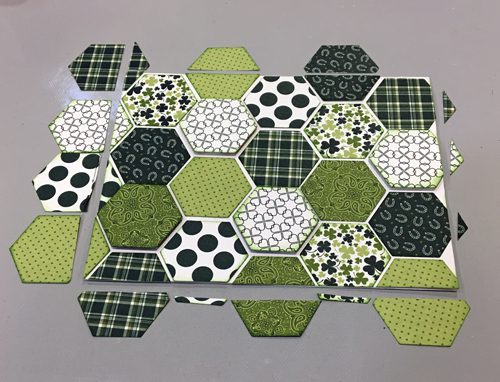
Once I cut and inked them up, I placed the die cuts on top of my A2-sized (5.50 x 4.25″) card base.
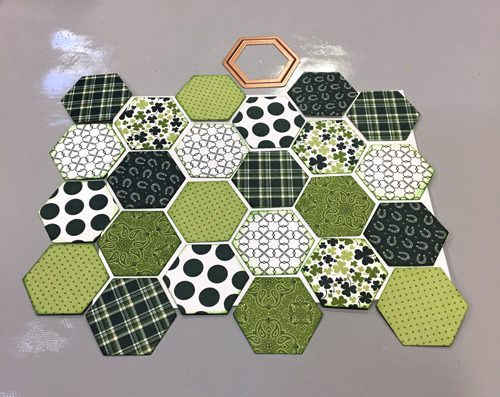
I used my E-Z Runner® Grand to adhere to most of my die cuts but popped up four random die cuts with 3D Foam Squares Black Regular.
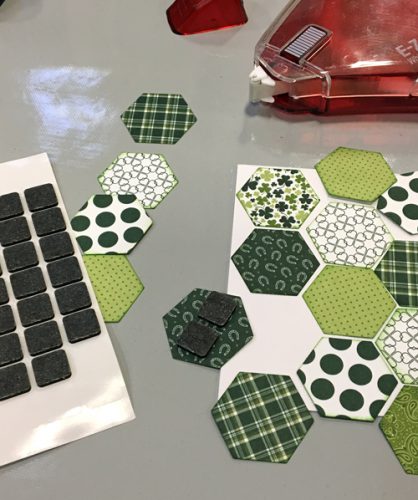
After all were secured them down, trim off the excess and your card base is done.
Embellishing Details
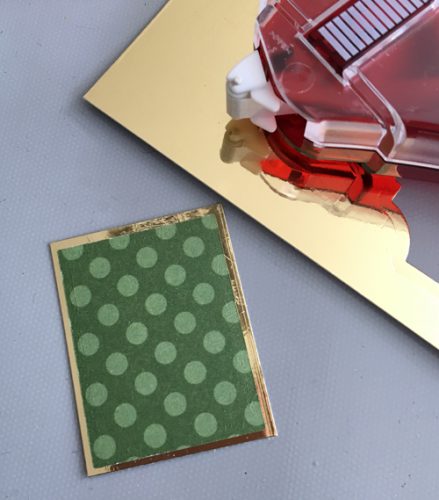
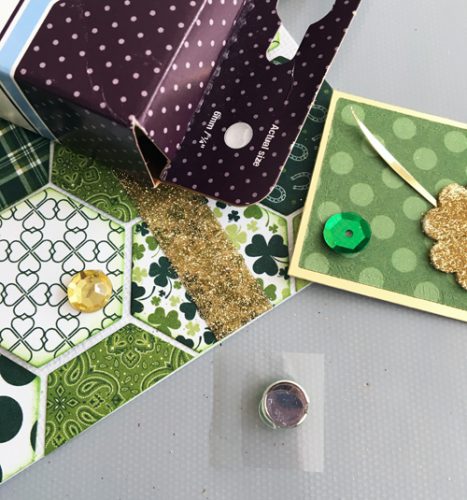
Now to embellish! I cut a rectangle shape from green patterned paper and cut another a little larger to the mat with gold mirror cardstock. I adhered them together with E-Z Runner® Grand.
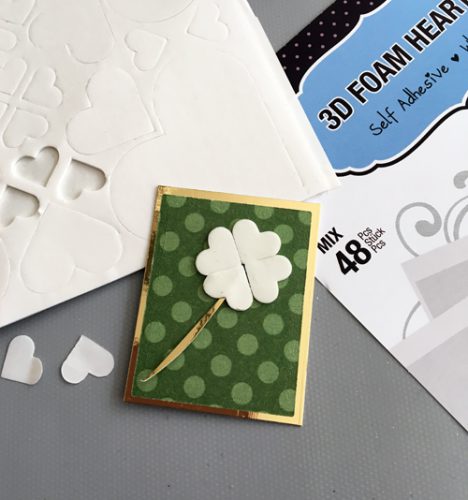
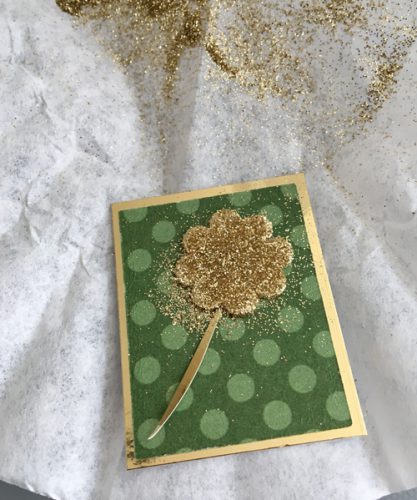
To create my gold shamrock, I took four 3D Foam Hearts and placed them on top of my matted rectangle. Remove the top liner to sprinkle gold glitter on top. Press firmly to make sure they are stuck on well. Shake off excess.
To anchor my embellished shamrock, I used Extreme Double-Sided Tape 1/2″ as a ribbon by adhering right down my card base. After taking off the liner, I sprinkled glitter. press down and dust off the excess.
For these wonderful sequins and gems, I used the Adhesive Dots Small to adhere to the card front. These adhesive dots are perfect for many sizes of embellishment – we have six sizes of Adhesive Dots!
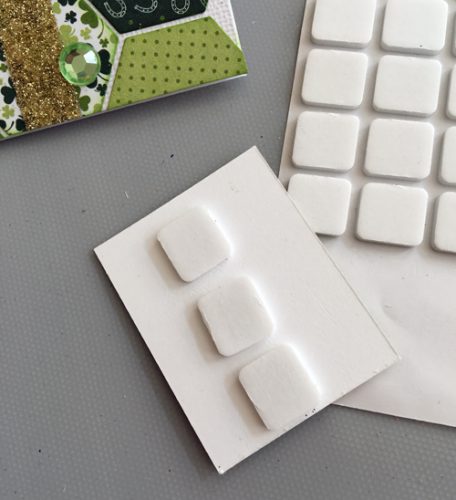
Add the embellished shamrock rectangle piece on top with 3D Foam Squares White Regular and you’re done!
Here’s another look…
If you are in need of more inspiration on this subject, click St. Patrick’s Inspiration by Scrapbook Adhesives by 3L® Design Team!
Thanks for stopping by!
Margie Higuchi
Creative Time: 35 minutes
Skill Level: Intermediate
Materials Needed:
Scrapbook Adhesives by 3L®
E-Z Runner® Grand Dispenser
3D Foam Squares Black, Regular
3D Foam Squares White, Regular
Adhesive Dots Small
3D Foam Hearts
Home Hobby by 3L®
Extreme Double-Sided Tape 1/2″ Permanent
Other
Ink and Foam Applicator: Distress Ink – Mowed Lawn (Ranger Ink/Tim Holtz); Patterned Paper: The Emerald Collection (Authentique Paper); Die and Machine: Hexagon and Prizm™ Die Cutting and Embossing Machine (Spellbinders® Paper Arts); Gold Mirror Cardstock; White Card Base; Sequin; Gems
Visit our Website and Blog!
Sign up for our Newsletter so you never miss a contest or giveaway!


By ~amy~ March 17, 2017 - 8:41 am
Such a gorgeous design Margie!
By Margie Higuchi March 17, 2017 - 10:16 am
Thanks Amy! SO fun to make esp with all that glitter! LOL!! Have a great weekend, my friend xo