
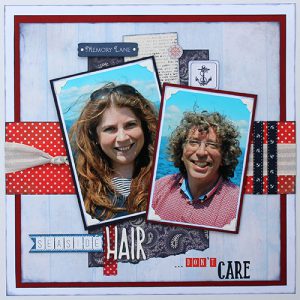
Hey everybody! As I sit here wishing for warmer summer temperatures to arrive, I thought I would share a summery scrapbook layout. This layout has lots of dimension using 3D Foam Squares and a little bit of texture with ribbon and the help of Extreme Double Sided Tape.
As always I used my E-Z Runner Grand to assemble all of my background layers.
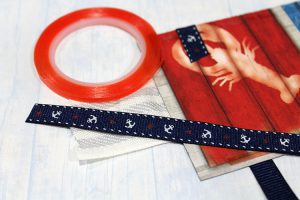
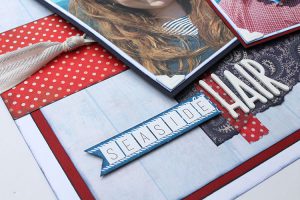
I love adding ribbon and trims to my papercrafting projects, and my secret weapon is Extreme Double Sided Tape. Here’s a little tip: I always have my ribbon wrap around the back of my layout instead of cutting it off at the edge. This makes for a much cleaner look. I add strips of the Extreme Double Sided Tape to the back of the paper, wrap the ribbon snuggly around the edge and adhere.
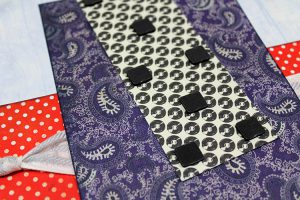
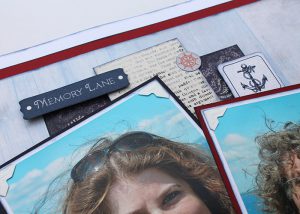
When assembling my layout, I like to add lots of layers and dimension using 3D Foam Squares. For this layout I added a single layer of the 3D Foam Squares on this patterned piece, and then a double layer of 3D Foam Squares to the back of my matted photos.
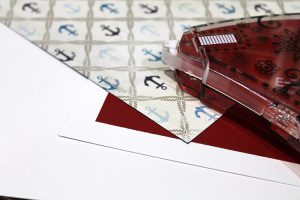
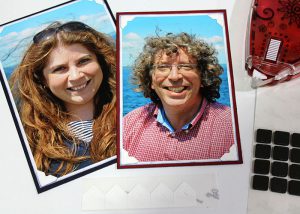
When I am matting my photos and getting ready to add them to my layout, my go-to’s are E-Z Runner Grand, Creative Photo Corners and 3D Foam Squares.
An easy way to add depth and dimension with ribbon, is to simply tie a knot in it. This creates a nice gathered look.

Supplies Needed:
Scrapbook Adhesives by 3L®
3D Foam Squares- Black Mix
Extreme Double Sided Tape- 1/8″
E-Z Runner® Grand
Creative Photo Corners- White
Other:
Patterned Papers: Authentique- Seafarer, Rugged Four and Dapper
Ink: ColorBox Ink (Sailboat)
White, Navy and Red Cardstock; Washi Tape; Letter Stickers; Linen Ribbon and Printed Grosgrain