
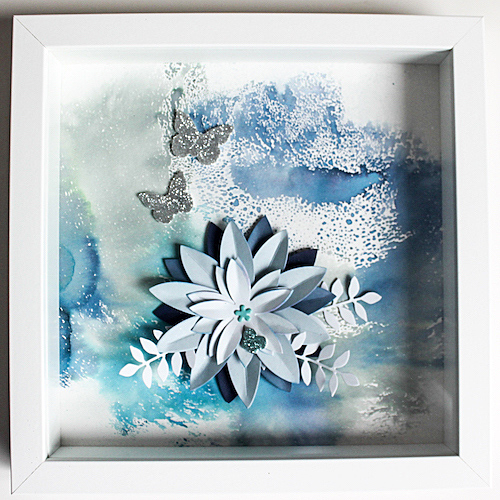
With spring in the air, I wanted to create a Flower Frame featuring 3D Foam Butterflies and a beautiful flower embellishment. Hi there, it’s Stephanie here today to share a tutorial on this project. This would be a lovely addition to your home or better yet, what a wonderful gift it would be!
How to Make the Flower Frame
First, I chose to use paper with a blue ombre design. Using those papers, die-cut them with a flower die and my manual die-cutting machine. Assemble the flower pieces to create a beautiful dimensional large blossom. Set it aside to work on the butterflies – my favorite part!
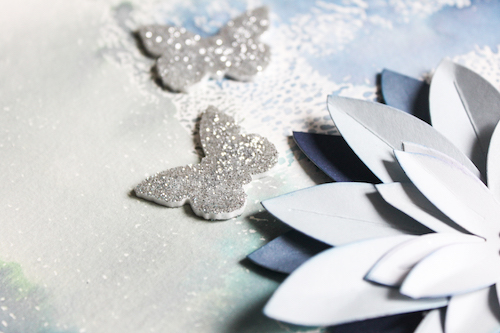
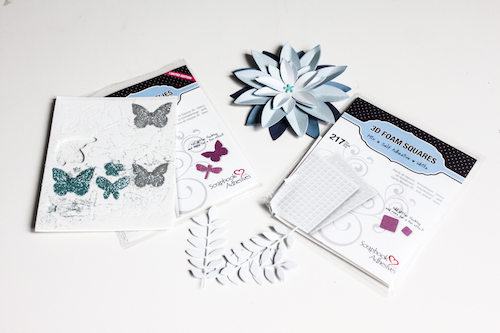
After gathering matching like colors of teal and silver glitter, I removed the top liners off of my choice of 3D Foam Butterflies and sprinkled glitter on top. Just tap off the excess and you have stunning dimensional butterflies with adhesive on the back side!
See a short video on How to Use 3D Foam Shapes…
Using Distress Oxide Inks, I created my background and adhered all the elements together. The butterflies came out so glittering and sparkling, I love it!
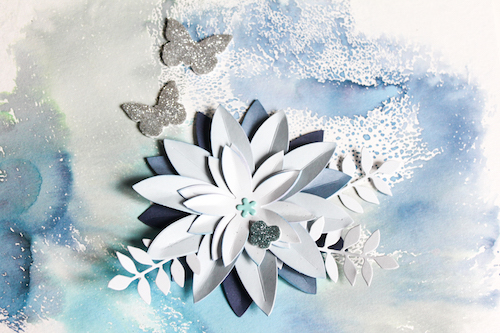
The 3D Foam Squares White Mix give the flower embellishment a dimensional effect. How do you do that? I simply used them under the flower and to adhere the branches. Then I added a glittered 3D Foam Butterfly on its petals for interest. Have fun with it!

Thanks for visiting us today! Have a great day!
Stephanie
Scrapbook Adhesives by 3L® Used:
3D Foam Squares White Mix
3D Foam Butterflies
Other:
Dies and Die Cut Machine: Sizzix
Visit our Website and Blog!
Sign up for our Newsletter so you never miss a contest or giveaway!


