
Have you ever paper pieced before? Christine here today to share with you a great shortcut for paper piecing with our adhesive sheets. This will really save some crafty time and who doesn’t appreciate that?!
Creating my Paper Piecing Card
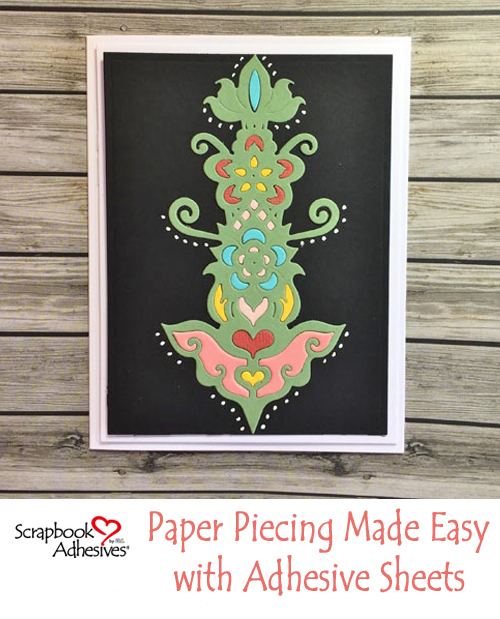
Firstly I created my card base and mats, affixed in place MyStik® Permanent Strips.

Next, I gathered together various colors of cardstock and Adhesive Sheets. Here I’m using the 4″ x 6″ sheets, they are also available in 6 x 12″ and 12 x 12″.
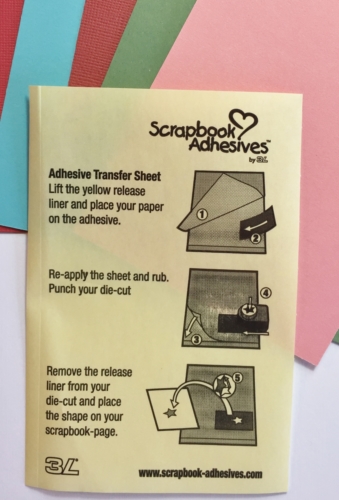
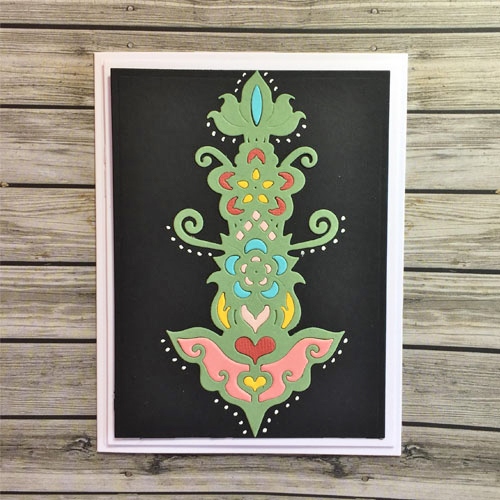
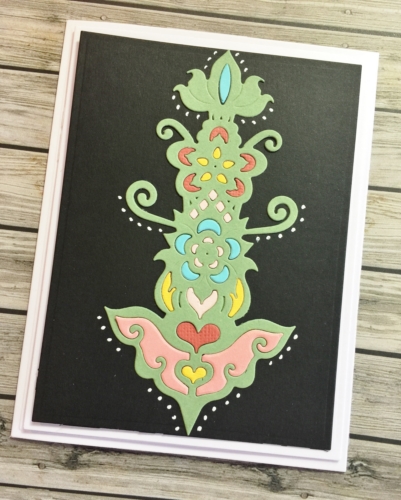
Lift the edge of the transfer sheet, pop your card inside, smooth down and run through your die cutting machine. I used a green card for the main die cut piece. The Adhesive Sheet gives a perfect layer of glue on the back of the die cut and those little fall out pieces. Keep running through with the various colors of cardstock with the sheets. Affix main die cut onto card front and then begin to insert those sticky fall out pieces. Here I’m just beginning to insert blue and red if you enjoy puzzles you’ll love this!
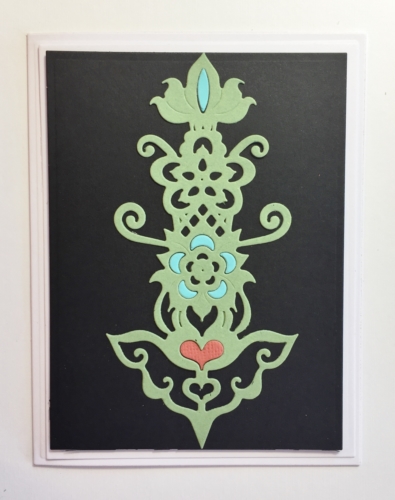
Keep going until you are happy with your design. I chose to fill the entire die cut! I finished with some white dots around the edge for that folk art look, simply added with a gel pen.
Thanks for stopping by today and don’t forget to check out all the great products on the website.
Creative Time: 45 minutes
Skill Level: Intermediate
Material Needed
Scrapbook Adhesives by 3L®
MyStik® Permanent Strips
Adhesive Sheets 4 x 6″
Other
Dies: Spellbinders® Paper Arts (A2 Matting Basics, Rosemal Flower)
Green, Peach, Red, Yellow, Blue, Black and White Cardstock, Gel Pen
Pin It!
By Terri Burson February 2, 2018 - 4:02 pm
What a great idea! Love this!
By Christine Collins February 3, 2018 - 1:26 am
Love Christine’s card and great tip for paper piecing.
By Elaine February 3, 2018 - 1:37 am
Lovely card and die Christine , the little white dots just add that extra touch .
Elaine H X