
Happy St. Patrick’s Day to you all! Today I’m lucky to be Irish for the day and get away with it – HA! To mark the occasion I created a set of St. Patrick’s Day cards from one sheet of patterned paper filled with phrases and images.
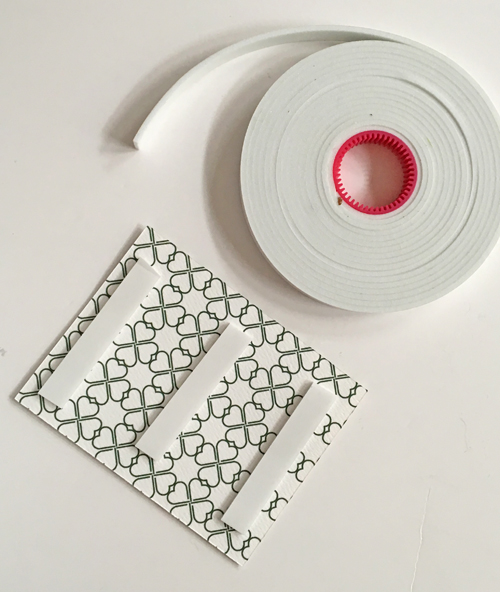
Some of the images were itching to be enhanced with dimensions using 3D Foam Hearts – put them together and they form a shamrock 🙂 Put them together with foil and glitter to WEAR YOUR ADHESIVES ON THE OUTSIDE!
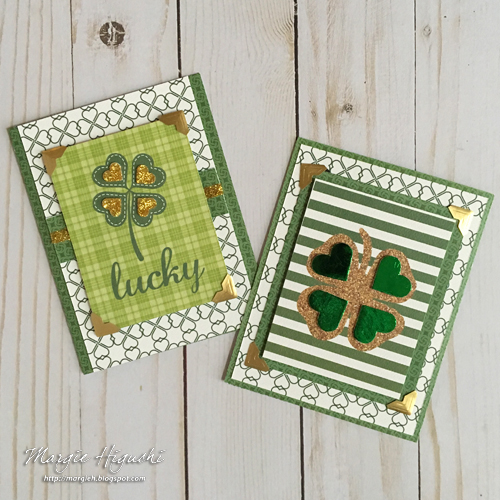
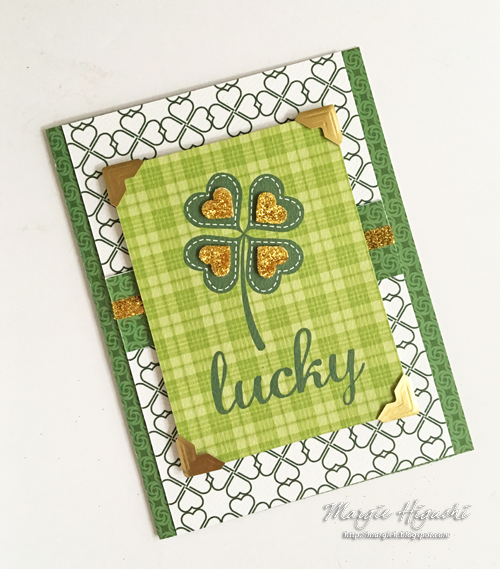
Lucky Card
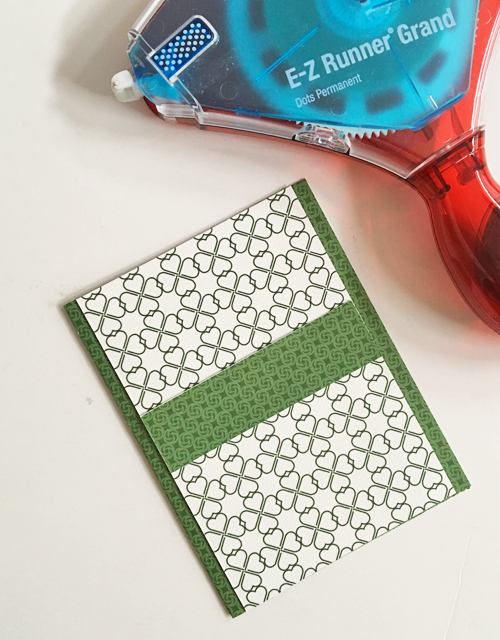
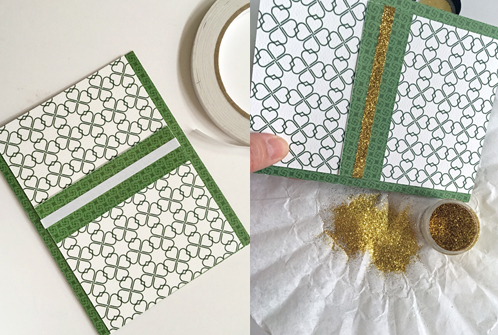
I used the 3 x 4 inch Lucky image from the Emerald Six patterned paper and its B-side for a 3 3/4 x 5 1/2 inch card panel. For the A2 (4.25 x 5.5 inch) card base and 3 3/4 x 1 inch band, I used a subtle green patterned paper to anchor my card. Adhere the card panel and band with E-Z Runner Grand Permanent Dots Refill.
To give my band a little sparkle, I placed Premium Double-Sided Tape 1/4 inch across, remove the top liner and applied gold glitter. Make sure to press into the tape to secure well. Tap off excess to see a beautiful band of gold!
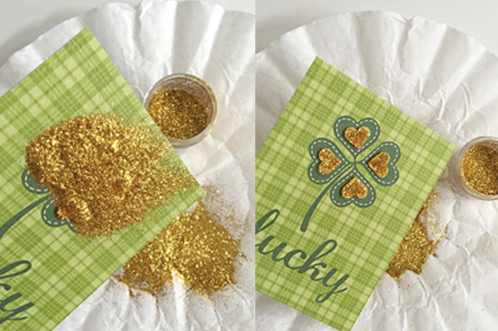
I forgot to take a before picture but four small hearts from the 3D Foam Hearts were placed in each clover leaf. Remove the top liner on each to apply the same gold glitter. Press into the heart shape to secure and tap off excess.
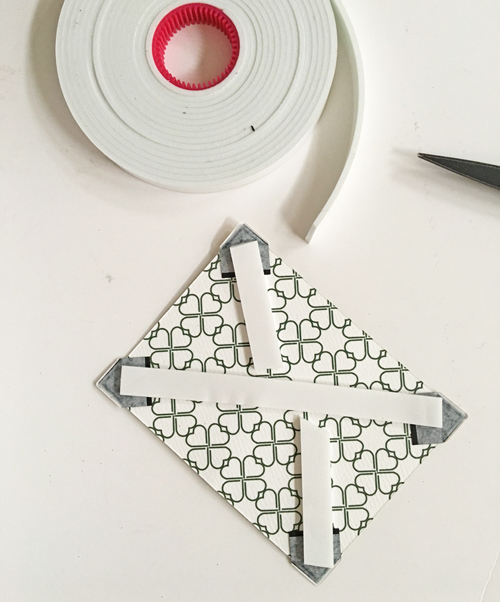
Place a Creative Photo Corner Gold on each corner – make sure they fit snuggly. Just so they do not shift, I placed Crafty Foam Tape White over the photo corner backing and adhered the card panel to the card.
Here’s the finished card!
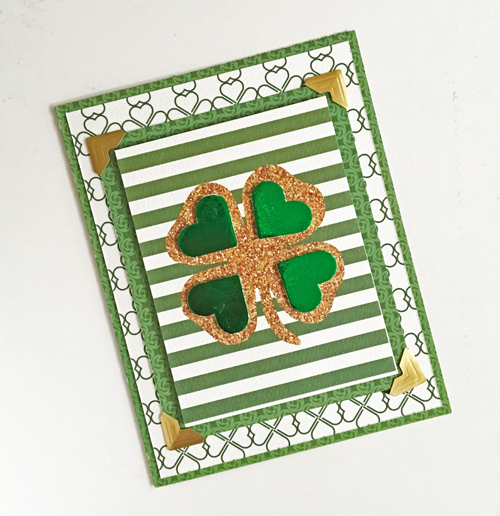
Shamrock Card
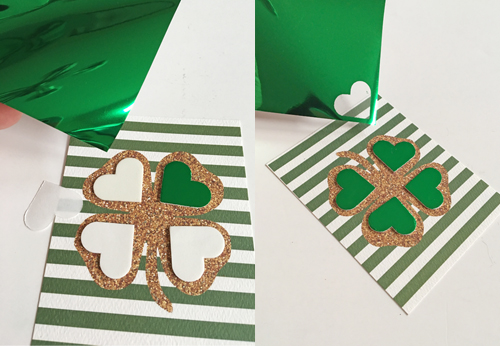
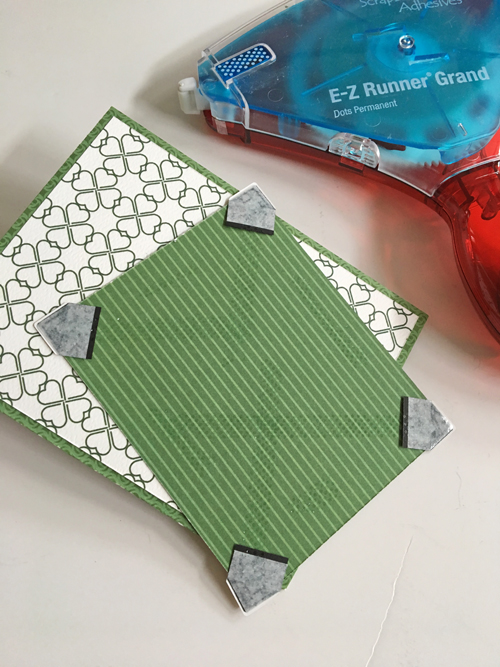
This image already had gold on it so why not go green but not just green, how about foil?! I gathered my A2-sized card base, 4 x 5 1/4 inch card panel, 3 1/2 x 4 3/8 inch card panel and 3 x 3 7/8 inch image with my four medium size 3D Foam Hearts already placed on top.

Let’s start with the Shamrock image. I removed the top liner and place the green foil (color side UP) on top. Give it a rub to transfer the medium to the 3D Foam Heart. EASY! Foil the rest.
Adhere the larger card panel to the card base with the E-Z Runner Grand Permanent Dots Refill. Place Creative Photo Corners Gold to each of the corners of the smaller card panel. To secure those corners, apply the E-Z Runner Grand Permanent Dots Refill to the backs and make an “X” mark. Adhere to the card base.

Take three strips of Crafty Foam Tape White and apply to the back of the image. Remove liners and center the image piece to the card front.
There you have it, another card done and both were done in 15 minutes!
Hope you like this idea of how to make wonderful cards out of one patterned paper with phrases and images. Thanks for stopping by! Share your St. Patrick’s Day project with me by linking in the comments below – I’ll come visit and comment 🙂
Happy St. Patrick’s Day!
Margie (mc)Higuchi
Scrapbook Adhesives by 3L®:
E-Z Runner Grand Permanent Dots Refill
Premium Double-Sided Tape 1/4 inch
3D Foam Hearts
Creative Photo Corners Gold
Crafty Foam Tape White
3D Foam Creative Embellishment Kit with Foil (Green Foil)
Other:
Patterned Papers: Authentique Paper
Glitter: Sprinkle N Sparkle