
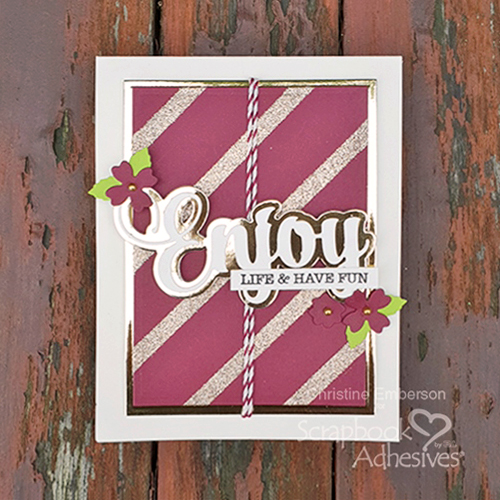
Hi everyone, Christine here today. With it being the start of a brand new year, this card is a reminder to ENJOY life and have fun. This golden card is so simple to make with an effective background created with Crafty Power Tape (yes it’s tape) and embossing powder! Let me show you how to Wear Your Adhesive on the Outside!
Creating a DIY Gold Background
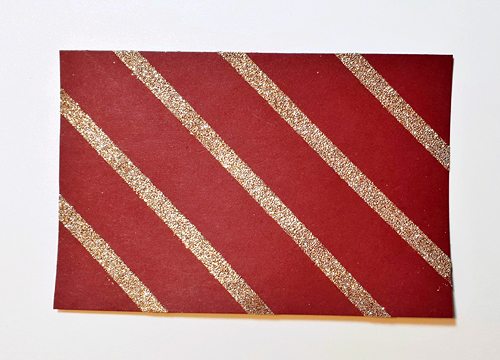
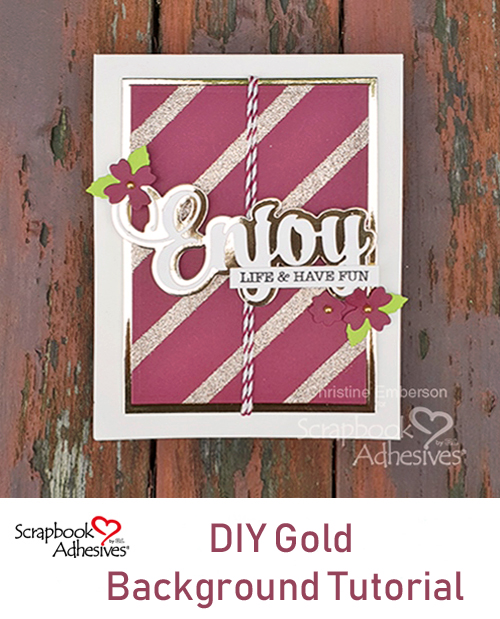
With a piece of colored card panel, apply Crafty Power Tape in a diagonal stripe design. If you wish, use a ruler as a guide or estimate by sight.
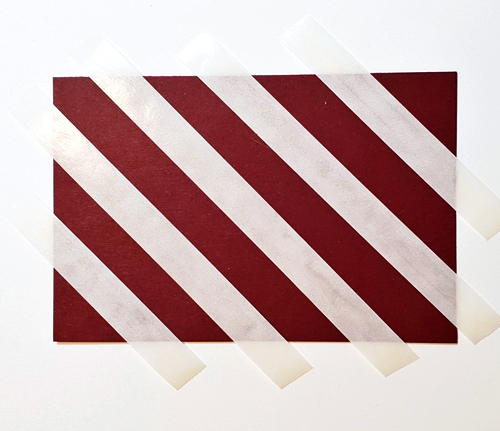
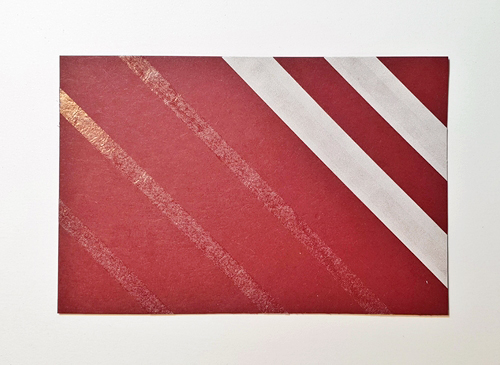
Smooth down to make sure that each strip is affixed. Trim around the edge of your card to remove the excess pieces. Then remove the white liners, you’ll notice that Crafty Power Tape liners remove easily and quickly!
Next sprinkle over embossing powder, your choice of color, I’ve gone with gold for my golden New Year’s theme.
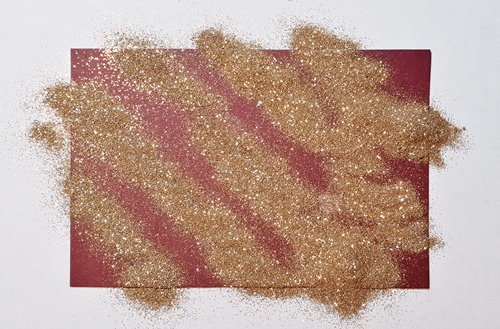
Tap away the excess and then heat set with a heat gun for glorious golden stripes!
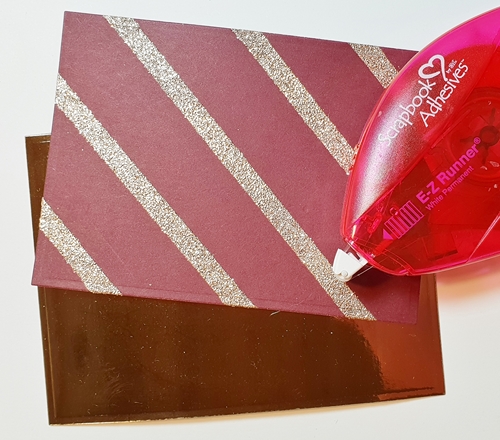
Using E-Z Runner® Permanent Strips Refillable Dispenser, I placed the panel onto a gold foil card mat.
For some interest, I looped burgundy twine around the layer twice vertically and affixed on the reverse with Crafty Foam Tape.
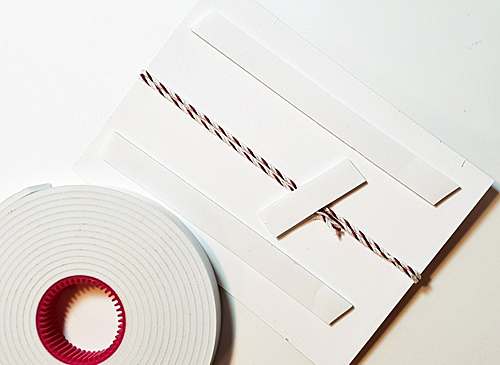
To balance out the back and add height, add strips of Crafty Foam Tape before matting onto the card base. The Enjoy sentiment was die-cut and affixed with 3D Foam Squares Regular.
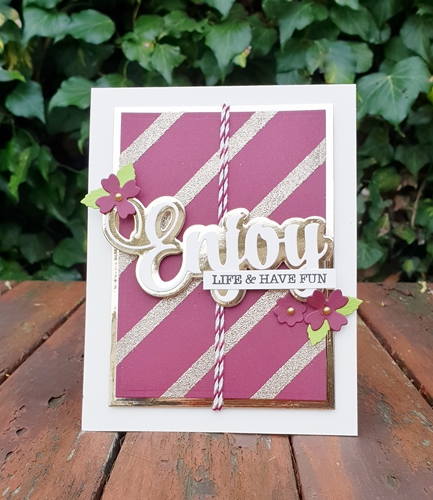
The finishing touches like flowers with little pearl centers and leaves die cuts were placed around the sentiment. This card was fun to do 🙂
Thanks for stopping by and wishing you a fantastic 2019!
Creative Time: 30 Minutes
Skill Level: Intermediate
Materials Needed
Scrapbook Adhesives by 3L®
3D Foam Squares White Regular
Crafty Power Tape
Crafty Foam Tape
E-Z Runner® Permanent Strips Refillable Dispenser
Other
Craft Dies: Spellbinders® Paper Arts (Enjoy Expressions, Swallow and Heart and A2 Matting Basics); Gold Mirror Cardstock; Burgundy, Ivory, and Green Cardstock; Gold Embossing Powder: WOW; Burgundy Twine; Pearls
Pin It!
By hazel young January 7, 2019 - 12:46 am
Beautiful card Christine and a great way to make custom patterned papers xx Hazel
By Christine Collins January 7, 2019 - 1:37 am
Great card Christine and such a useful tip to brighten up plain card.
Chris xx
By Lydia Jordan January 7, 2019 - 3:02 am
Great card Christine, like the striped background.
Lydia
X
By Christine Keeble January 7, 2019 - 6:24 am
Nice idea to make your backgtround paper stand out, love the simplicity of the card, not too fussy, just right
By Brenda Lello January 7, 2019 - 7:46 am
Hello Christine, Beautiful card and what a great way to give plain card a touch of class. Will definitely borrow this idea. Brenda xxx
By Patricia Howarth January 7, 2019 - 2:28 pm
Hi Christine, What a brilliant idea, and what a lovely card !!
Lots of love from Patricia xx
By Anne Oliver January 7, 2019 - 3:58 pm
Hi Christine,
What a lovely card. Such a good idea to create a background with some interest. My only hesitation might be over whether I could get the tape down in parallel lines! I might have to opt for a pattern that is obviously random. Lovely sentiment for the new year. Best wishes, Anne 🙂