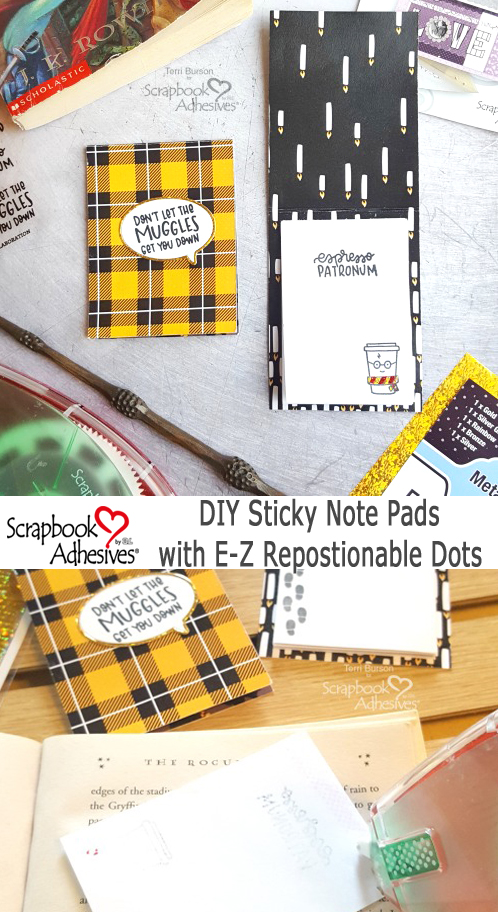
Hello friends, Terri here with creative tips for making these Wizard DIY Sticky Note Pads. We all have Harry Potter fans in our life and these would be great for gifting to your Wizard loving co-workers, friends, and family. Let’s get started!

Easily Create a Booklet Pad
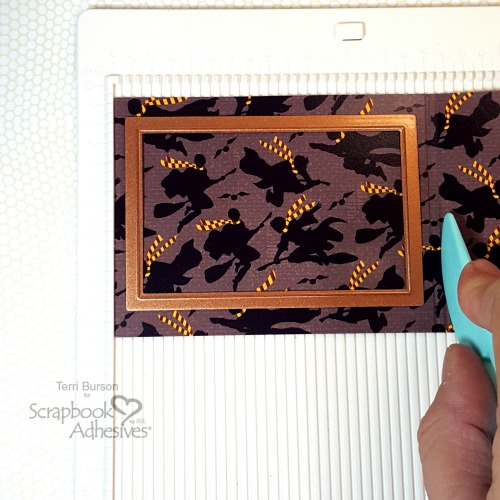
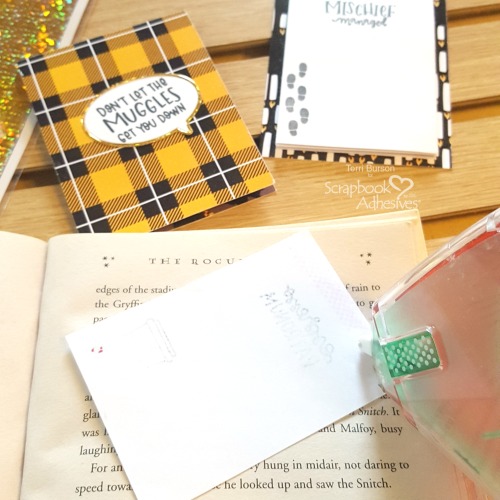
To create this Wizarding booklet, you will only need a few tools; a trimmer, scoreboard and scoring tool, ruler, and thematic card stock. Simply trim an 8 x 3 inch piece of card stock. Preferably, a heavyweight cardstock. Next, measure 4 inches down from the top and score across the width. Drop down 1/4-inch and score again at the width. Fold, and you’ve got your booklet! (I’m using that die below, as a helpful visual for where I want to score.)
Embellish With Foil
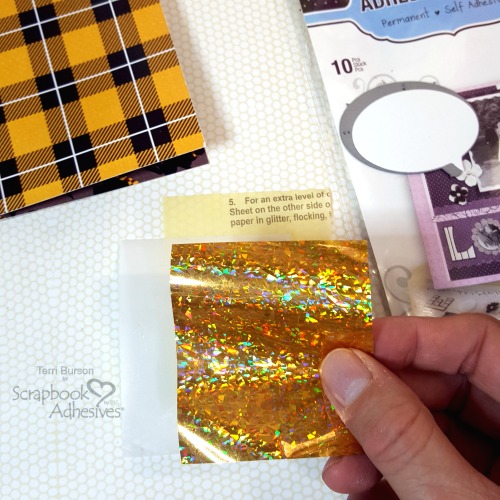
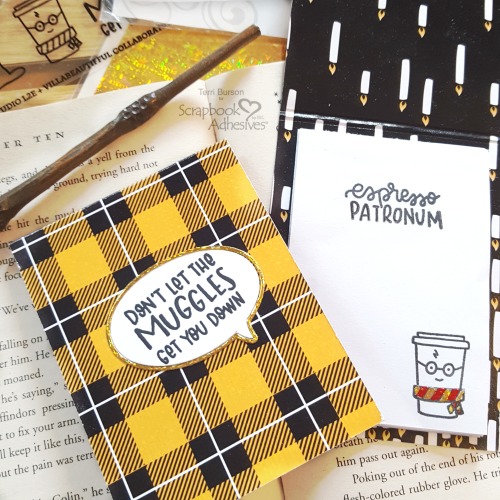
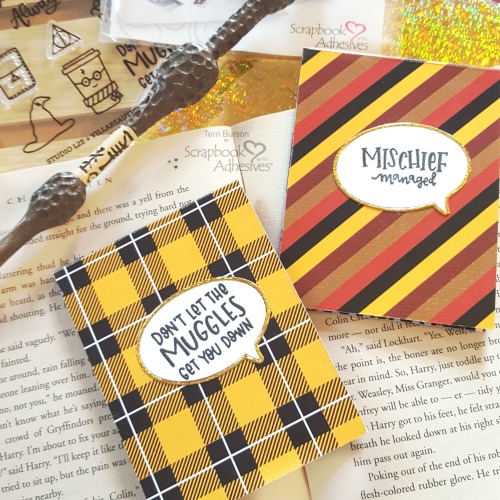
To embellish the front of my booklet, I’m using a bubble chat die with a stamped sentiment. The die actually cuts a separate thin outer ring, which I intend to foil, using the new gold foil from the Metallic Transfer Foil Sheets Holographic. To easily foil, trim a piece of card stock large enough for the bubble die. Trim two sections from the Adhesive Sheets 4×6 inch. Peel the top yellow layer and apply an adhesive sheet to cardstock. Apply foil and rub in. Peel the second piece of adhesive sheet and apply adhesive to back of the cardstock. Do not remove the backing until after running the foiled cardstock and die through your manual die cut machine.
Assembly Line Stamping
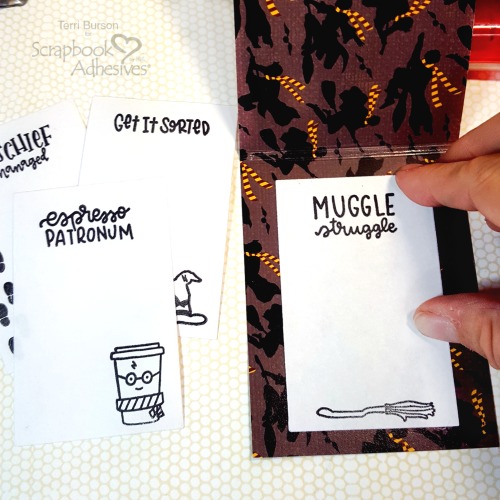
For this next step, I’m using planner stamps, black ink, and a small acrylic block. First, I trimmed some plain white computer paper, enough to make 20 sheets sized at 3 1/2 x 2 1/2 inches. Four sheets of computer paper are sufficient for trimming 20 sheets. You can also use a rectangle die and stack at least 5 sections of paper at a time, to speed up the cutting process with a manual die cut machine. You can also stack and trim with a paper trimmer. Using an acrylic block makes quick work of assembly line stamping, using the same stamp for 5 sheets, then switching out stamps for the next 5 sheets, and so on.
Designer’s Tip: When using clear photopolymer stamps, they need to be conditioned for the first use. Rub the stamp across the back of your hand or arm. The oils from your skin will help condition the stamp and allow the ink to fully adhere.
The Perfect Adhesive
When you want to make your own Wizarding DIY Sticky Note Pads, you will need to go for the green. Yes, the E-Z Runner® Grand Repositionable Dots Refill is my go-to cartridge for non-permanent adhesive. Just pop it into the E-Z Runner® Grand Refillable Dispenser and you are good to go. One word of advice, though. The adhesives I mentioned above are exactly what you need to run across the back top portion of your DIY notes. However, the very first paper note that you adhere to your booklet needs a sturdier adhesive. It’s the key to holding everything else in place. Swap out your cartridge for the E-Z Runner® Grand Ultra Strong Refill, and swipe across the top, the backside of your first note and adhere as the base note paper for your booklet. Trust me on this!
To Color Or Not To Color
I thought it would be fun to leave all my images black and white. That way, when I gift these, the recipient can have fun coloring the images, if they wish. However, I couldn’t resist adding bling to one of those sweet little wizard coffee cups. I was already finished photographing this project when I ran to get my red foil from the 3D Foam Creative Embellishment Kit, more gold foil from the Metallic Transfer Foil Sheets Holographic, and Premium Double-Sided Tape 1/8in.
First, I hand-trimmed my Premium Double-Sided Tape 1/8in into tiny bits and applied and foiled first the red foil. Next, I applied the bits in the alternating sections and applied the gold foil. I couldn’t resist adding Gryffindor colors to that scarf! It’s also a great way to use up some of your leftover foil sections, which is why I hoard every little piece! It’s also a great way to “Wear Your Adhesive On The Outside.”
Watch my flip-through video!
If you would like links to the products that I used today, please visit my blog, Waving My Wand. Thanks so much for stopping in. I hope you enjoyed this project! Terri
Creative Time: 30 minutes
Skill Level: Beginner
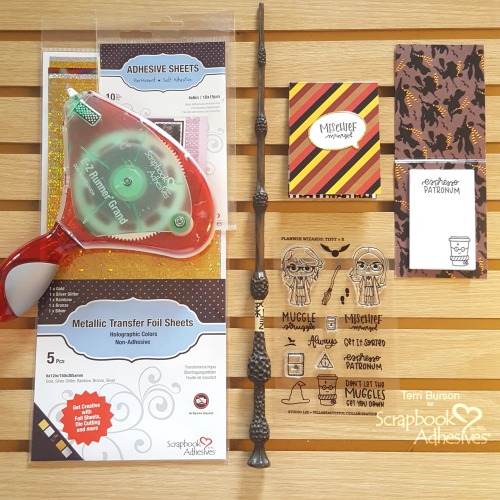
Materials Needed:
Scrapbook Adhesives by 3L®
Metallic Transfer Foil Sheets Holographic
Adhesive Sheets 4×6 inch
E-Z Runner® Grand Repositionable Dots Refill
E-Z Runner® Grand Ultra Strong Refill
3D Foam Creative Embellishment Kit
E-Z Runner® Grand Refillable Dispenser
HomeHobby by 3L®
Premium Double-Sided Tape 1/8in
Other
Photo Play Paper, MFT Stamps, StudioL2E Stamps, Fiskars Trimmer, Neenah Card stock, Colorbox Ink, Scrapbookcom Acrylic Block, We R Memory Keepers Trim/Score Board, Spellbinders® Paper Arts Die Cutting Machine
Pin It!