
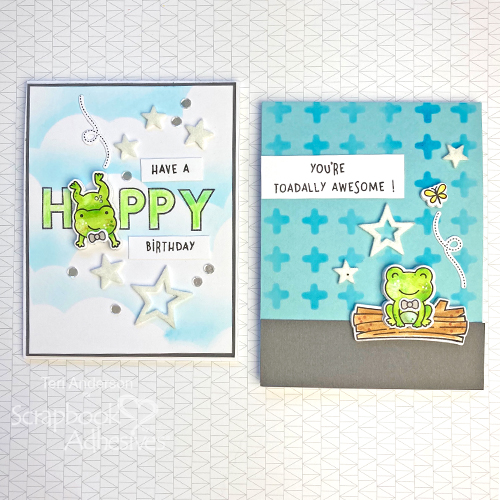
Hi, friends! Looking for a way to add pop to your next stamped card? Teri here, and I’ll show you a fun way to make frogs (or any other critter stamps) look like they are going to jump off your cards.
It’s easy to pull off this look with just a few basic crafting supplies! Let’s get started!
Make a Frog Pop on the Card
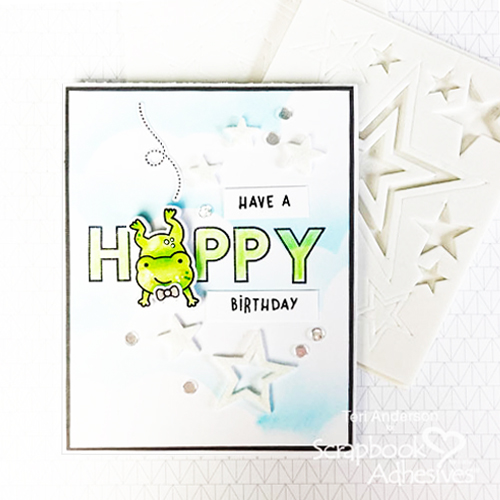
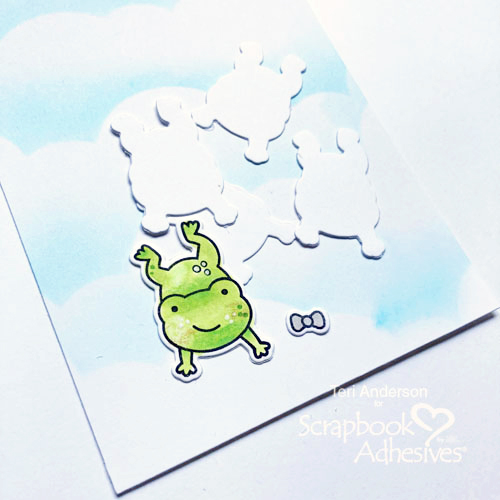
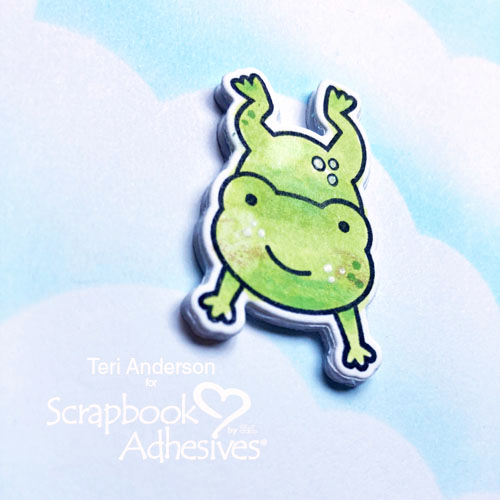
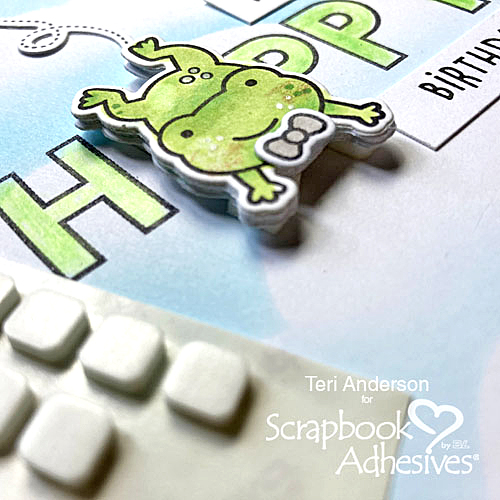
First, stamp, color and die-cut one frog. Once you’ve got your stamped image, you’ll want to die-cut four more frog shapes from white cardstock. No need to stamp or color.
Then stack and adhere all the frog die-cuts one on top of each other with the stamped and colored frog on top. We just created one tall frog!
Sentiment Placement
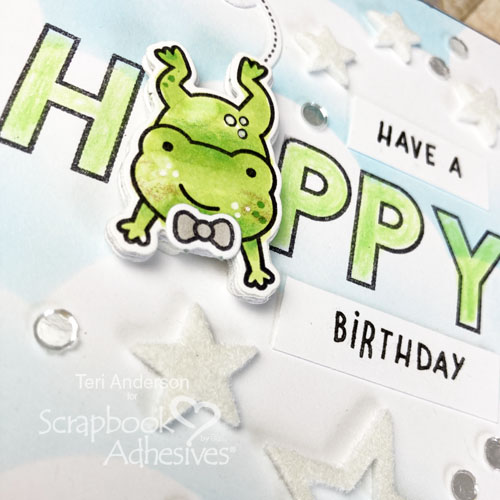
Once you’ve got your frog, stamp the letters around him so he looks like he is part of a word.
To make frog pop even more, add a few 3D Foam Squares underneath him before affixing him to your background paper.
Color the letters in and add a few more stamped words to complete the sentiment.
Finishing off the Frog Card
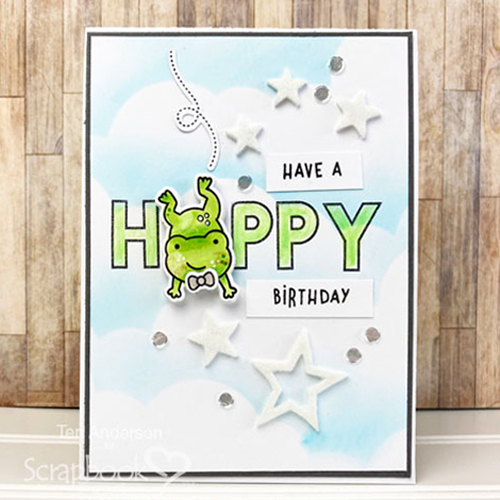
Randomly add a few 3D Foam Stars and remove the top liner. Cover the stars with flock or glitter. Make sure to press the medium into the stars to secure before tapping off the excess. Want your card to have a little sparkle? Add a few sequins to your card as well!
Mat your background paper and adhere it to an A2 card.
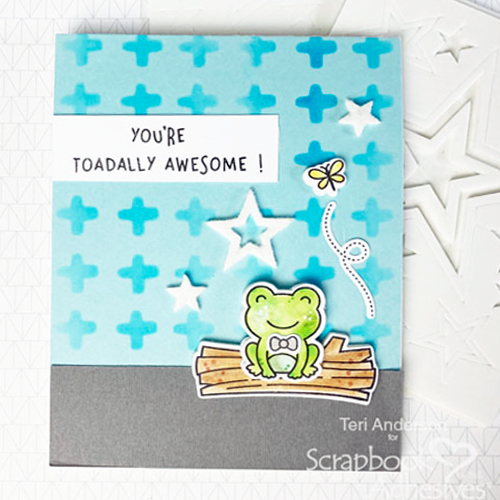
Toadally Awesome Frog Card
Here’s another card where I made the frog pop! This time, I stamped, die-cut and colored in the log. Then I die-cut a base for the log from a 3D Foam Creative Sheet.
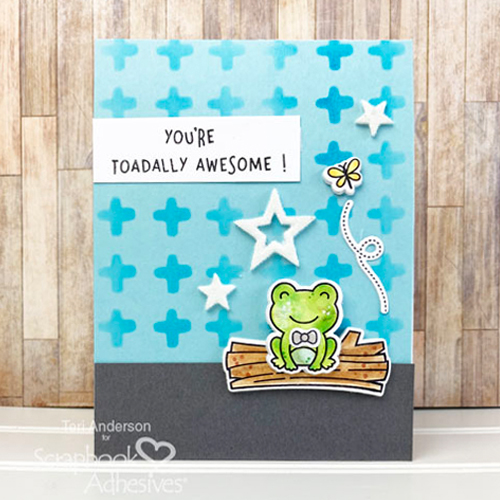
I stamped, die-cut and colored in the frog and then added four bases die-cut from cardstock under him. Then I mounted him to the log and die-cut a mat for the frog from a 3D Creative Sheet. I cut it up, using just part of the mat his head so his head would not flop around on the card!

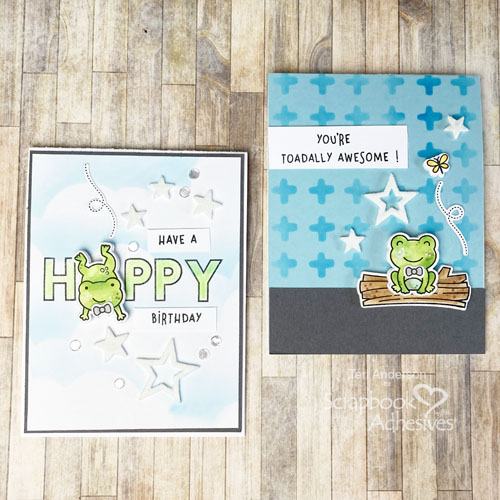
While I used frogs to create these cards, you don’t have to when you make your own cards! These tips from my Fun Frog Card Tutorial will work with any critter stamps and dies. Imagine all the possibilities!
I sure would love to see your cards with critters that “pop” off them! Share a link in the comments so I can leave you some love!
Happy creating,
Teri Anderson
Creative Time: 60 Minutes
Skill Level: Intermediate
Materials Needed
Scrapbook Adhesives by 3L®
- E-Z Dots® Permanent Refillable Dispenser
- E-Z Runner® Permanent Strips Refillable Dispenser
- 3D Foam Stars, 3D Foam Squares White Mix, 3D Foam Creative Sheets Small White
- Adhesive Dots Micro
Other
White Cardstock: Neenah Paper; Blue and Gray Cardstock: My Favorite Things; Dies: Lawn Fawn (Toadally Awesome); Stamps: Lawn Fawn (Toadally Awesome Stamp Set) and Kelly Purkey (Greenpoint Stamp Set); Stencils: Lawn Fawn (Cloudy) and Paper Smooches (Savvy); Sequins: Pretty Pink Posh; Blue Ink Pad: My Favorite Things; Black Ink Pad: Ranger Ink; Flock: Stampendous!; Markers: Copic; Pencils: Prismacolor; White Gel Pen: Uni-ball
Pin It to Pinterest!
Visit our Website and Blog!
Sign up for our Newsletter so you never miss a contest or giveaway!


