
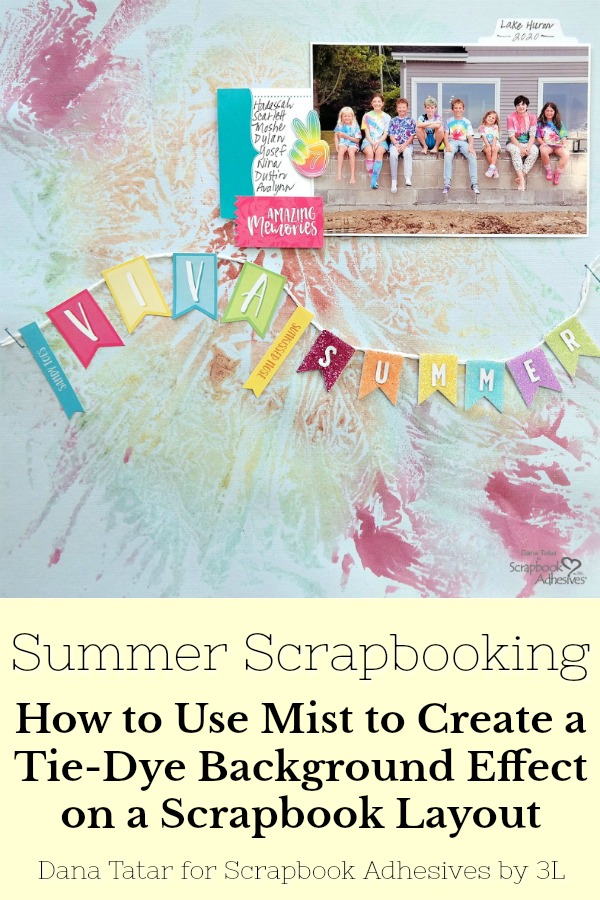
Hi friends! Dana here today sharing a fun tutorial that is perfect for creating colorful backgrounds for Summer papercrafts. Last Summer, I started the tradition of creating tie-dye t-shirts with my children, nieces, and nephews while vacationing together at our cottage. Everyone was looking forward to repeating the activity this year. The t-shirts turned out even better the second time around!
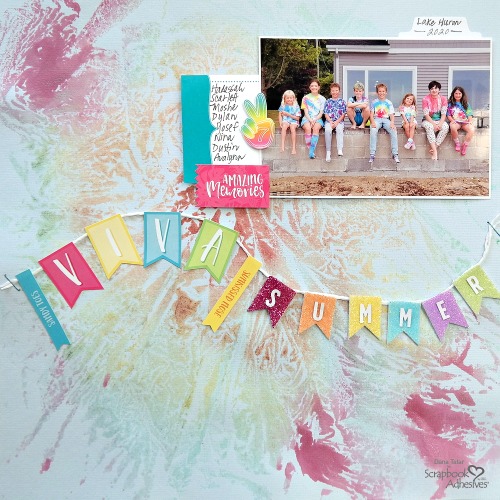
I wanted to create a colorful background for my scrapbook layout documenting this event. A plastic grocery bag, an assortment of spray mist, and Premium Double-Sided Tape 1/2 in. are the only supplies required to create this amazing patterned paper.
How to Transfer Tie-Dye Prints to Cardstock
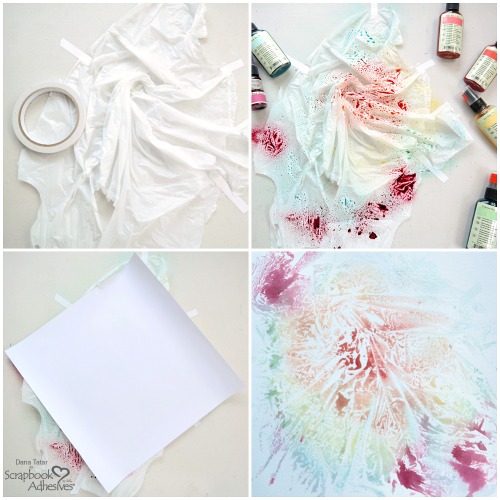
- Cut a plastic grocery bag open so that it can lay flat in a single layer over the work surface. Pinch the plastic sheet in the center and twist to create a swirl design. Use Premium Double-Sided Tape 1/2 in. to secure the plastic to the work surface.
- Apply spray mist to the plastic. I chose a rainbow color palette, but any combination of colors would work for this technique.
- Place a piece of cardstock over the misted plastic and press to transfer the color to the paper.
- Carefully lift the cardstock to reveal the tie-dye print. Set aside to dry.
Glittered 3D Foam Pennant Embellishment
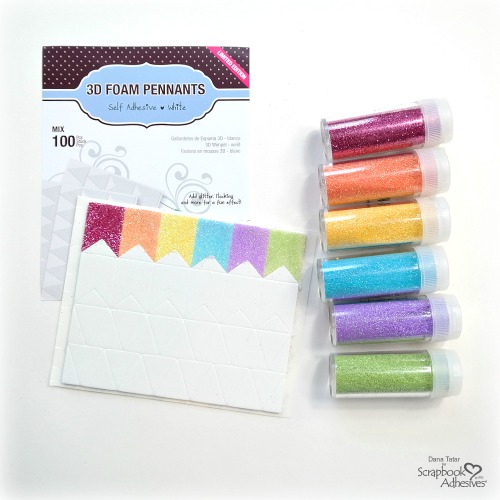
I created a rainbow banner embellishment to go with the rainbow tie-dye background. First, gather several colors of glitter and a package of 3D Foam Pennants. Next, peel off the top liner from one pennant and sprinkle with glitter. Repeat this process, one pennant at a time, until the desired amount of pennants are glittered.
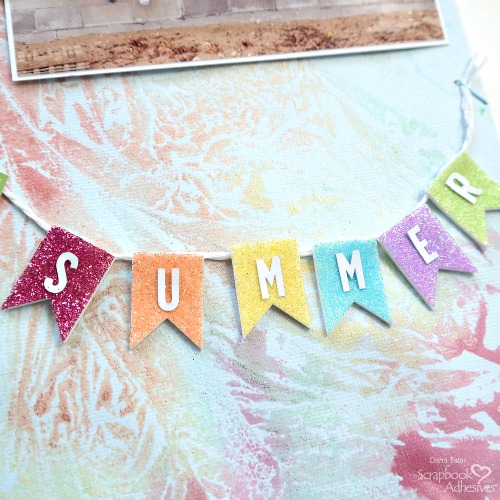
To assemble the banner, first, staple a length of string to the cardstock. Peel off the backing liner of each pennant, align the top of the pennant with the top of the string and then press to secure to the page. I used the colorful pennants as part of my title and added letters to the center of each.
Layout Assembly
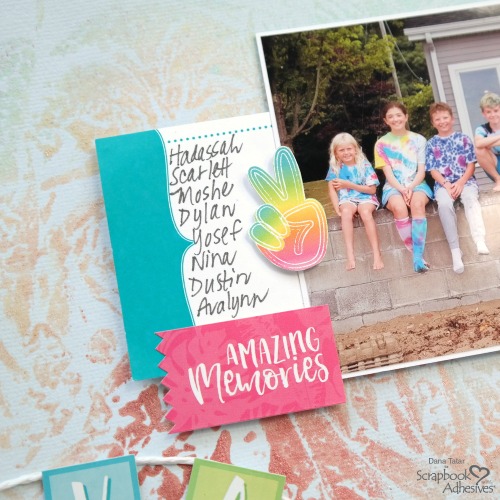
To ensure that my photo stands out from the busy background, I attached it to the layout using 3D Foam Squares. I also used 3D Foam Squares to secure a journaling card and peace sign die-cut to the page.
I hope you enjoyed the tutorial and will try making your own tie-dye background print. Thanks so much for stopping by!
~Dana Tatar
Creative Time: 60 Minutes
Skill Level: Intermediate
Materials Needed:
Scrapbook Adhesives by 3L®
3D Foam Squares White Regular Size
3D Foam Pennants
HomeHobby™ by 3L
Premium Double-Sided Tape 1/2in
Other
Cardstock; Journaling Card: Elle’s Studio; Die-Cuts: Photo Play Paper; Stickers: Photo Play Paper; String: Prima; Black Marker: American Crafts; Glitter: American Crafts; Glimmer Mist: Tattered Angels; Staples: WRMK
Save it on Pinterest!
Visit our Website and Blog!
Sign up for our Newsletter so you never miss a contest or giveaway!


