
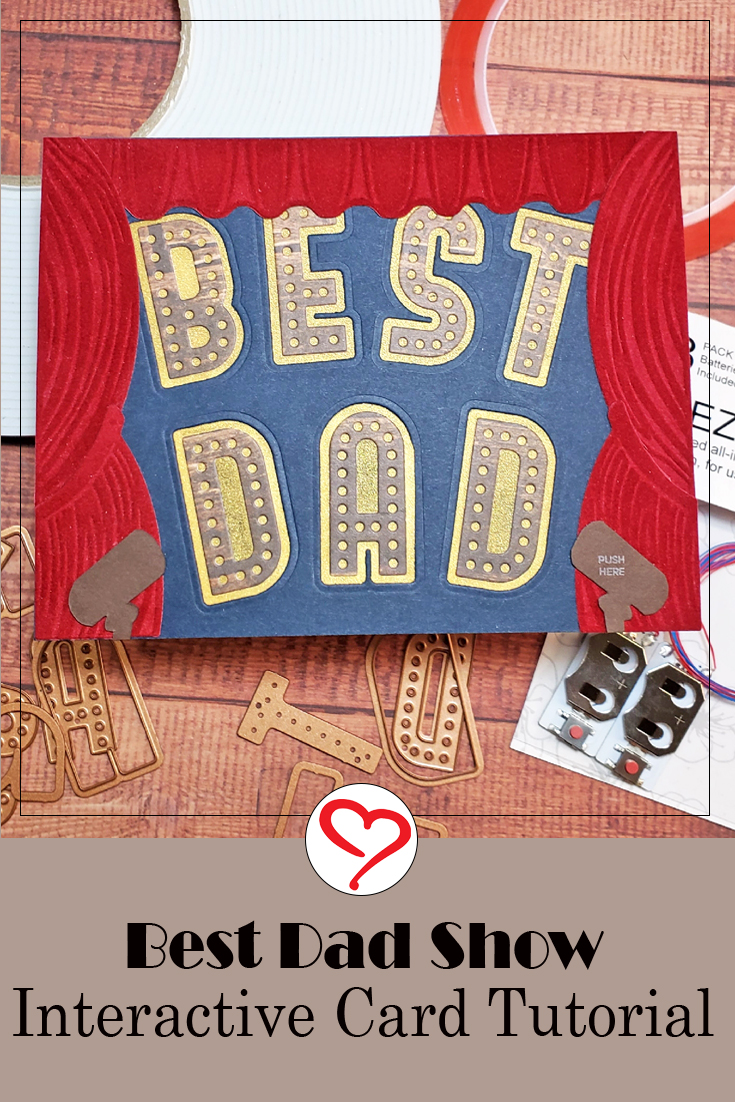
Hello, my crafty friend! With Father’s day at the end of the month, I thought I would get a head start on a card for my dad. My Best Dad Show interactive card was inspired by the Deco Bold Alpha Dies that looked like marquee words and I knew I wanted to light them up!
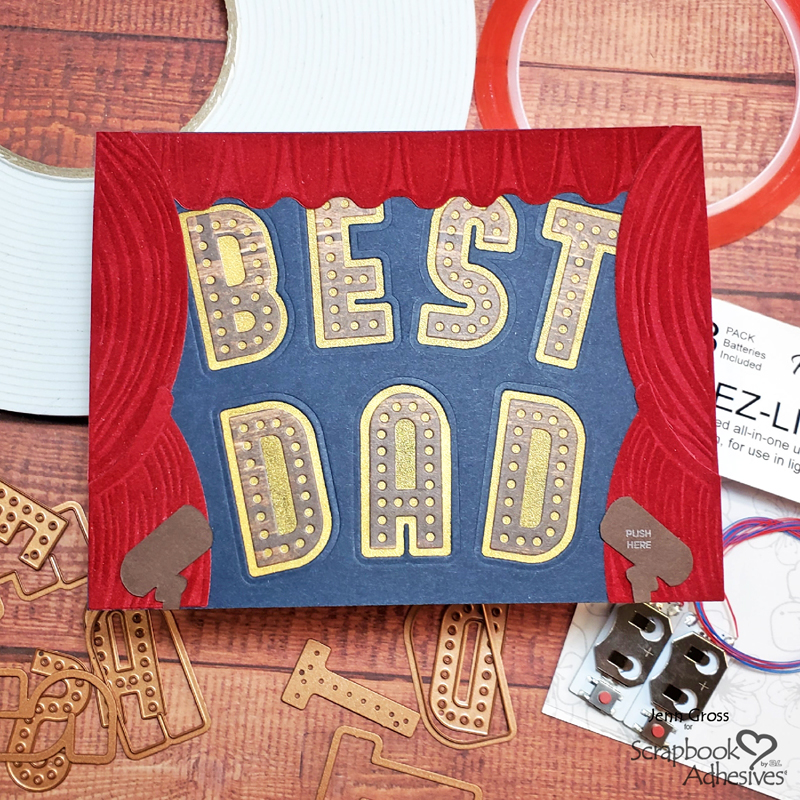
Best Dad Card Panel
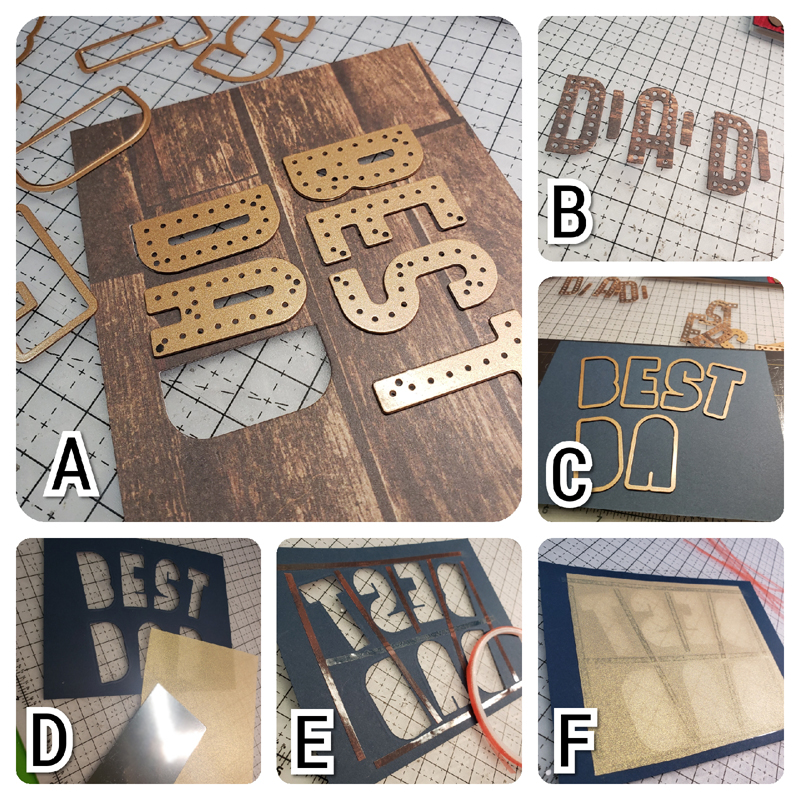
A and B – Die cut the letters to spell “Best Dad” from a piece of woodgrain printed cardstock. Save the middle pieces from the Ds and A to use later.
C and D – Use the outline alpha dies to position the words on a piece of 4 1/4 x 5 1/2-inch navy cardstock and die-cut to make the letter windows. Cut a piece of 4 x 4 1/2-inch gold vellum to cover the entire backside of the letter windows. Next, cut a piece of 1 3/4 x 3 1/2-inch silver mirror cardstock.
E and F – Frame out the backside of the windows with Extreme Double-Sided Tape 1/8″ and attach the piece of gold vellum.
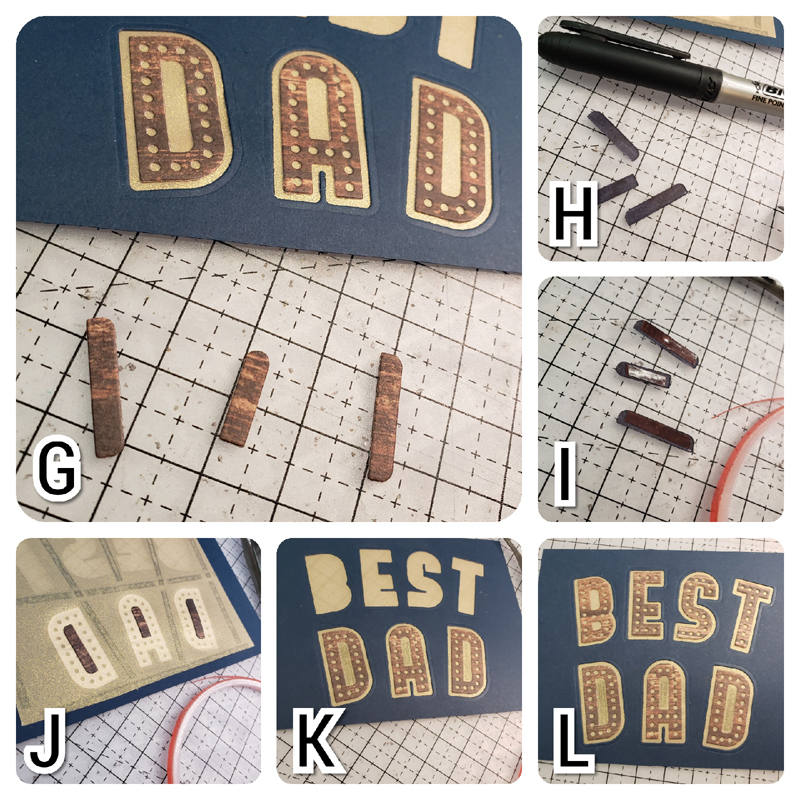
G – Turn the navy card panel to the front and start adhering the letters DAD to the center of the gold vellum-covered windows.
H, I, and J – Take the middle pieces for the Ds and A, and color them with a black sharpie marker. Adhere Extreme Double-sided Tape 1/8″ to the back. Turn over the navy card panel and place the middle pieces of DAD as shown
K and L – Turn the navy card panel over and attach the remaining letters.
Stage Lights
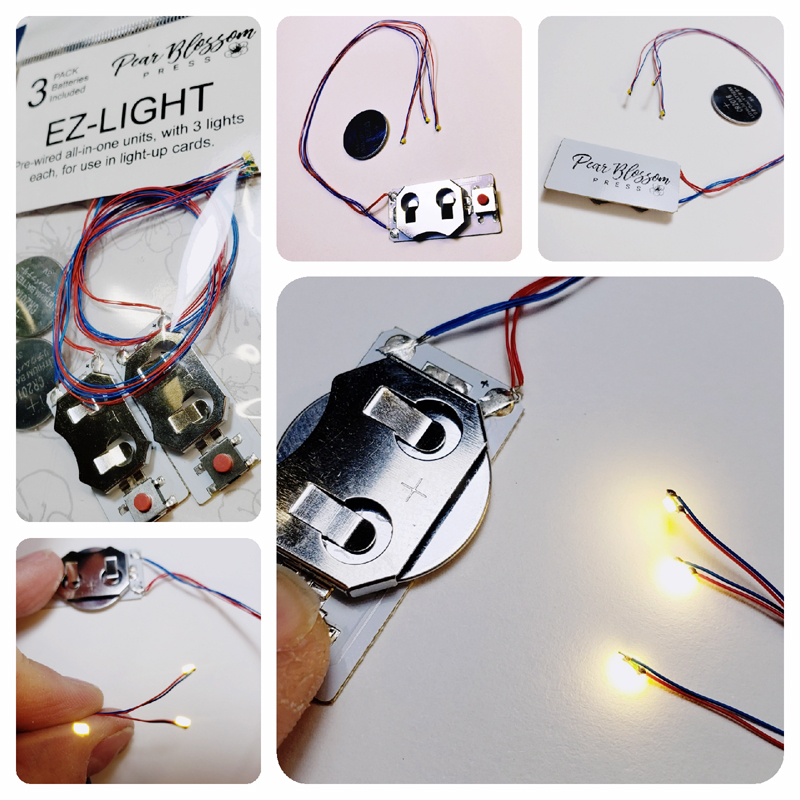
Next, we are going to attach a set of EZ-Lights by Pear Blossom Press. It has a battery pack with three tiny lights in a set. Insert a battery and press the red button to light up. Perfect for an interactive card creation like my Best Dad Show card!
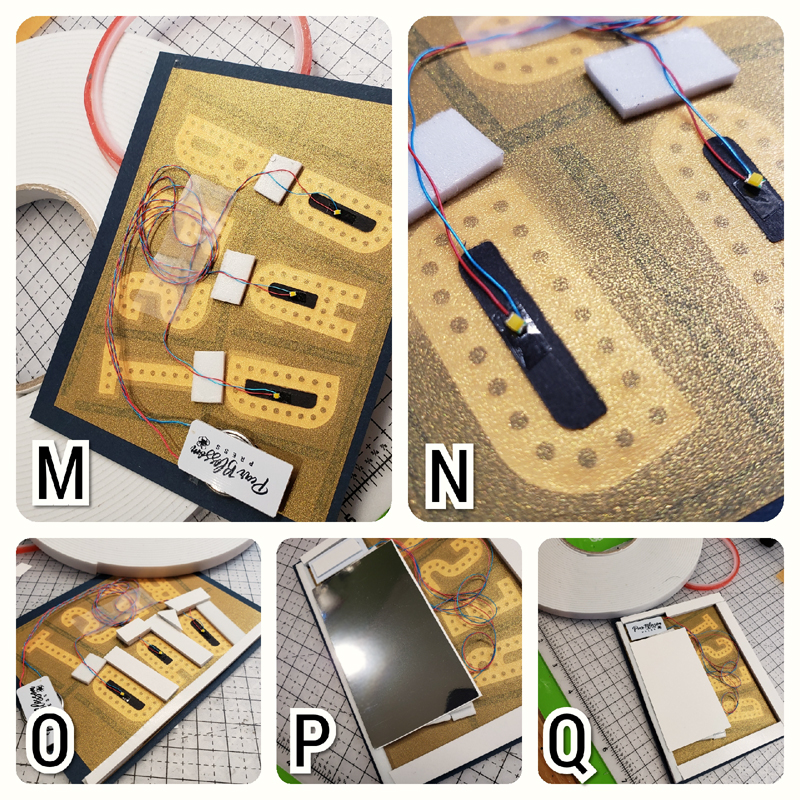
M – DAD will be lighting up so flip the card panel to the back. Cut three small pieces of Crafty Foam Tape White in 54ft and place each piece over each letter of DAD. Remove the liners.
N – Position each light face up in the middle of each letter (where the black pieces are) so they shine away from the letters. Arrange the light wires to adhere over the foam pieces to secure. Wrap the wires flat over the word BEST, secure with tape, and place the battery pack on the left side of the word DAD.
O – Double up on the Crafty Foam Tape White in 54ft as the battery pack is a little thick (about double the foam tape). Do this by cutting the foam tape the length of the card panel bottom and then cut in half the long side to create two thinner strips of foam tape. Stack the two pieces together and adhere to the card panel bottom. Next, frame out each letter of DAD with Crafty Foam Tape White in 54ft in double thickness (using the previous steps).
P and Q – Finish framing the sides of the card with a double thickness of Crafty Foam Tape White in 54ft. Remove the liner around the word DAD, adhere the silver mirror cardstock (shiny side down) to seal the letters with the lights inside. It will add additional reflection creating a brighter and more diffused light for the letters
Curtain Time
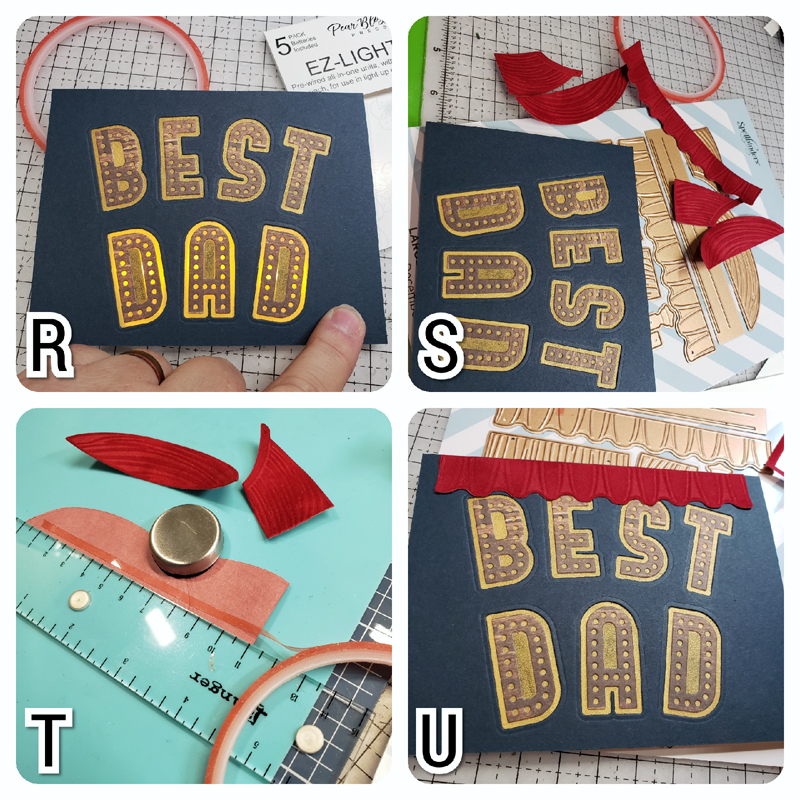
R – Turn over the card panel and test the light switch. Remove the remaining liner around the back of the card panel and add Extreme Double-sided Tape 1/8″ to the silver mirror cardstock. Attach the card panel to an A2-sized card base.
S – Die-cut the curtain die to cut the top and two side curtains piece from a red flocked specialty paper.
T – Assemble and adhere the side curtain pieces with Extreme Double-sided Tape 1/8″ and set them aside.
U – Add Extreme Double-sided Tape 1/8″ to the back of the top curtain and attach it to the middle top of the card.
Final Details
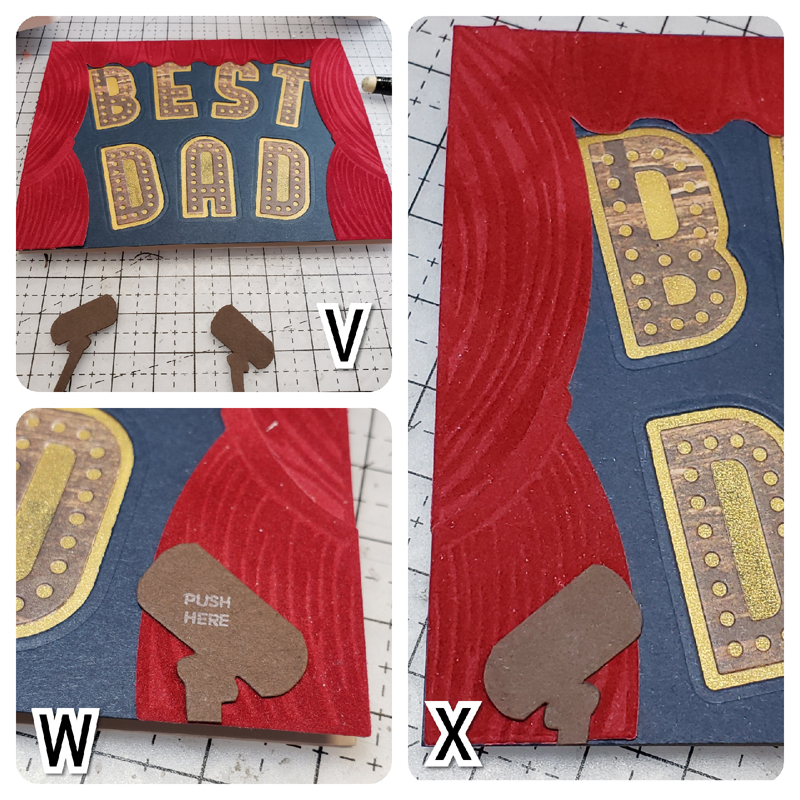
V – Adhere the side curtains. Hand draw two theater can lights and cut from brown cardstock.
W – Stamp/write Push Here on the right can light and position it over the battery pack button. Adhere in place and trim off the excess light post.
X – Add the left can light and cut off the excess light post.
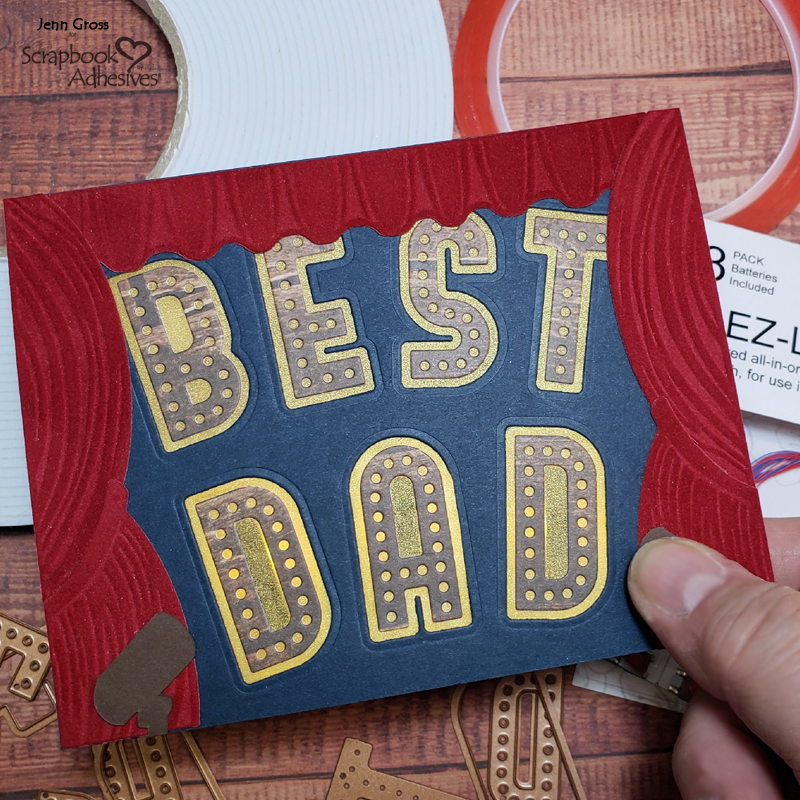
Now you have a competed light up Best Dad card!
Thank you for stopping by todays’ blog. I hope you enjoyed learning how to create my Best Dad Show Interactive Card. Let me know in the comments how you would use these lights!
Be Creative ~ Stay Inspired
Jenn Gross
Creative Time: 90 minutes
Skill Level: Advanced
Materials Needed:
Scrapbook Adhesives by 3L®
Crafty Foam Tape White in 54ft
HomeHobby™ by 3L
Extreme Double-sided Tape 1/8″
Other:
Craft Dies: Spellbinders Paper Arts (Deco Bold Alpha, and Look Behind the Curtain); Lights: Pear Blossom Press (EZ Lights Pre-wired All in One Lights); Woodgrain Printed Cardstock, Navy Cardstock, Yellow Gold Vellum, Silver Mirror Cardstock, and Red Flocked Specialty Paper
Save it to Pinterest!
Visit our Website and Blog!
Sign up for our Newsletter so you never miss a contest or giveaway!


By Amanda Stevens June 12, 2021 - 12:26 am
Wow! This is super cool!